> ## Documentation Index
> Fetch the complete documentation index at: https://help.maestra.io/llms.txt
> Use this file to discover all available pages before exploring further.
# How to add a User
Add a teammate to your Maestra Platform account so they can log in and start working on customers, campaigns, and reports.
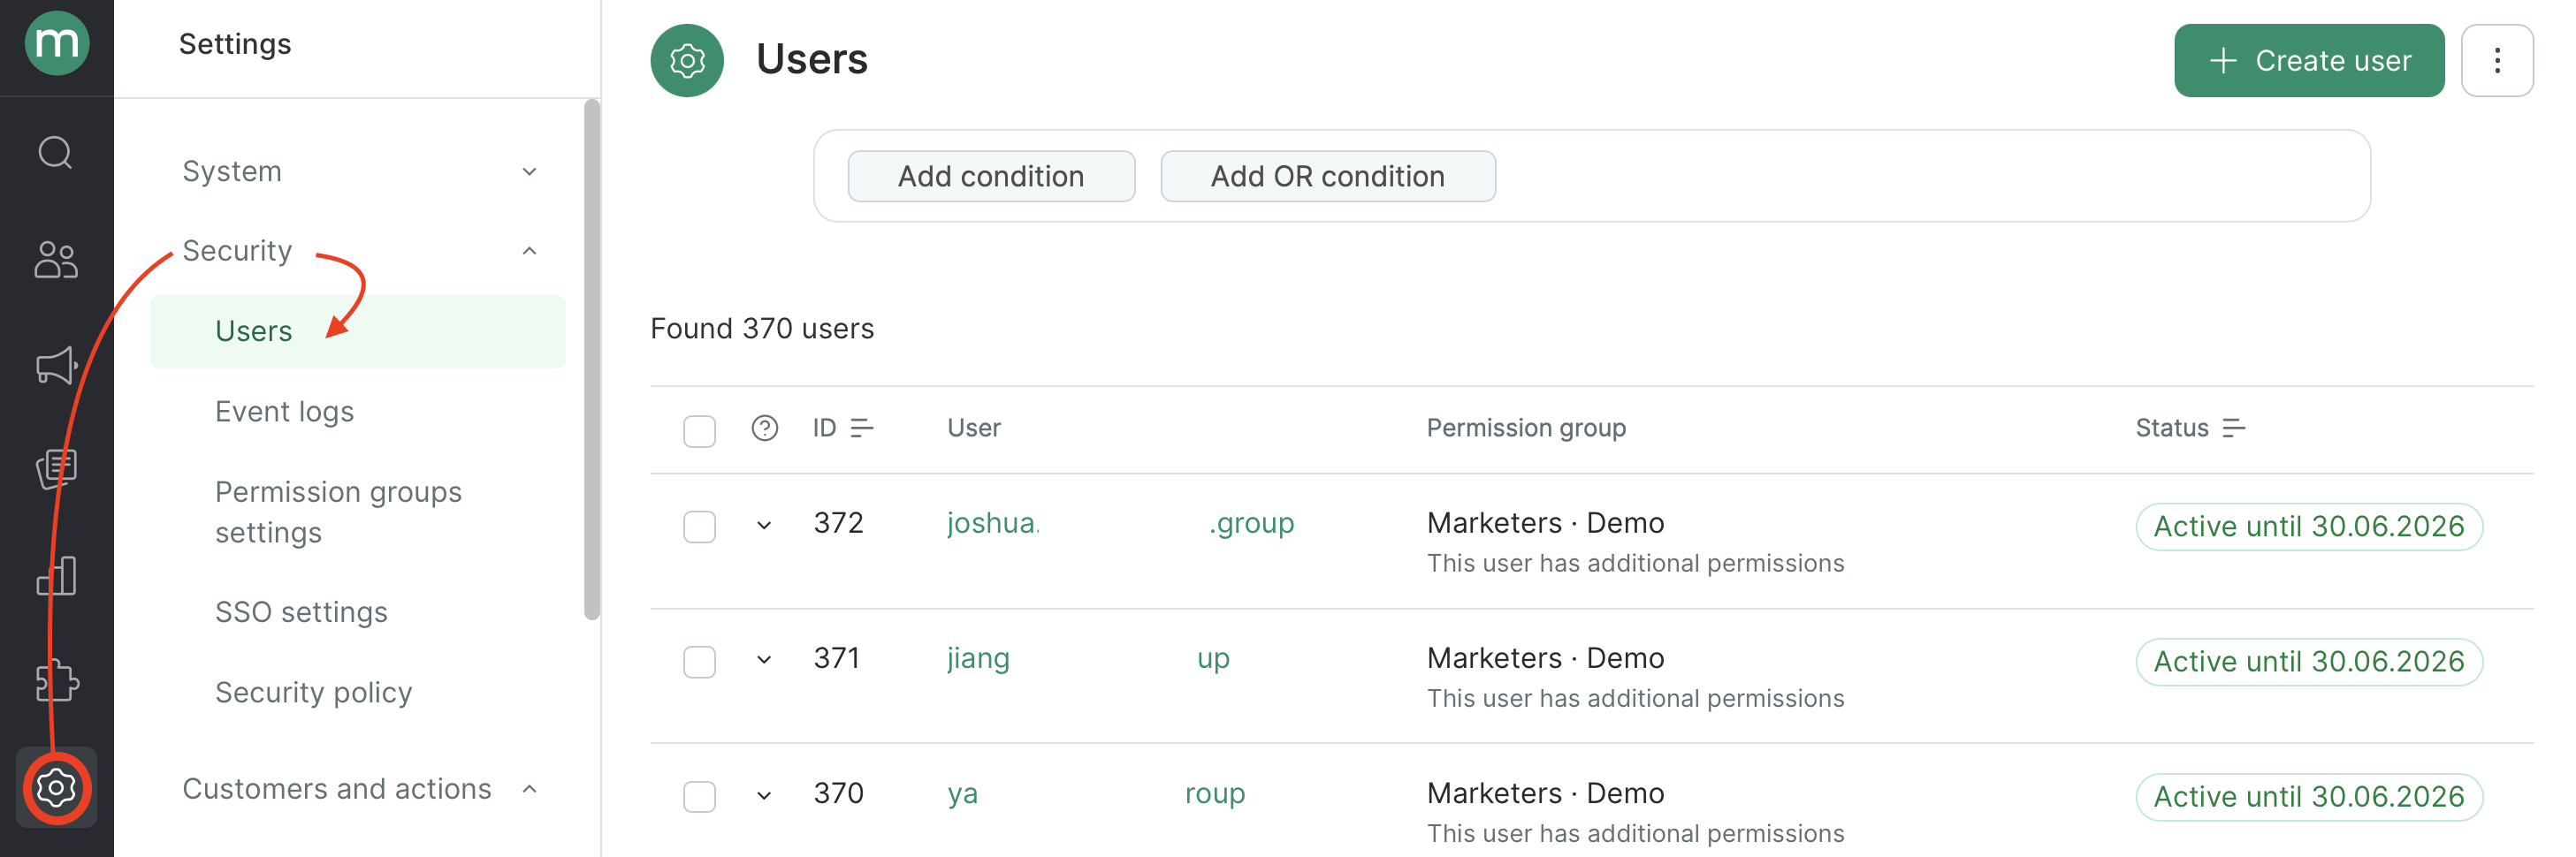
1. Go to **Settings** → **Security** → **Users**.
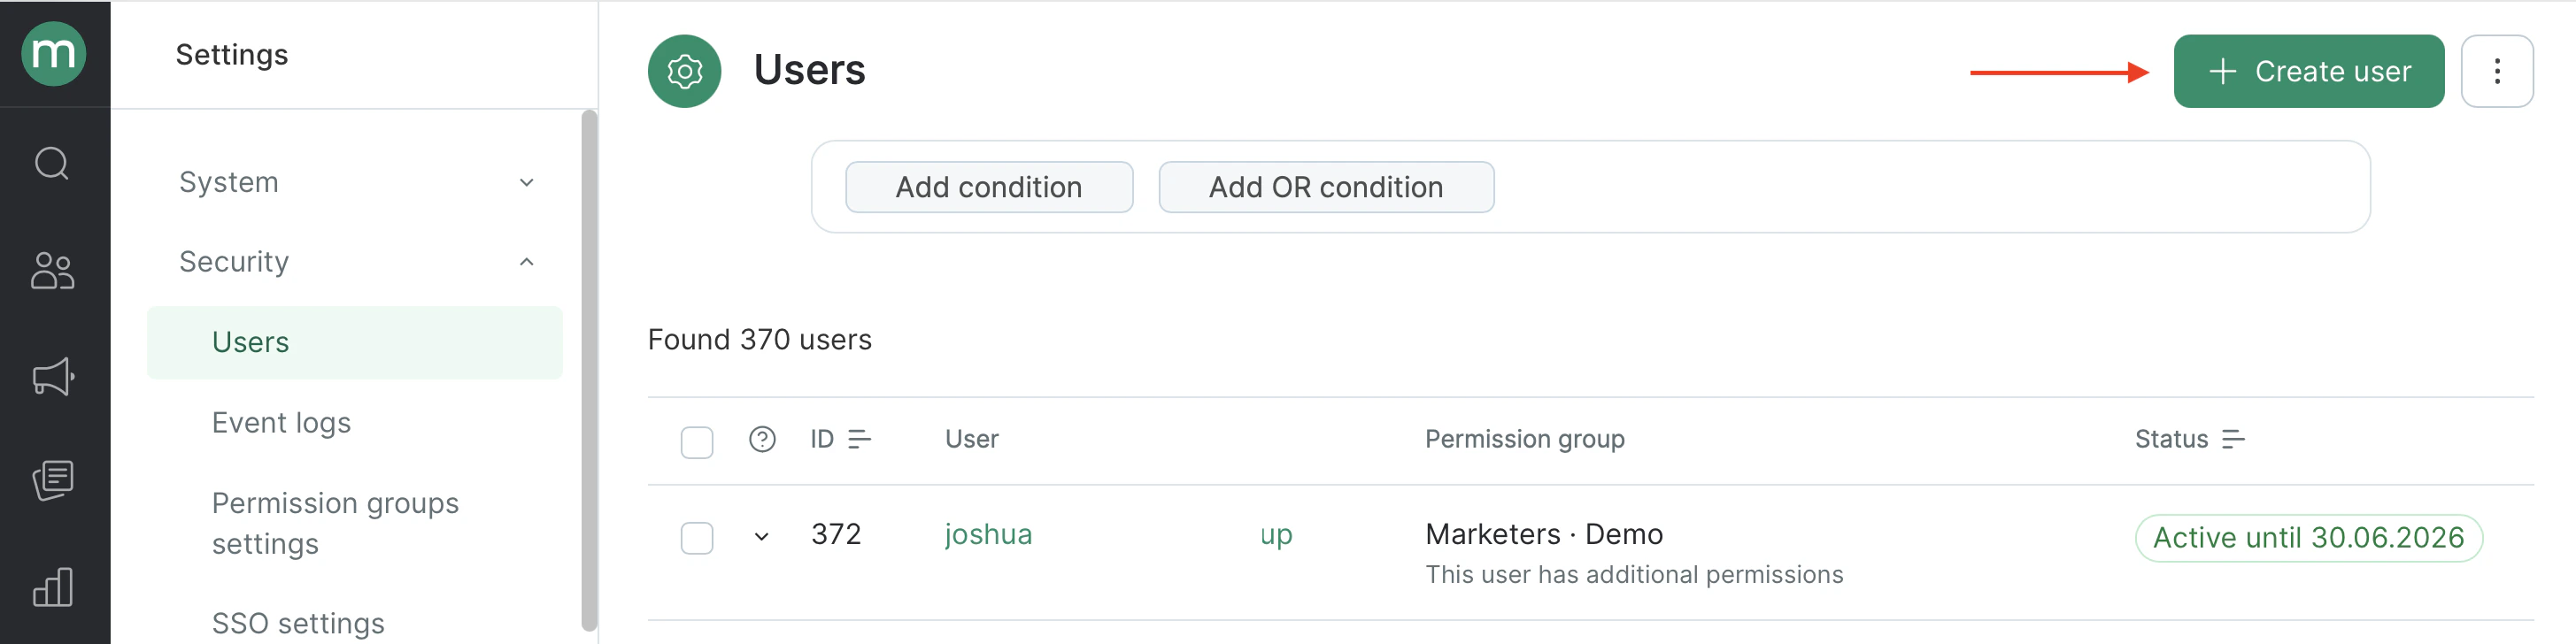
 2. Click **Create user**.
 3. Fill in the new user's profile.
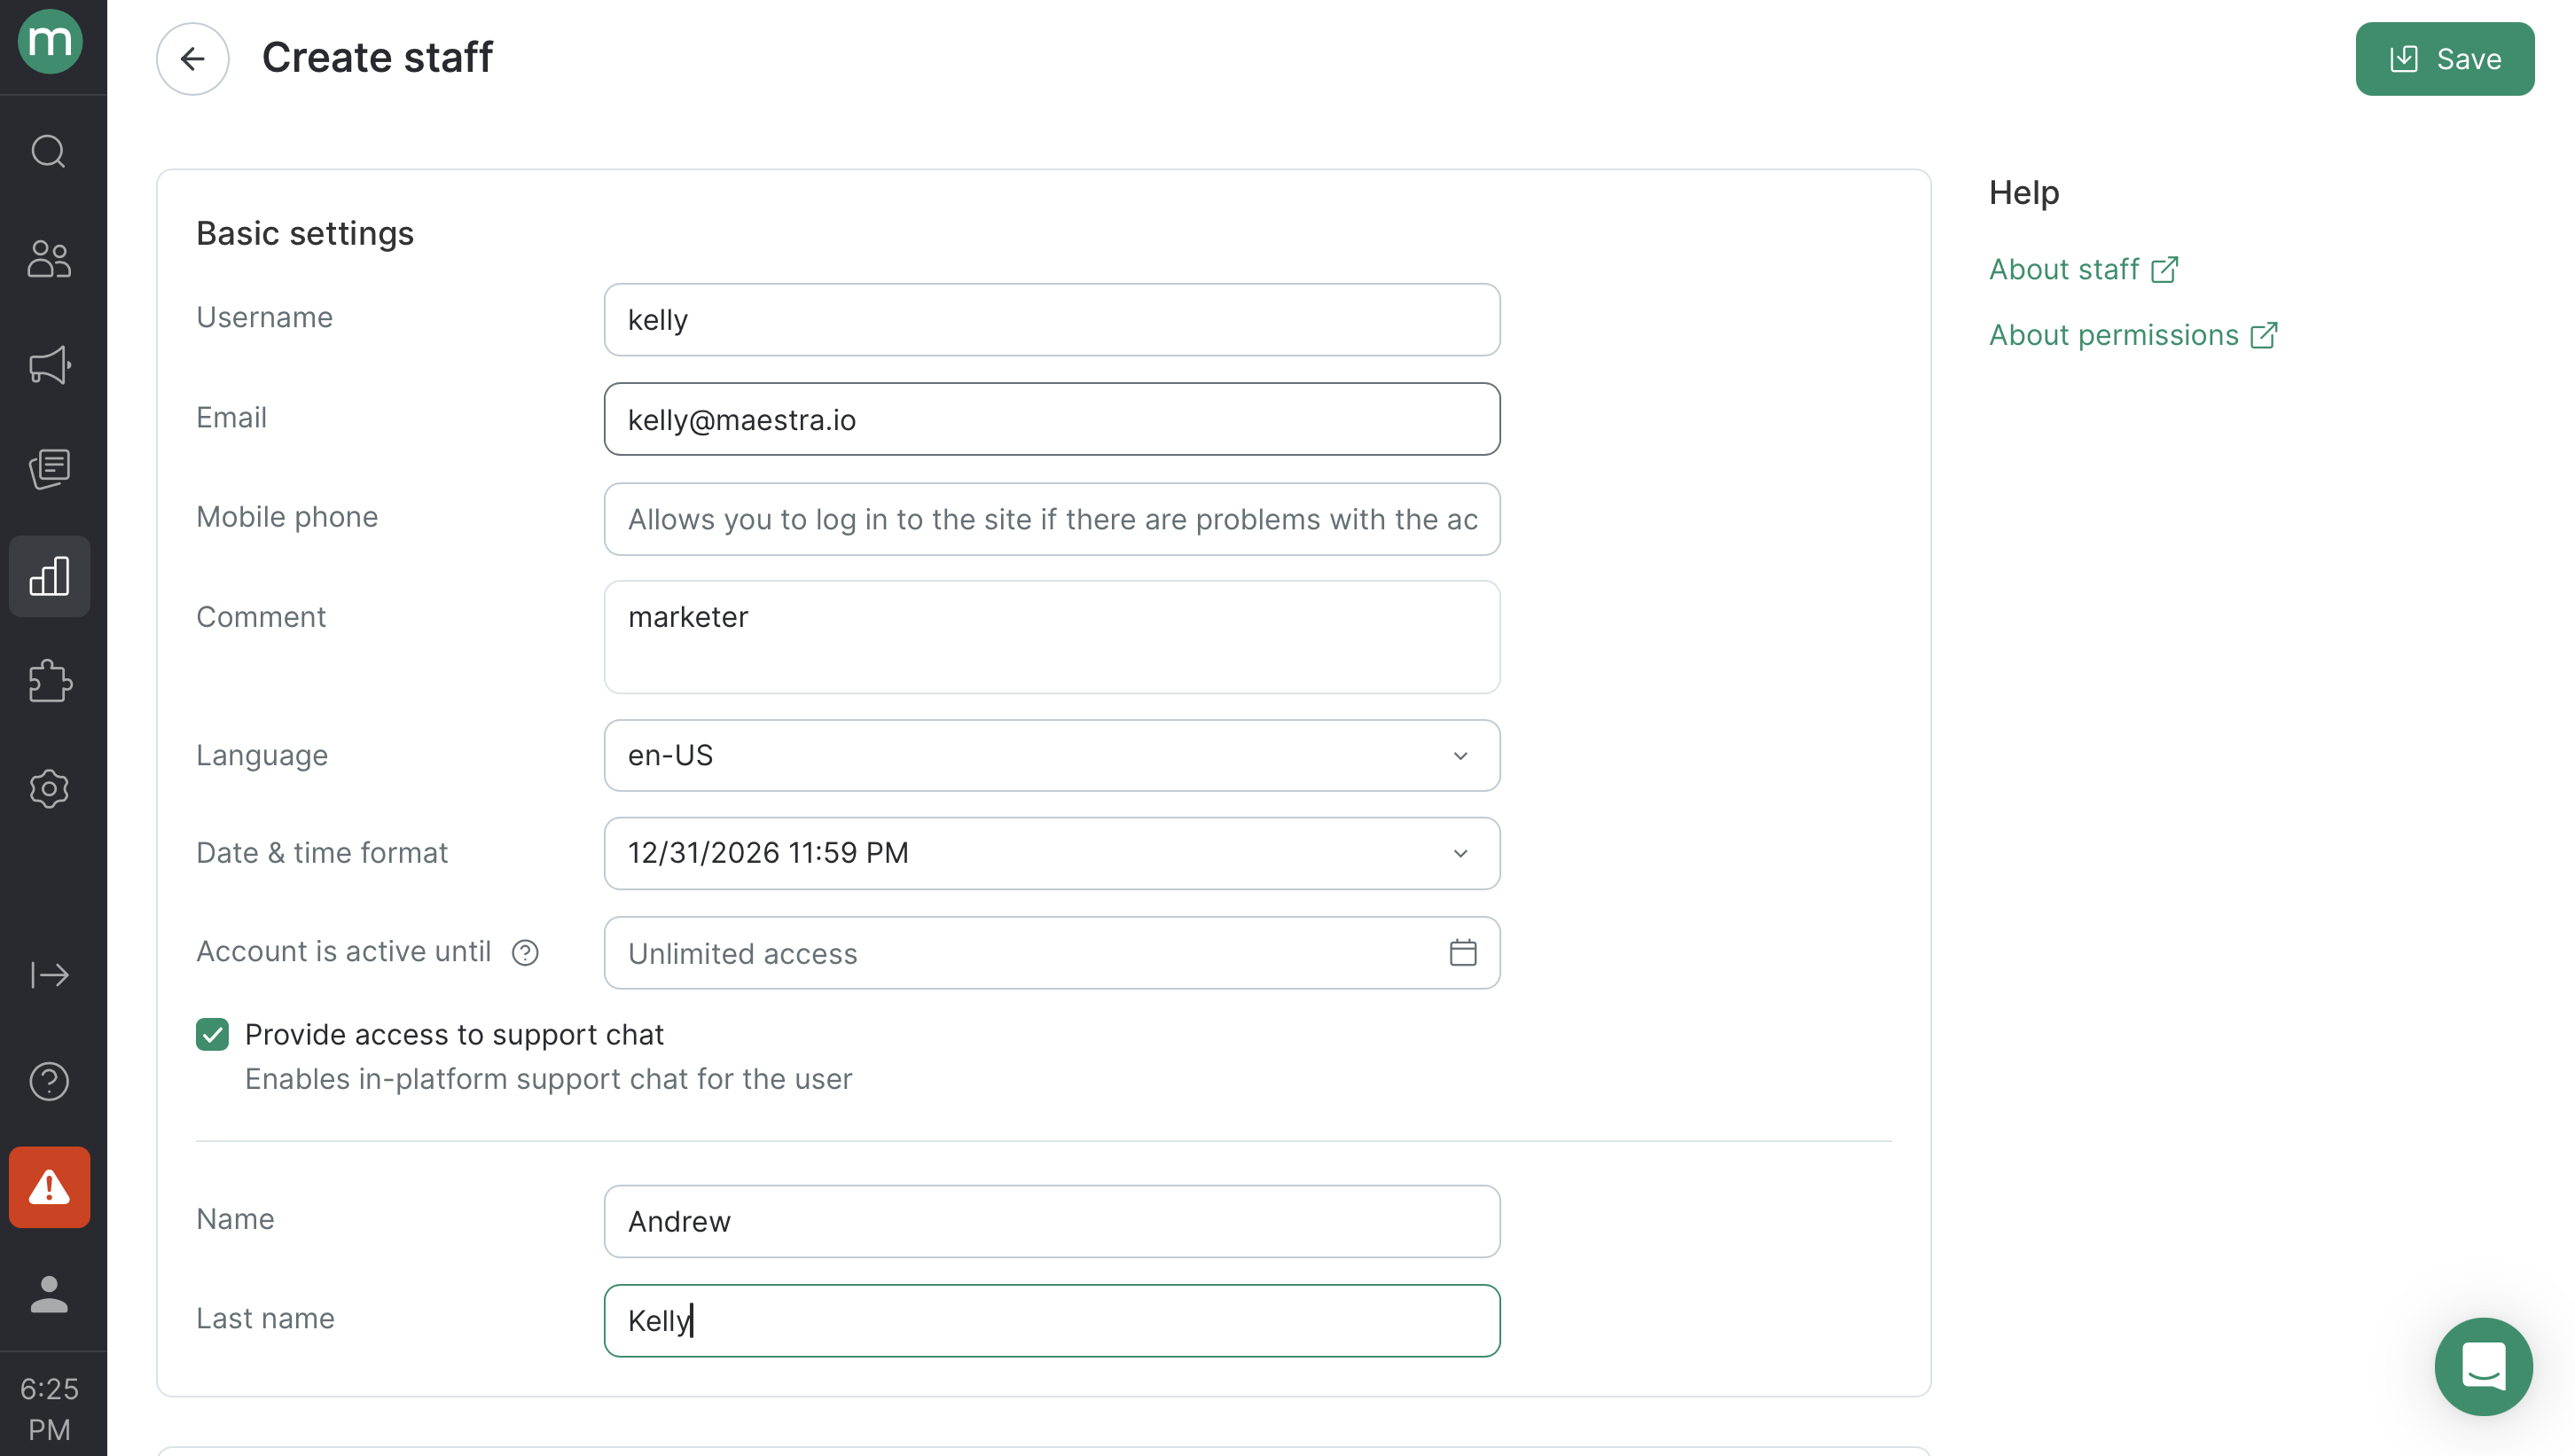 ## Basic settings
* **Username** — Latin characters only. Required.
* **Email** — we'll send a password setup link here. Required. If the email doesn't arrive within 10 minutes, ask them to use the password recovery flow.
* **Mobile number** — optional, but required if you want them to use SMS-based [two-factor authentication](/security/how-two-factor-authentication-works).
* **Comment** — usually the person's role (for example, "Email Marketing Manager"). Required.
* **Language** — interface language.
* **Date & time format** — how dates and times display for this user (12-hour or 24-hour).
* **Account is active until** — set an expiration date for contractors or seasonal staff. The account is blocked automatically on that date.
* **Provide access to support chat** — enables the in-platform support chat for this user. Billable once more than five users on your account have it.
* **Name** and **Last name** — optional.
## Accesses
## Basic settings
* **Username** — Latin characters only. Required.
* **Email** — we'll send a password setup link here. Required. If the email doesn't arrive within 10 minutes, ask them to use the password recovery flow.
* **Mobile number** — optional, but required if you want them to use SMS-based [two-factor authentication](/security/how-two-factor-authentication-works).
* **Comment** — usually the person's role (for example, "Email Marketing Manager"). Required.
* **Language** — interface language.
* **Date & time format** — how dates and times display for this user (12-hour or 24-hour).
* **Account is active until** — set an expiration date for contractors or seasonal staff. The account is blocked automatically on that date.
* **Provide access to support chat** — enables the in-platform support chat for this user. Billable once more than five users on your account have it.
* **Name** and **Last name** — optional.
## Accesses
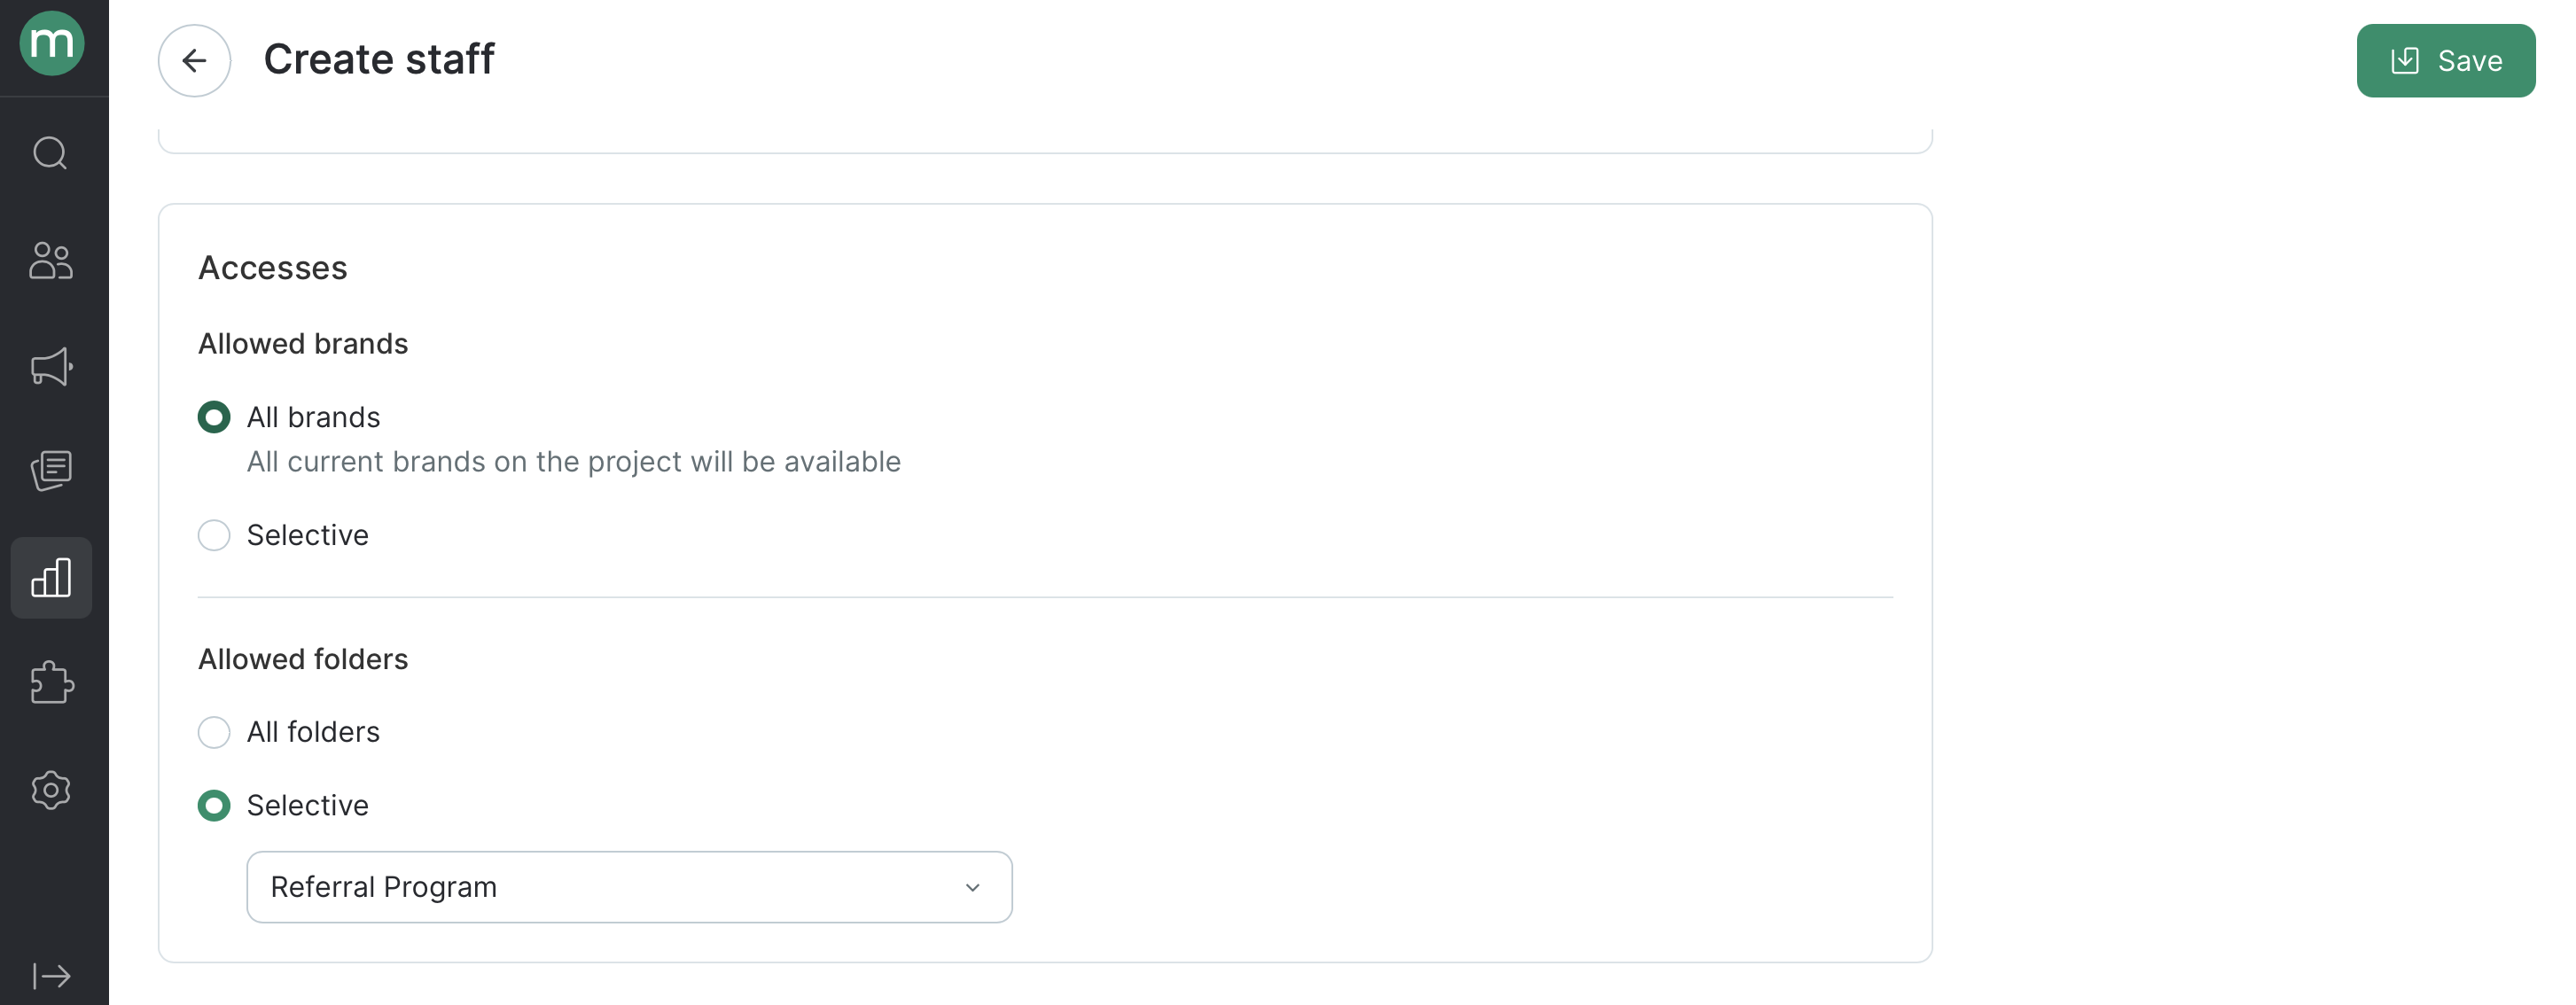 * **Allowed brands** — keep **All brands** or switch to **Selective** to limit the user to specific [brands](/administration/multibrand).
* **Allowed folders** — keep **All folders** or switch to **Selective** to limit the user to specific folders.
## Permissions
* **Allowed brands** — keep **All brands** or switch to **Selective** to limit the user to specific [brands](/administration/multibrand).
* **Allowed folders** — keep **All folders** or switch to **Selective** to limit the user to specific folders.
## Permissions
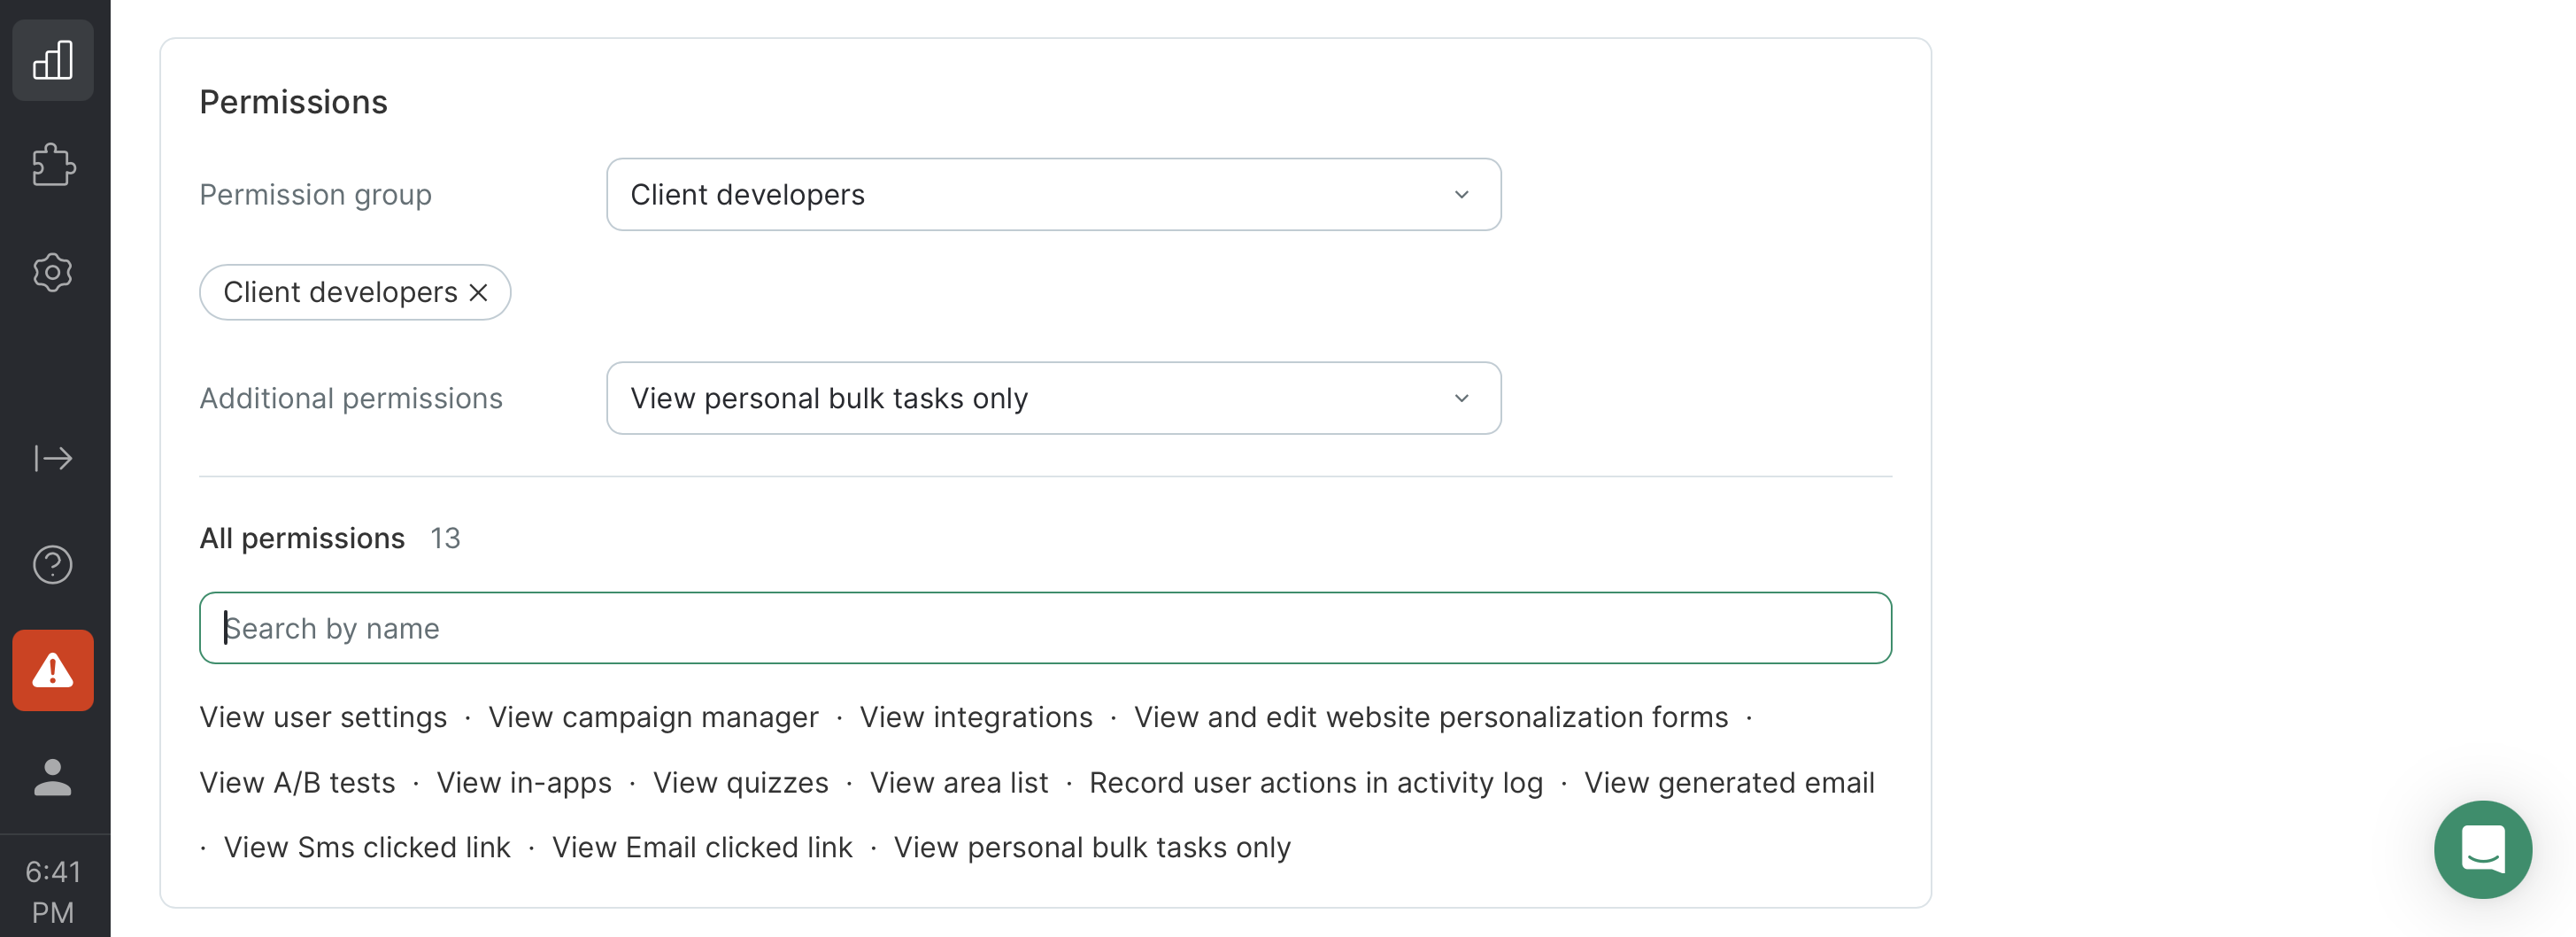 * **Permission group** — a bundle of permissions. Pick a [built-in group](/administration/staff/what-security-groups-are-available) (like Marketers or Analysts) or a [custom one](/administration/staff/how-to-create-a-security-group) you've created. To assign a group, you either need to be a member of it yourself or hold every permission it contains.
* **Additional permissions** — [extra rights](/administration/staff/how-to-extend-staff-permissions) on top of the group. You can only grant permissions you have yourself.
At least one permission or one permission group is required.
4. Click **Save**.
The new user gets an email with a link to set their password.
* **Permission group** — a bundle of permissions. Pick a [built-in group](/administration/staff/what-security-groups-are-available) (like Marketers or Analysts) or a [custom one](/administration/staff/how-to-create-a-security-group) you've created. To assign a group, you either need to be a member of it yourself or hold every permission it contains.
* **Additional permissions** — [extra rights](/administration/staff/how-to-extend-staff-permissions) on top of the group. You can only grant permissions you have yourself.
At least one permission or one permission group is required.
4. Click **Save**.
The new user gets an email with a link to set their password.