> ## Documentation Index
> Fetch the complete documentation index at: https://help.maestra.io/llms.txt
> Use this file to discover all available pages before exploring further.
# How to Set Up Branded Click Tracking
**Click tracking** is how Maestra Platform knows who clicked what in your emails. Branded click tracking moves those tracking links onto a subdomain you own.
**How it works:**
1. Before an email goes out, Maestra Platform rewrites every link in it as a tracking URL.
2. When someone clicks, their browser hits the tracking link first, and the click lands in their customer profile.
3. Then they're redirected to the page the original link pointed to.
By default, those links sit on one domain shared by every project on the platform. Whatever other senders do on that domain shapes its reputation — and when the reputation drops, mailbox providers lower deliverability for everyone using it.
## Why set up your own domain
* Better deliverability: mailbox providers check the reputation of the domains in your links and factor it into whether your emails get delivered.
* You can set up a separate domain for each brand if your project has more than one.
## What you'll need
* A free subdomain that isn't already used for your website, return path, link shortener, or any other service — for example, `click.yourbrand.com`.
* Access to the DNS panel at your registrar or hosting provider.
## Step 1. Add the domain in Maestra Platform
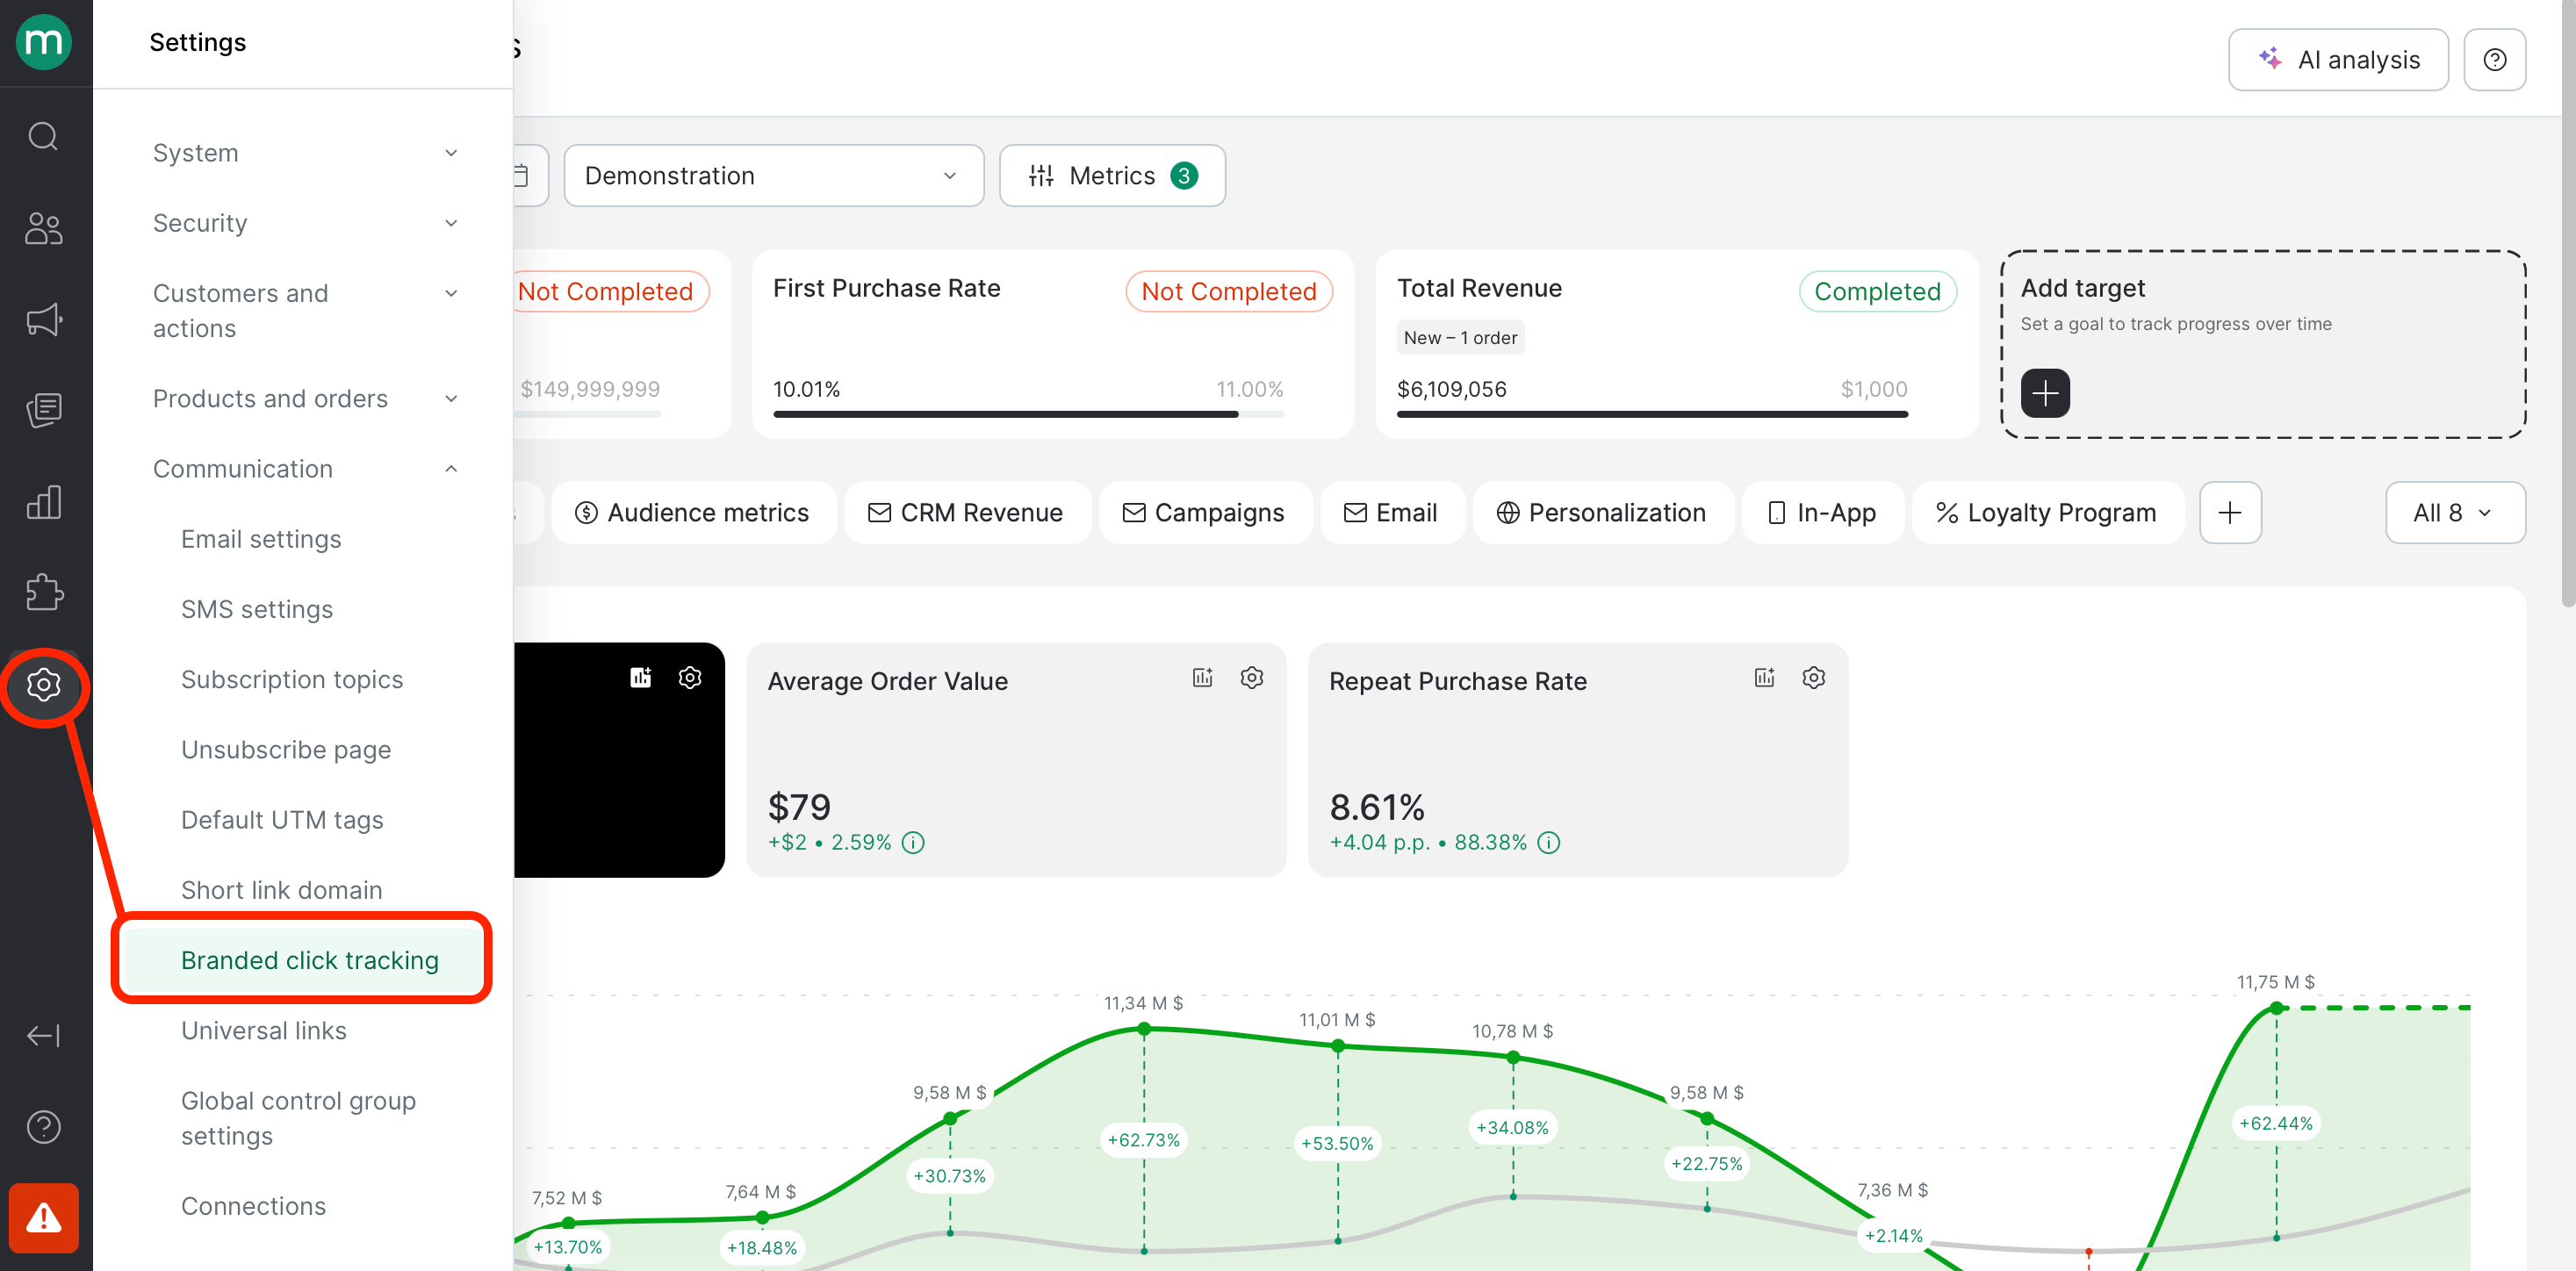
Go to **Settings** → **Communication** → **Branded click tracking**.
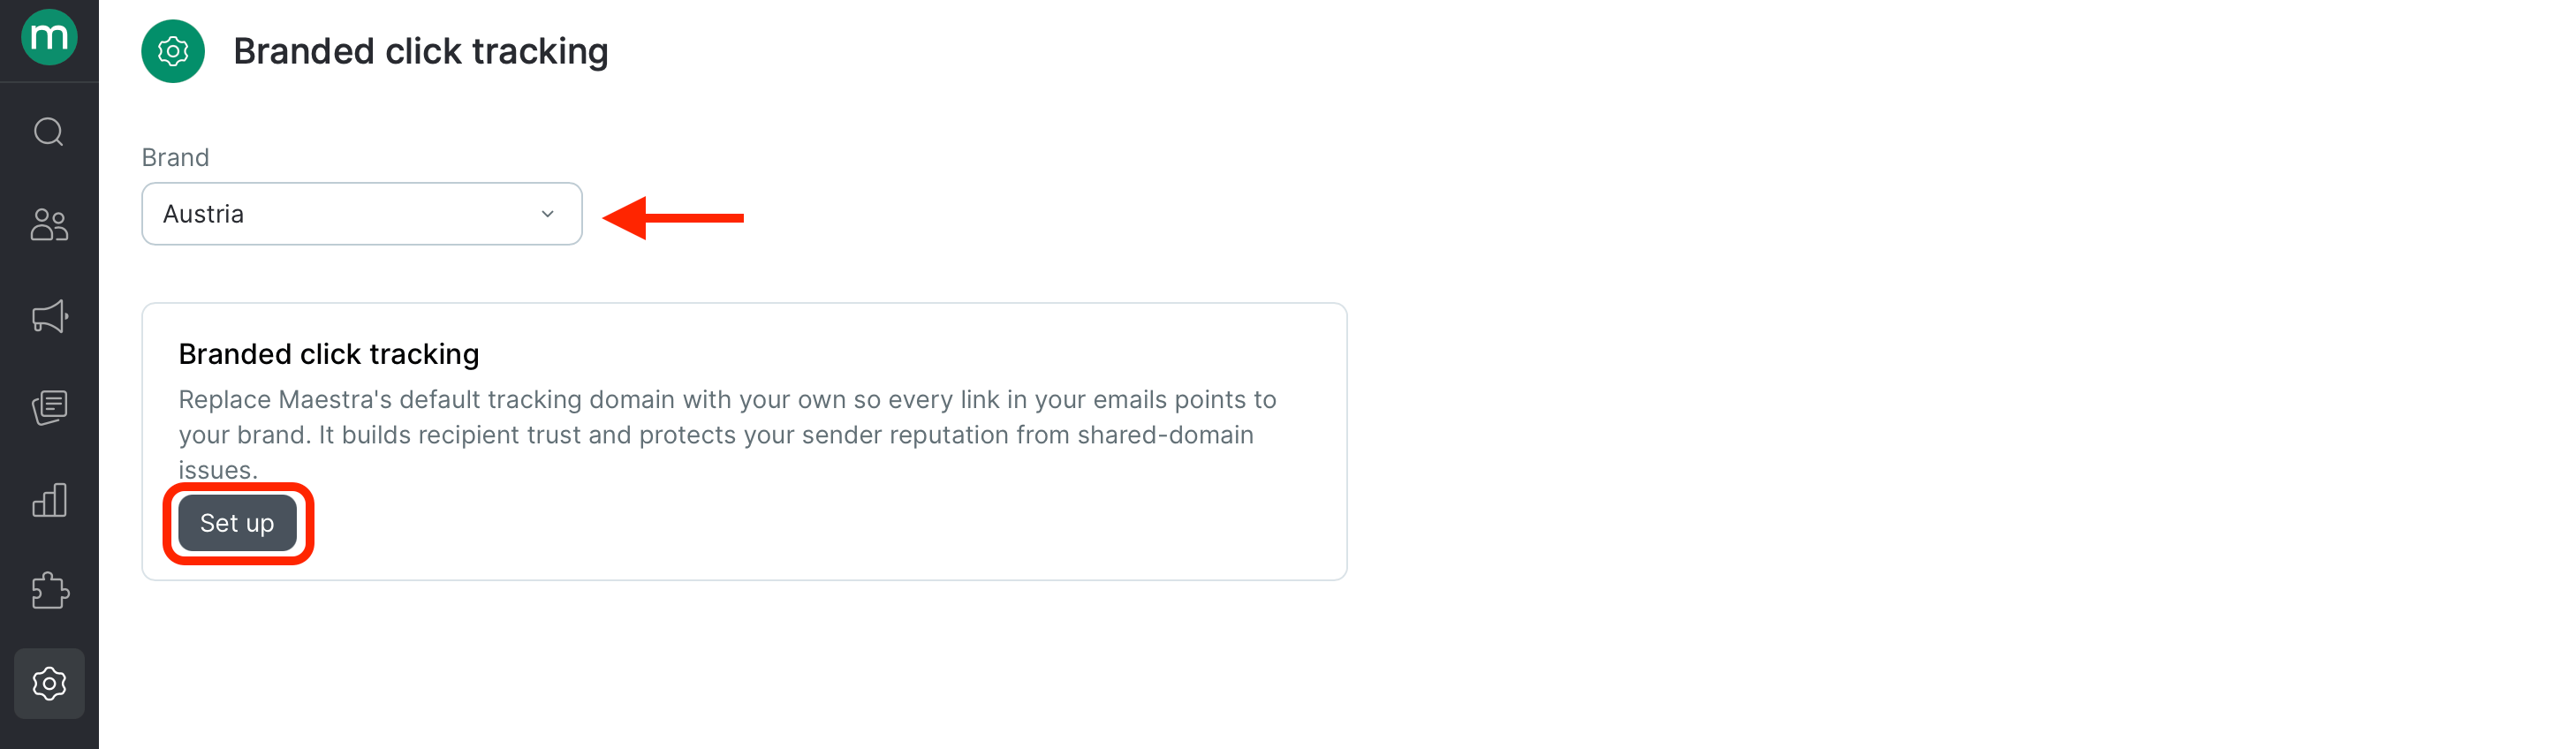
 Choose the brand you're configuring the domain for, then click **Set up**.
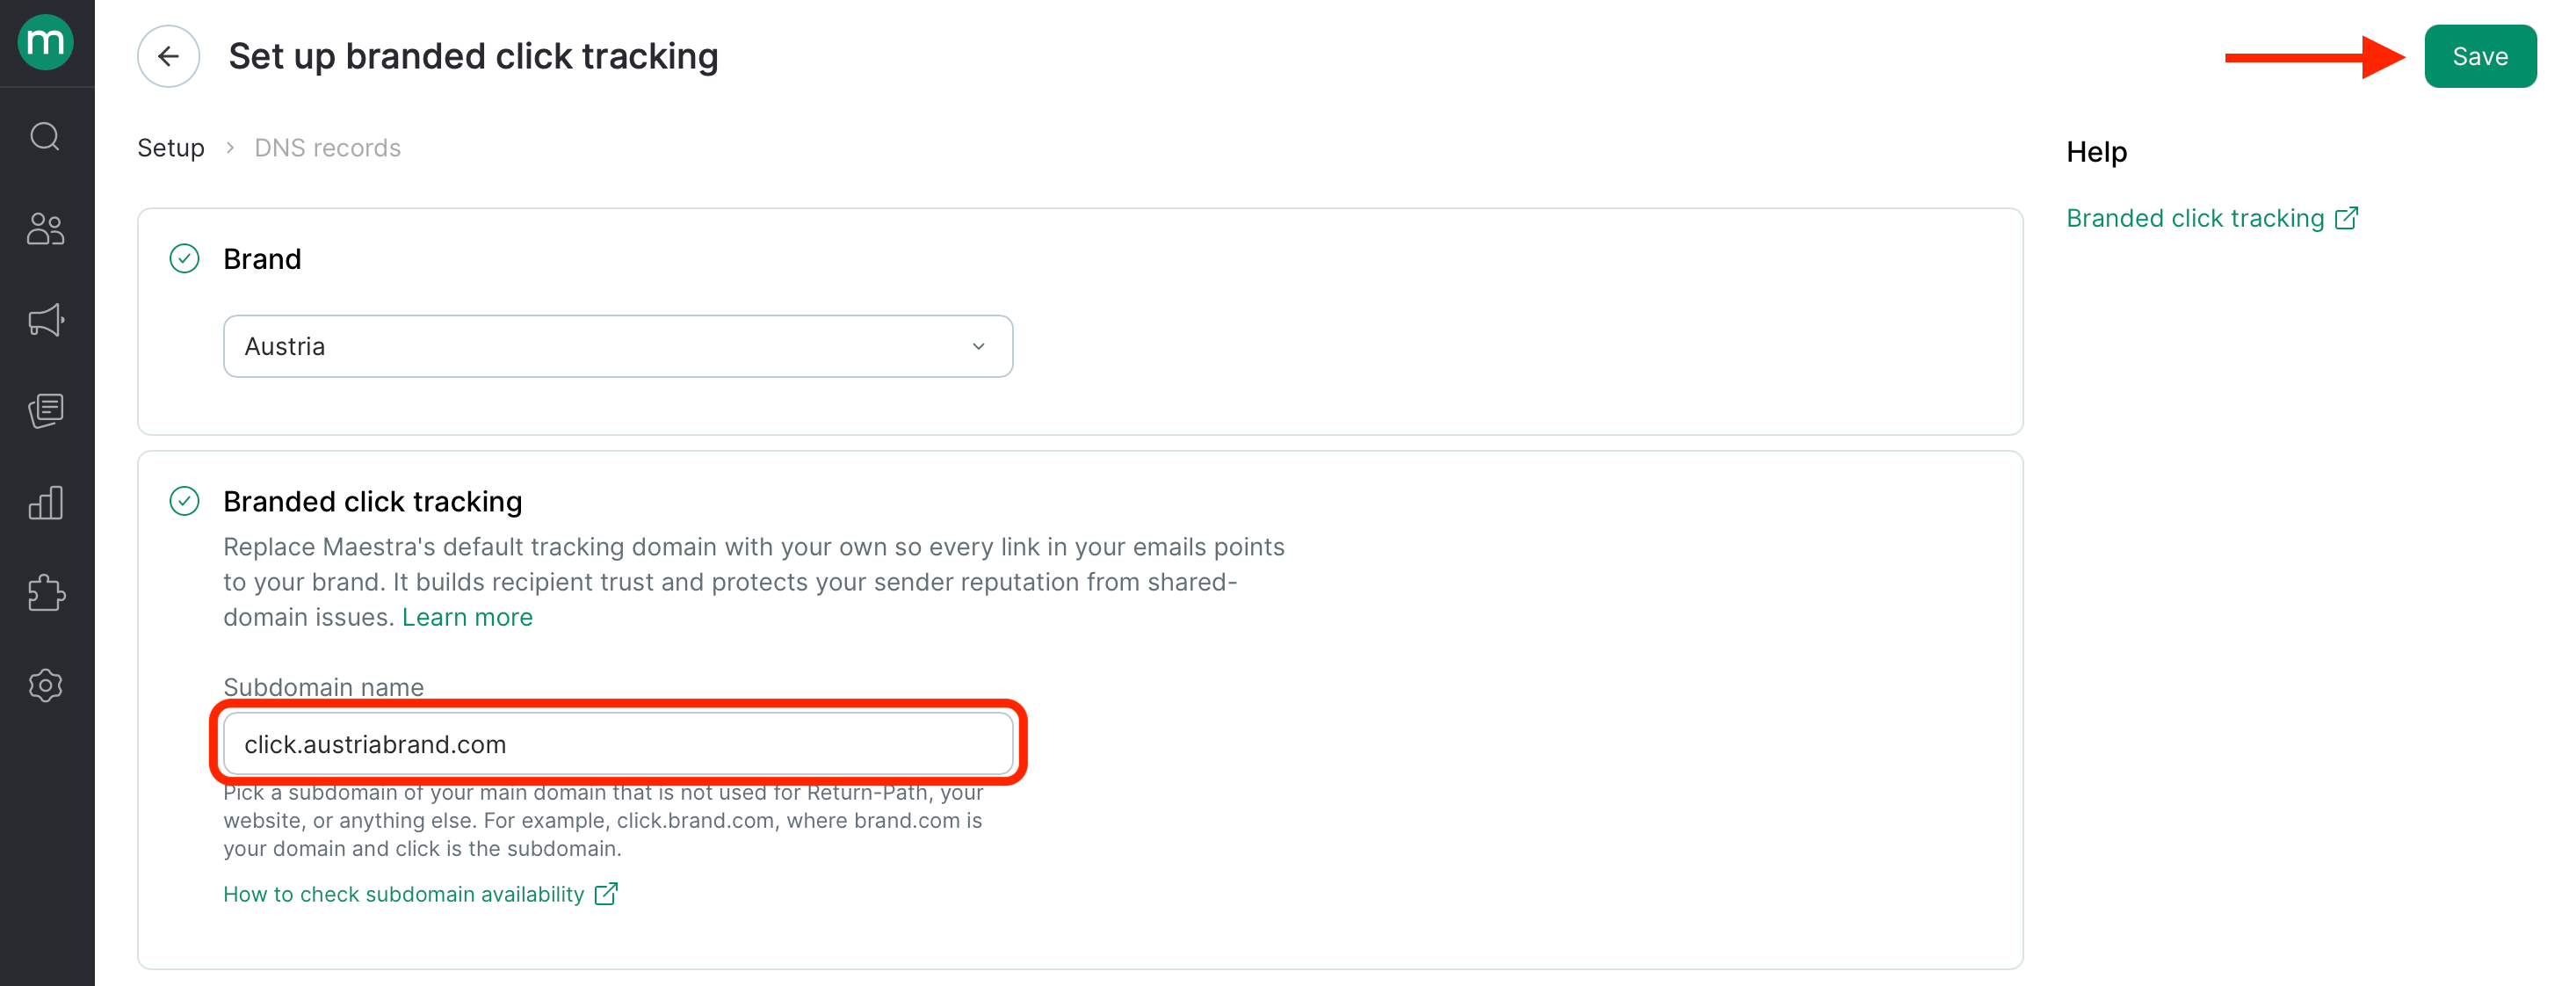
 Fill in **Subdomain name** — for example, `click.yourbrand.com` — then click **Save**.
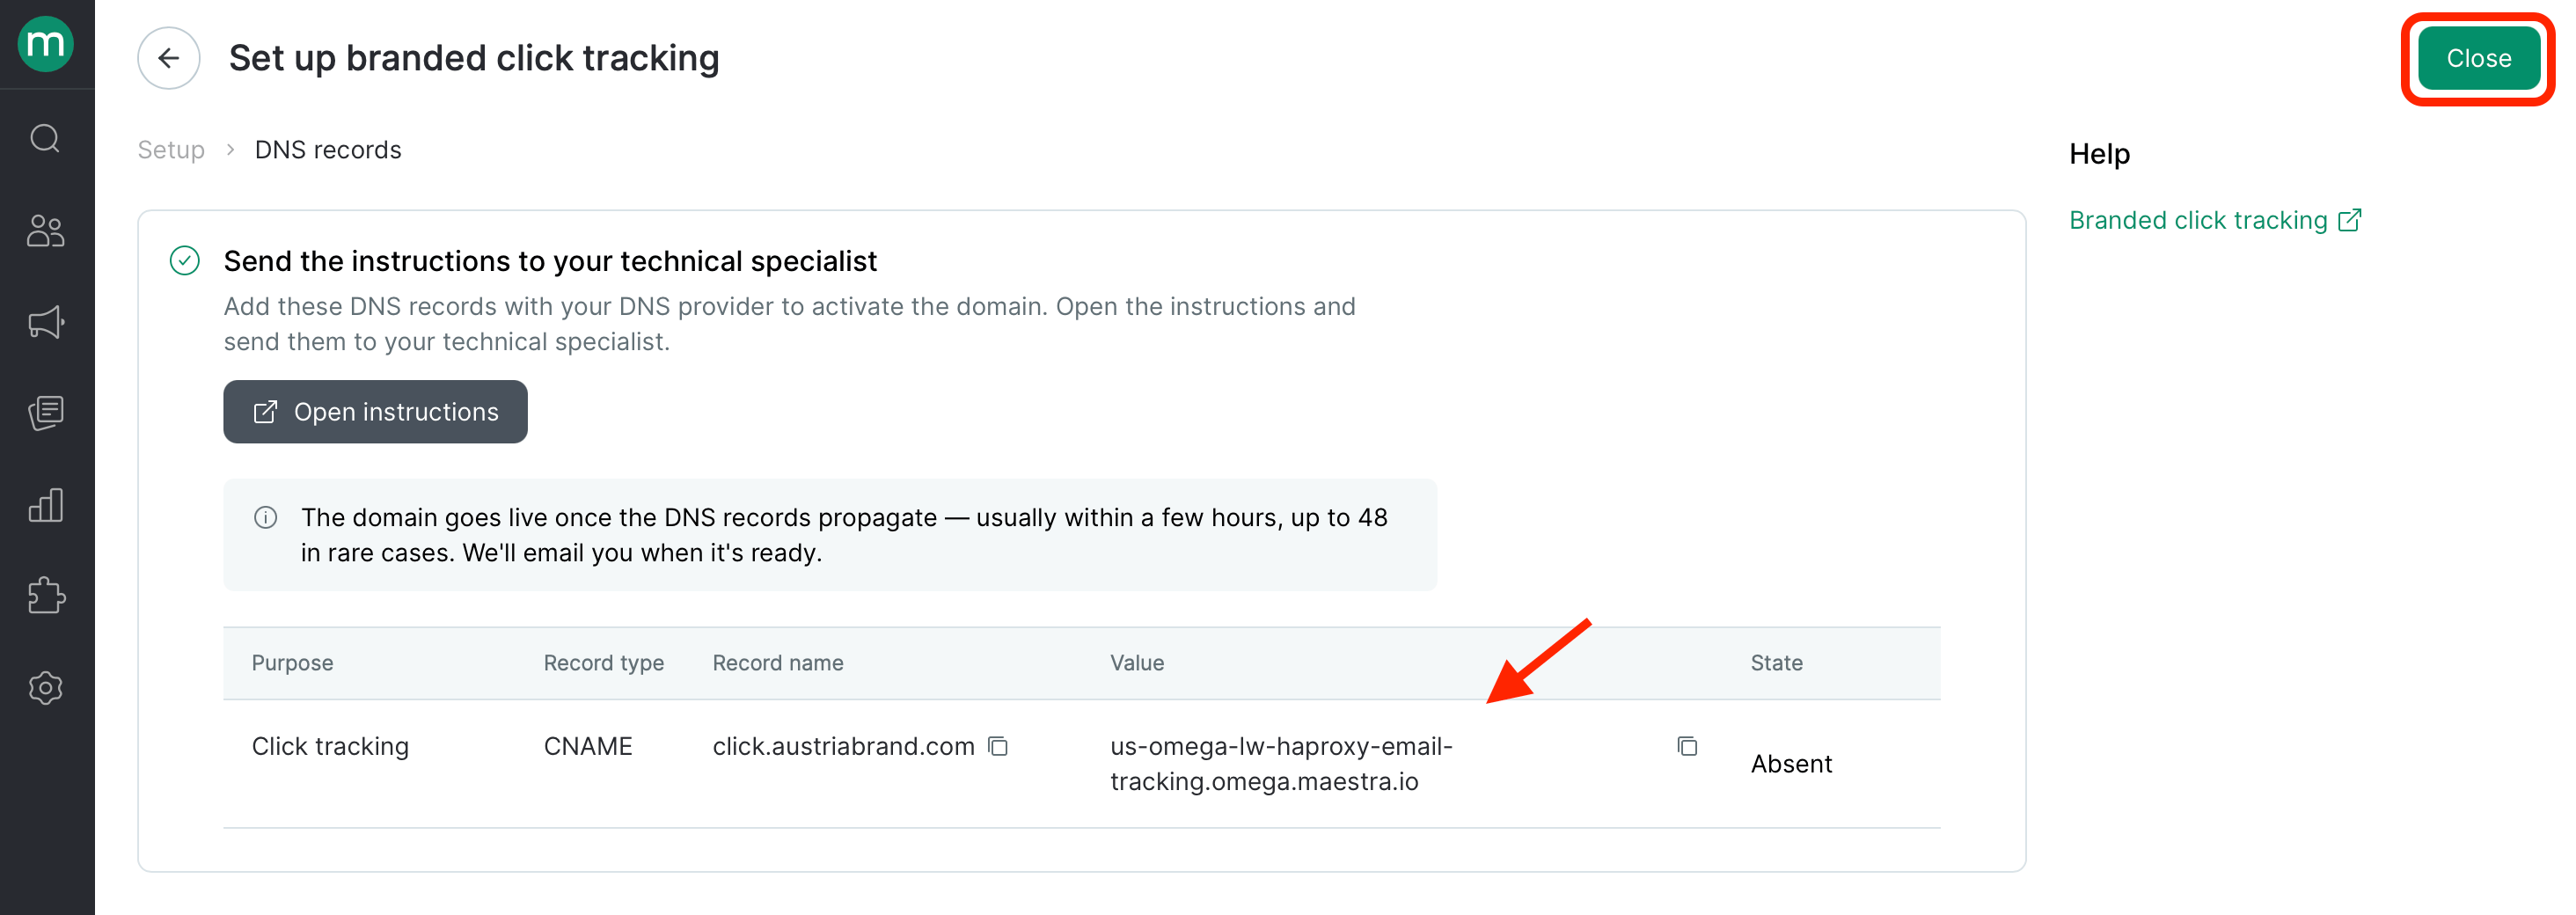
 Maestra Platform lists the CNAME records to add. Click **Open instructions** — the setup instructions open in a new tab.
If someone else handles DNS, copy the URL from that tab and send it to them.
Then click **Close** and move on to the DNS setup.
Maestra Platform lists the CNAME records to add. Click **Open instructions** — the setup instructions open in a new tab.
If someone else handles DNS, copy the URL from that tab and send it to them.
Then click **Close** and move on to the DNS setup.
 The instructions open without signing in to Maestra Platform, so your DNS specialist can view them even without an account.
## Step 2. Add the DNS records
1. Copy the CNAME records marked **Click tracking** that Maestra Platform showed you.
2. Add them in the DNS control panel for your domain.
3. Wait for Maestra Platform to check the records and update the domain status.
DNS records don't take effect right away — usually anywhere from a few minutes to a few hours, and in rare cases up to 48 hours. Maestra Platform emails you once the domain goes live, so you don't have to sit on the page waiting.
## Step 3. Check the domain status
The domain status shows up on the **Branded click tracking** page.
| Status | What it means | What to do |
| -------------- | -------------------------------------------------------------------------------------- | ----------------------------------------------------------------------------------------------- |
| Not configured | Maestra Platform hasn't detected the DNS records yet | Check that the records are added in your DNS panel. They can take several hours to take effect |
| Configuring | The DNS records are in place and Maestra Platform is setting the domain up on its side | Wait for setup to finish |
| Confirmed | The domain is ready. Maestra Platform uses it to track clicks in email campaigns | Nothing to do |
| Absent | The DNS records are incorrect or have been removed | Check that every DNS record is added without typos and matches what Maestra Platform showed you |
As soon as the status flips to **Confirmed**, Maestra Platform starts building the links in your emails on your domain.
## When DNS records stop working
If the DNS records for your click tracking domain get deleted or are entered incorrectly:
* The domain status changes to **Absent**.
* Links in new emails are built on the shared Maestra Platform domain.
* An issue is generated in your project automatically.
To get the domain working again, check the DNS records and re-enter them as described in step 2.
## Deleting a domain
Once you delete the domain, links in your emails will be built on the shared Maestra Platform domain. Don't forget to delete the DNS records at your DNS provider.
Go to **Settings** → **Communication** → **Branded click tracking**.
The instructions open without signing in to Maestra Platform, so your DNS specialist can view them even without an account.
## Step 2. Add the DNS records
1. Copy the CNAME records marked **Click tracking** that Maestra Platform showed you.
2. Add them in the DNS control panel for your domain.
3. Wait for Maestra Platform to check the records and update the domain status.
DNS records don't take effect right away — usually anywhere from a few minutes to a few hours, and in rare cases up to 48 hours. Maestra Platform emails you once the domain goes live, so you don't have to sit on the page waiting.
## Step 3. Check the domain status
The domain status shows up on the **Branded click tracking** page.
| Status | What it means | What to do |
| -------------- | -------------------------------------------------------------------------------------- | ----------------------------------------------------------------------------------------------- |
| Not configured | Maestra Platform hasn't detected the DNS records yet | Check that the records are added in your DNS panel. They can take several hours to take effect |
| Configuring | The DNS records are in place and Maestra Platform is setting the domain up on its side | Wait for setup to finish |
| Confirmed | The domain is ready. Maestra Platform uses it to track clicks in email campaigns | Nothing to do |
| Absent | The DNS records are incorrect or have been removed | Check that every DNS record is added without typos and matches what Maestra Platform showed you |
As soon as the status flips to **Confirmed**, Maestra Platform starts building the links in your emails on your domain.
## When DNS records stop working
If the DNS records for your click tracking domain get deleted or are entered incorrectly:
* The domain status changes to **Absent**.
* Links in new emails are built on the shared Maestra Platform domain.
* An issue is generated in your project automatically.
To get the domain working again, check the DNS records and re-enter them as described in step 2.
## Deleting a domain
Once you delete the domain, links in your emails will be built on the shared Maestra Platform domain. Don't forget to delete the DNS records at your DNS provider.
Go to **Settings** → **Communication** → **Branded click tracking**.
Pick the brand, then click the bin icon next to **Open**.
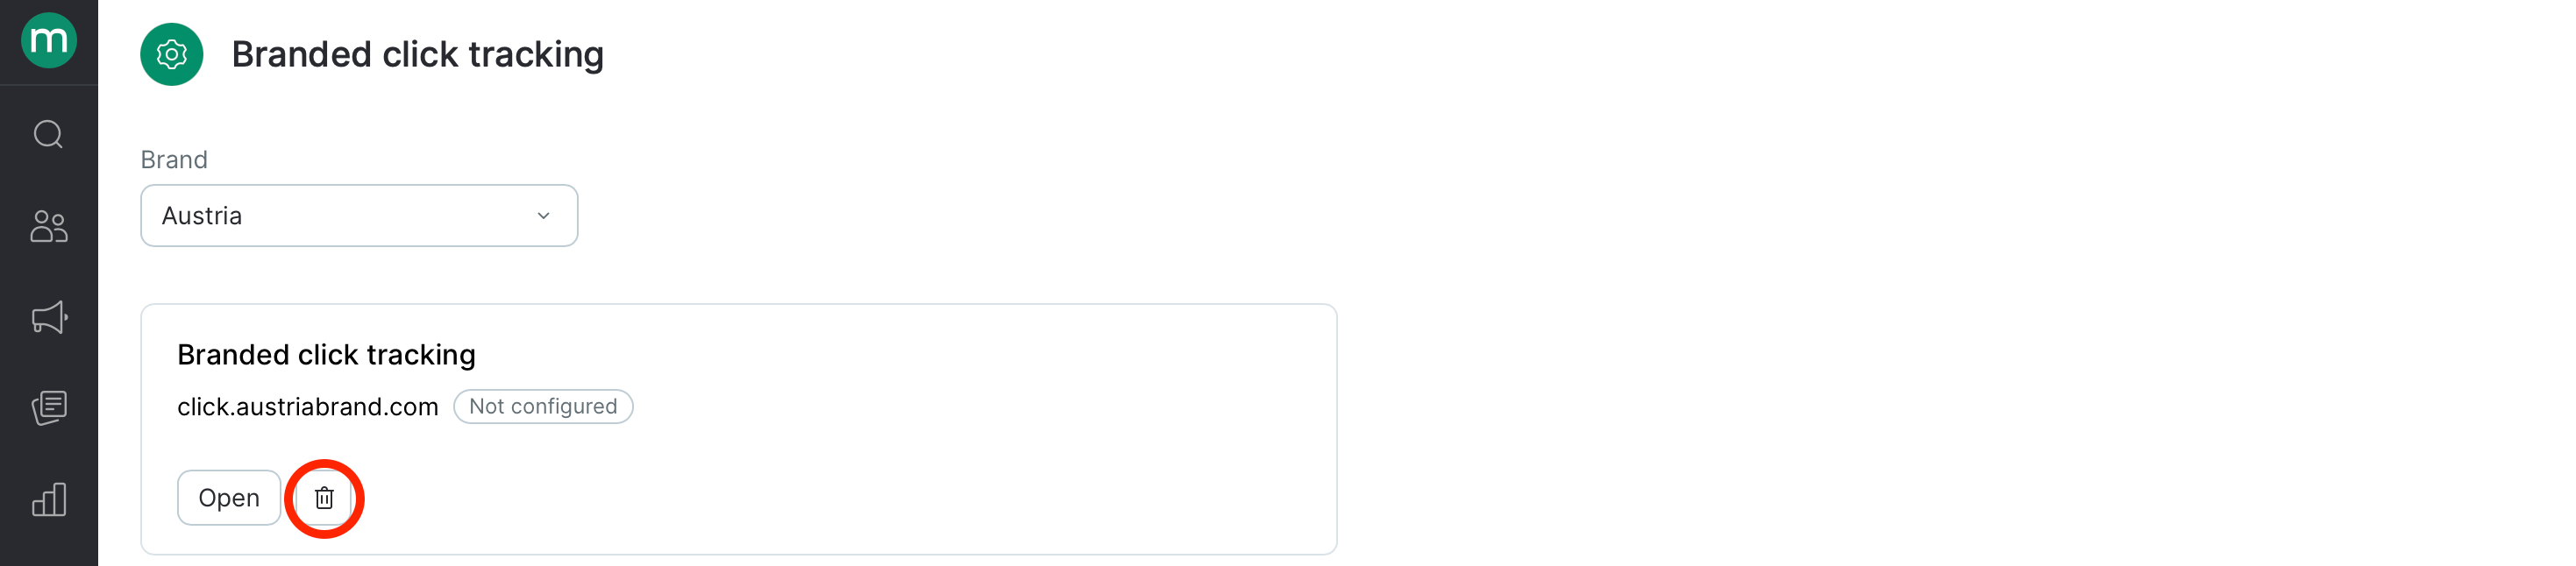 Maestra Platform asks you to confirm before the domain is removed.