An action template is a name of a customer-related event.
Some good examples are when the customer visits your website, opens an email, is imported into the database, or tagged for mailings.
Action templates may be used in a wide range of situations. For example:
-
To tag customers at import. This will then allow you to filter customers in order to segment them.
-
To record an action resulting from running an API method on the web site. For example, a product view.
-
To set up a trigger.
How to create an action template
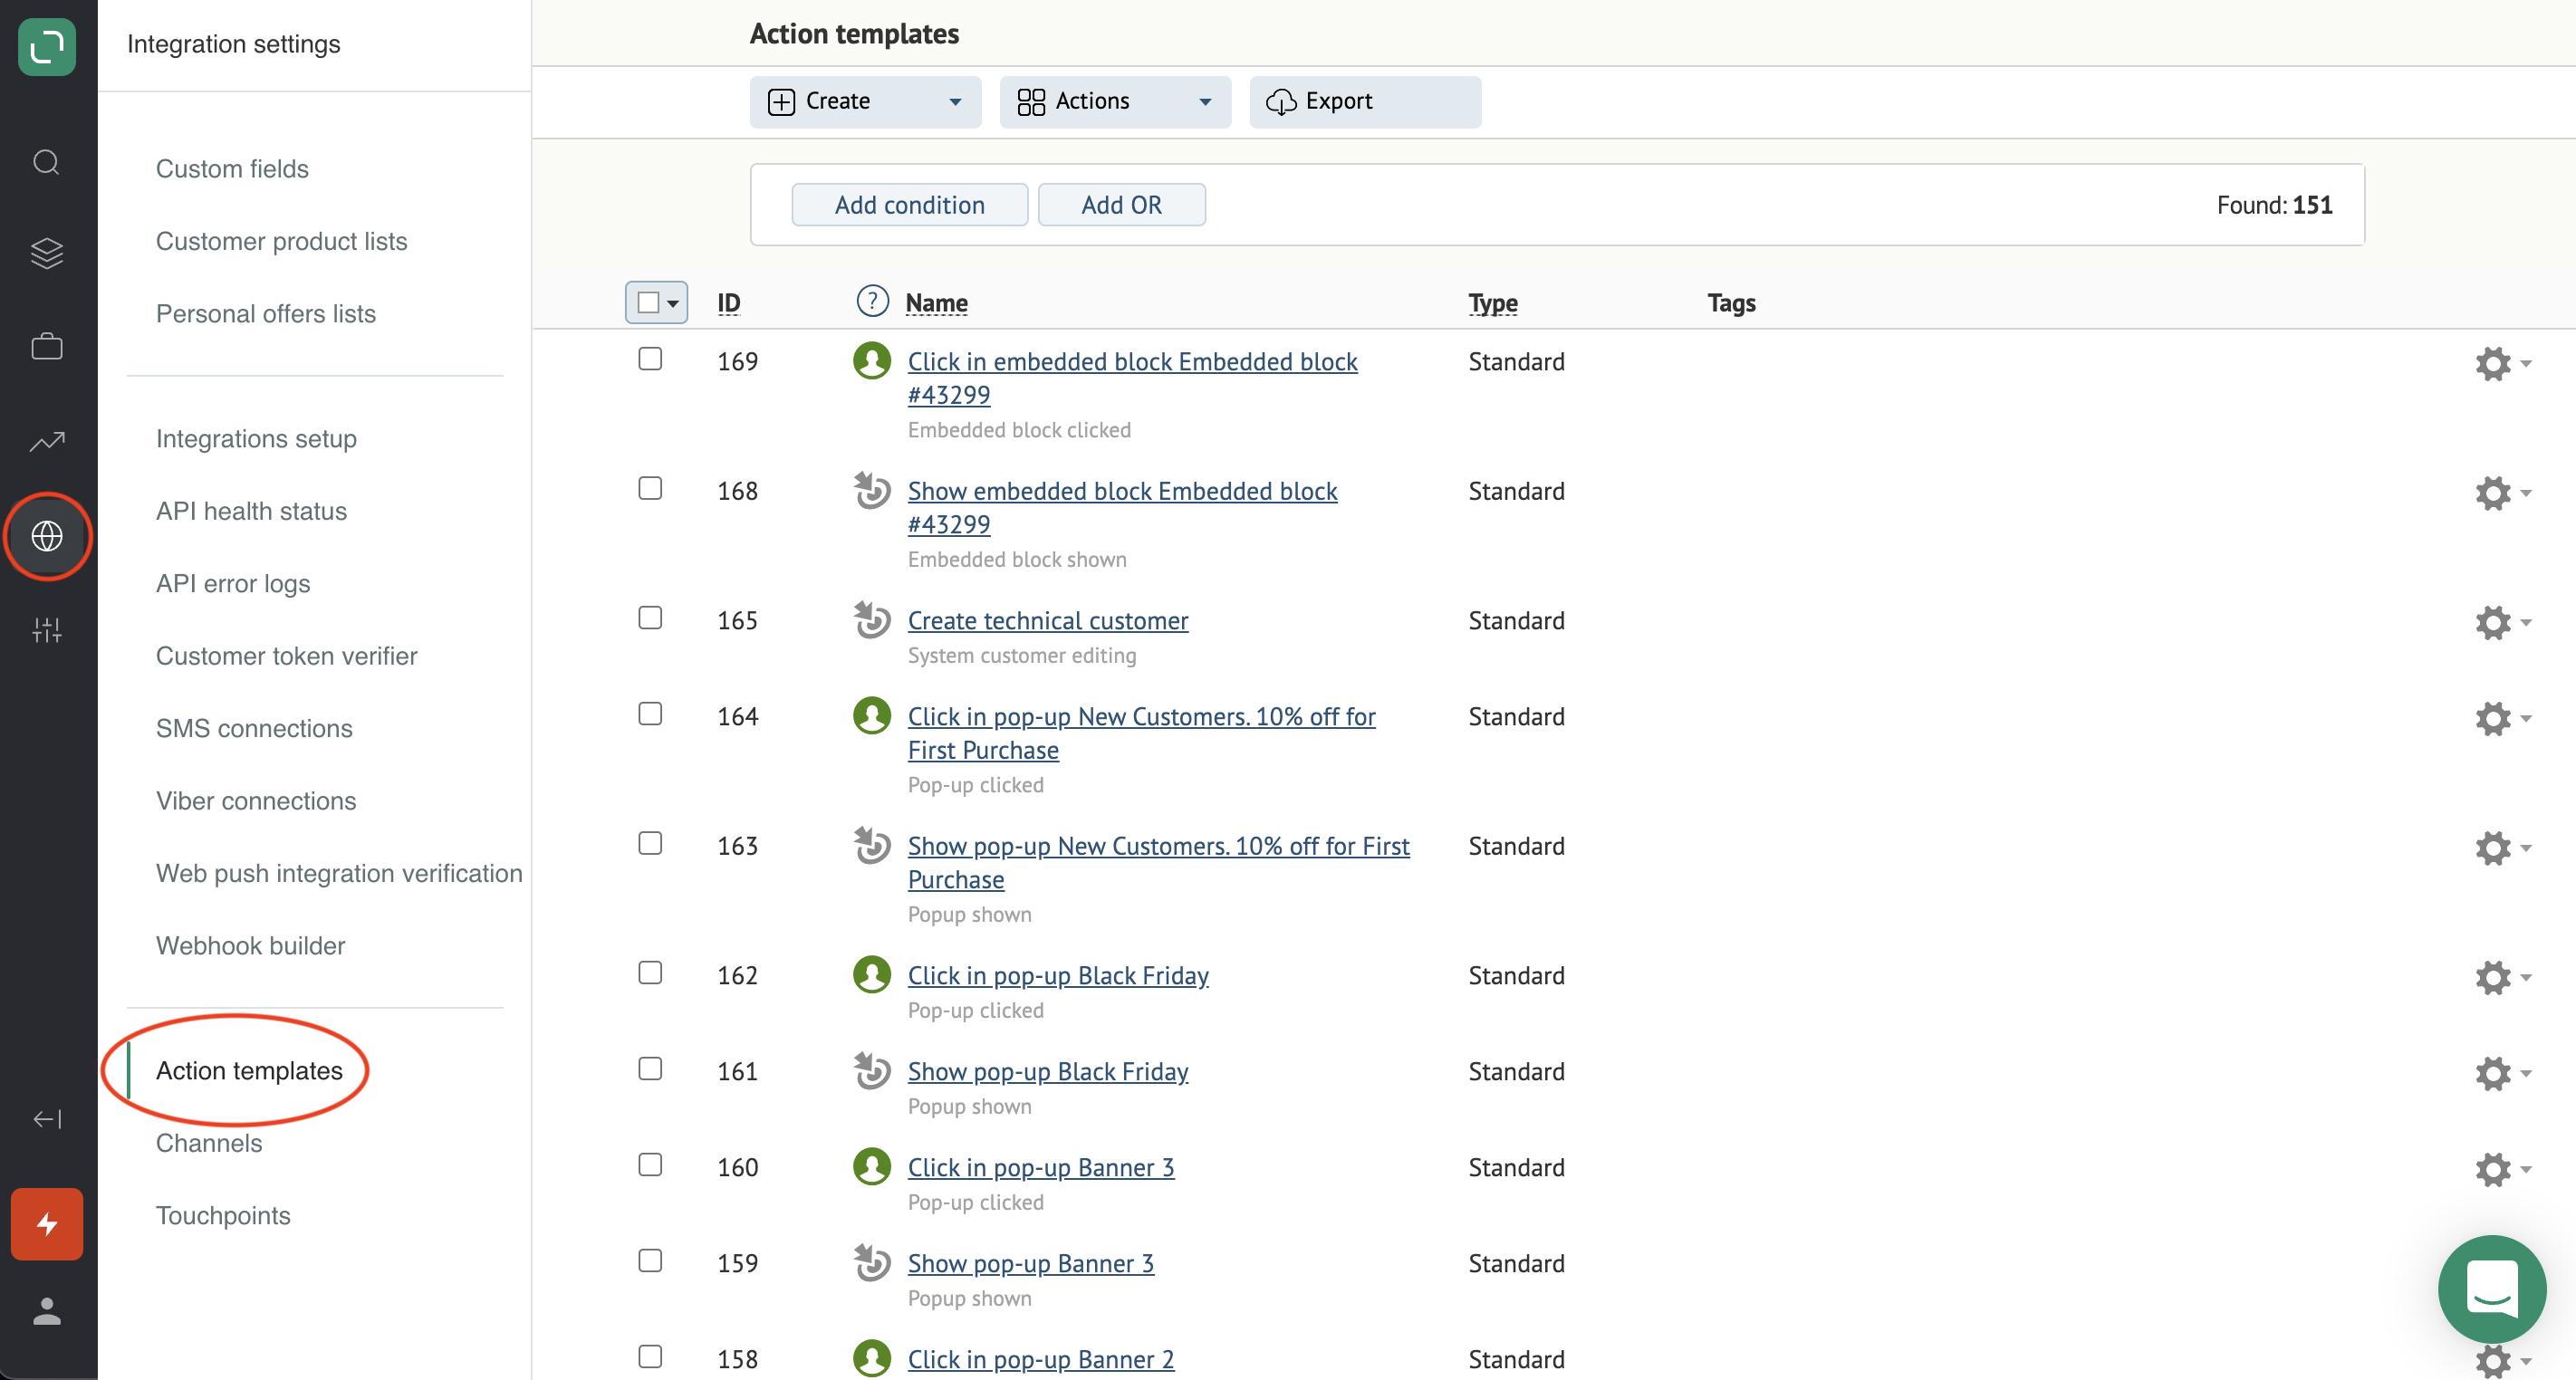
- Go to Integration settings → Action templates:
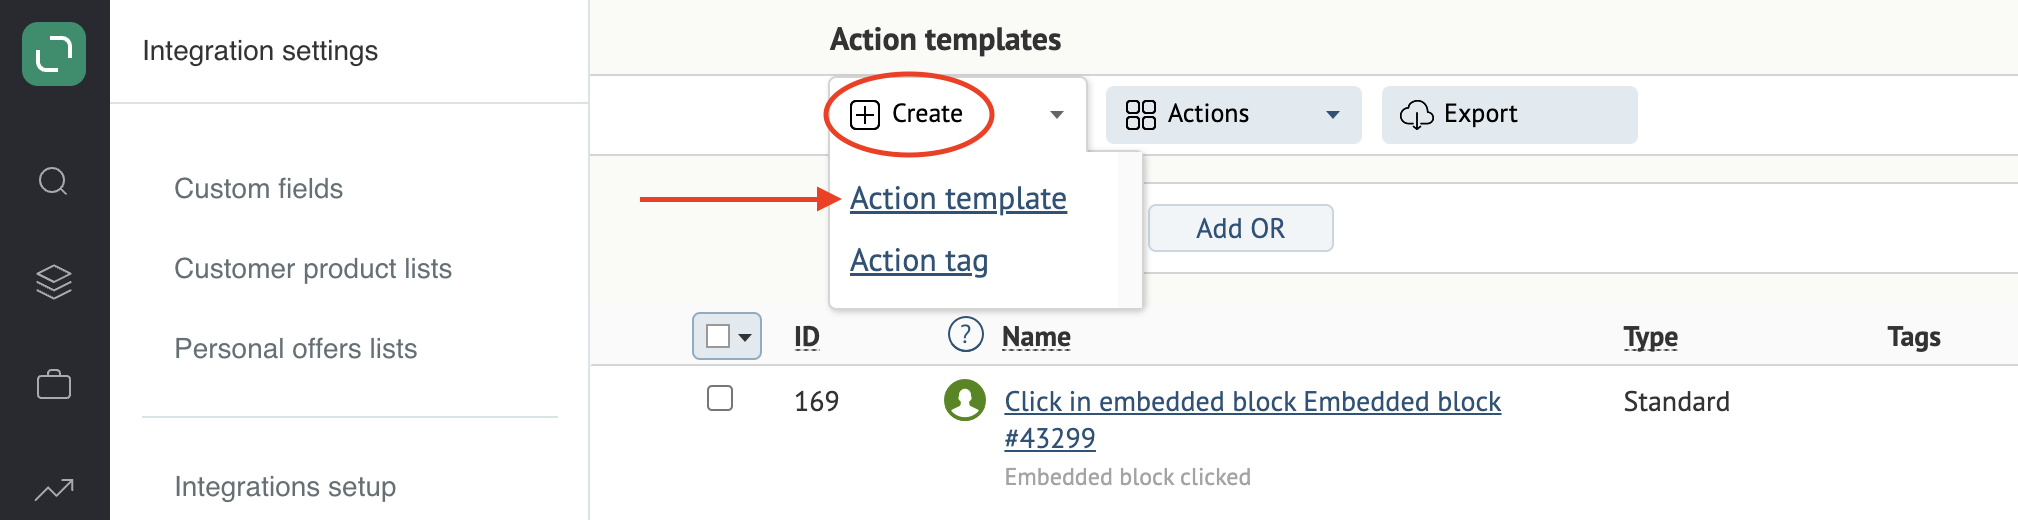
- Click Create and select Action template:
- Fill in the fields.
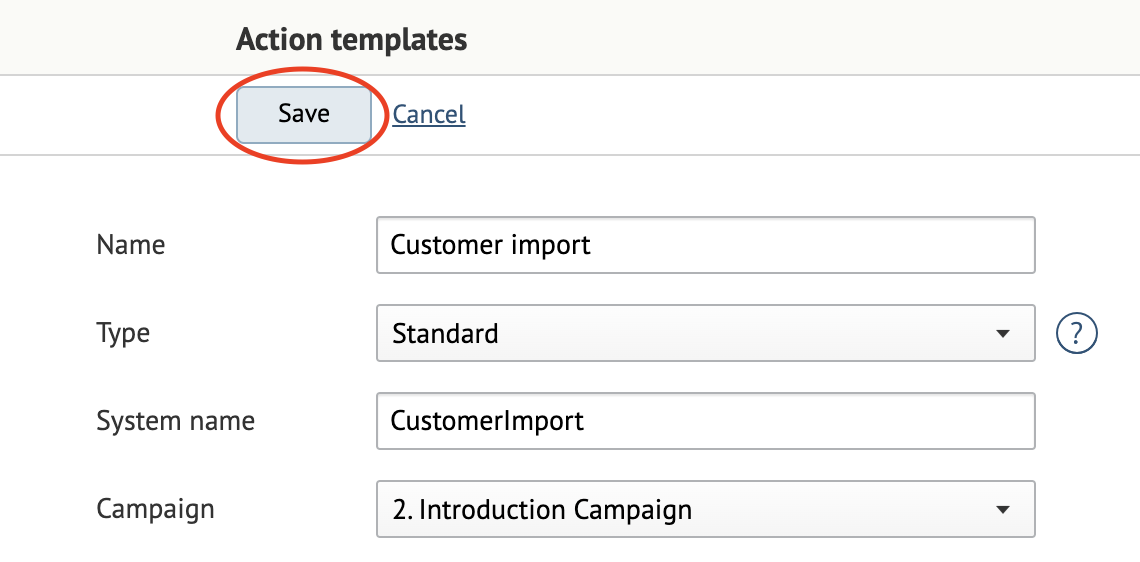
Example of a completed template:
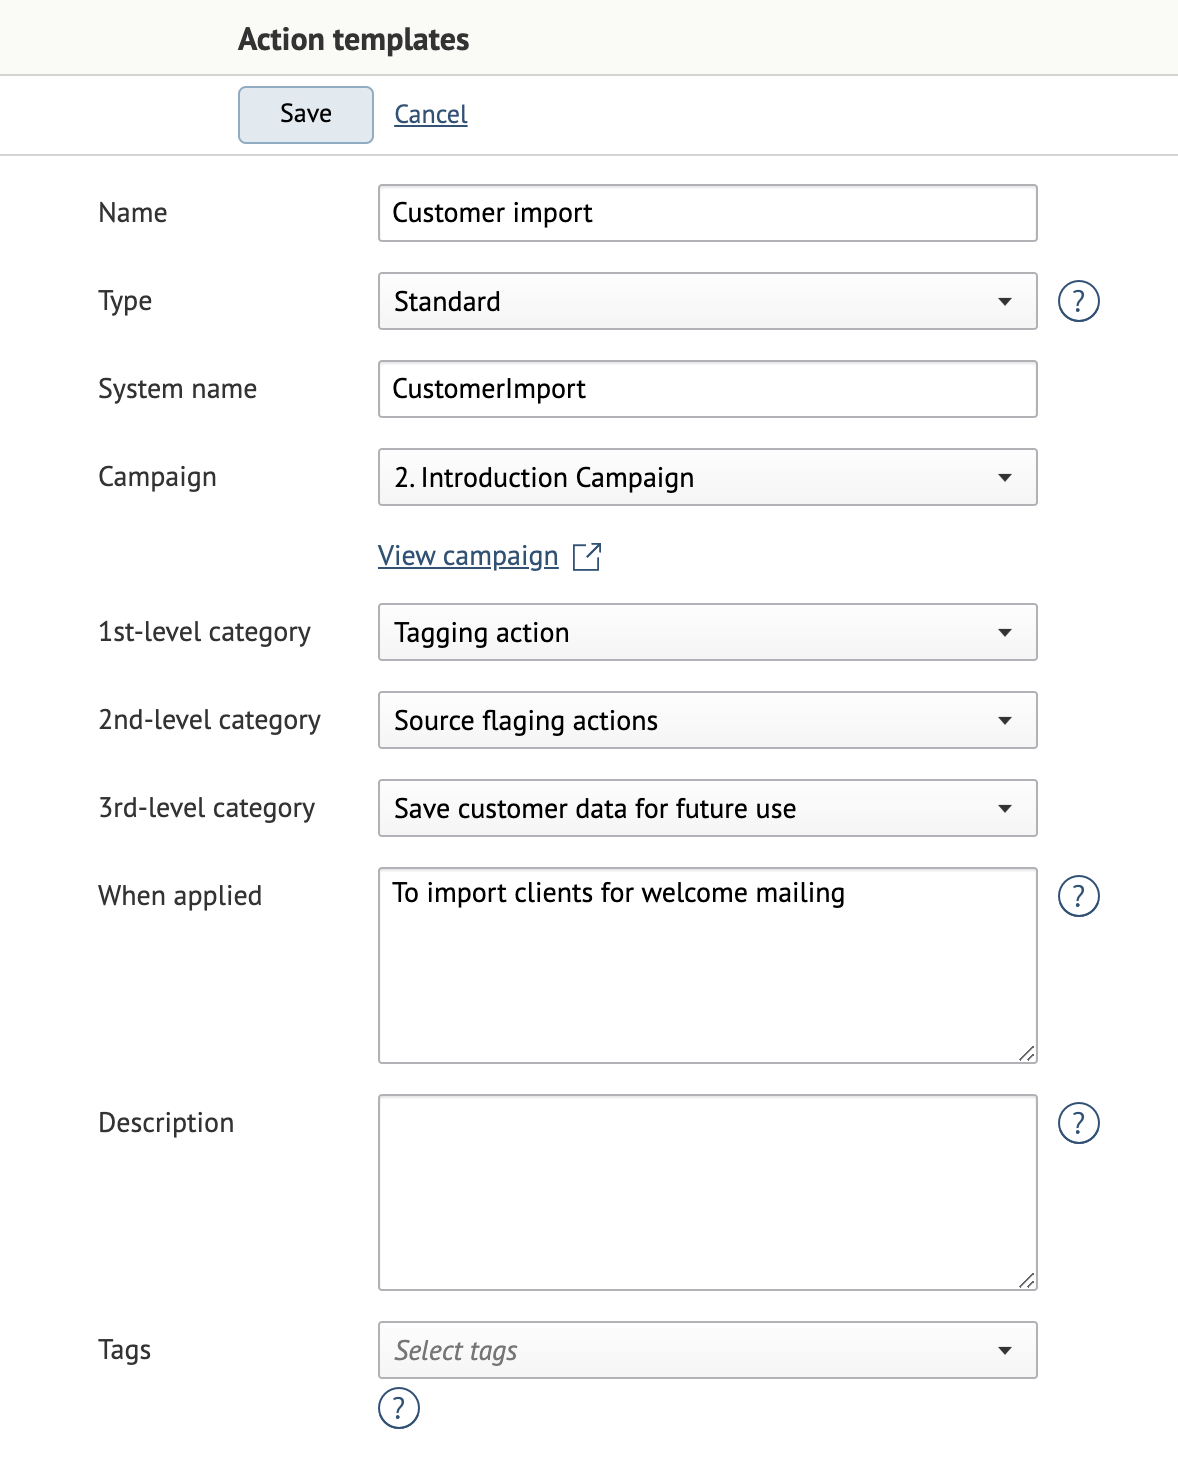
Name: the action name. This will be assigned to customers in the system.
Type: the action type. The "Standard" type is used in most cases. Other types are used in action templates that were created automatically.
System name: the name of the action template in the Maestra database. This is used for integrations. The system generates this name automatically.
Campaign: the campaign where this template will be used.
Applied to brands: the brand to apply the template to, provided that the project supports brands.
Categories should be filled in based on the tasks your action template solves. For examples of filled-in Categories, please refer to articles linked on this page.
1st-level category — the overarching category:
- Customer action: the actions that the customer performs;
- System action: the actions that we initiate in the system;
- Tagging action: for example, tagging customers.
2nd-level category: the drop-down list contents depend on what was chosen in the first-level category.
3rd-level category: the drop-down list contents depend on what was chosen in the second-level category.
When applied and Description are optional.
Tags: can be used to group the action templates.
- Save your action template: