Imagine a typical everyday task: rendering listed data into a table. Some good examples include order line items, products in a cart, purchase recommendations.
Sometimes the exact quantity of line items is unknown, or it cannot be divided by the quantity of table columns without a remainder.
The TableRows function can solve this problem by making a layout. It groups the list of values (variables) into rows of X elements each. After that, you can render the table rows and columns in cycles.
TableRows receives the following two variables:
- collection — a list of products;
- number of table columns.
TableRows returns a collection of table rows. Every row has the following properties:
-
Index: the index number of the table row (starting with 1); -
IsFirst: whether a given row is the first; -
IsLast: whether a given row is the last; -
ValueCount: the quantity of non-empty cells in the row.
For example, if you try to add a list of 8 line items to a 5-column table, the relevantValueCountwill equal 5 for the first row and 3 for the second one because the second row will have some empty cells. -
Cells: the list of cells in the row.
The number of cells is always equal to the number specified in theTableRowsvariable even if there are less values in this variable.
Every cell has the following properties:-
Index: the index number of the table column (starting with 1); -
IsFirst: whether the column is the first; -
IsLast:whether the column is the last; -
Value: a relevant list element. This field may be empty.
-
Please note: The Value property of a given cell can be empty (null) if the quantity of elements of the TableRows variable can be divided by the quantity of cells with a remainder only. Therefore you’ll need to check whether this Value is null if you cannot ensure the appropriate quantity of elements. An email may fail to be sent if there is an empty cell.
Example:
@{ if cell.Value != null }
Upload some of the field values: ${ cell.Value.Title }
@{ else }
Make a layout without using values
@{ end if }
Let’s see how it all works by looking at some examples.
Example 1:
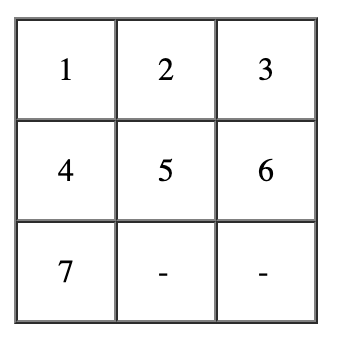
Layout:

A placeholder, e.g. an image, is added to empty cells.
Layout code:
<table>
  @{for row in Products, 3)}
    <tr>
      @{for cell in row.Cells}
        <td>
          @{if cell.Value != null}
            ${cell.Value.Name}
          @{end if}
        </td>
      @{end for}
    </tr>
  @{end for}
</table>
Example 2:
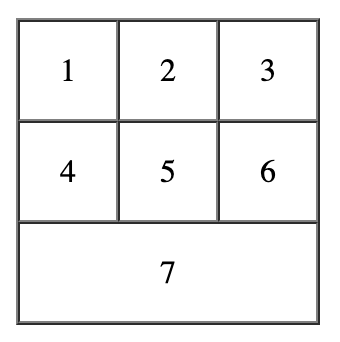
Layout:

If there are not enough elements for the last row in the layout, a different layout is applied — e.g., with merged cells.
Layout code:
<table>
@{ for row in tableRows(Products, 3) }
    @{ if row.ValueCount = 3 }
        @{* Layout for a standard row where all the relevant elements are present *}
          <tr>
            @{ for cell in row.Cells }
              <td>
                ${ cell.Value }
              </td>
            @{ end for }
          </tr>
        @{ else }
          <tr>
            <td colspan="3">
	            @{* Example of a table inside the last row *}
	              <table>
	                <tr>
	                  @{ for cell in row.Cells }
                      @{ if cell.Value != null }
                        <td>
                          ${ cell.Value }
                        </td>
                      @{ end if }
                    @{ end for }
                  </tr>
                </table>
            </td>
          </tr>
    @{ end if }
  @{ end for }
</table>
Example 3:
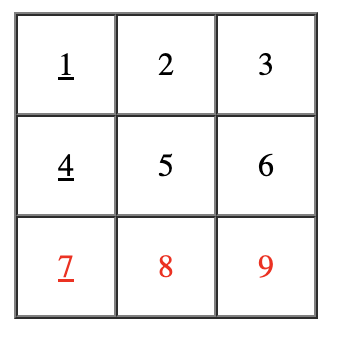
Layout:

The last row has a different style and might use a different layout; each starting element in the row has a different style / layout.
Layout code:
<table>
  @{ for row in tableRows(Products, 3) }
    <tr class="${ if (row.isLast, "red", "regular") }">
      @{ for cell in row.Cells }
        @{ if cell.Value != null }
          <td class="${ if (cell.isFirst, "highlight", "regular") }">
            ${ cell.Value }
          </td>
        @{ end if }
      @{ end for }
    </tr>
  @{ end for }
</table>