What are flows?
Flows help set up automated communications with customers across all channels (email, mobile and web push notifications, SMS, webhooks, and more), assign promo codes, award bonus points, edit customer data, and transmit this data between segments.
Flows are highly flexible, and combined with Maestra’s segmentation capabilities, they allow you to create an ultra-personalized sequence of interactions with each customer.
How to create a flow
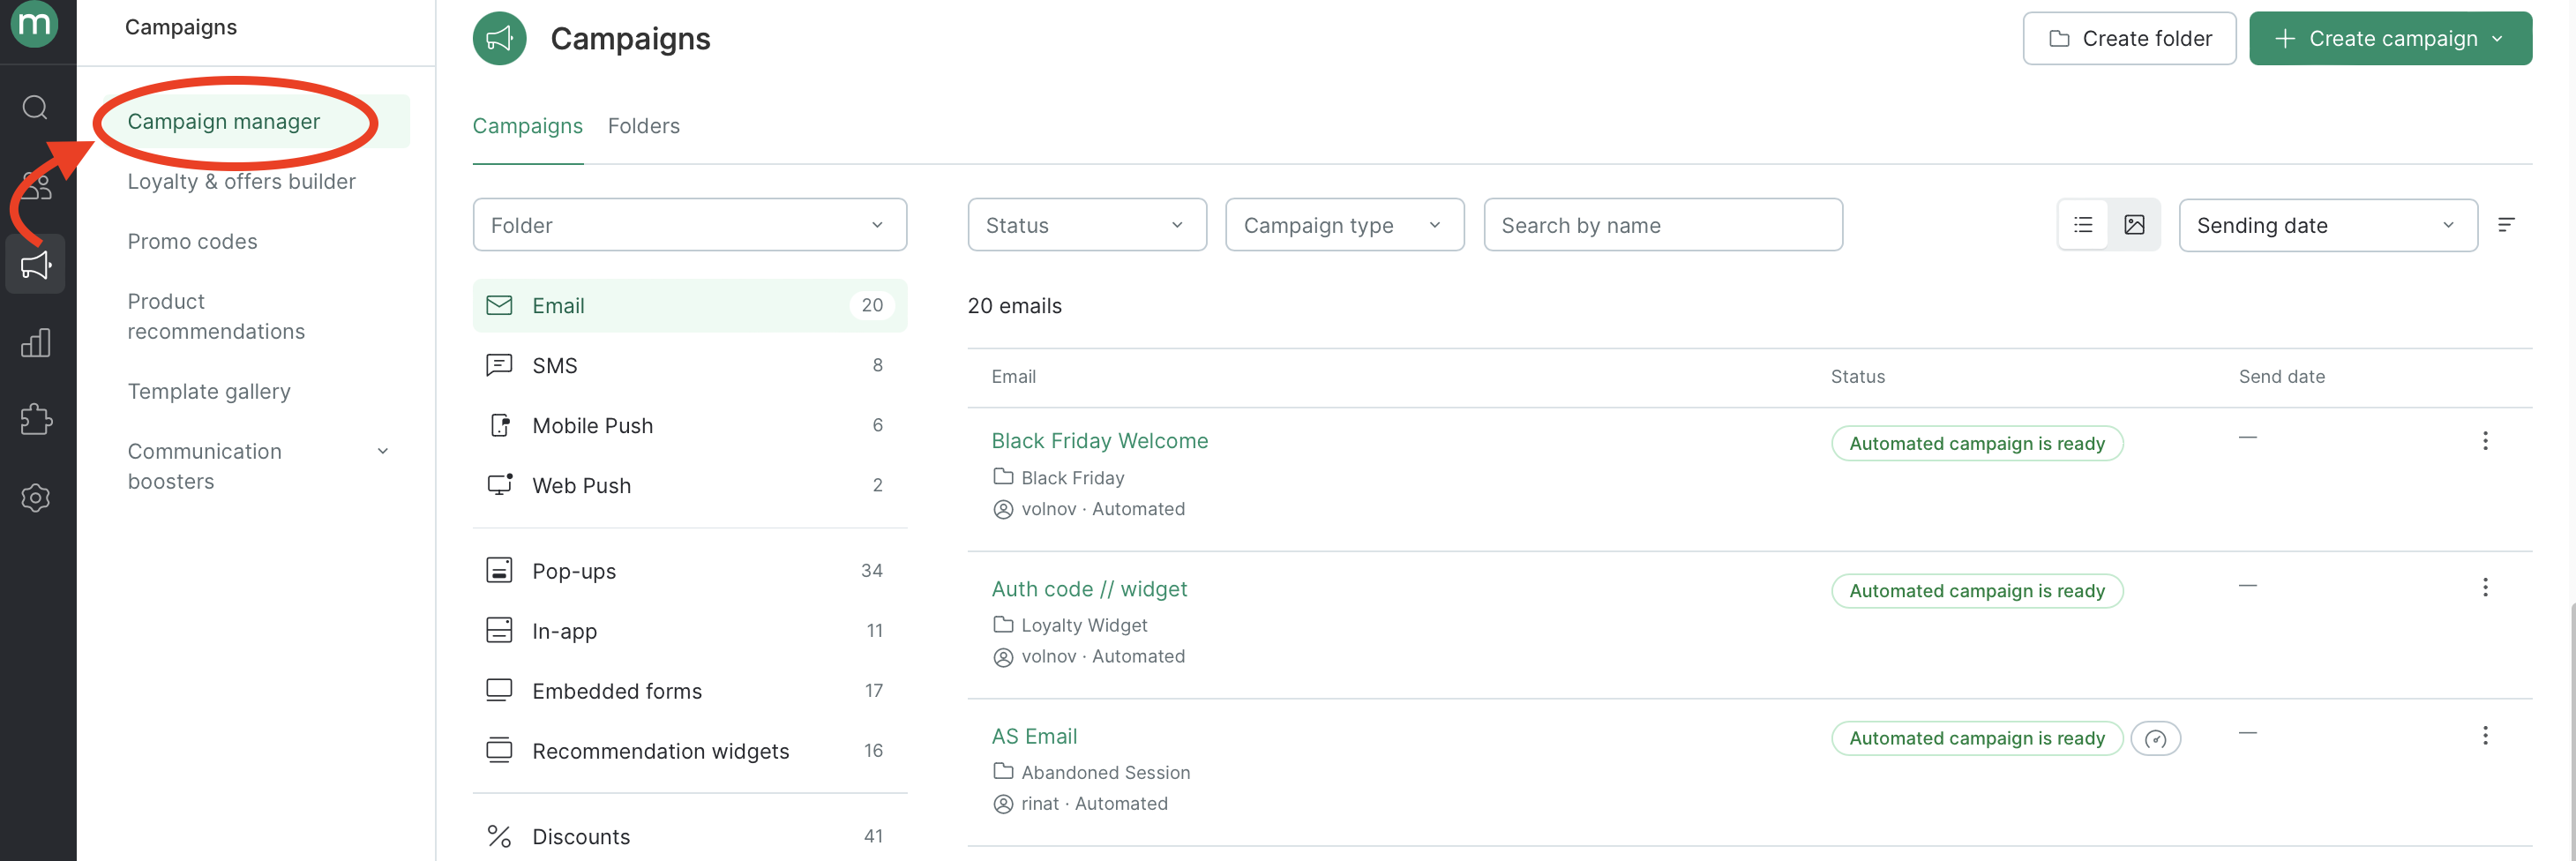
Go to the Campaigns → Campaign manager:
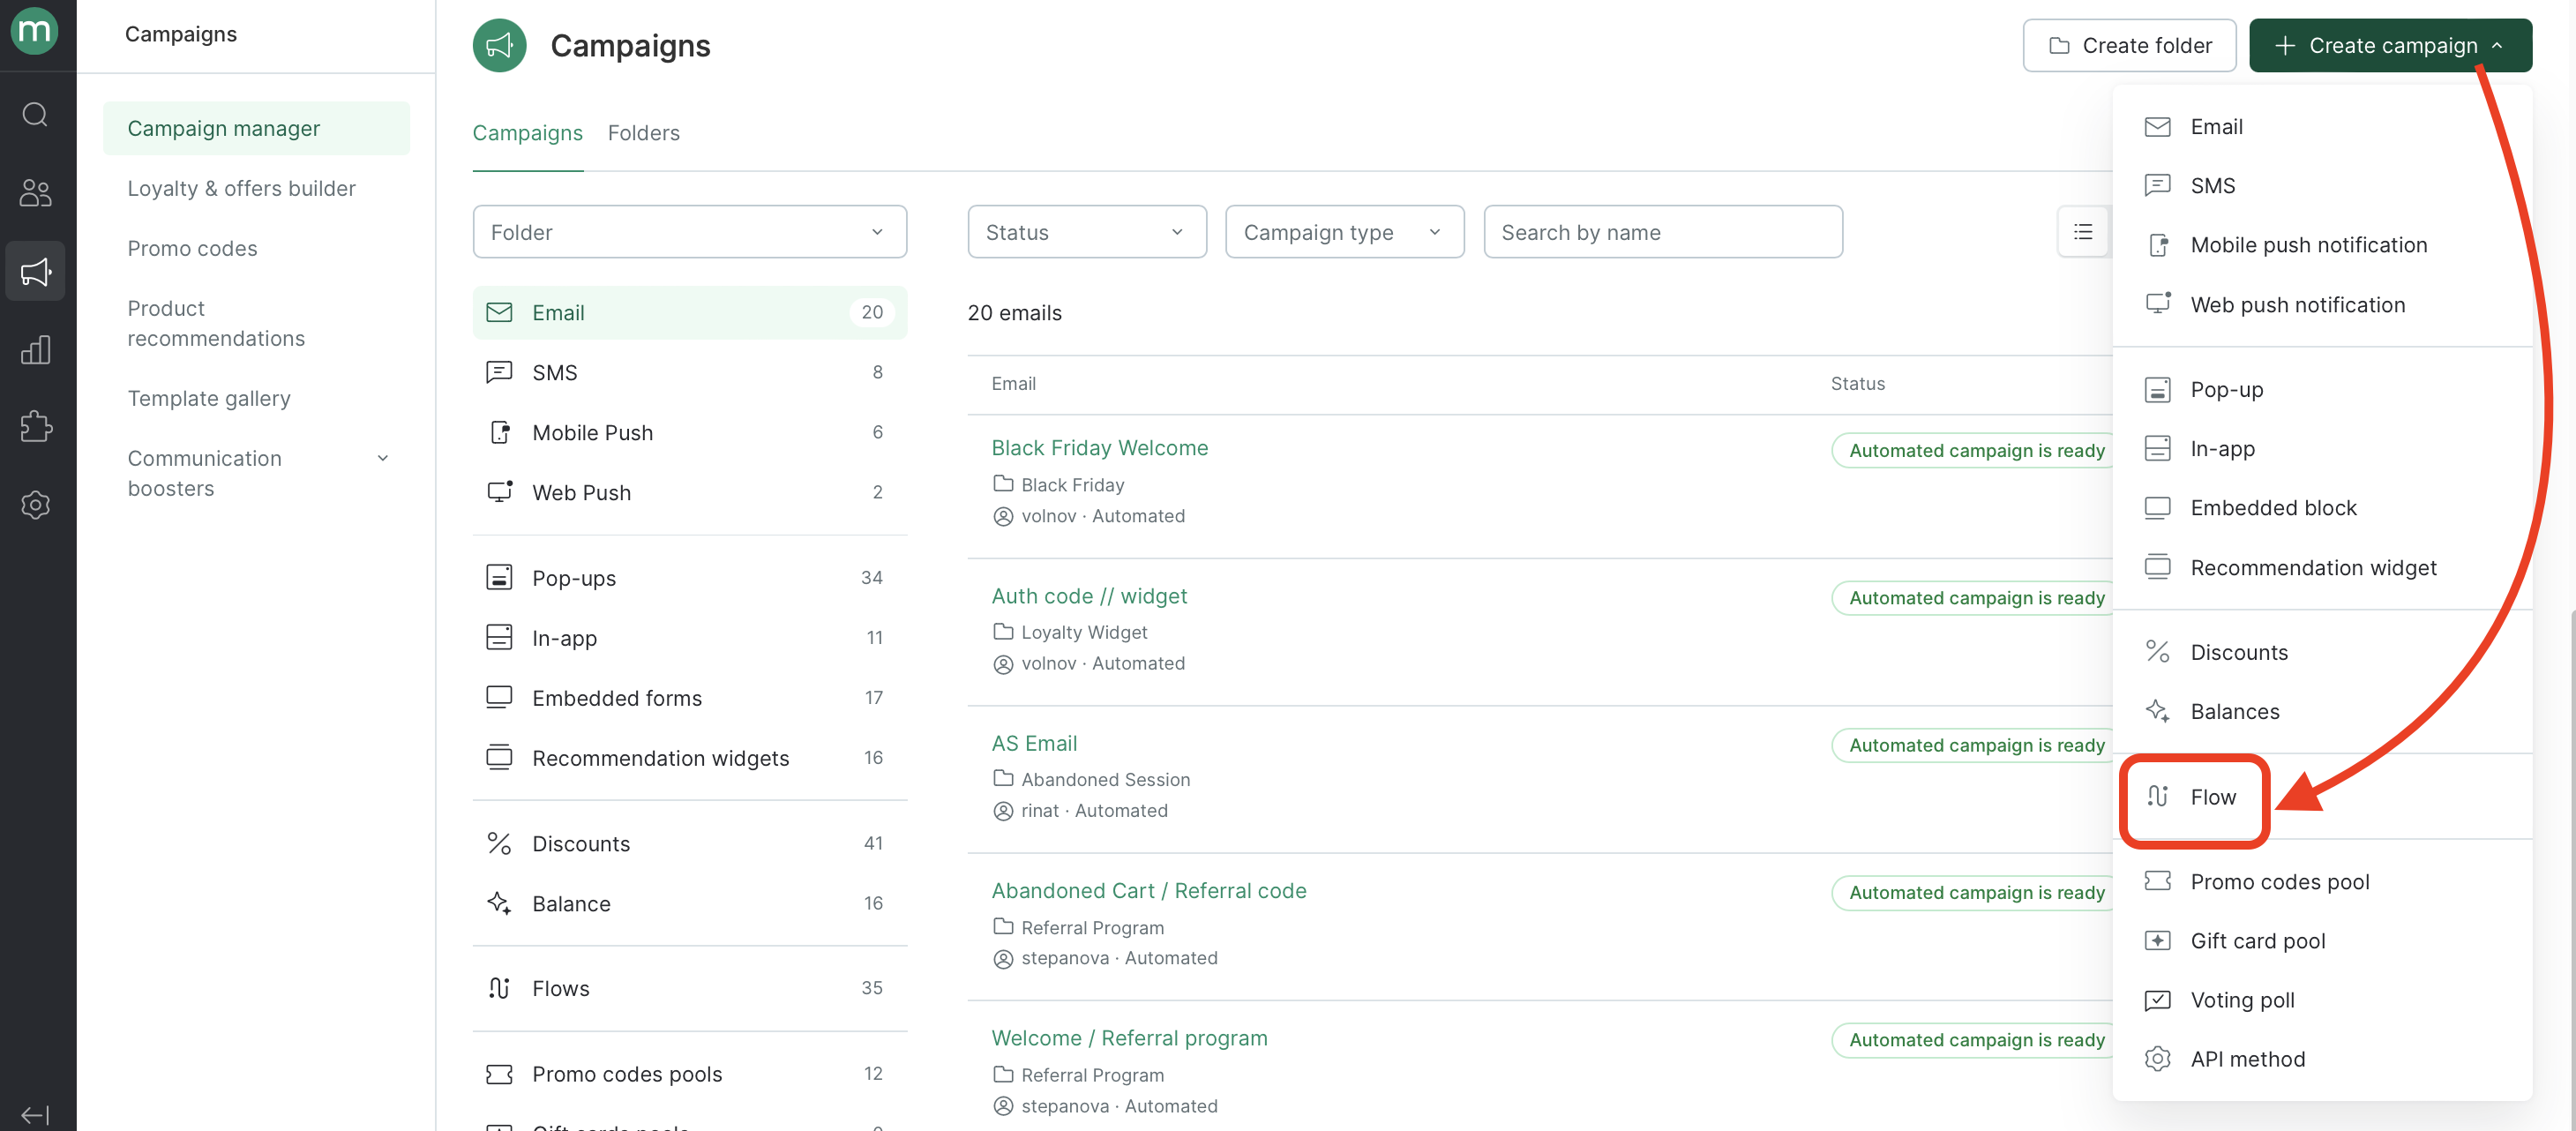
Click the green Create campaign button in the upper right corner and select "Flow" in the dropdown list:
Next, choose the folder where the system will create your flow and brand (if you have several, otherwise the brand field will be hidden) and click Create:

How to set up a flow
Settings
flow statuses
- Draft: some nodes are still empty;
- Ready for launch: all the blocks are filled in and the workflow (or the draft) can be launched;
- Launching: this status is displayed for a couple of seconds after clicking the Launch button;
- Active: the flow is running;
- Paused: the flow has been paused;
- Creating draft: the status is displayed for a couple of seconds after clicking the Edit or Copy flow buttons.

A flow consists of different nodes:
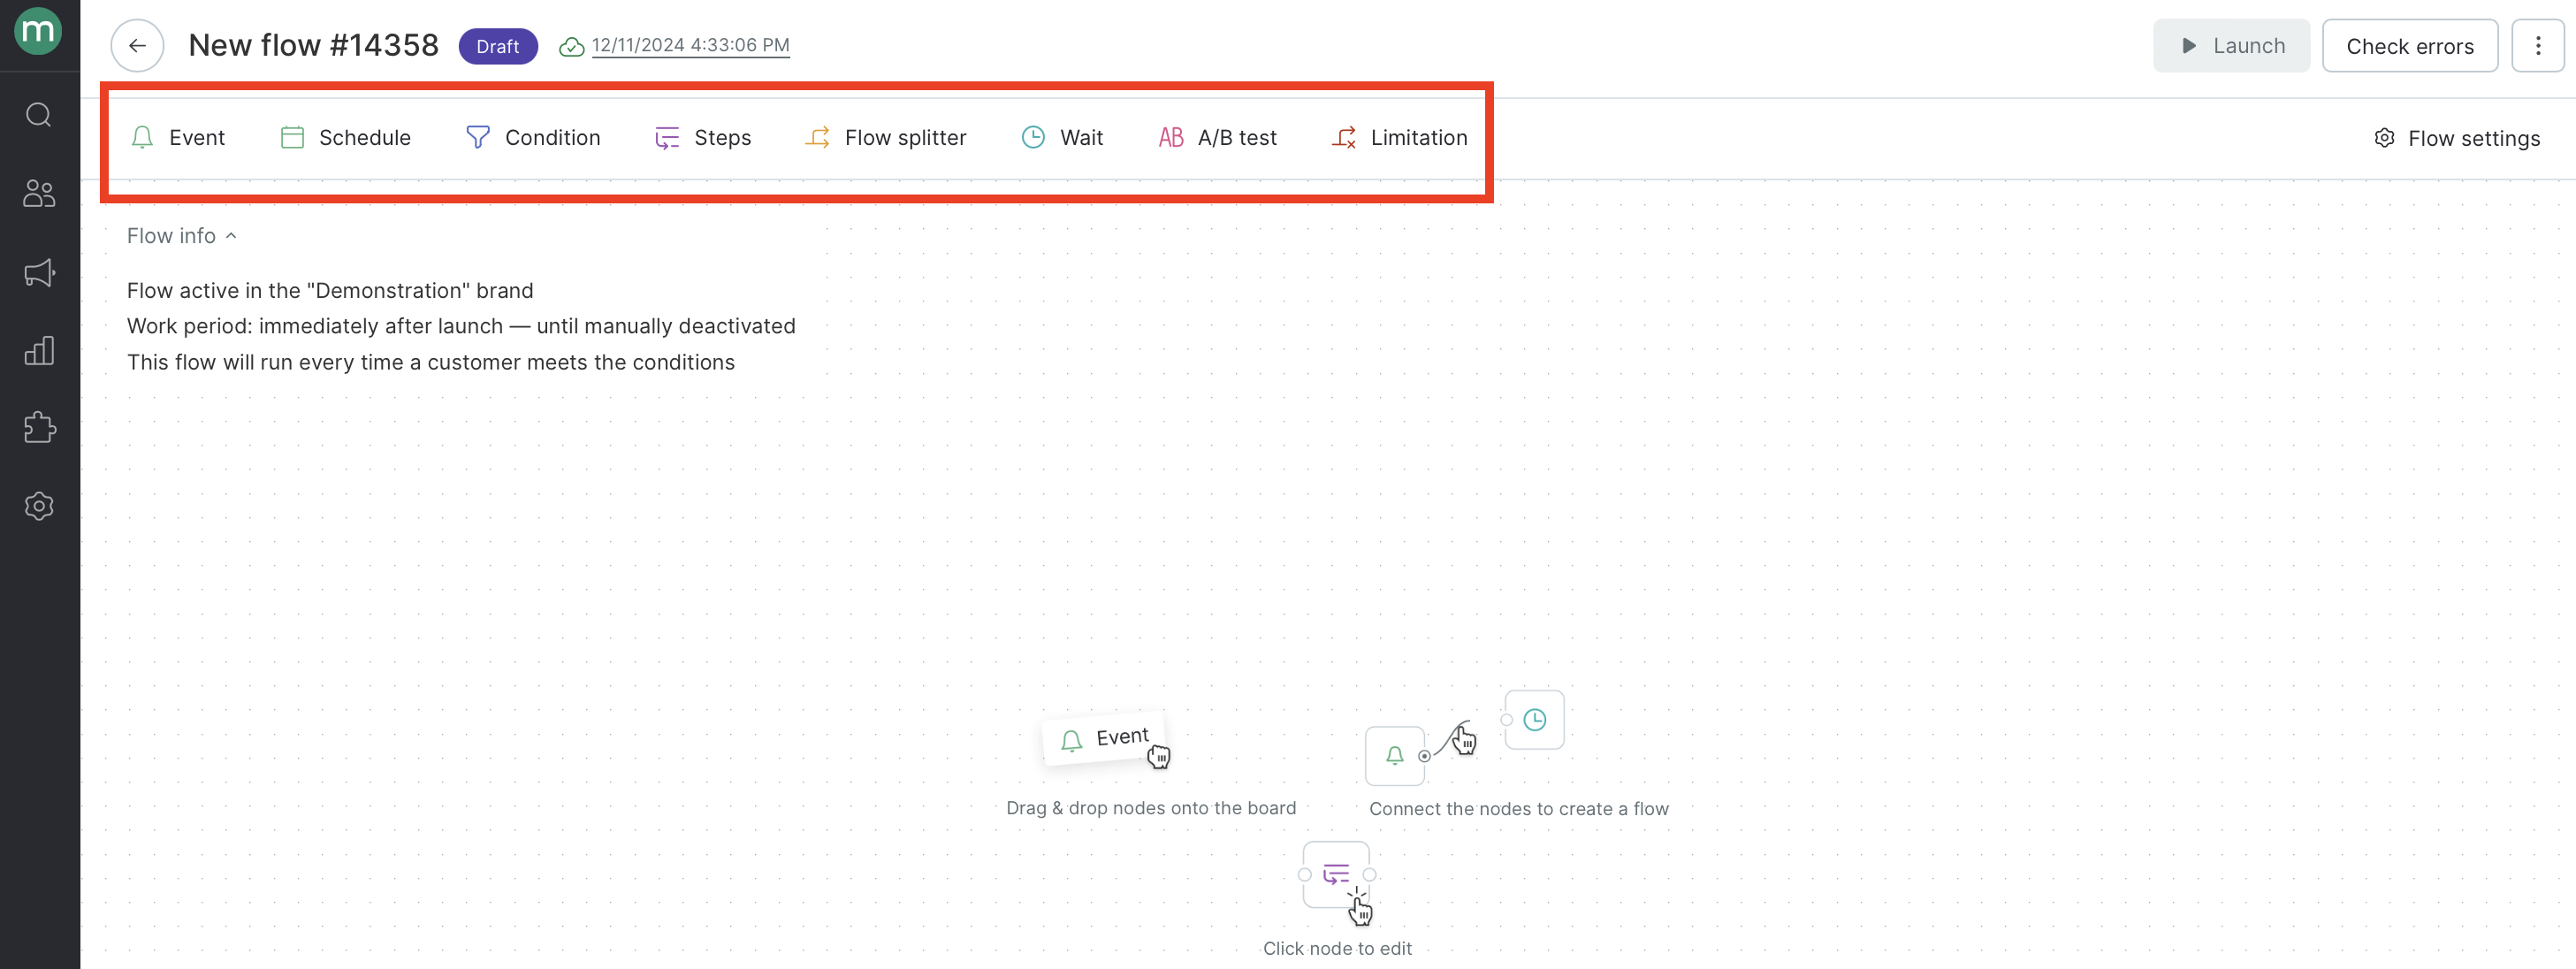
We support the stable workflow interface up to 150 added nodes.
Event
The Event node activates a flow. For example, once a customer is added to the database, a session ends, or an order status is changed. The event node is mandatory and you can have only one event per flow.
The event you select sets limitations on the conditions available in filters, custom fields in the Delay node, and event parameters in the Template engine.
For example, if you select the "Order added or changed" event, you will be able to check conditions not only by customers, but also by orders, and set the waiting period using the date in the custom field of the order, as well as use the Order parameter in your campaigns.
Schedule
With the Schedule node, your flow will be activated by a timer instead of an event — e. g., once every 24 hours / on certain days of the week / on certain days of the month, by New York time (UTC-04:00).
Condition
Use the Condition node to segment your customers by order details or their actions during a session so that the flow only gets activated by relevant events. The Condition node has two options: it can be applied to customers who meet the conditions you specified and to those who don’t. You’ll need to add at least one of these outcomes, but you can also use both of them simultaneously.
For example, use a chain of several conditions to create an abandoned session workflow: if a customer has products in their cart, an abandoned cart email will be sent. If the cart is empty and the customer viewed products during their session, an email with viewed products will be sent instead.
In this node, you can also set up restrictions so that certain steps are activated only if promo codes are available in a specific pool or products are available in a specific segment.
Steps
Use the Steps node to define what actions you want the system to take when a customer does or doesn’t meet the selected conditions.
Flow splitter
The Flow splitter node allows you to set probability rates for different steps. Use this node to split your flow into two different branches. Customers will be randomly sorted into each branch.
Wait
Wait nodes are used to set a delay for a customer to leave the node. The delay can be Fixed, Dynamic or Timed.
Fixed delay allows you to select X days / hours / minutes.
Dynamic delay depends on the date of a customer’s custom field / order / product / action.
Timed delay allows to set hours and particular days for exit from a node.
A/B test
A/b test node allows you to distribute audience in percentages among variants, set up conditions, test hypotheses, collect and analyze results.
Limitation
You can limit the number of customers who can enter a specific node. This allows you to control communication costs and regulate user traffic.
This functionality is suitable for tasks such as:
- limiting sending through paid channels (SMS, WhatsApp, Flash Call) to avoid exceeding the campaign budget;
- limiting the number of campaigns sent over a period to manage the load on the website, app, or call center;
- setting up promotions with a limited number of points or other benefits distributed in the flow.
Use connection lines to join nodes into a sequence
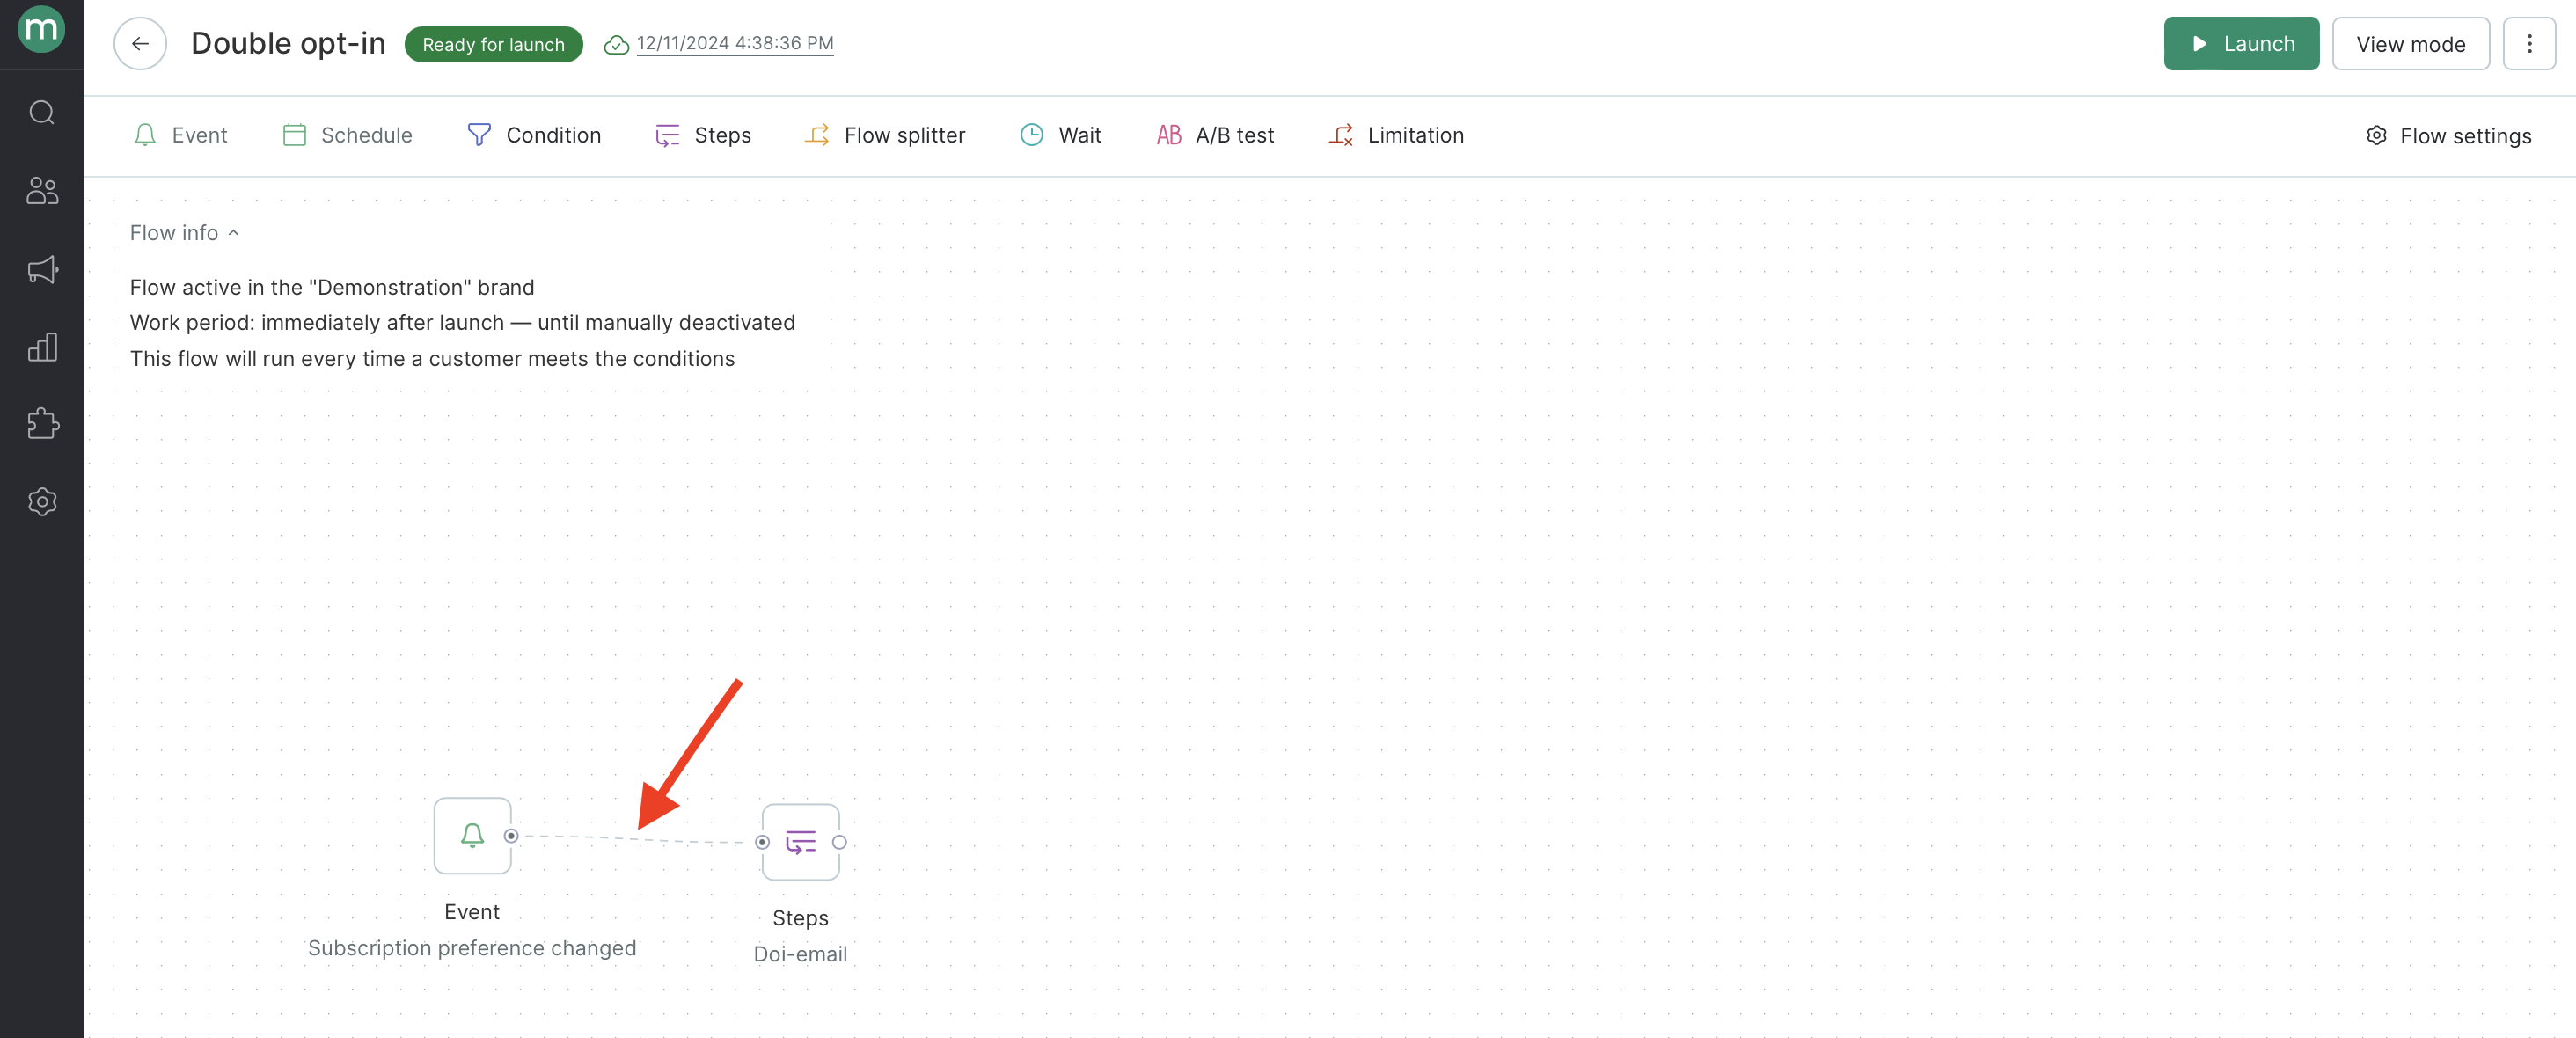
The flow sequence can be linear:
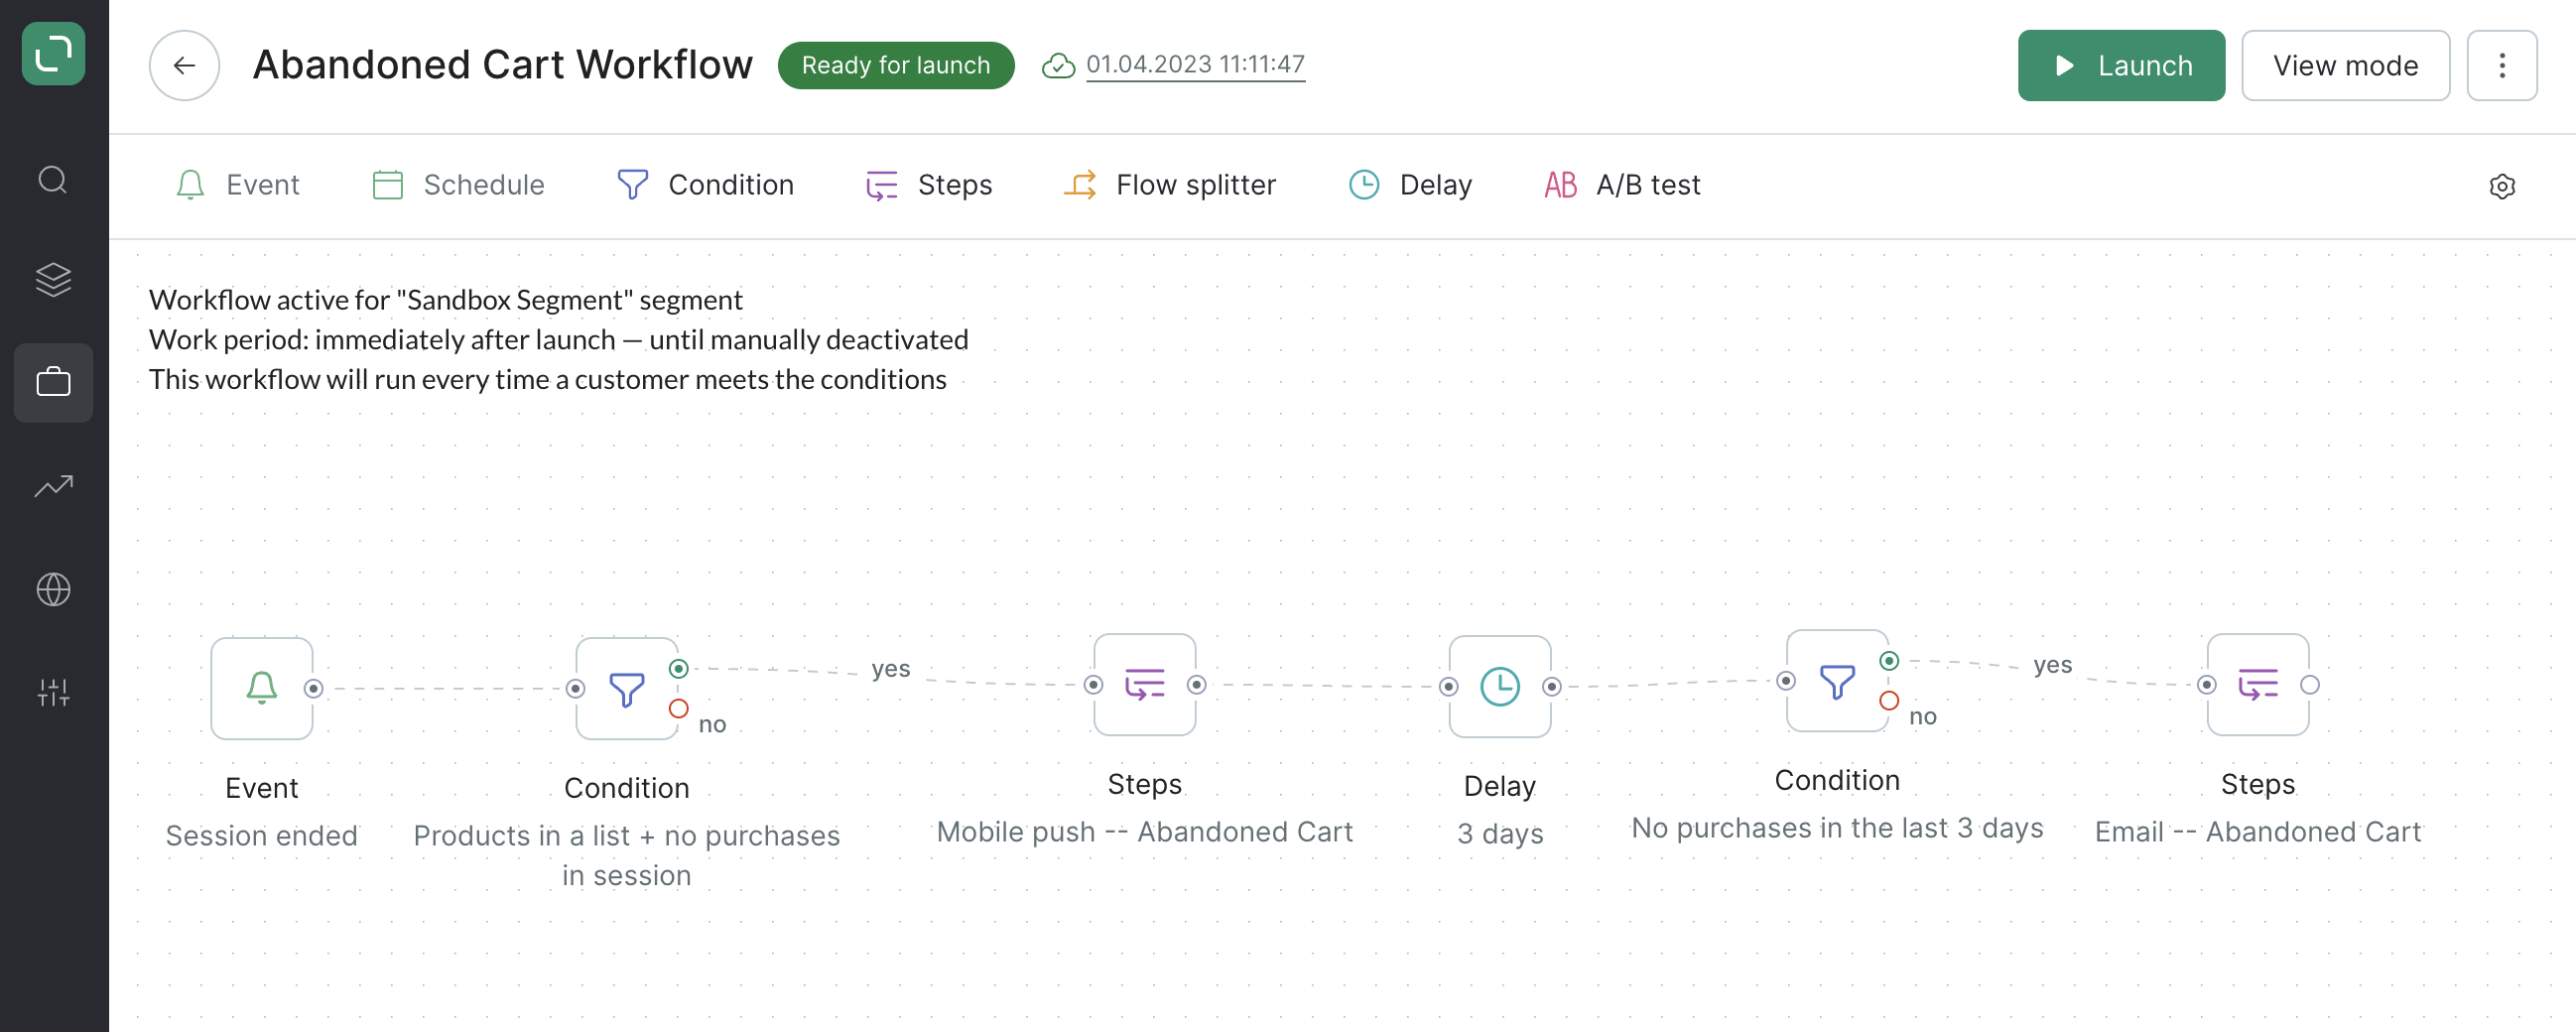
In this example, the flow sends an abandoned cart mobile push. After three days, if a customer hasn’t made an order, an email is sent with their abandoned cart.
The sequence can also have different branches and can be split into steps that are chosen depending on the customer’s behavior:
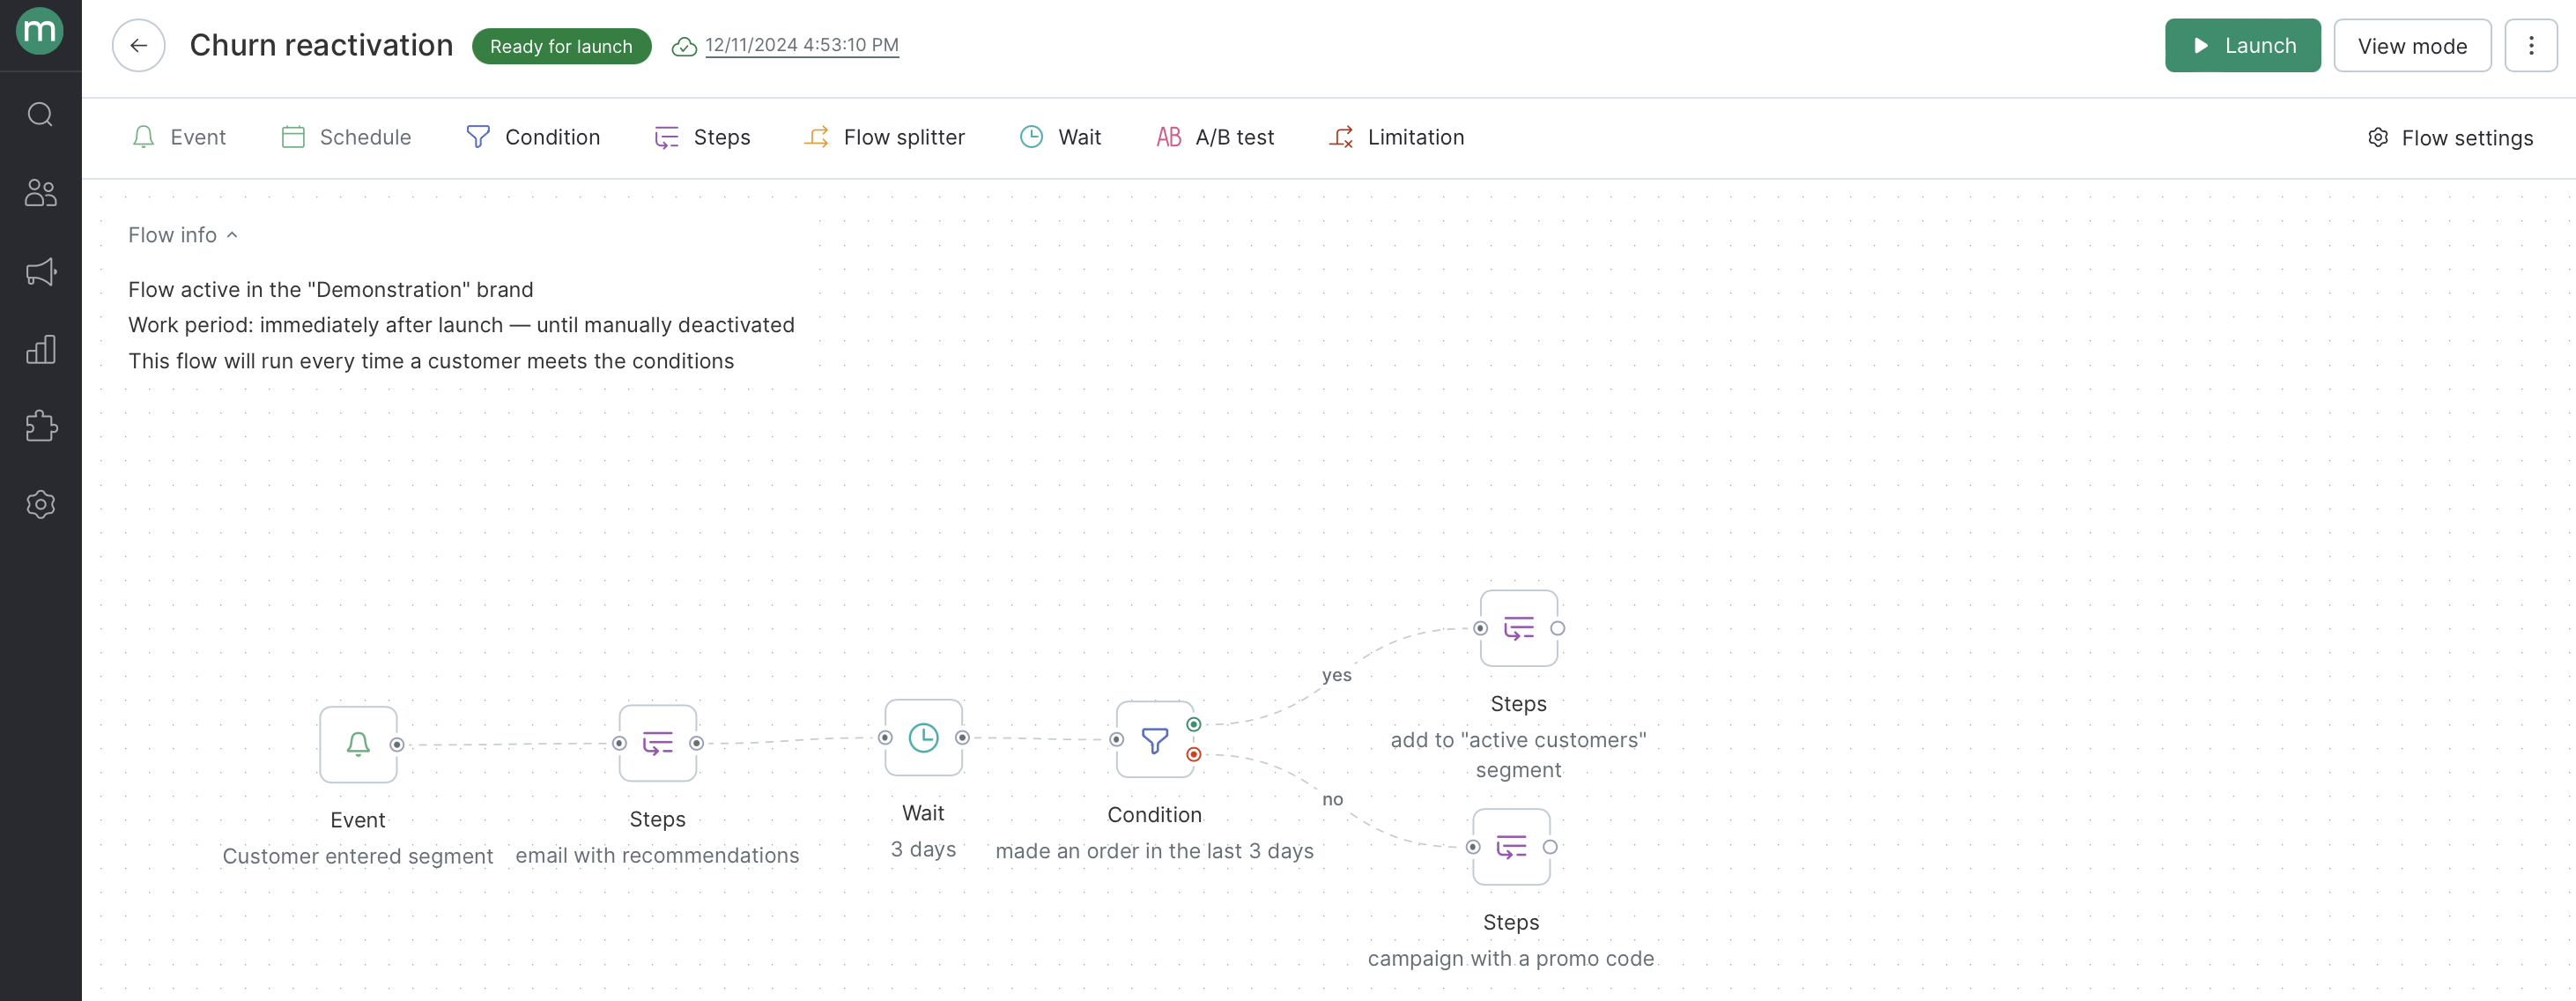
Here, once a customer gets added to the churn segment, the system sends out an email with recommendations. If the customer makes an order, they are added to the "active customers" segment.
If a customer does not make any orders over three days, they’re assigned a promo code, which is sent in a new email.
Step-by-step example of creating a workflow
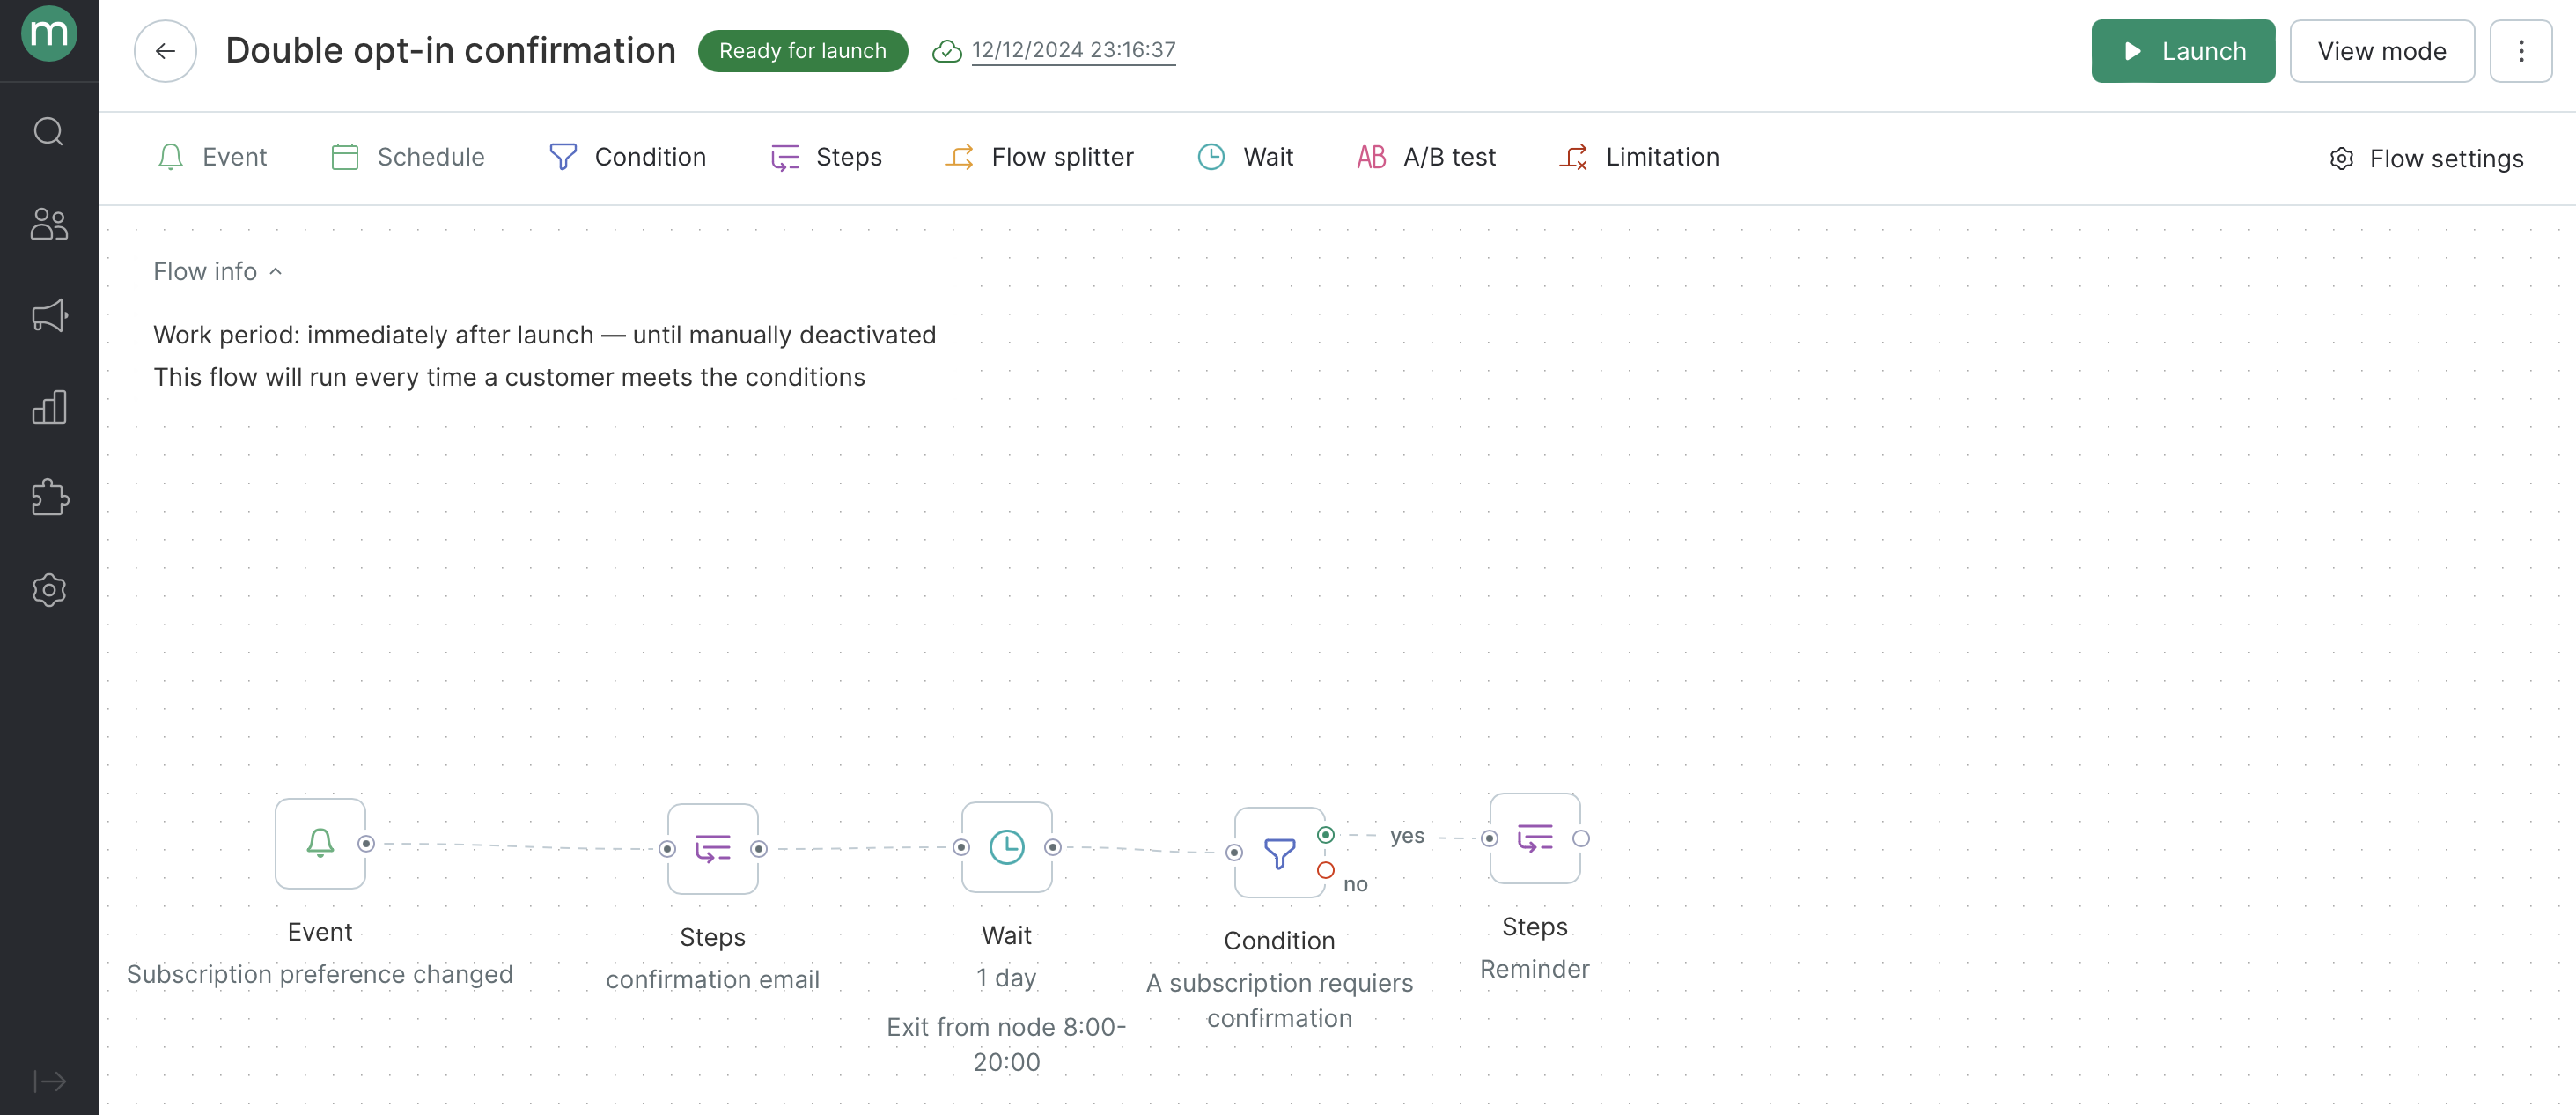
Let’s imagine that we have the following goal in mind — we need to send out a subscription confirmation email after a customer has registered, and send a reminder if the customer doesn’t confirm their subscription within 24 hours.
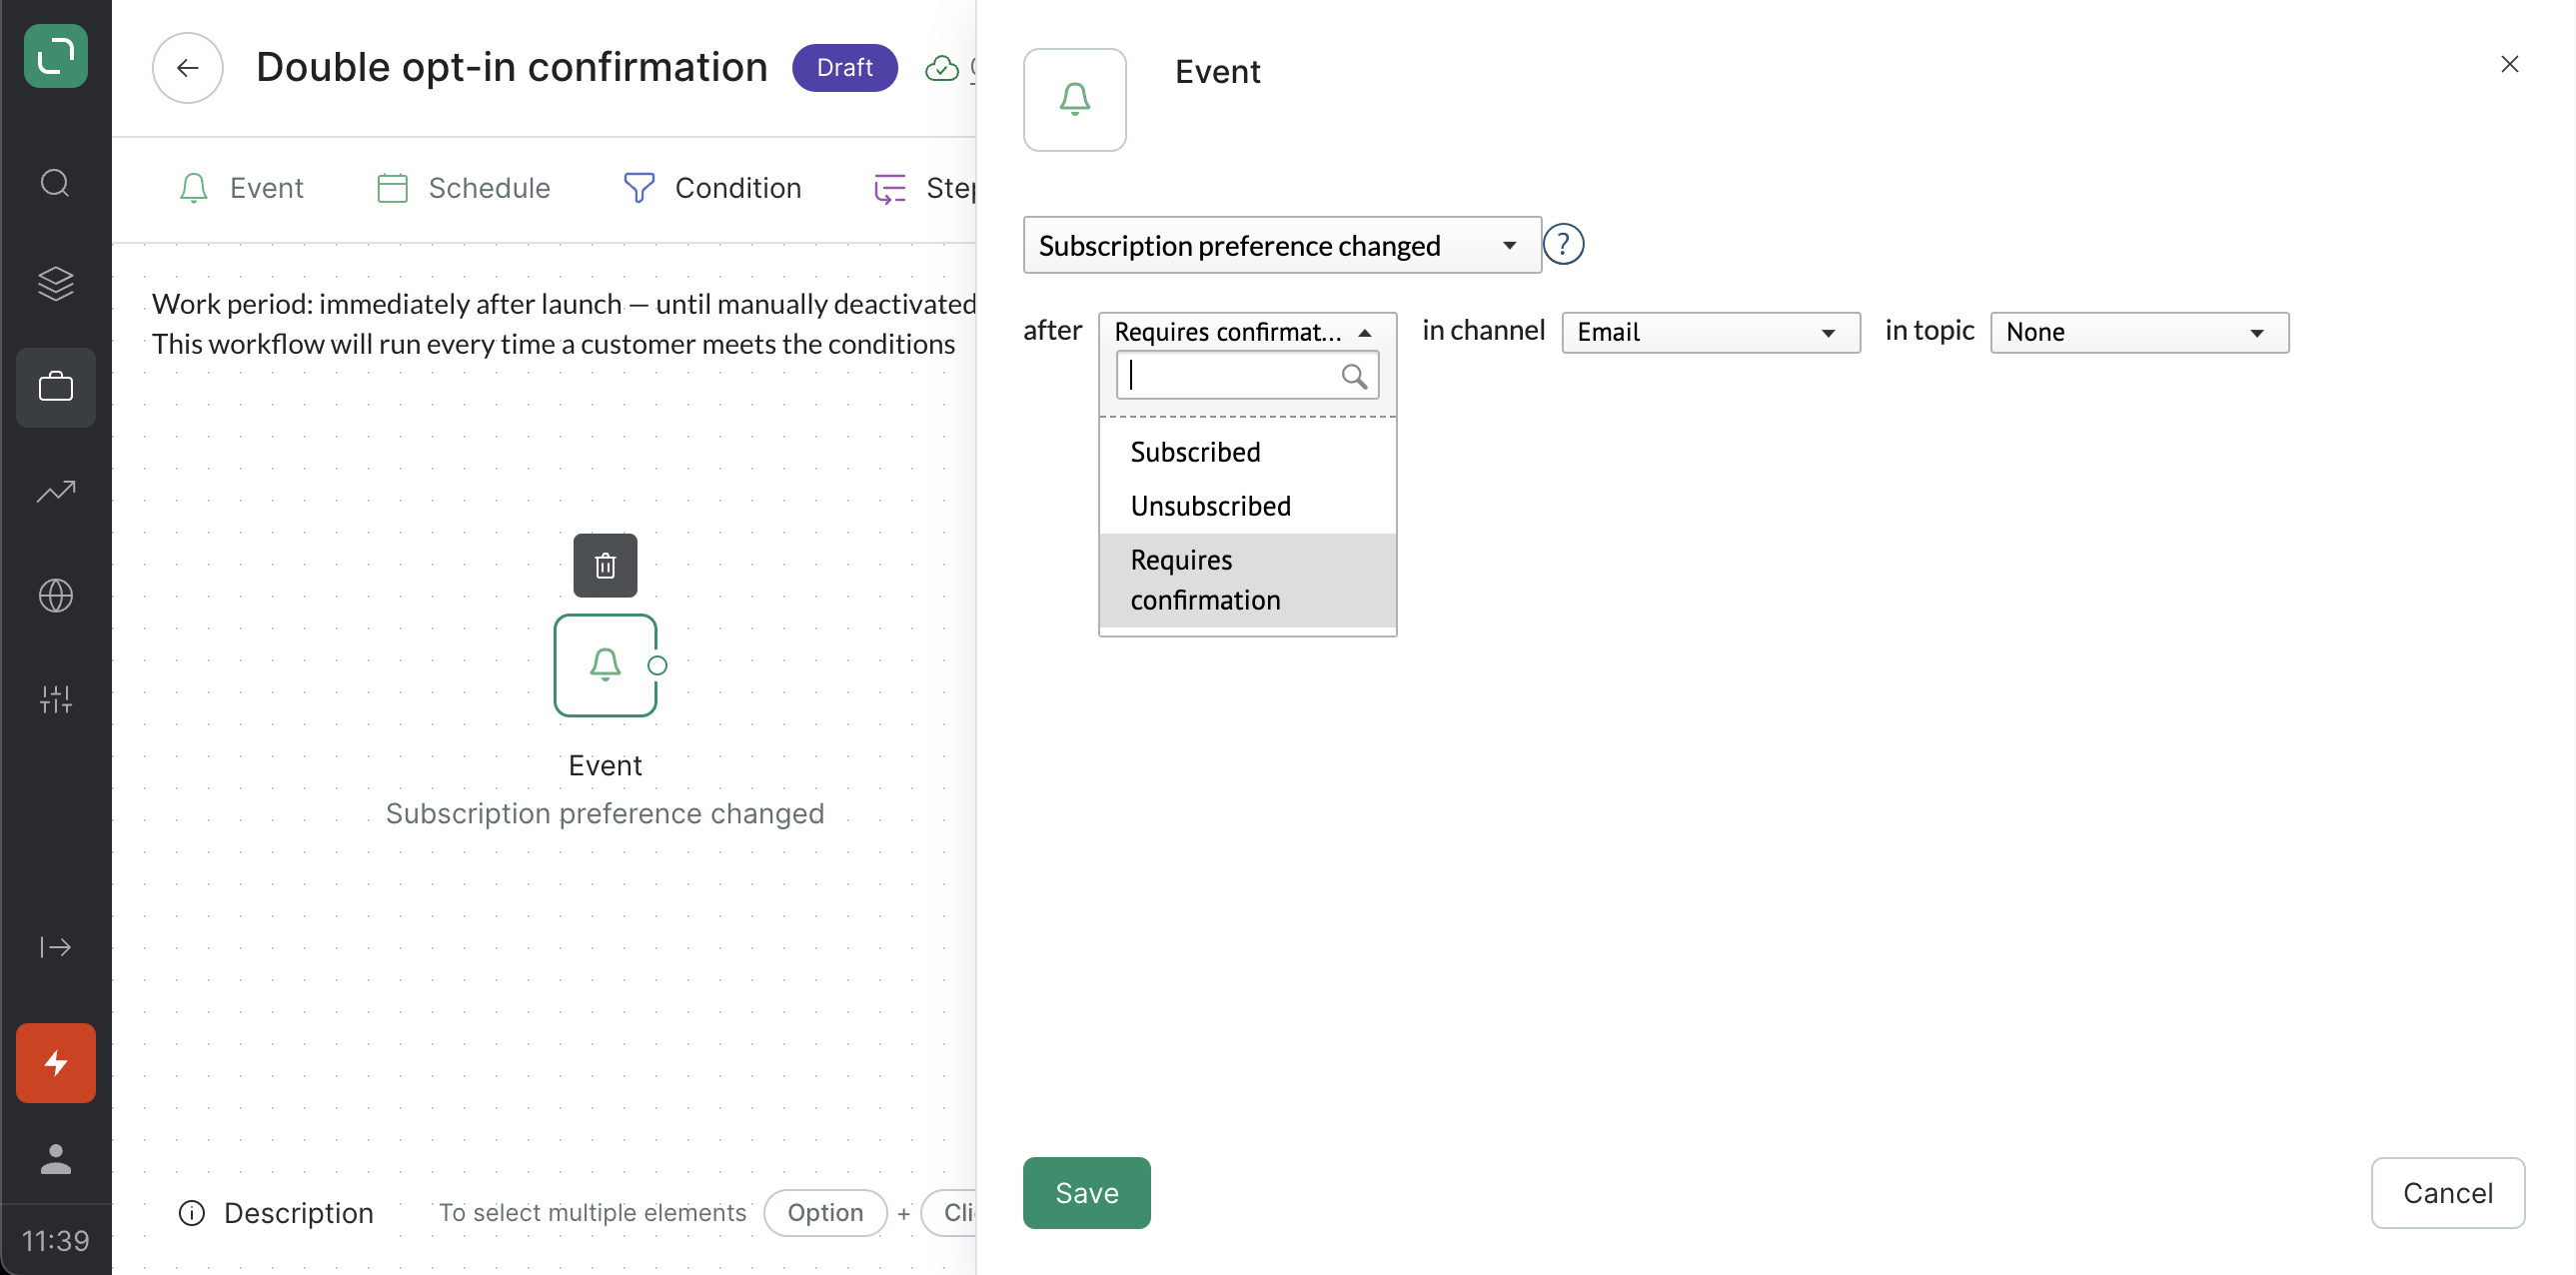
- Drag the event block to the area where you will create your workflow. After registration a customer get a subscription status — requires confirmation, therefore you should select the "Subscription preference changed" event and save your choice:
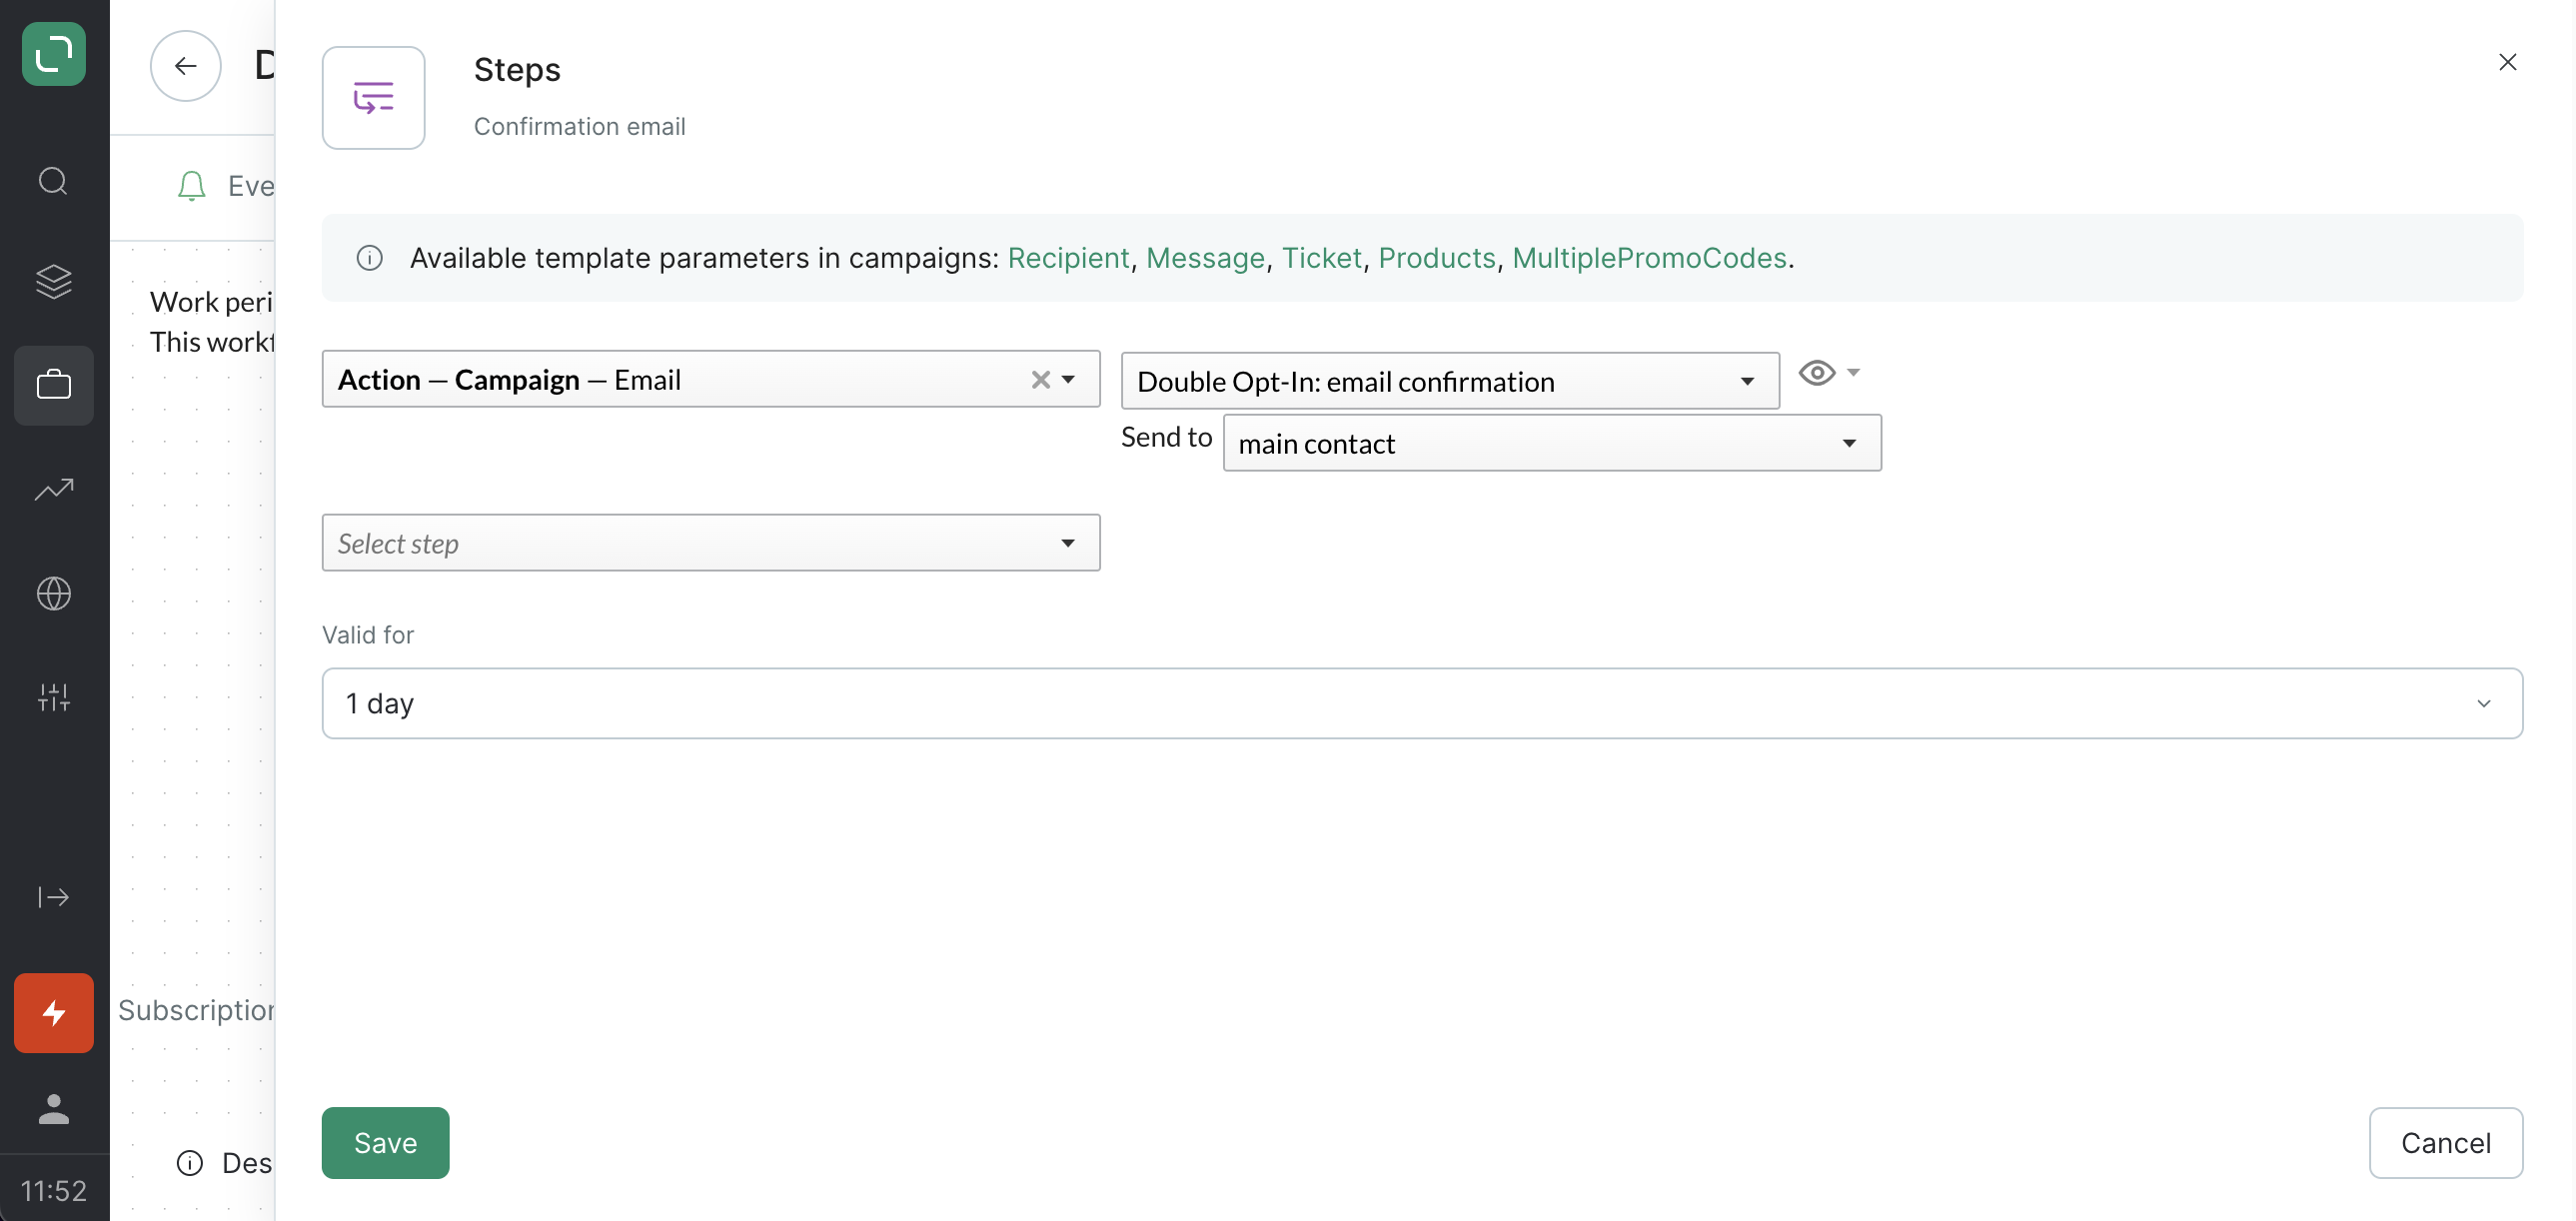
- Add a group of steps where the first email is sent. You can give the group a title to help you remember what it does:
- Schedule a 1-day waiting period and configure node schedule:
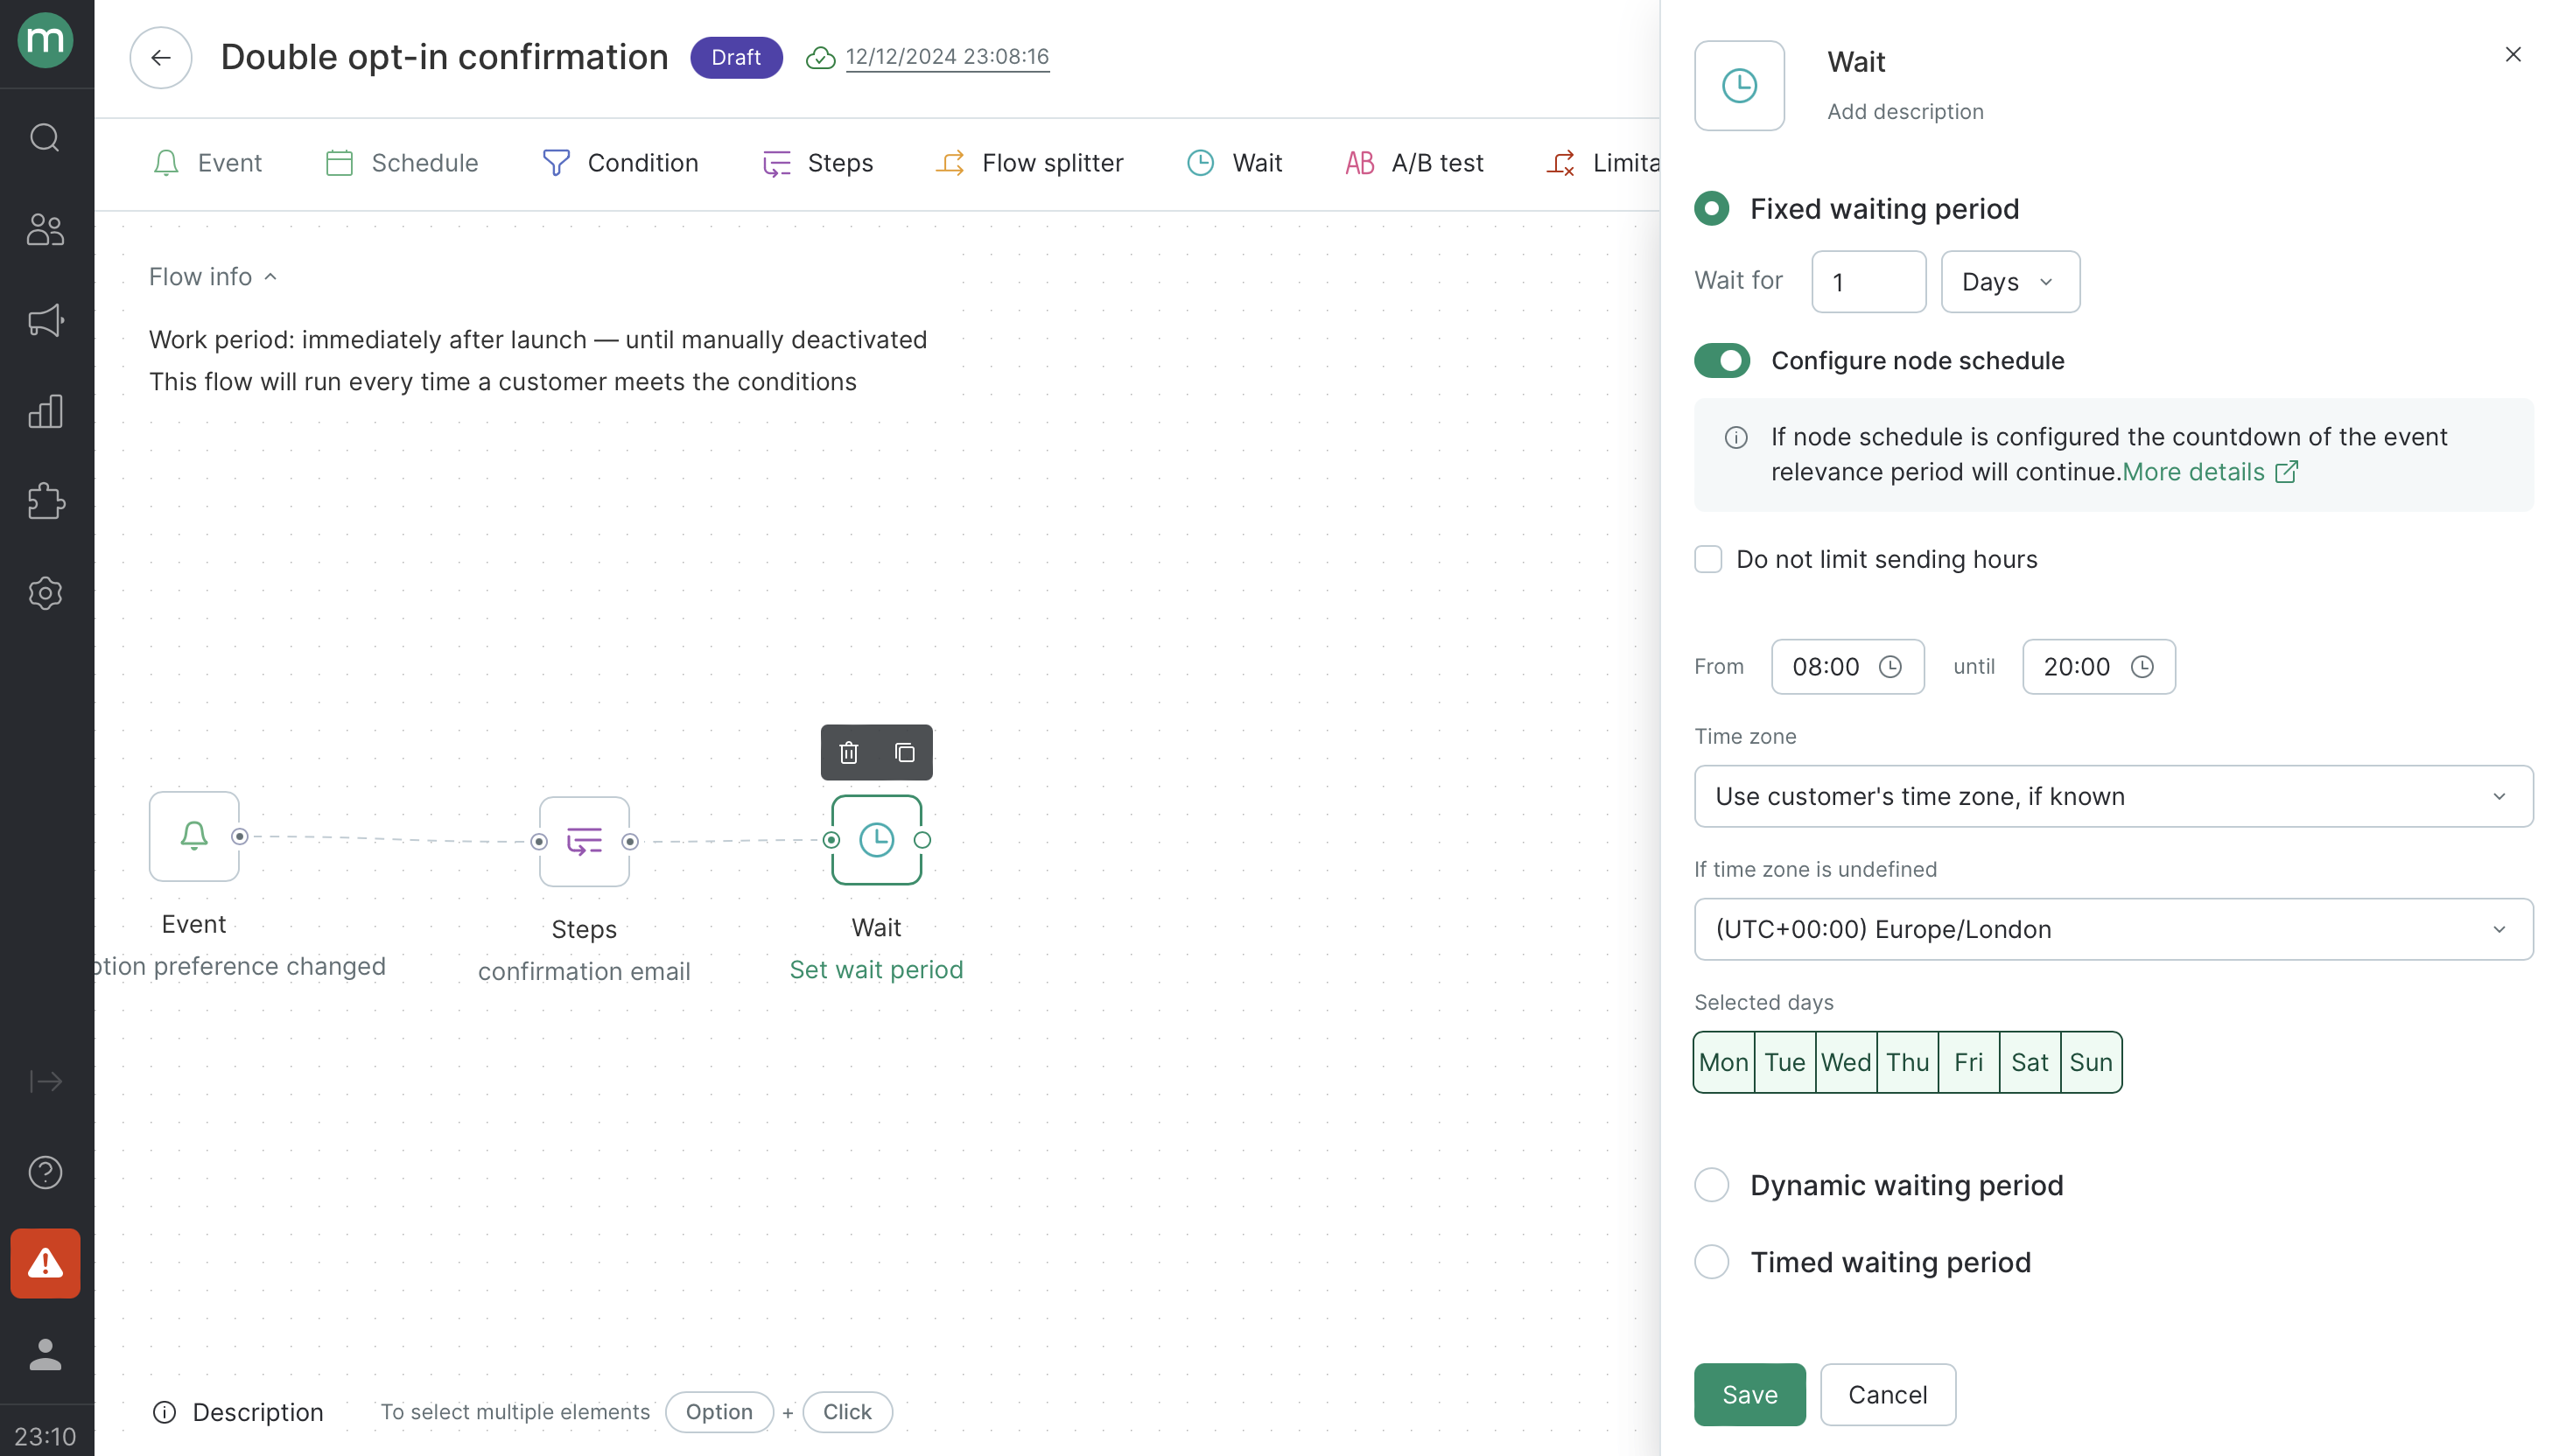
This is basically like setting "working hours" for the Wait node.
For example, you may want to avoid sending campaigns to your customers late at night. Using the schedule feature, you can specify hours when customers can "exit" the node and have the next group of steps applied (e.g. get a campaign sent to them). If you set the schedule from 8 a.m. to 8 p.m., customers will only receive the campaign during these hours.
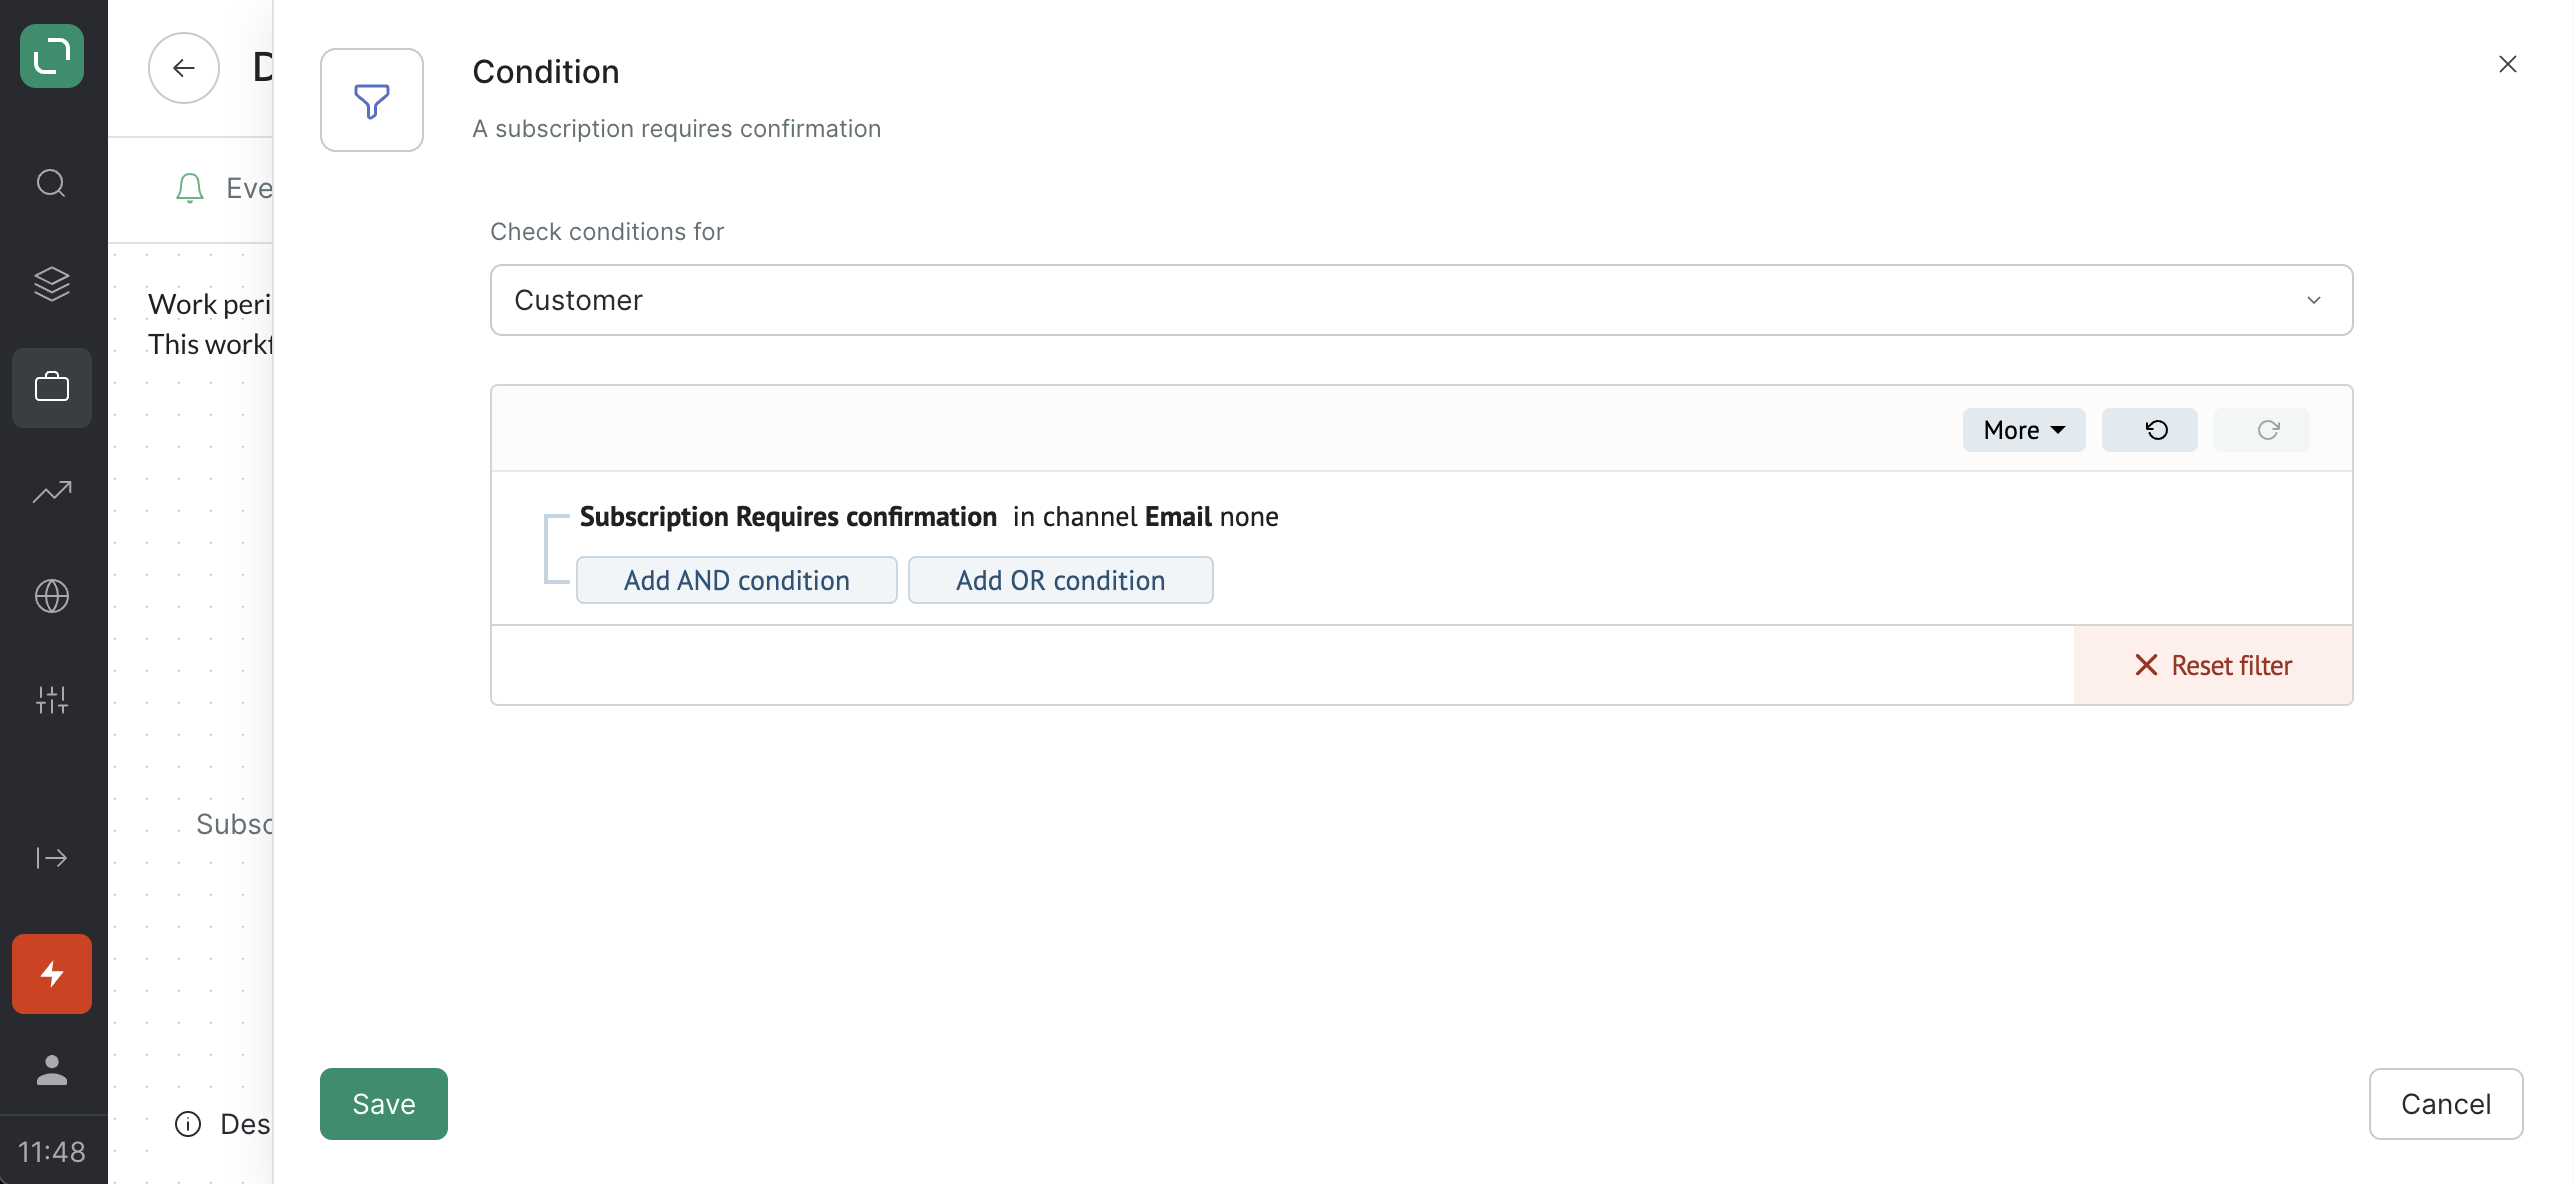
- Check if the customer has confirmed their subscription:
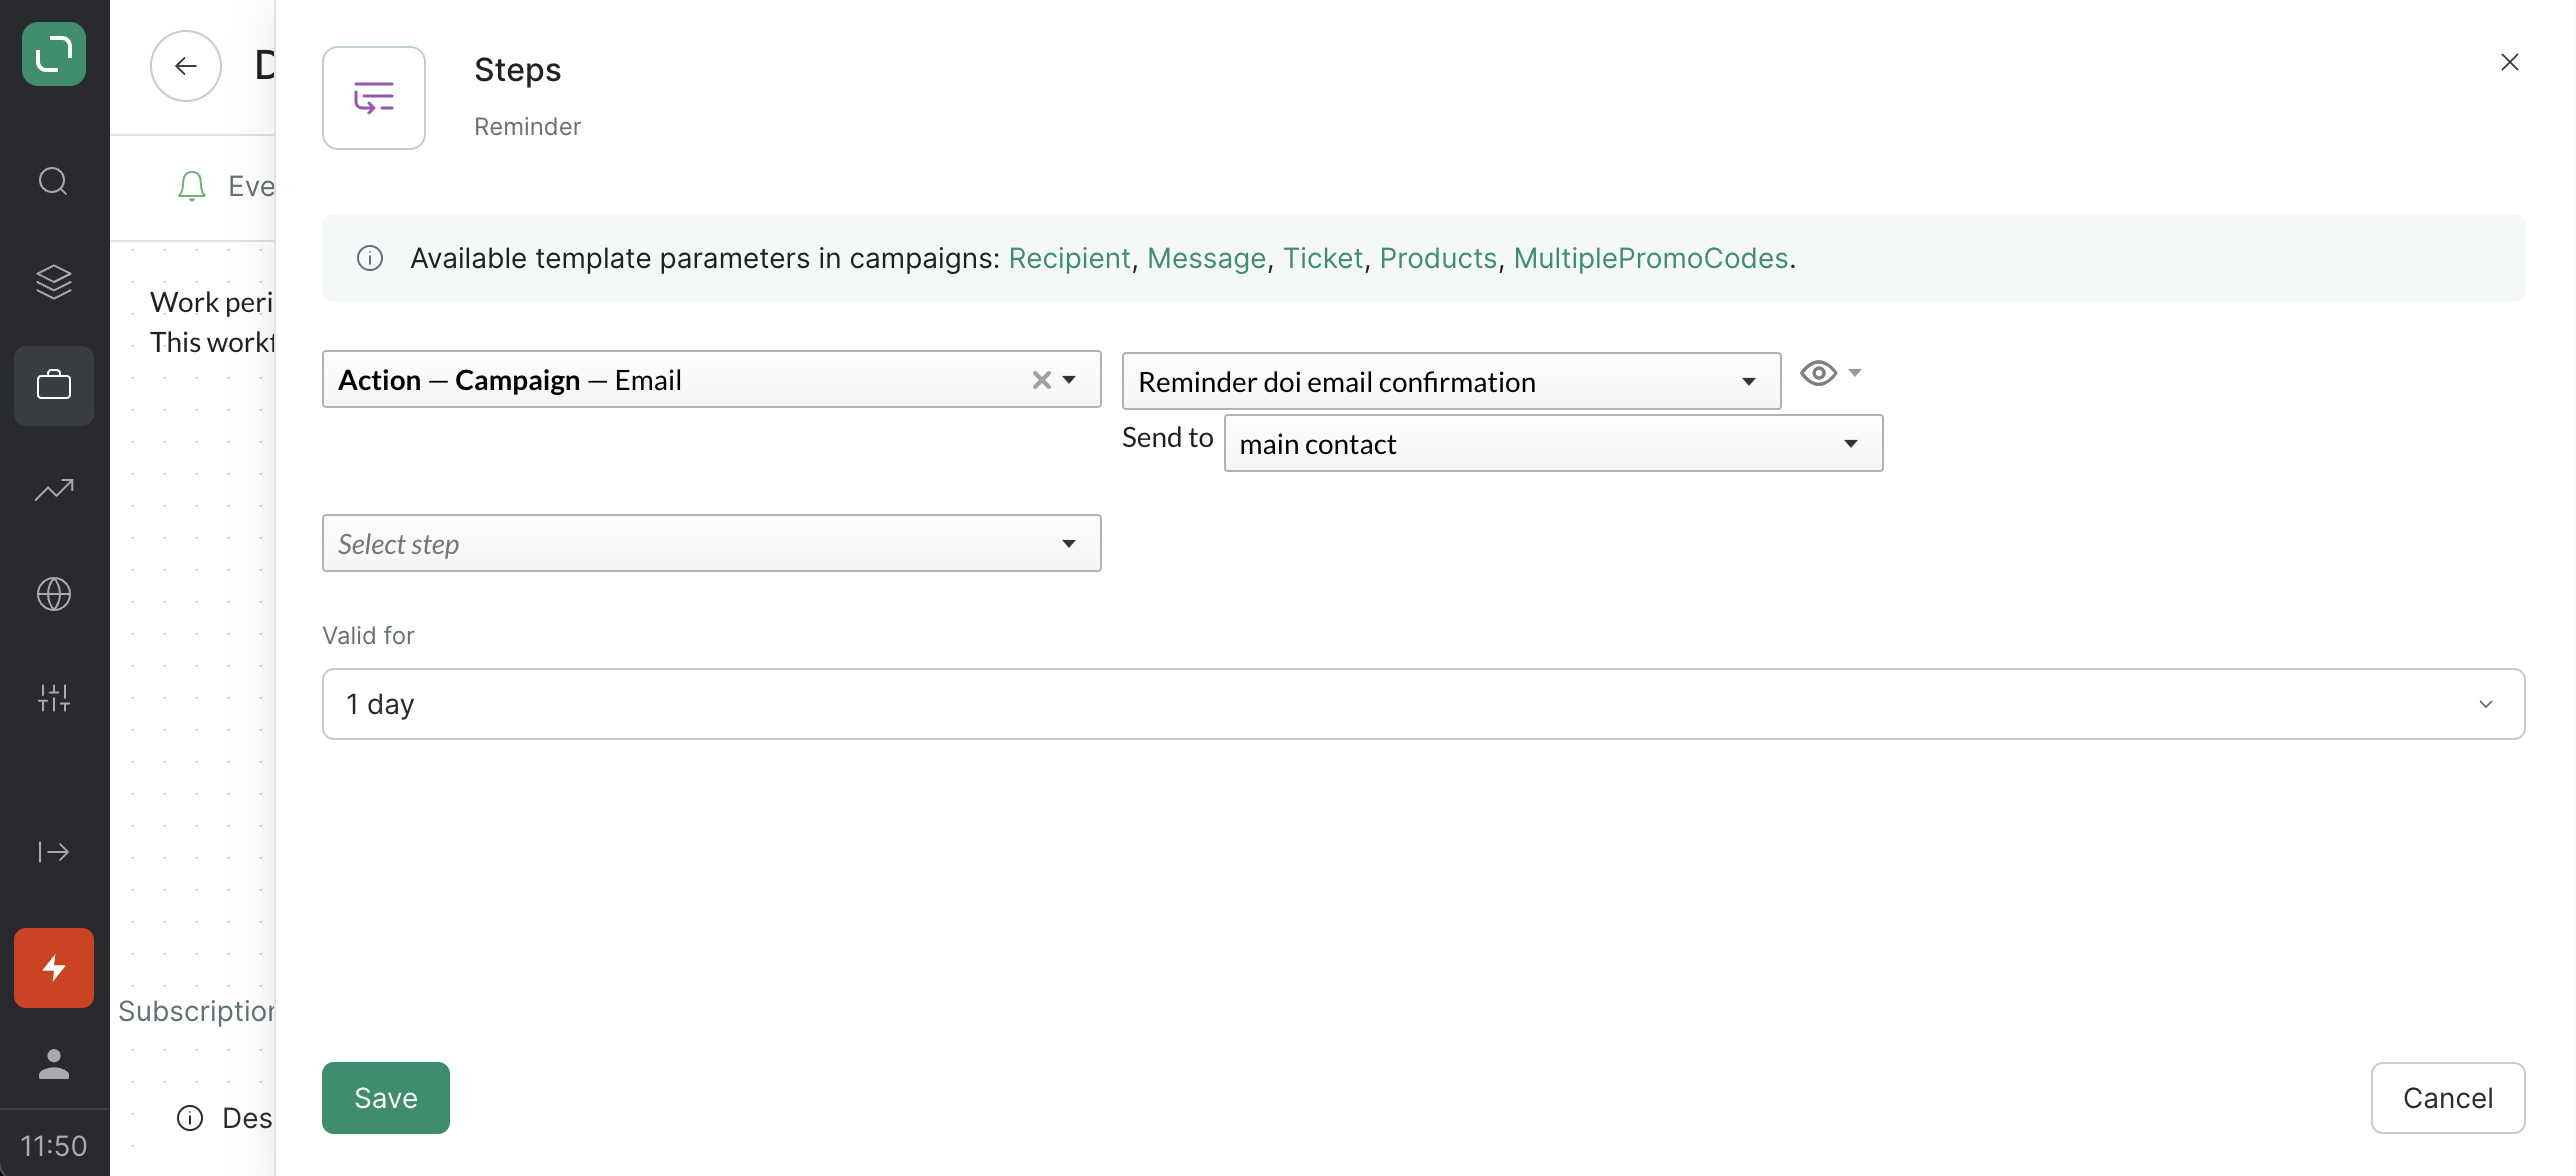
- If the customer meets the specified conditions, the second email will be sent:
That’s it, your workflow is complete! You can now launch it:
Auto-saving and validation
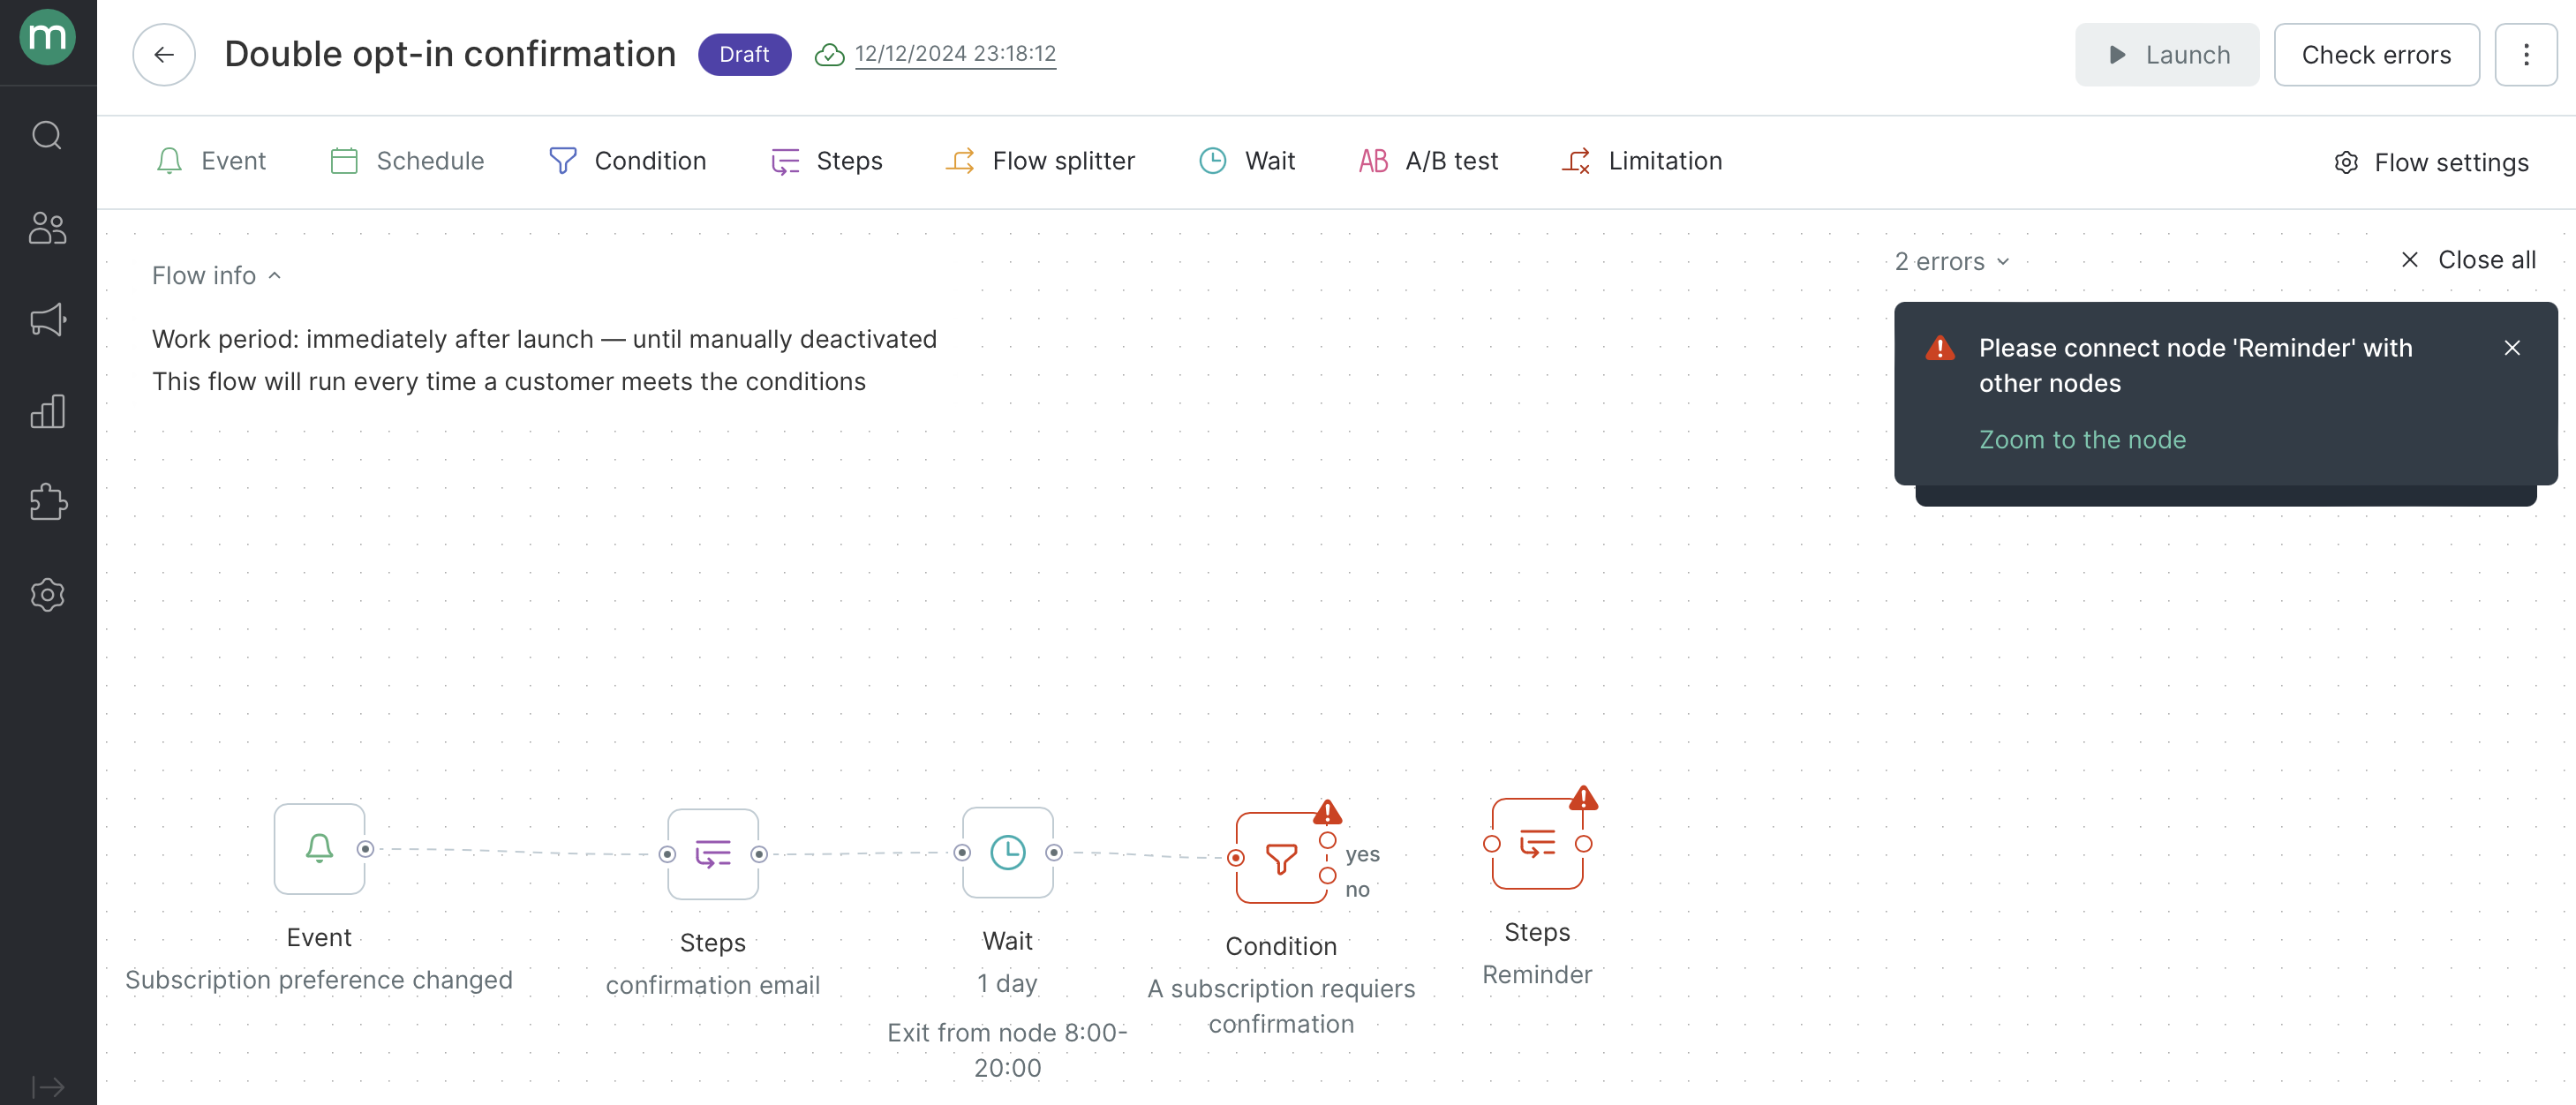
Every time you update a flow, the new version will be saved.
If you can’t launch your draft due to an error in one of the nodes, a link will appear to help you find the error:
How to edit a launched flow
- Click Edit.
- A draft version of your flow will be created. It doesn’t affect the launched version, which continues to run as before.
- Add your changes.
- Click Launch to activate the draft. The previous version of the flow will become inactive.
- Click Delete draft if you’d like to cancel the changes you made:
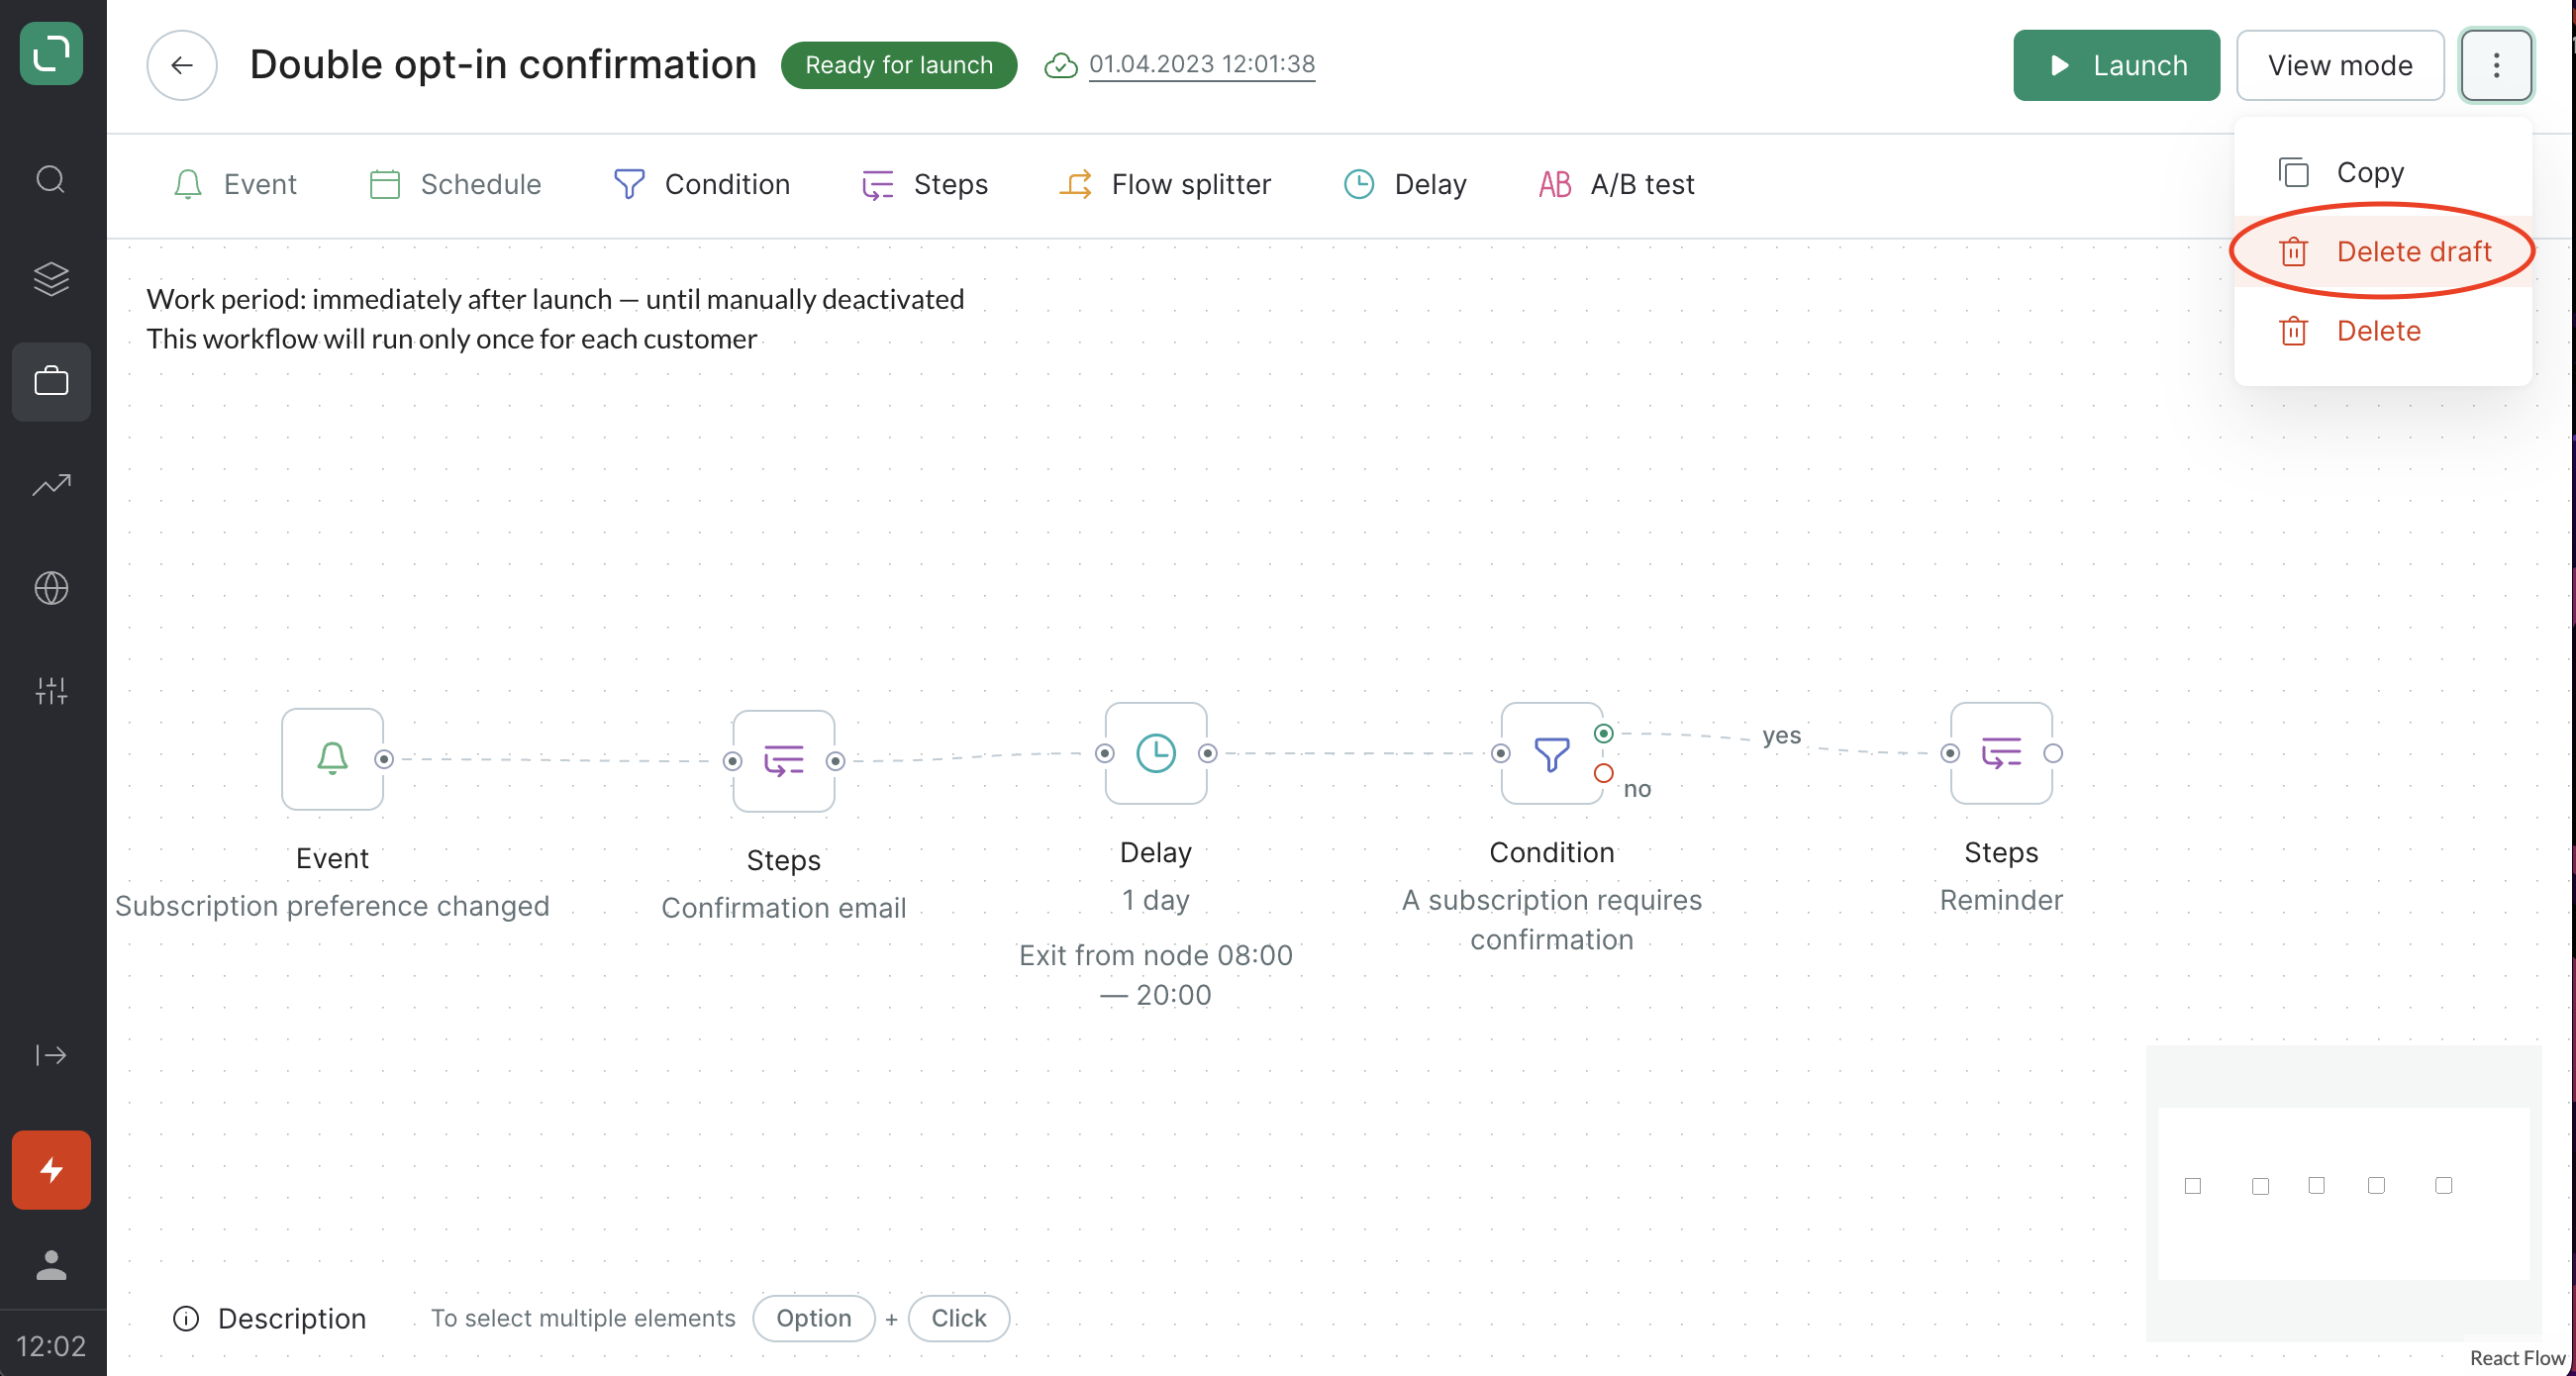
Please note that there can only be one draft per flow. When a new draft is created, the old one gets deleted.
- If you have customers in Wait nodes, they will stay there until the nodes have been applied according to the flow’s settings prior to editing. As soon as these customers move on to the next node, the new version of the flow will be applied to them.
- If you delete a Wait node, customers in this node will be removed from the flow.
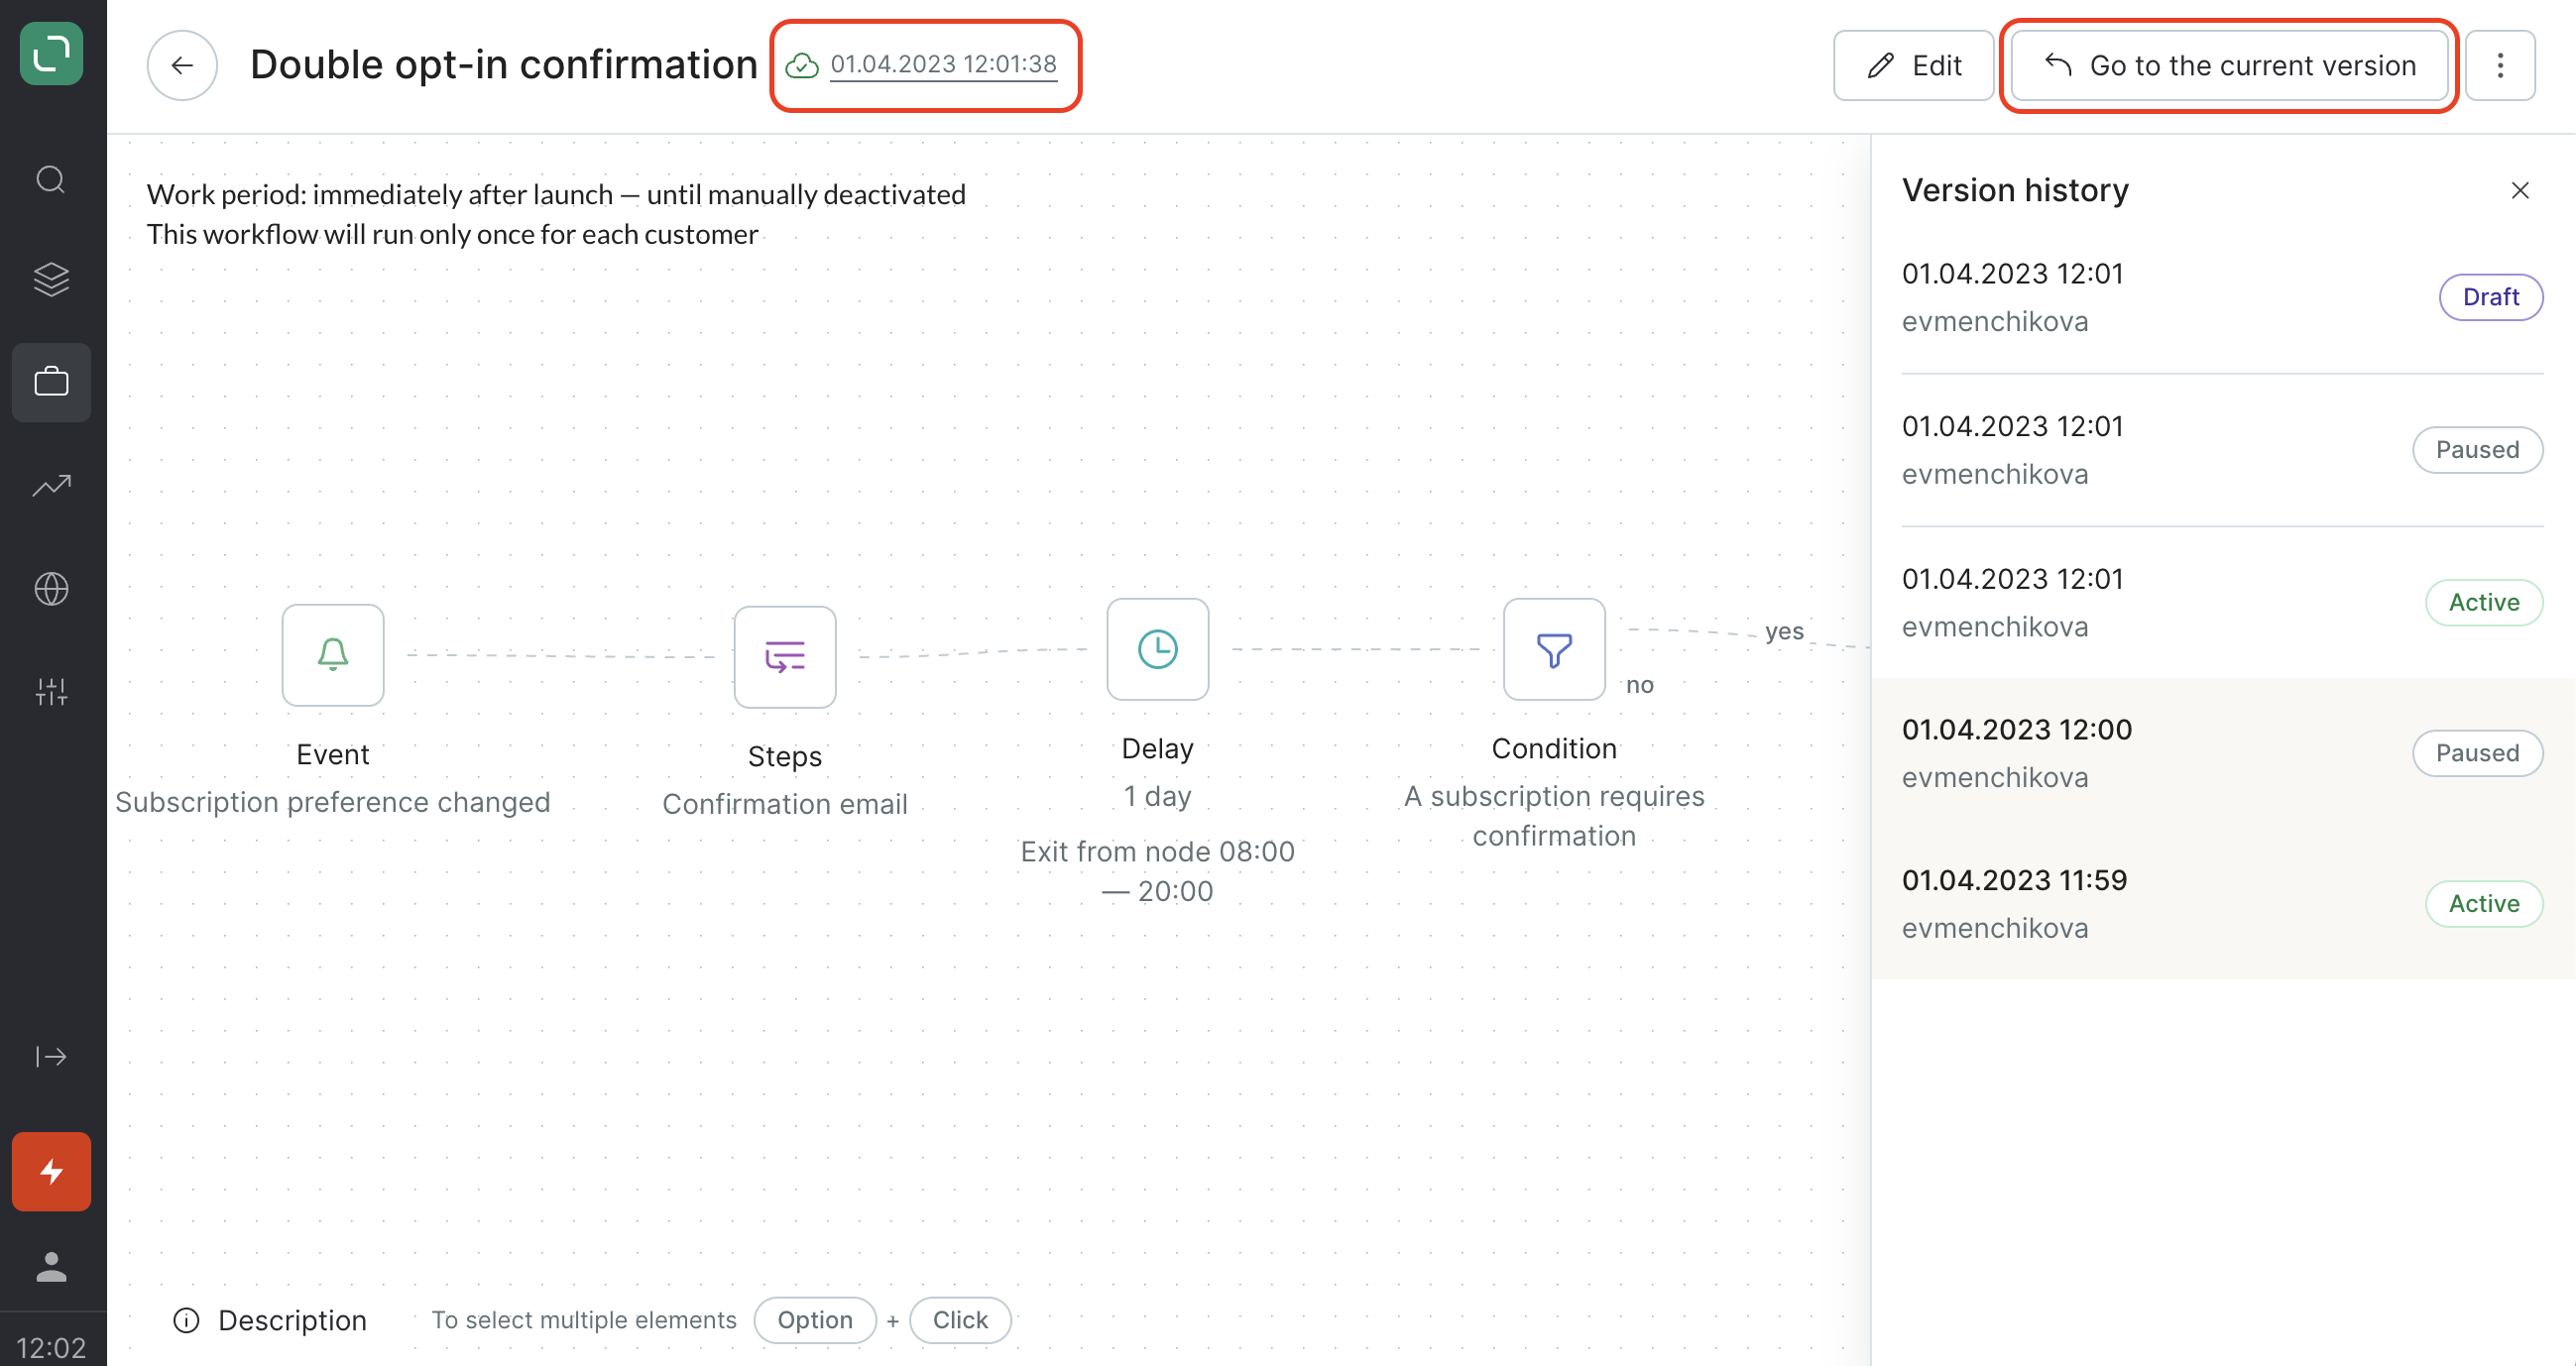
Flow changes are recorded in the version history
Click the date next to the flow name to open its version history.
The history displays the date of the last update of the draft and the dates when the versions were launched / stopped.
Clicking on one of the flow versions will show you its settings at the time it was running.
How to limit the number of times your flow is launched for each customer
Click the cogwheel icon and choose an option from the drop-down list:
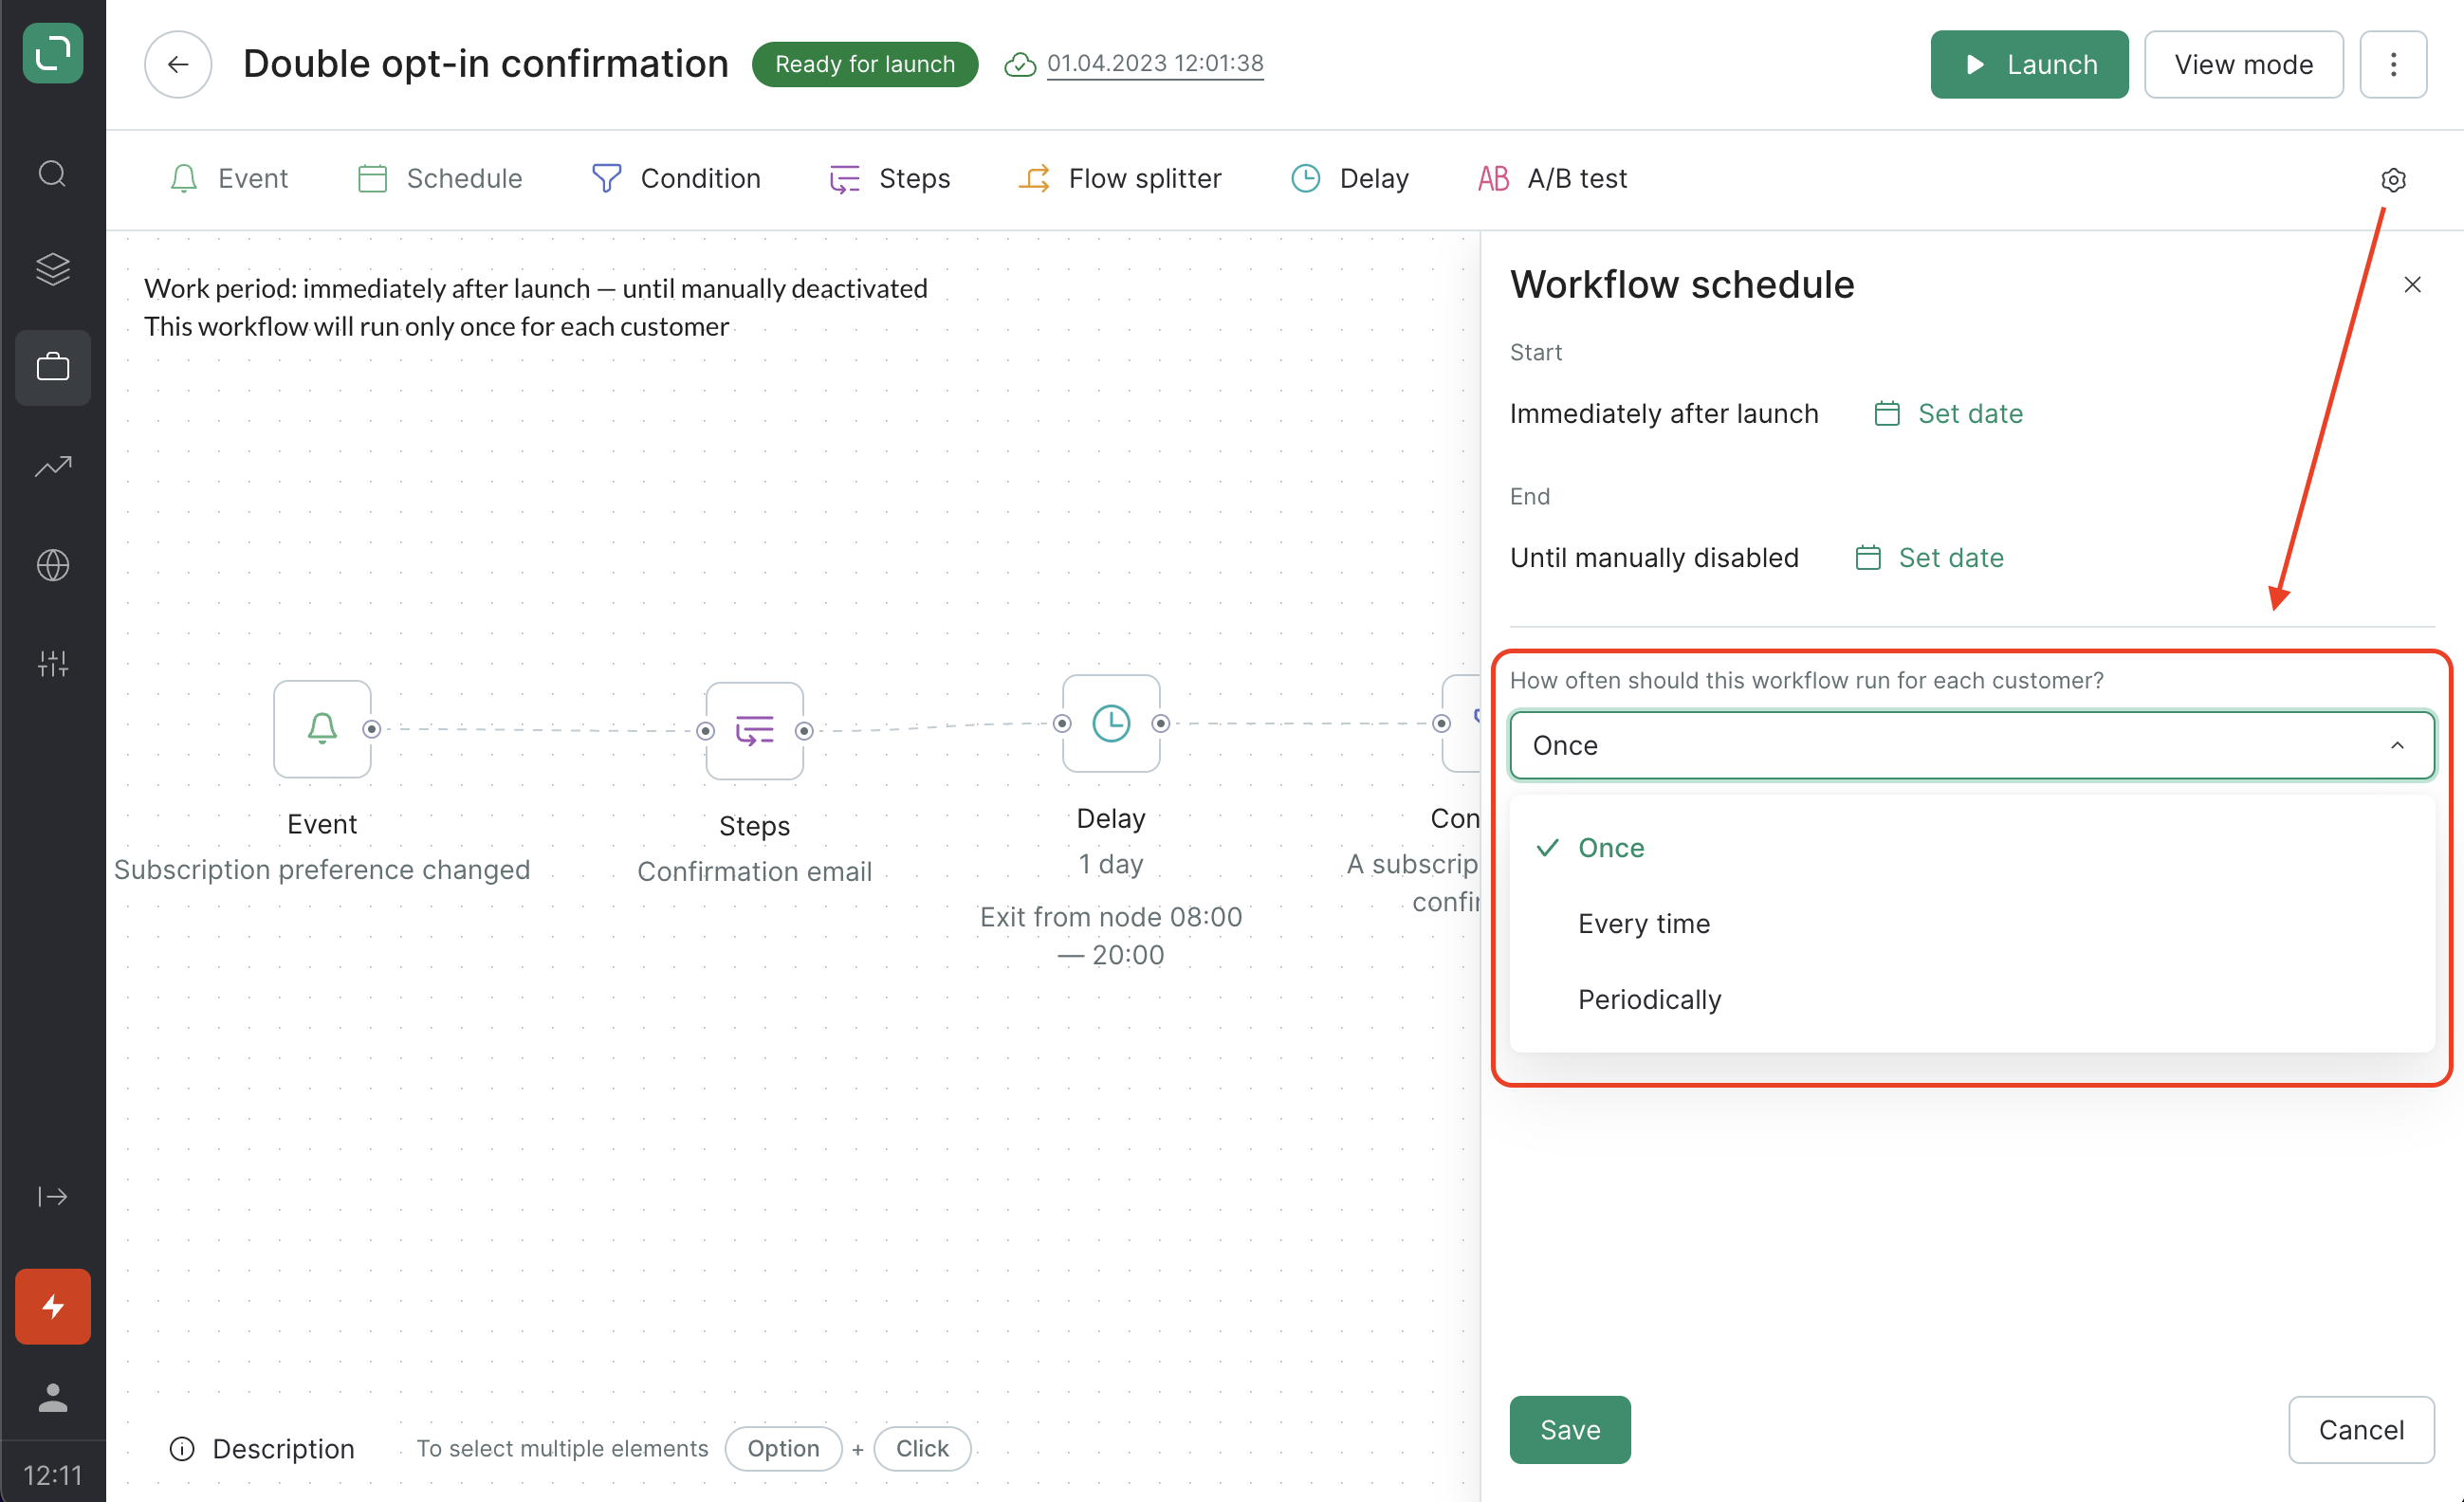
Once: your workflow will be applied to each customer only once while it is active, even if you make changes.
Every time: you can limit the total number of times the workflow is applied to each customer.
Periodically: you can set the frequency and limit the total number of times the workflow is launched for each customer.
How it works
There may be several groups of steps that are executed at different times in the flows. To better understand how to limit the launch frequency, it’s important to review a few key principles:
A flow is considered to have been "launched" when a group of steps is executed
-
If a step could not be executed due to its relevance period expiring or if it was executed with an error (which will be reflected on the Campaign & Data monitoring page), the flow will not be launched. Please note that if you see a "Message not sent" action, this means Maestra tried to deliver the campaign and the flow was launched.
-
Applying several groups of steps to a customer within a single launch of the flow is considered as one flow activation.
For example, a customer receives a reminder about their unused points a week before they expire, and another reminder six days later if the points are still unused. Despite two groups of steps being executed, this counts as a single launch of the flow.
Time is calculated from the last successful execution of any step
This means that the possibility of a customer re-entering the flow may be postponed as they progress through it.
For example, a flow is set up to send an email after the end of the session and issue a promo code three days later. The flow has been set to launch no more than once per week (seven days).
The customer finishes their session on August 10 at 1:00 pm and receives the first email. Until August 17 at 1:00 pm, they will not be able to re-enter the workflow.
However, the limitation does not affect the current workflow — the customer proceeds through the nodes and receives the promo code on August 13 at 1:00 pm. Now, the customer will not be able to enter the workflow again until August 20 at 1:00 pm.
Applied as soon as you launch the flow
Once the system registers that a customer has passed through the flow, this will not be reset even if you edit the flow. This means that if you’ve limited the number of times the flow can run for every customer to "Once", then the flow will only be launched once for each customer that meets its conditions. If you later edit the workflow schedule and select "Every time" or "Periodically" instead, this will only apply to new customers and customers who have previously completed the flow will not re-enter it.
How to set a flow schedule
You can set a date and time for when you’d like to start and end the flow, which gives you more precision when it comes to automation.
To set a flow schedule, click on the cogwheel icon in the top right-hand corner.
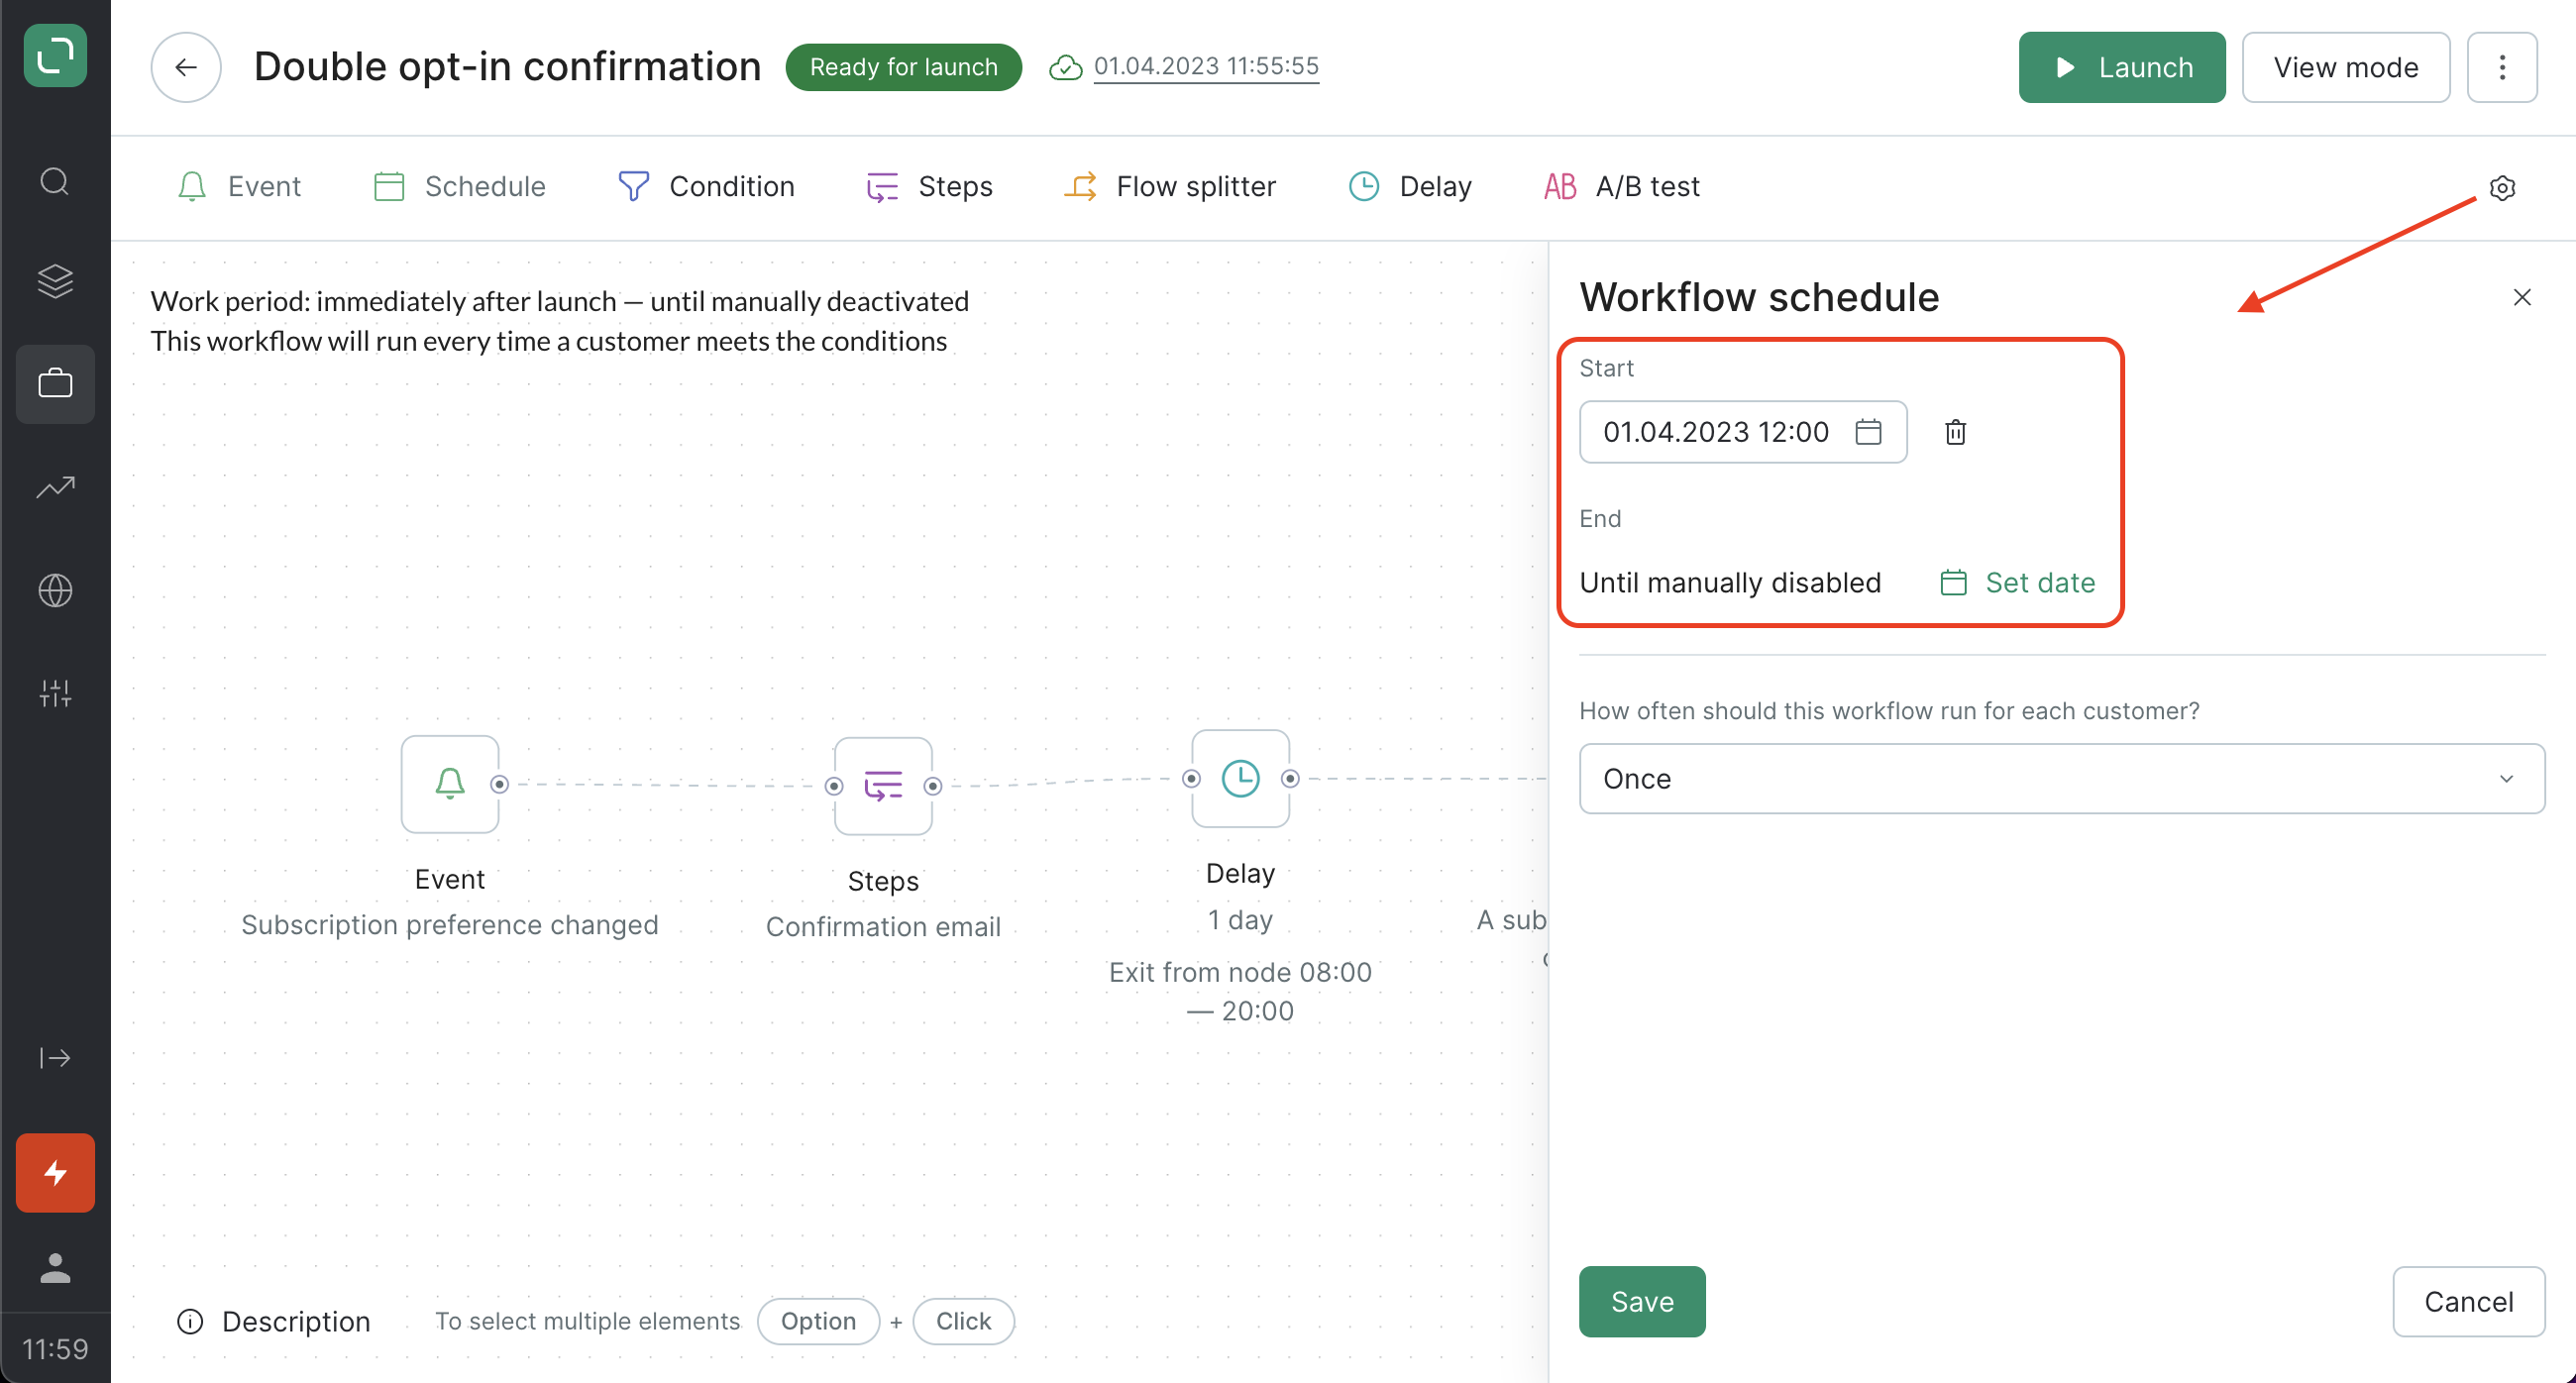
"Start" — the workflow will only be launched for events that occur after the date and time specified here.
"End" — this works in the same way as manually stopping the flow and uses the same principles: customers in delay nodes will remain there for the specified period, and steps will not be executed. If you shift the end date of the workflow while customers are in the delay node, they will be able to proceed through the workflow.
How to duplicate a flow
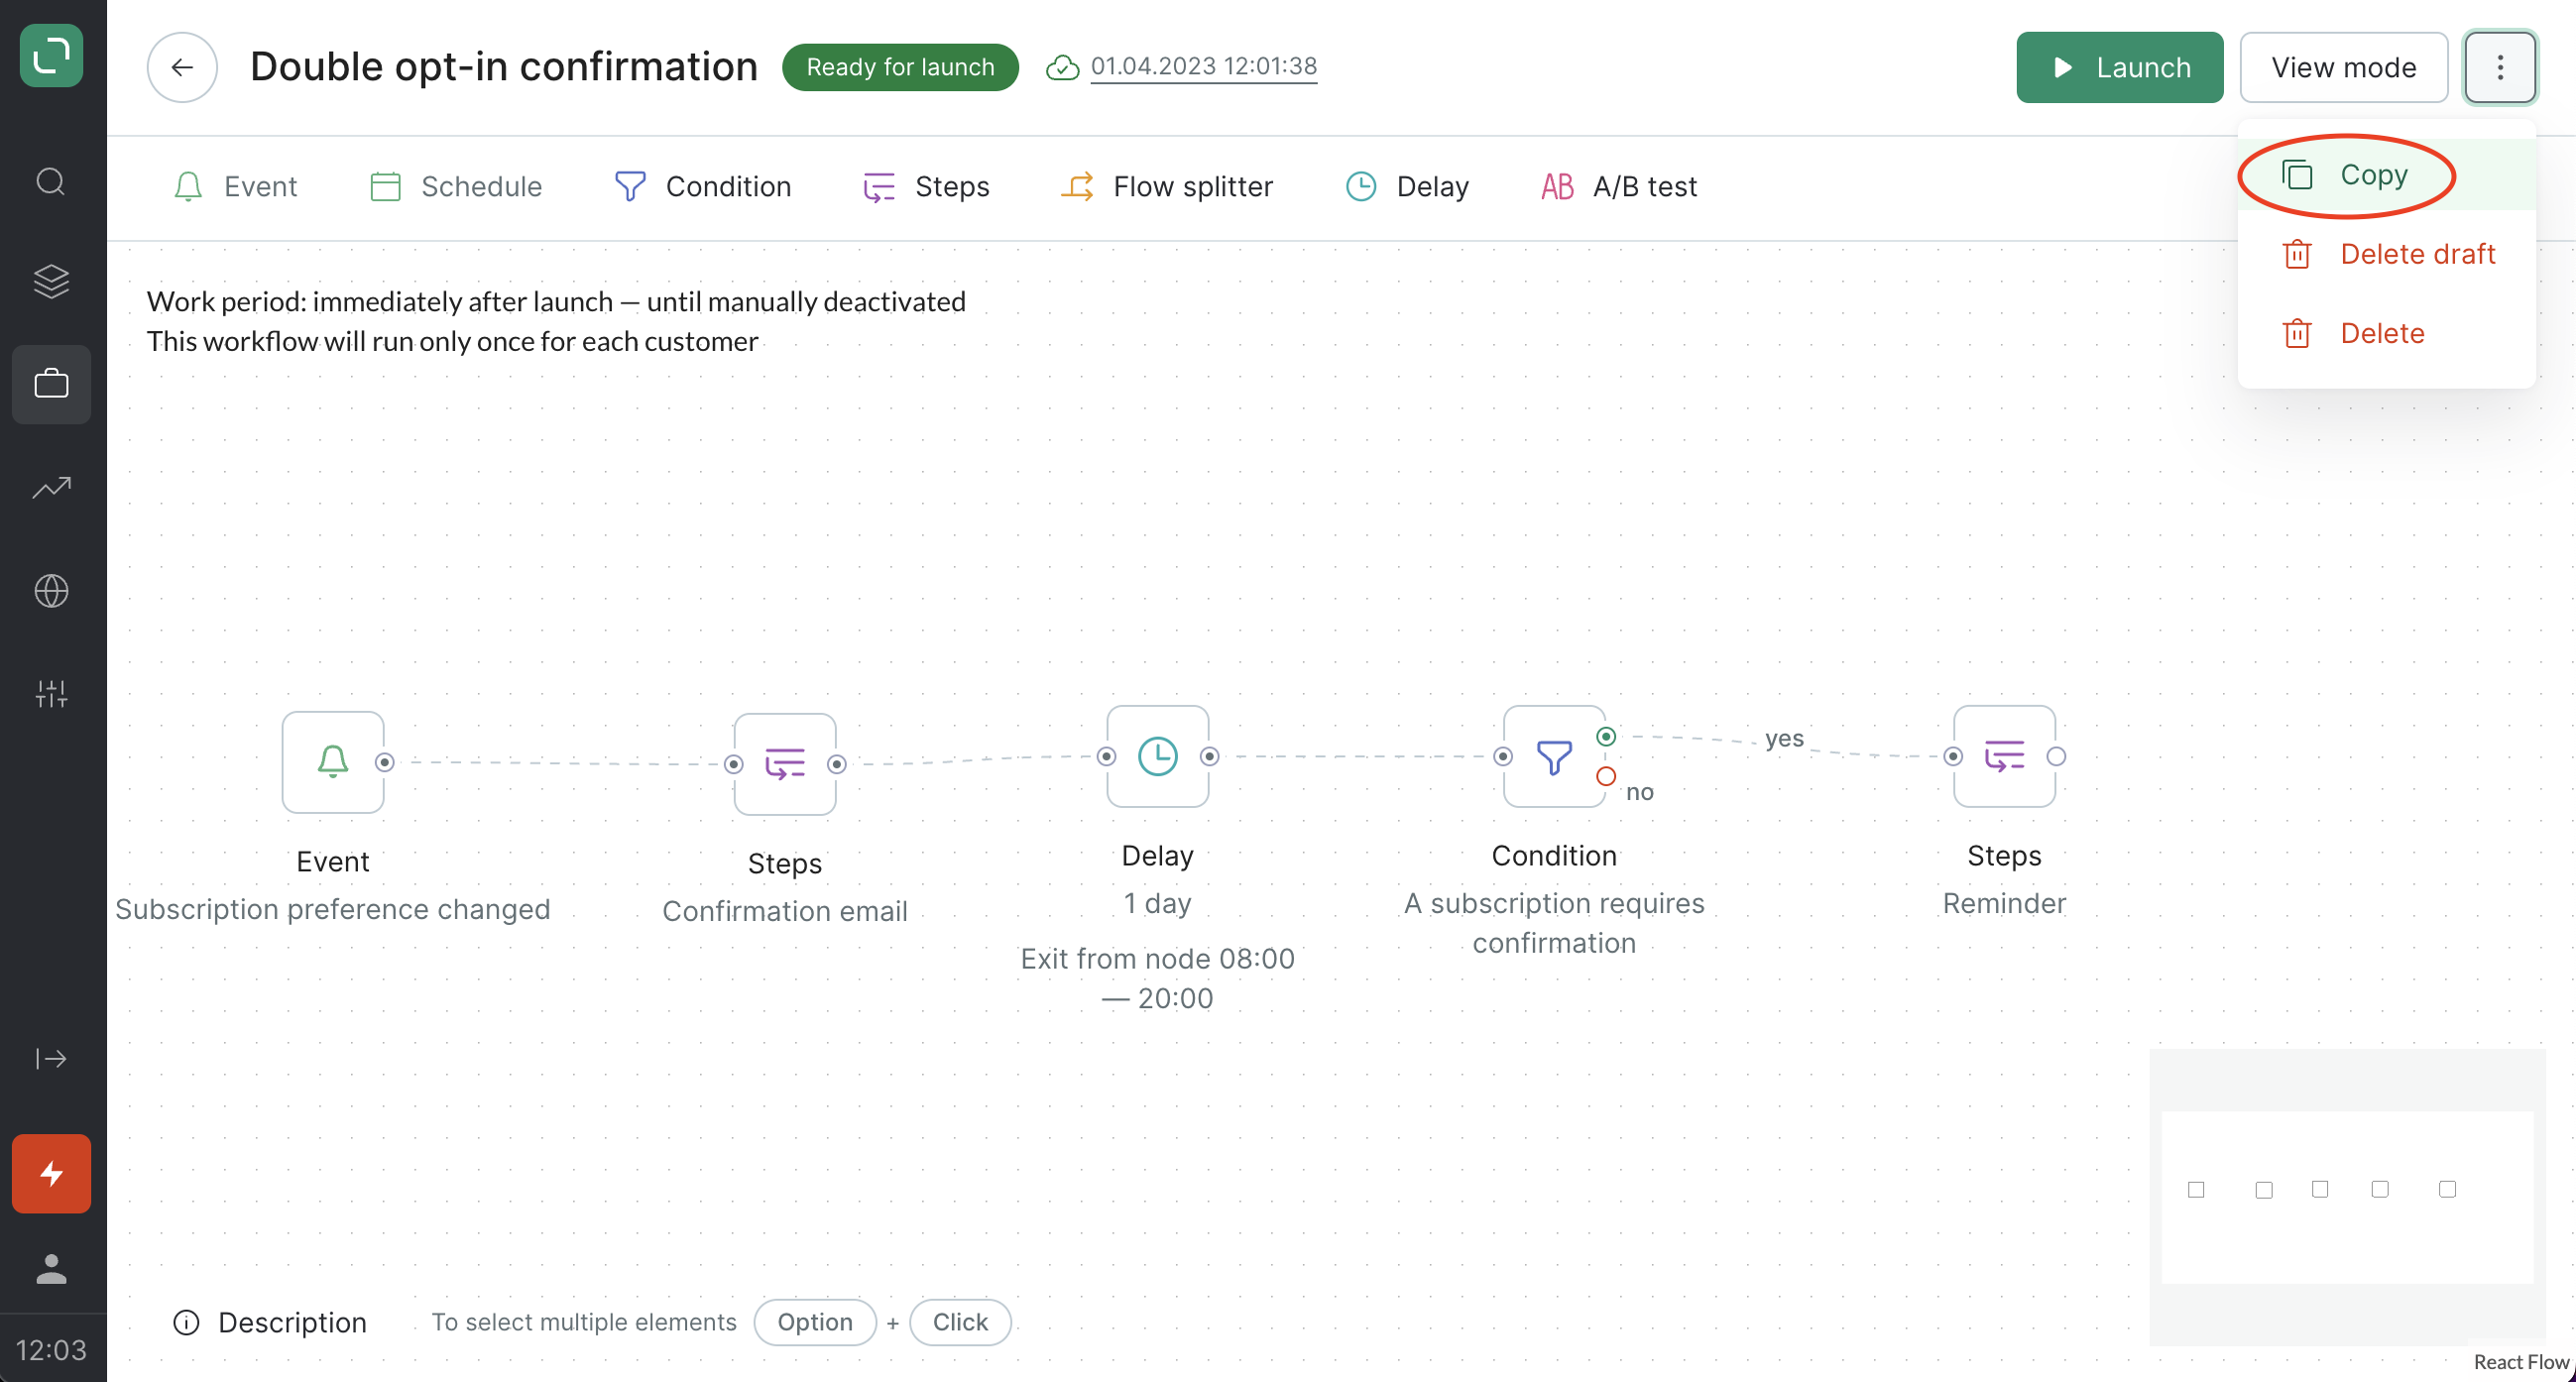
Open the menu in the top right corner and click Duplicate:
