> ## Documentation Index
> Fetch the complete documentation index at: https://help.maestra.io/llms.txt
> Use this file to discover all available pages before exploring further.
# How to Create Embedded Form
To work with cart data and viewed pages, a full integration is required according to the [setup guide](https://developers.maestra.io/page/website-personalization).
# Adding an Embedded Form
1. Go to **Customer Data Platform→ Customers**.
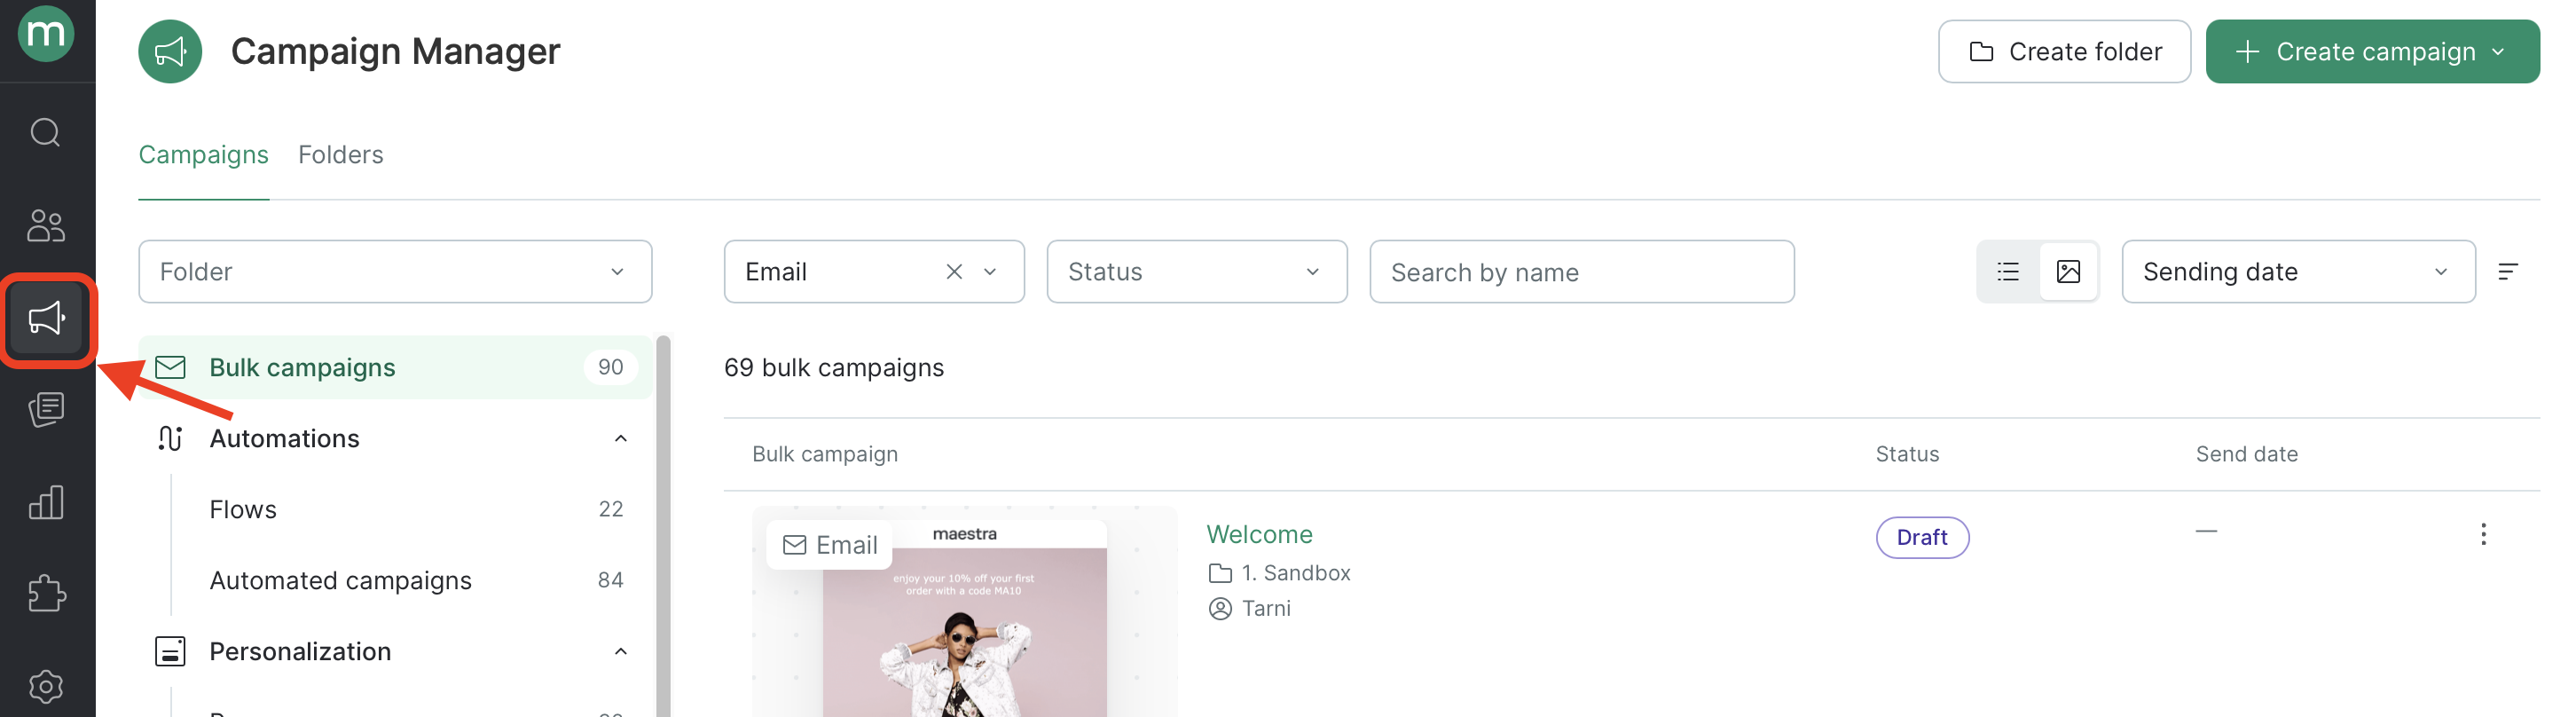 2. Click “**Create Campaign**” → “**Personalization**” → “**Embedded form**”:
 3. Select a folder and click “**Create**”:
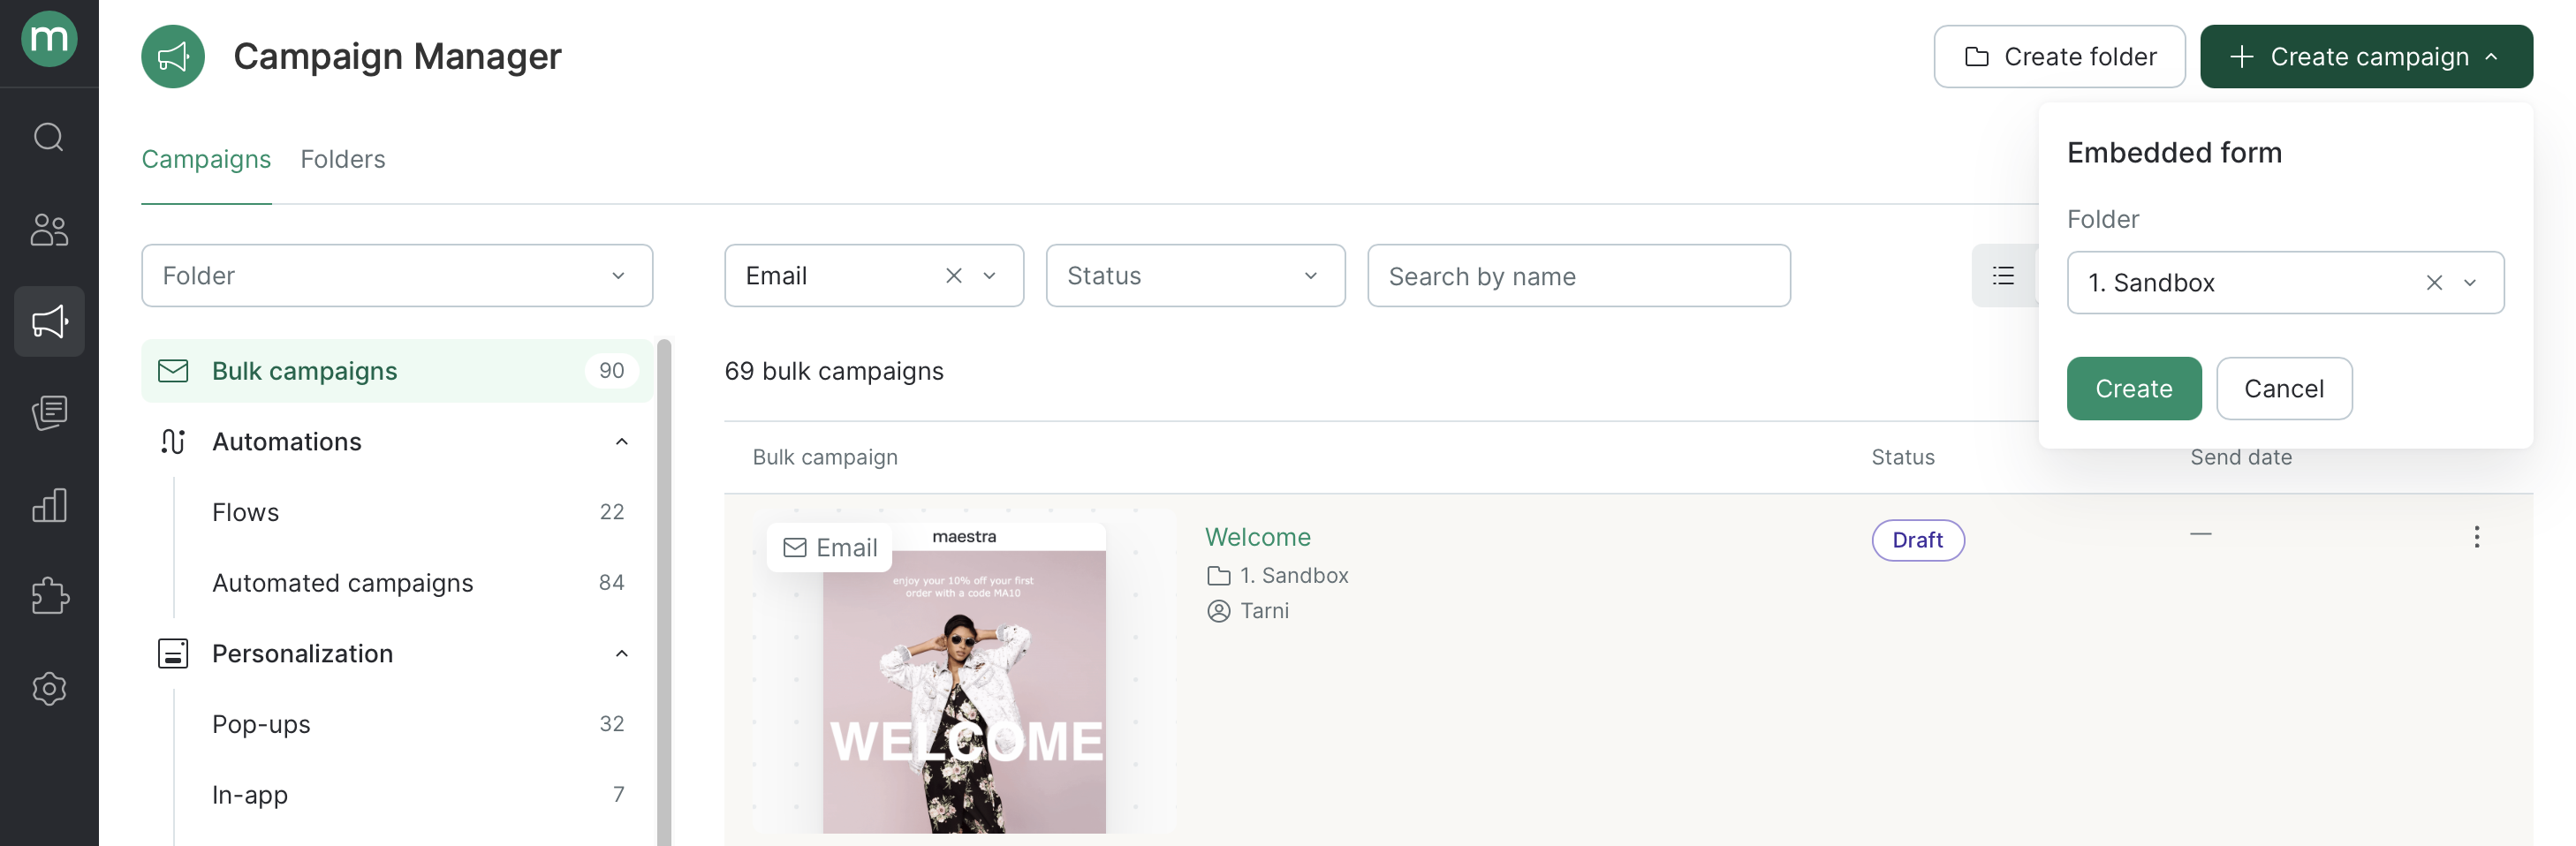 4. Choose a template:
 5. Select a website:
 6. Enter a name:
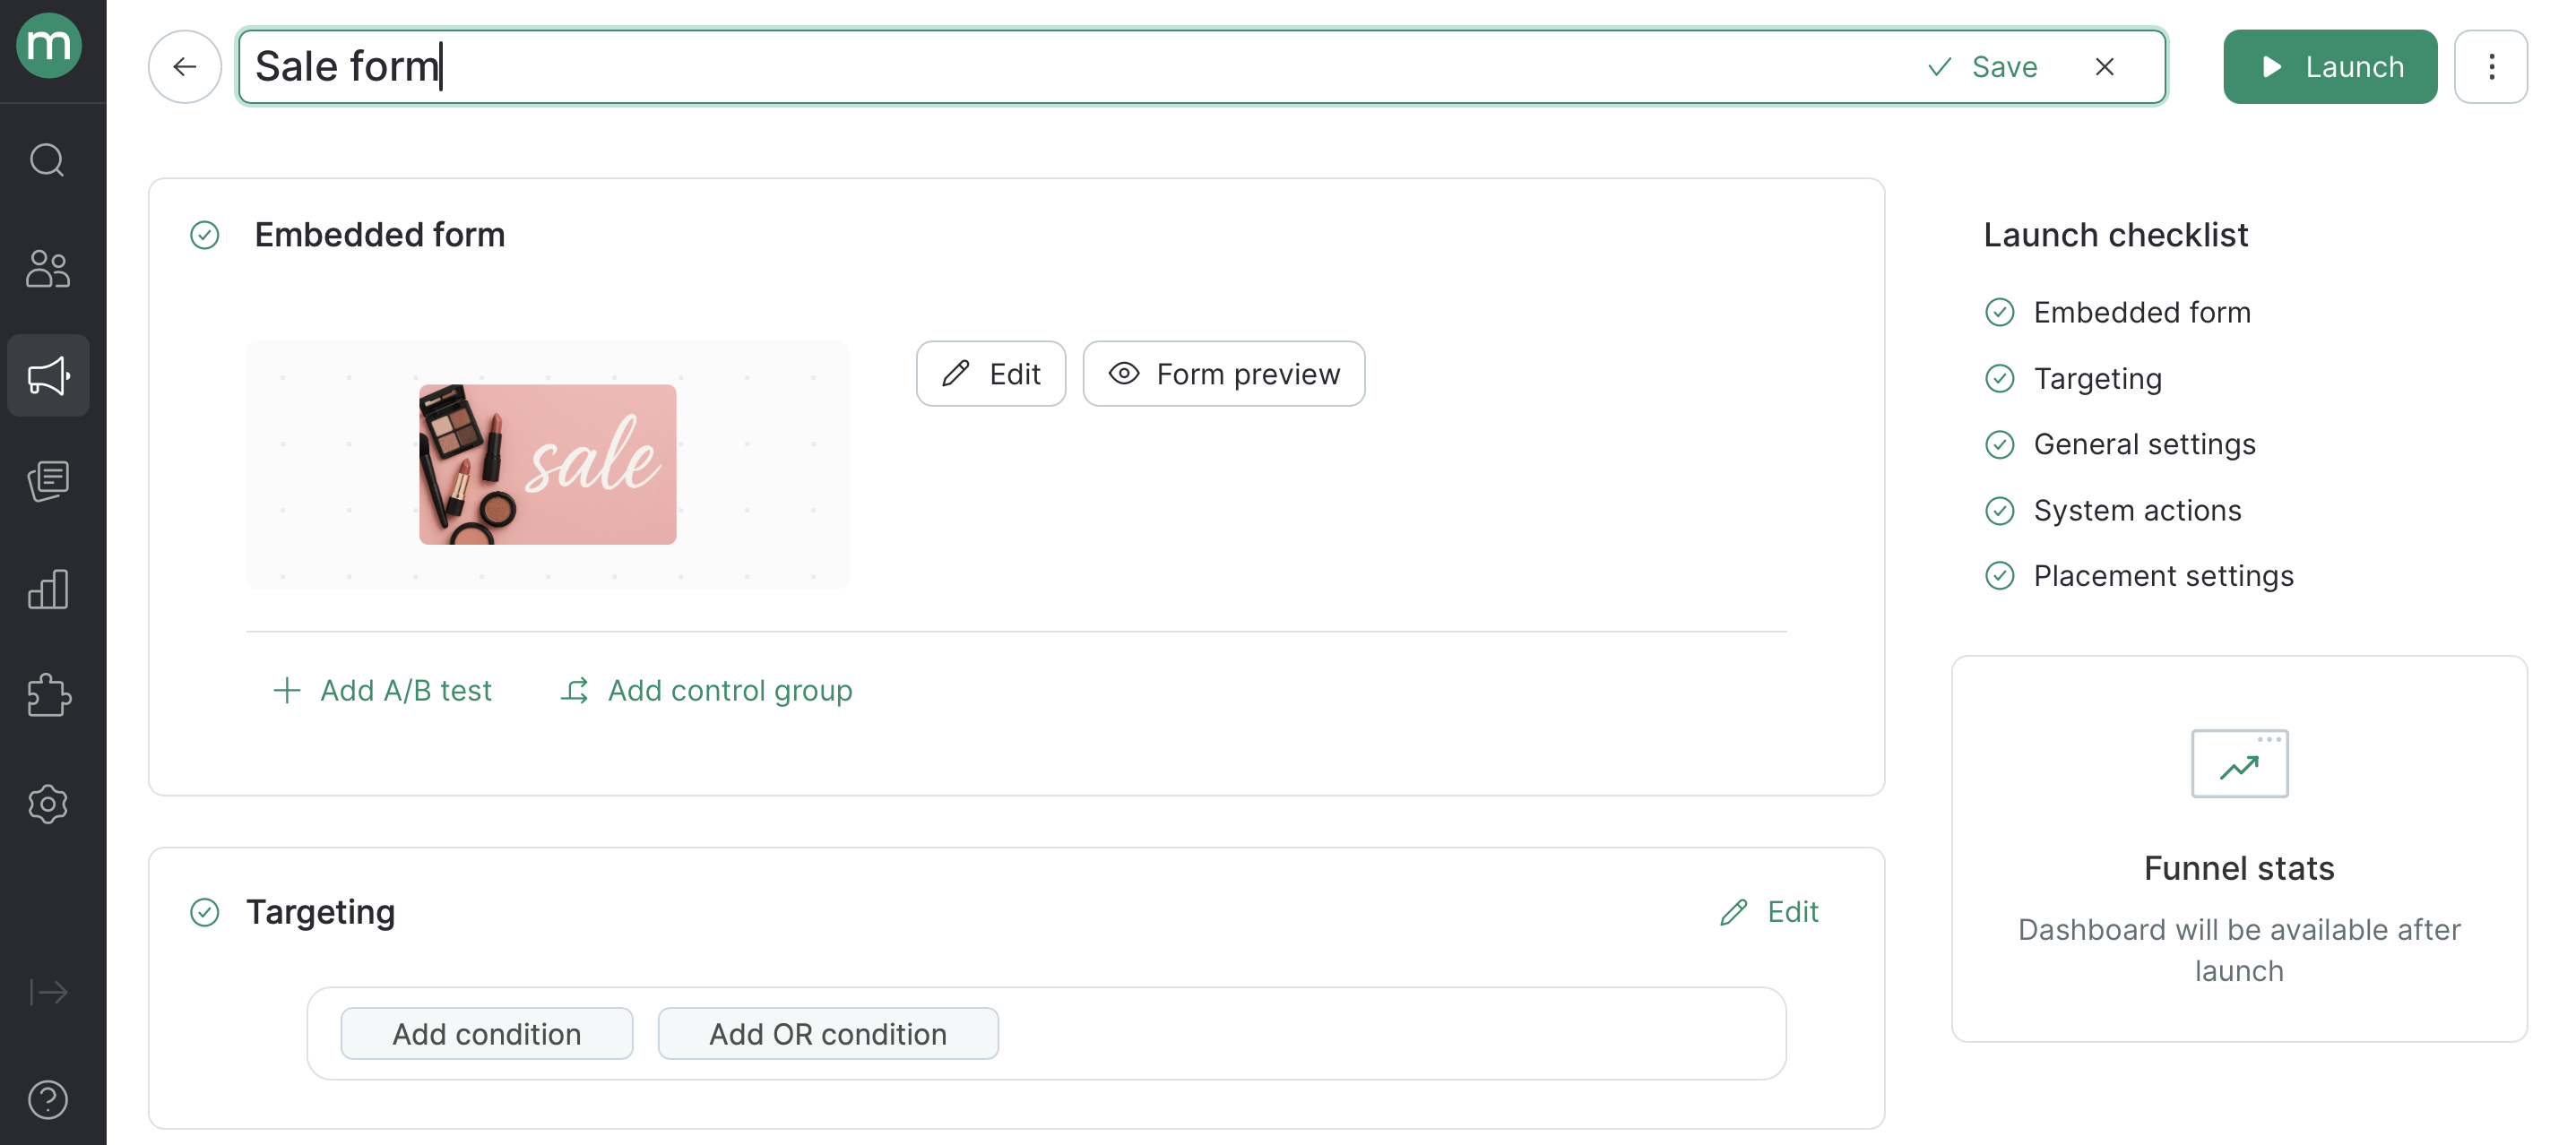 ## Form Design
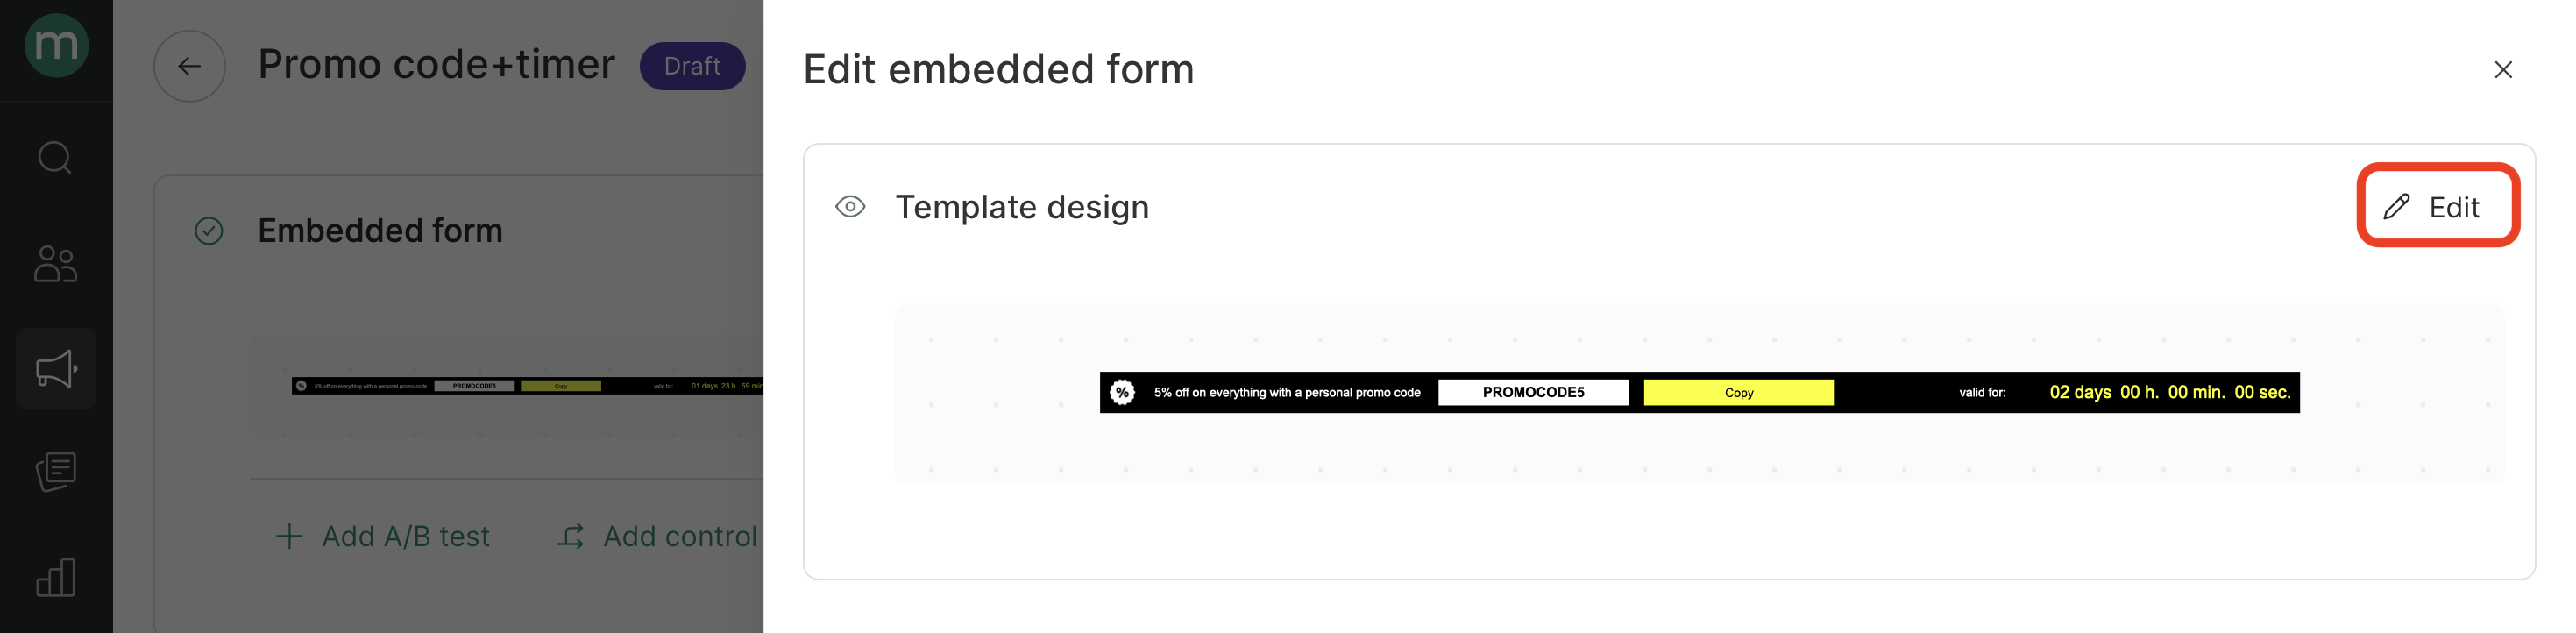
In the “Embedded Form” section, click “Edit”, then click “Edit” under “Template design”.
## Form Design
In the “Embedded Form” section, click “Edit”, then click “Edit” under “Template design”.
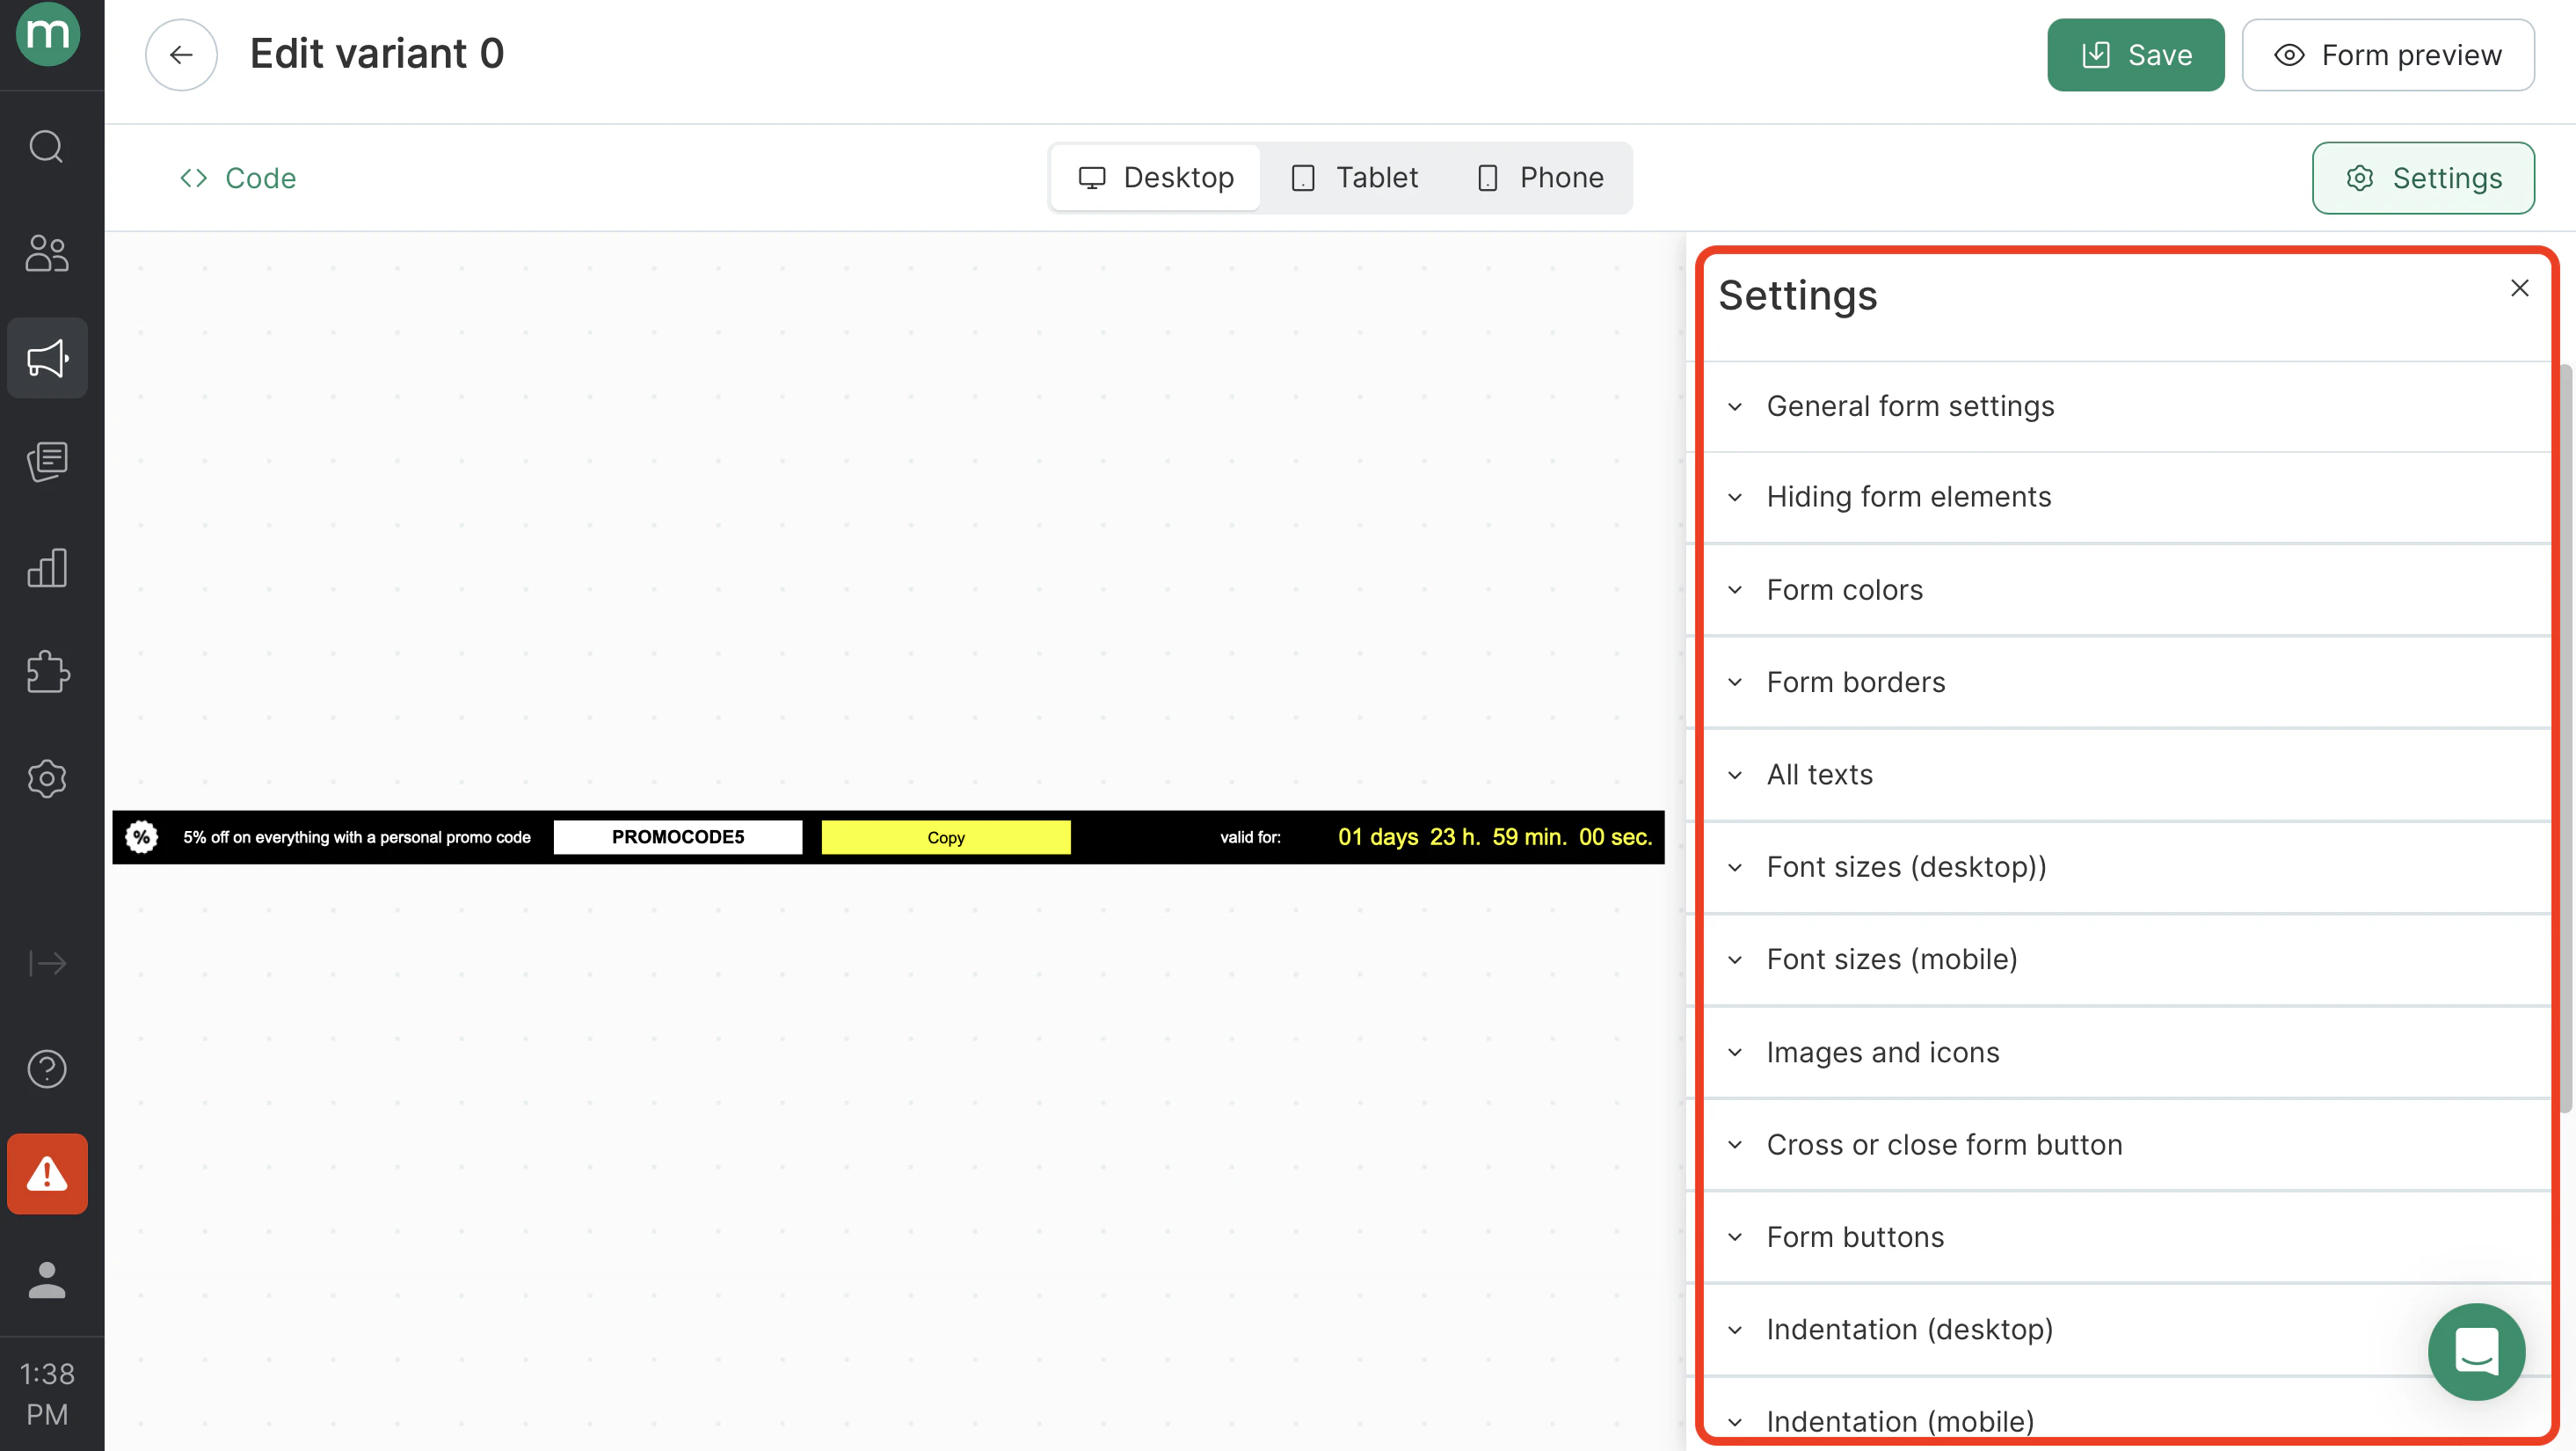
 **Basic Settings** Configure the appearance and placement of the embedded block:
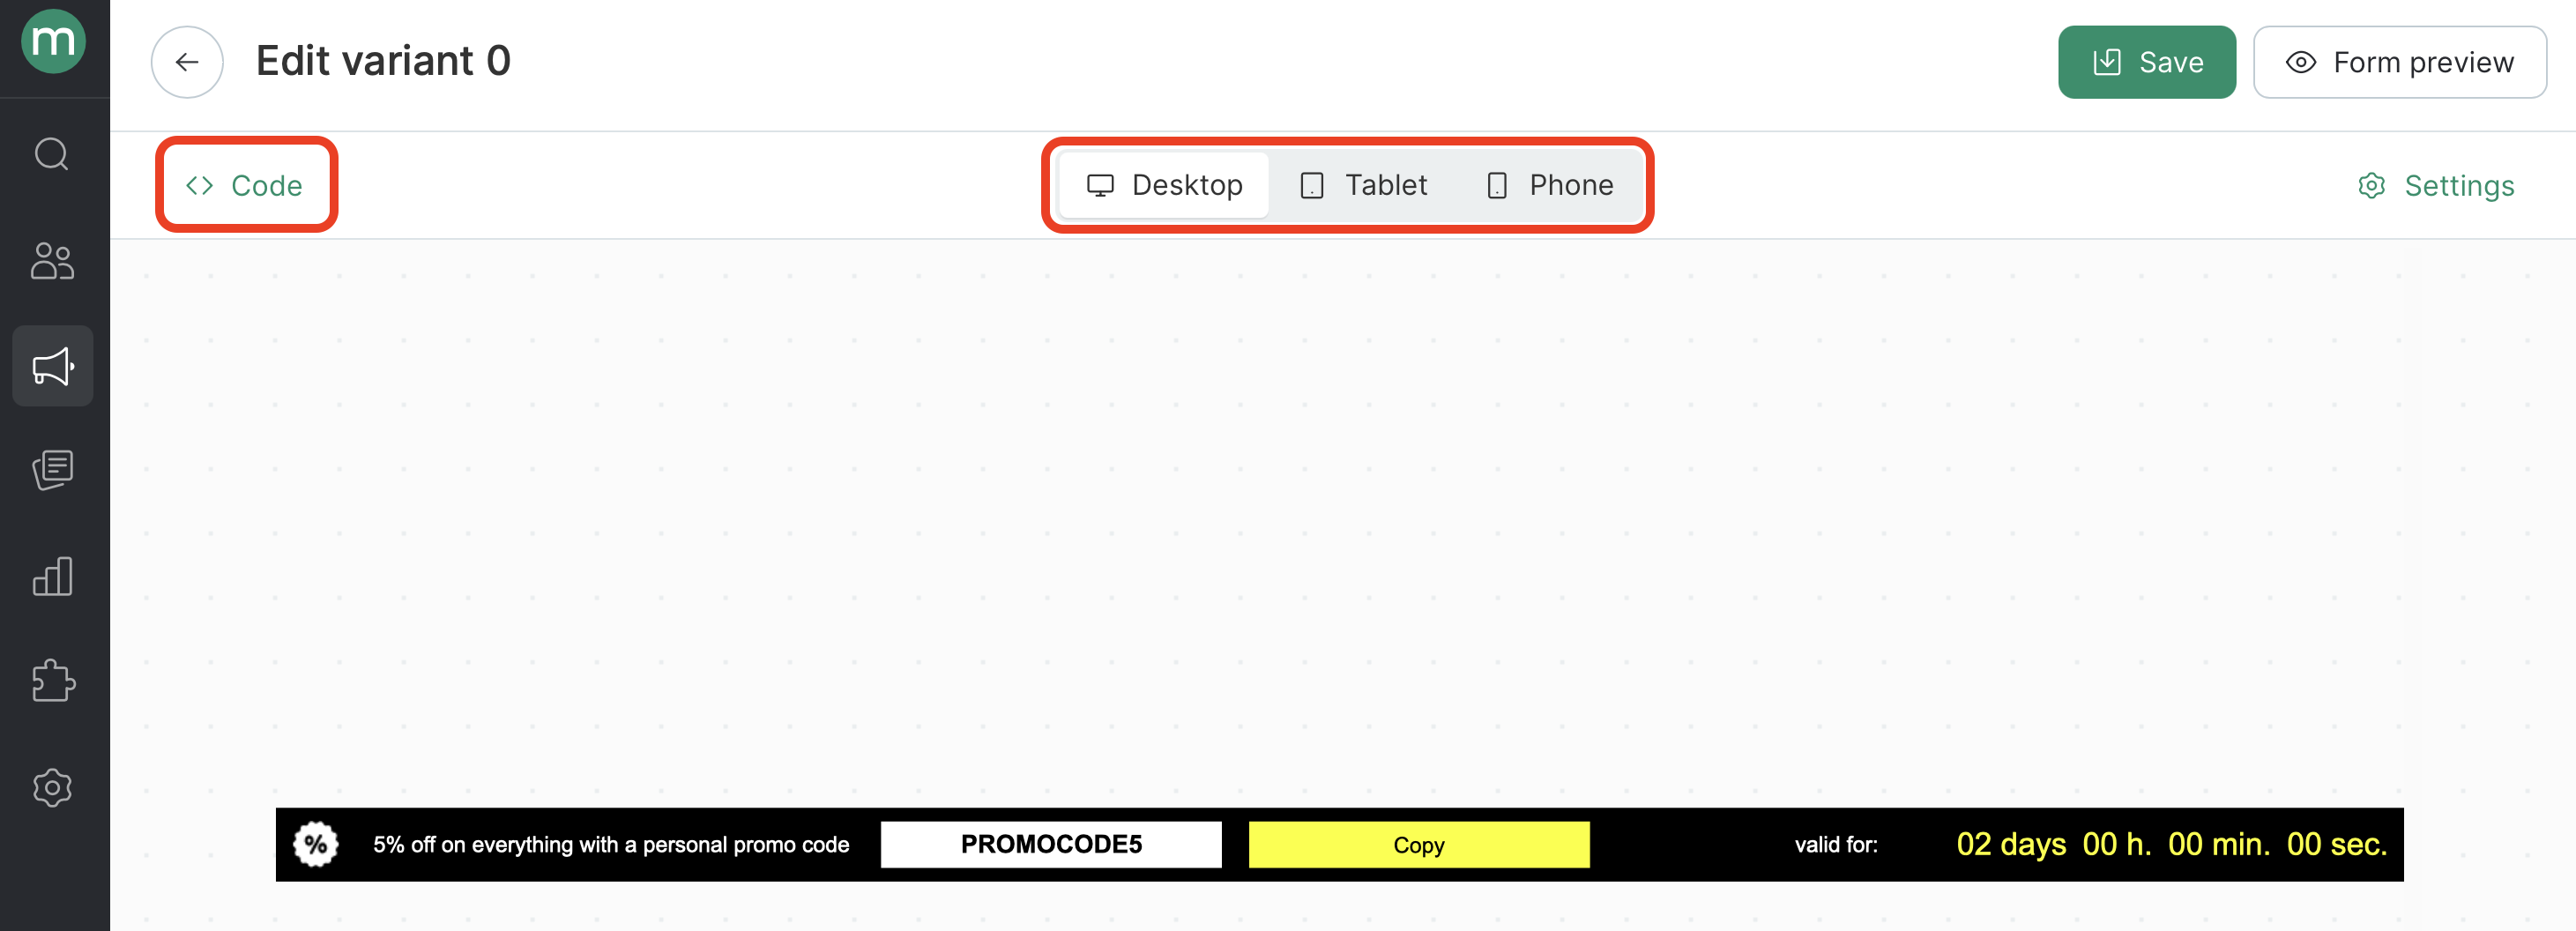
 On the template editing page, you can also preview how the embedded form appears on different devices and edit the HTML and CSS code if needed.
 ## New Templates
Use the new embedded block templates for more flexible customization.
* Choose a template labeled “New”:
## New Templates
Use the new embedded block templates for more flexible customization.
* Choose a template labeled “New”:
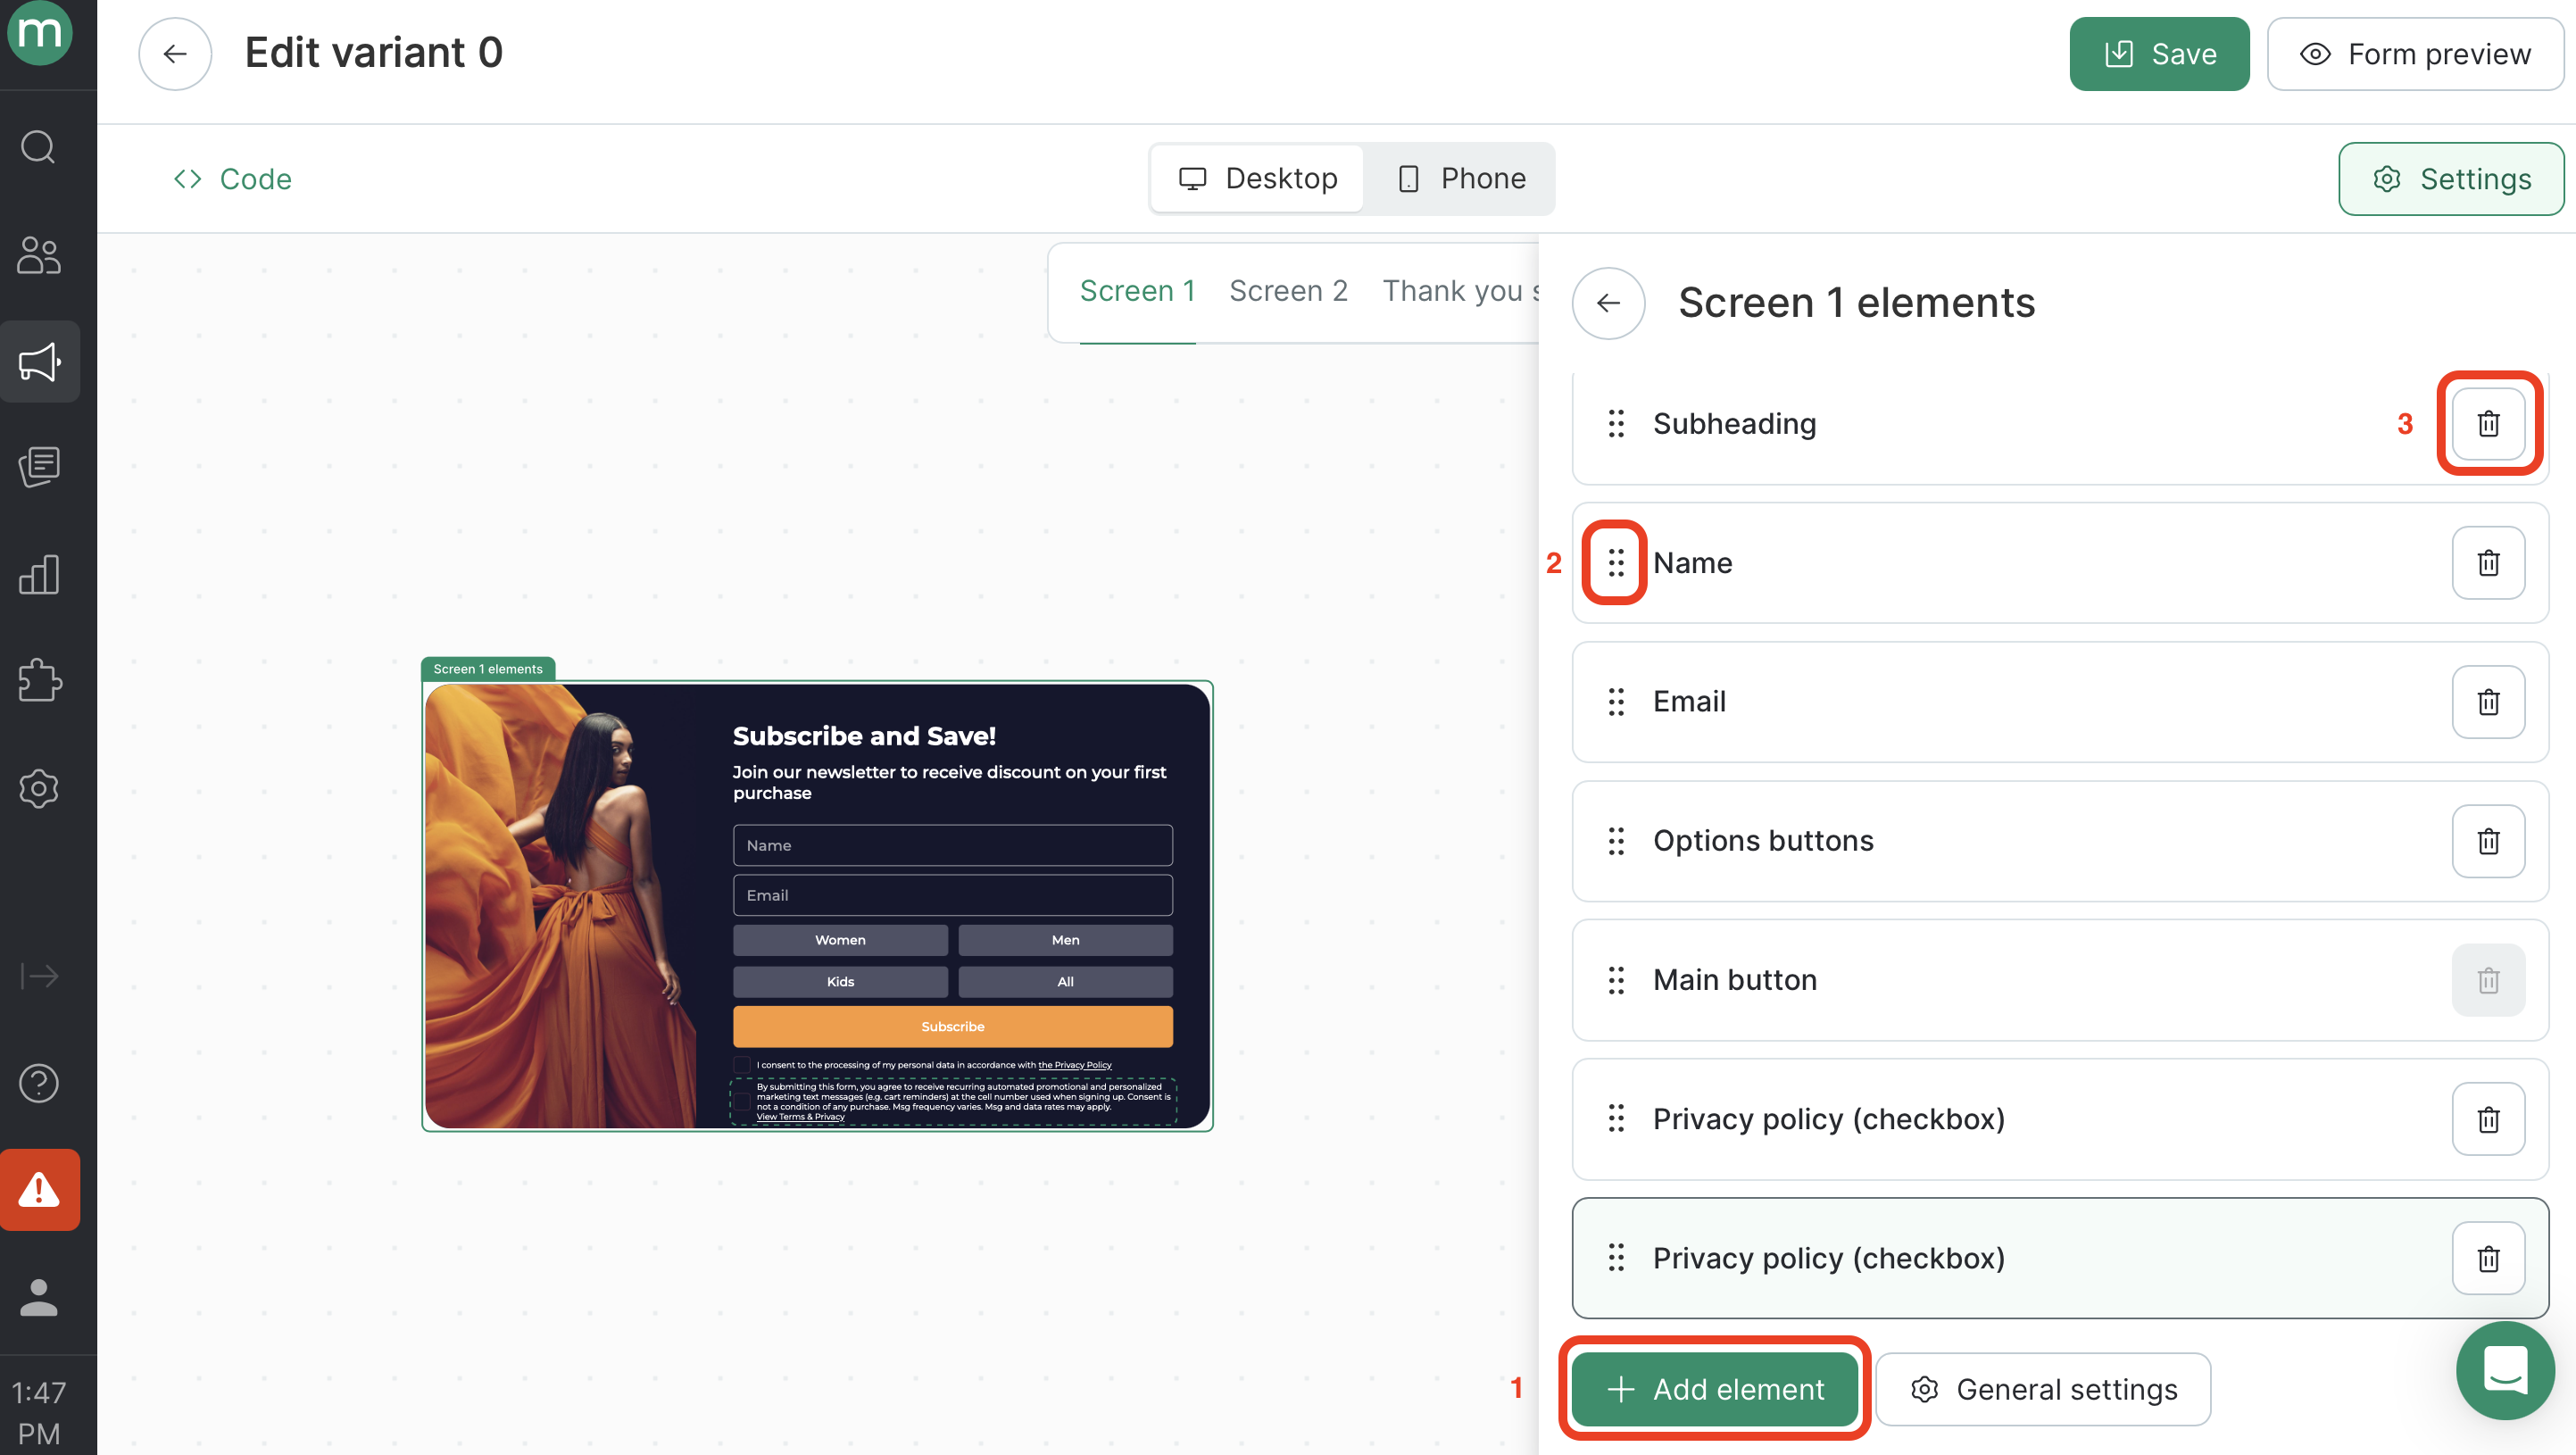
 * Add the required elements to each screen using the “Add element” button (1), reorder them as needed (2), and remove any unnecessary ones (3).
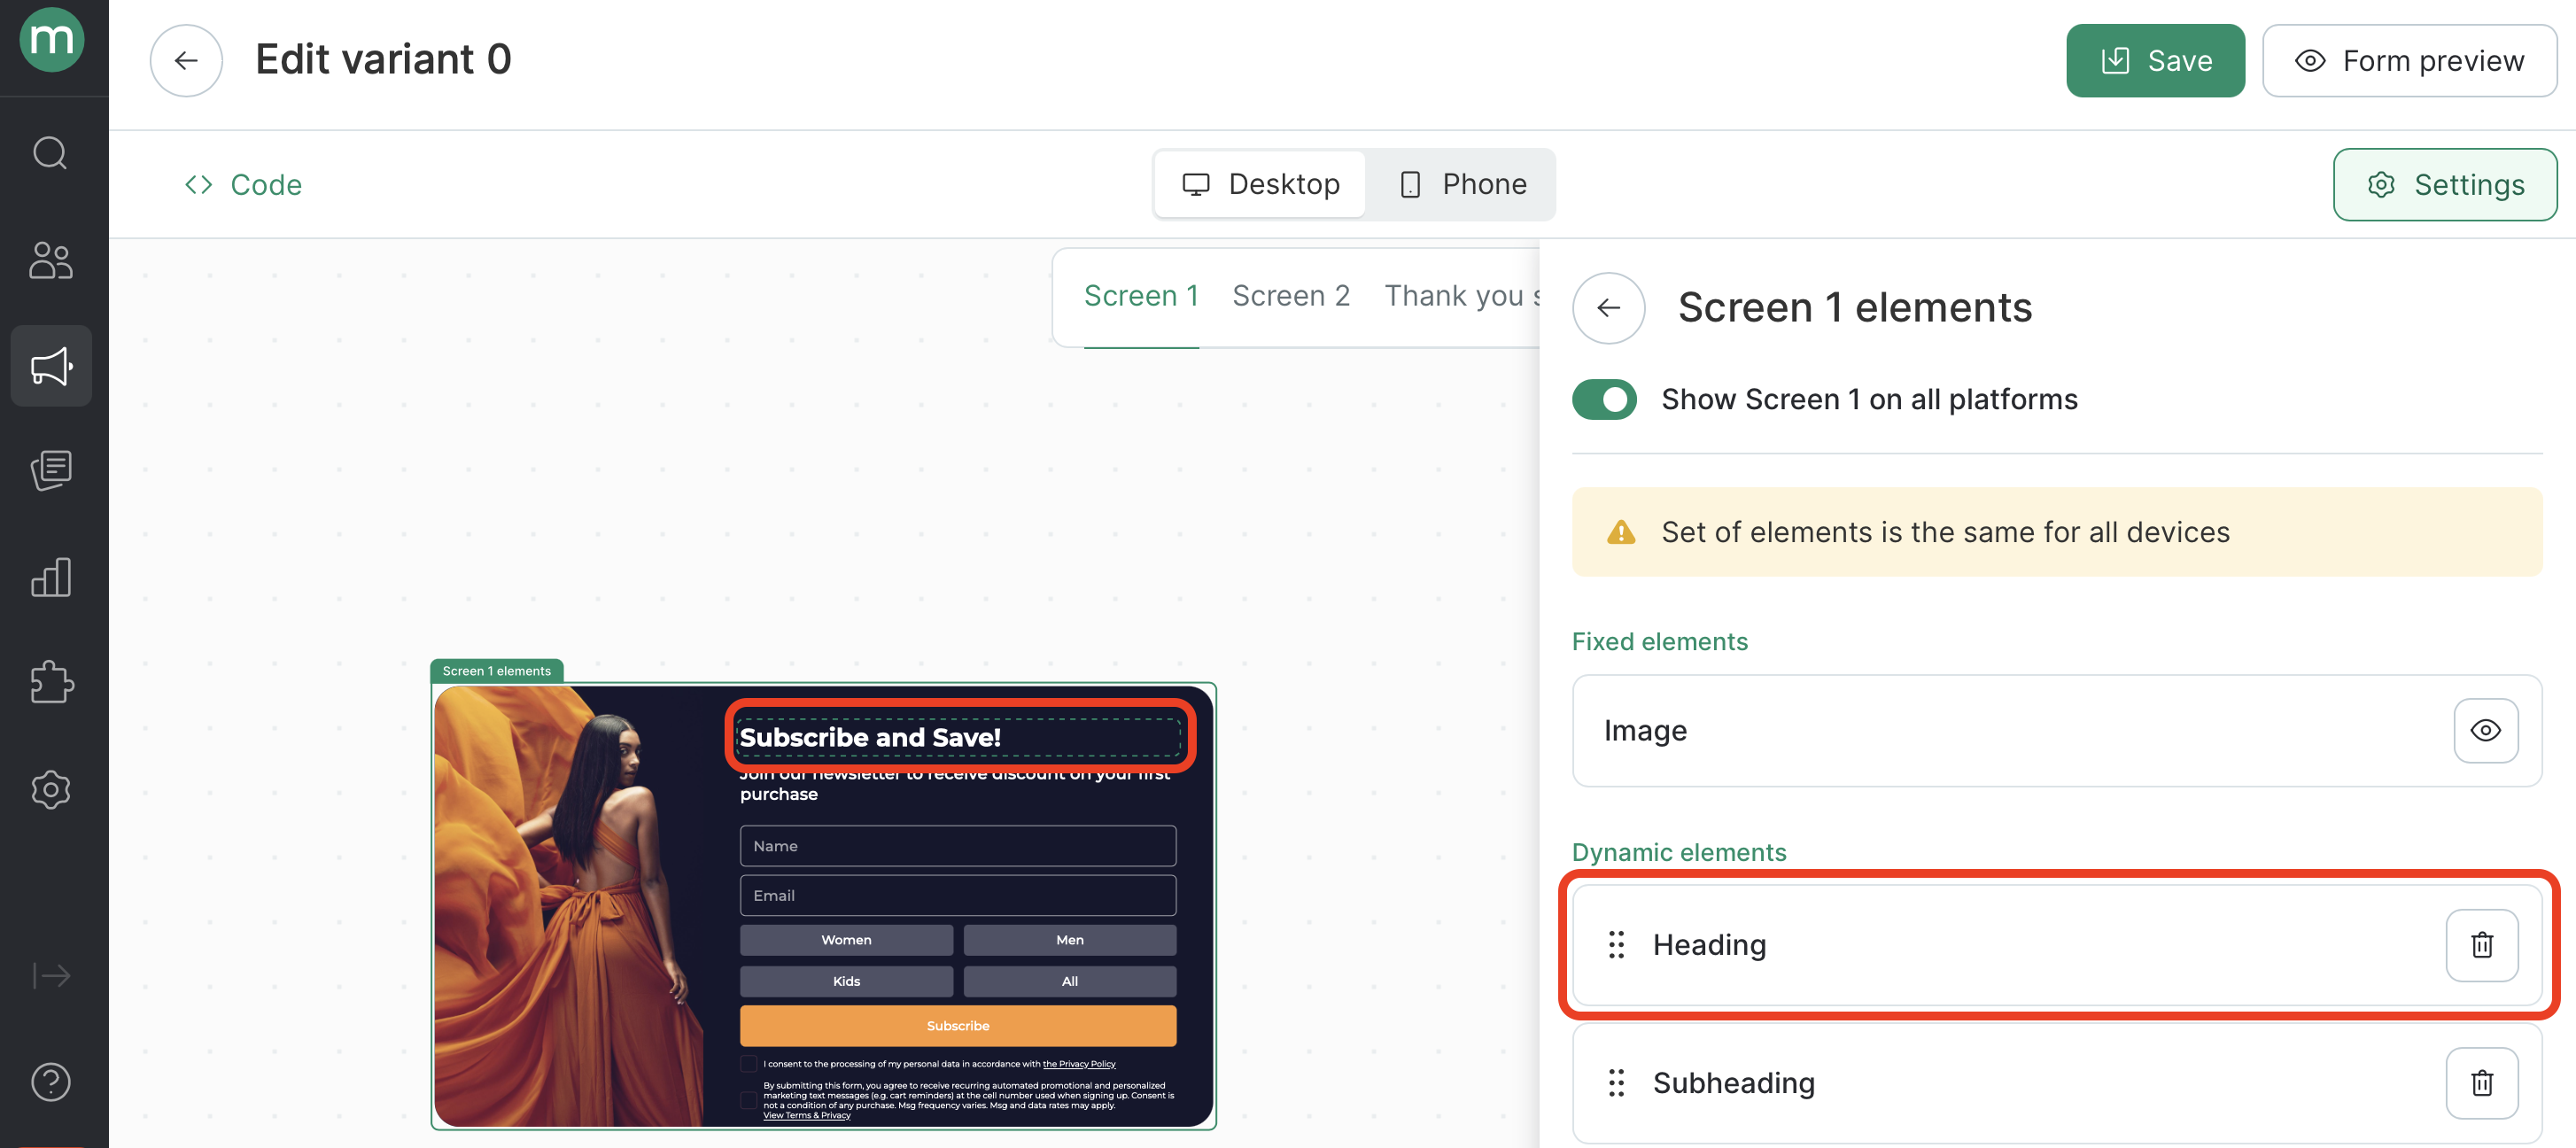
 * To edit an element, click it in the screen element list or directly in the preview:
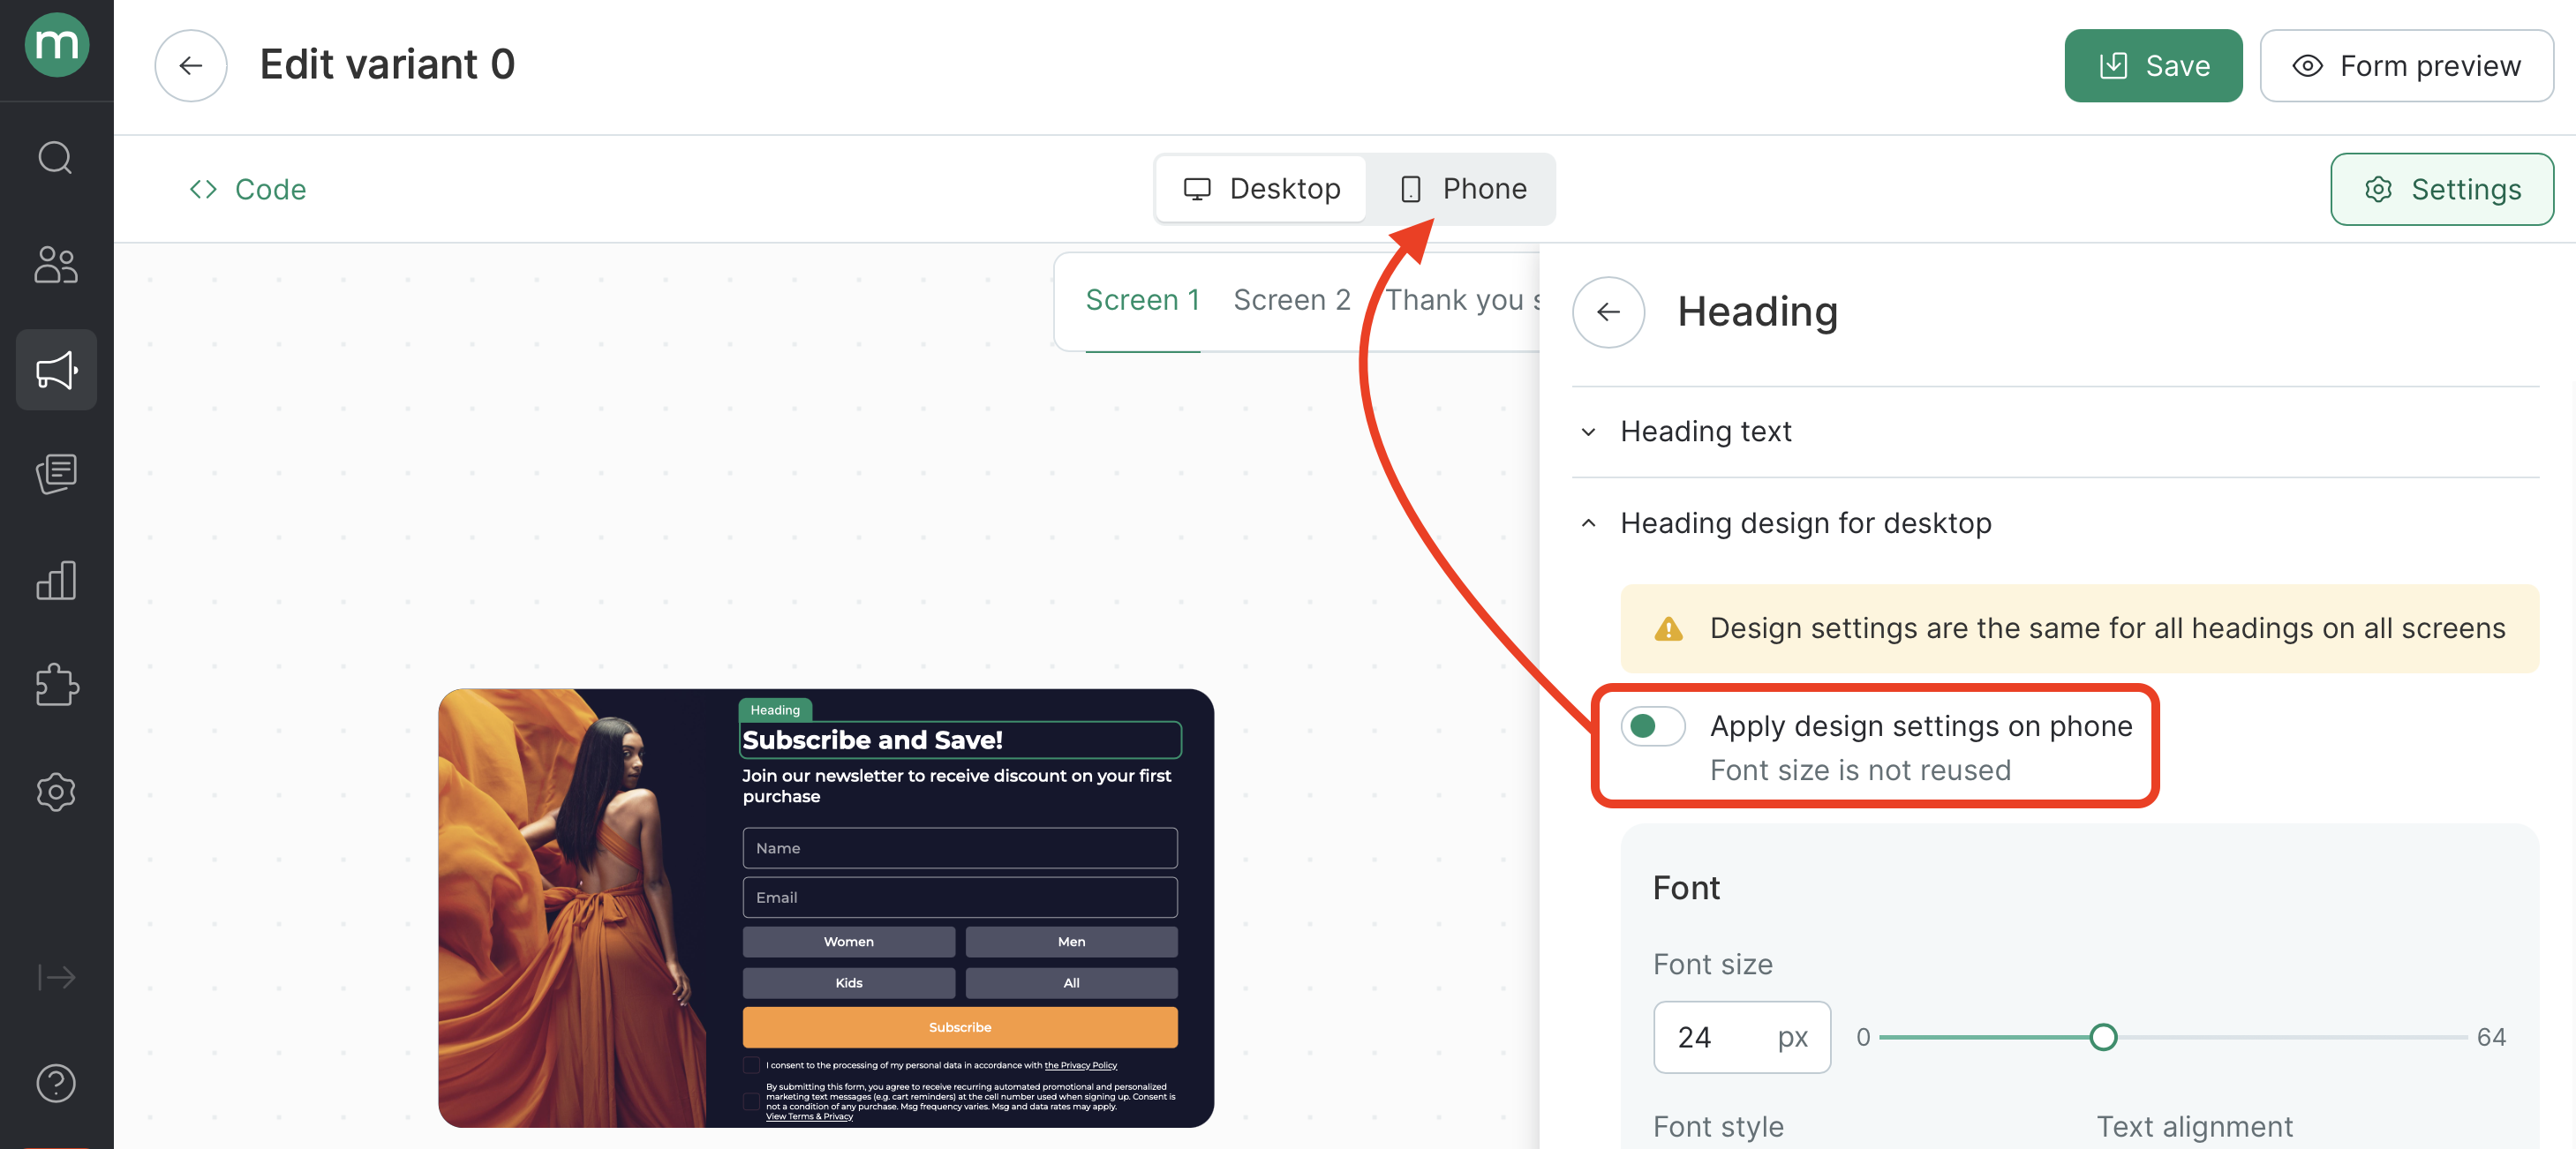
 In the new templates, you can configure different settings for each text element on different screens, including font style, size, color, and text alignment.
**Device-Specific Design** By default, the design of most elements is automatically synced and optimized for mobile. Disable syncing on the **Desktop** tab. To apply unique settings for your phone, switch to the **Phone** tab.
In the new templates, you can configure different settings for each text element on different screens, including font style, size, color, and text alignment.
**Device-Specific Design** By default, the design of most elements is automatically synced and optimized for mobile. Disable syncing on the **Desktop** tab. To apply unique settings for your phone, switch to the **Phone** tab.
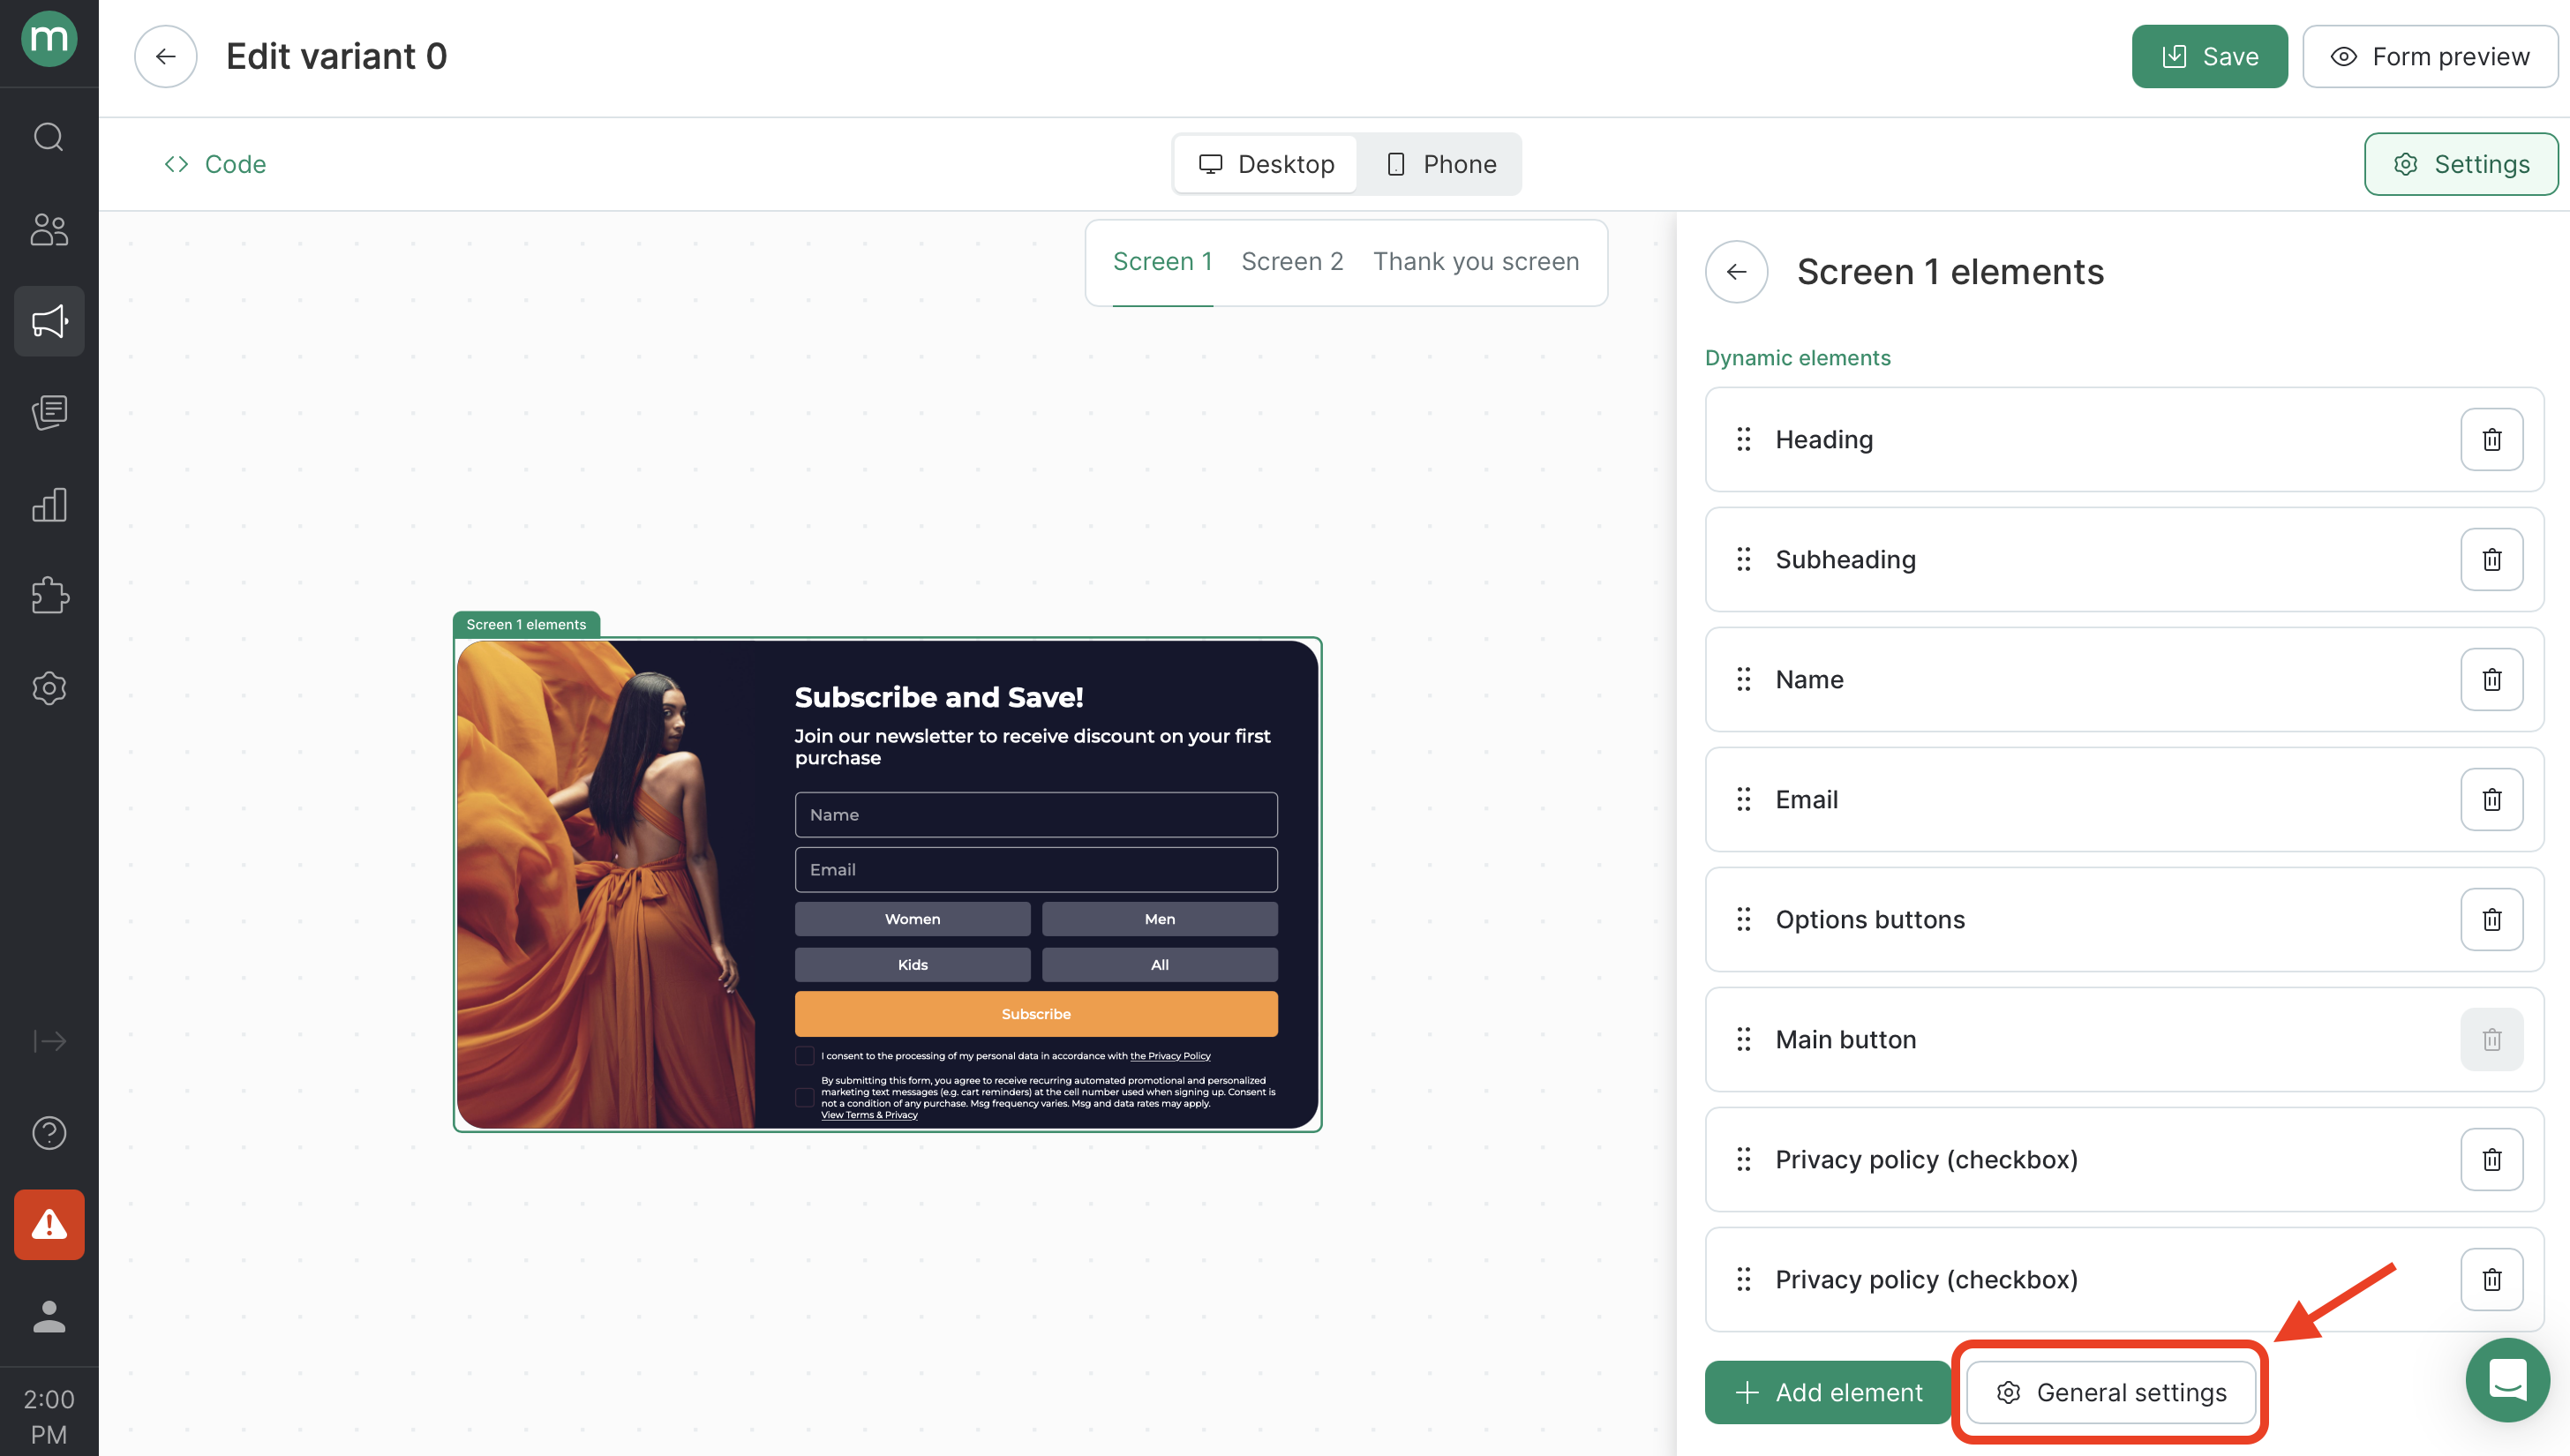
 * **Go to “General Settings” to update:**
* The overall form design (font, width and height, close button, and more)
* The form placement on the website
* Data submission settings (phone input format, autocomplete, user data storage)
* **Go to “General Settings” to update:**
* The overall form design (font, width and height, close button, and more)
* The form placement on the website
* Data submission settings (phone input format, autocomplete, user data storage)
 In the new template settings, you can set a unified form height for all screens. This is useful when screens contain different types of content and the height may otherwise change when switching between them.
In templates with multiple screens, you can enable saving entered data when the second screen is closed. In this case, all fields on **the second screen become optional**.
To do this, go to **General Settings → Data submission → User Data** and enable the option:
In the new template settings, you can set a unified form height for all screens. This is useful when screens contain different types of content and the height may otherwise change when switching between them.
In templates with multiple screens, you can enable saving entered data when the second screen is closed. In this case, all fields on **the second screen become optional**.
To do this, go to **General Settings → Data submission → User Data** and enable the option:
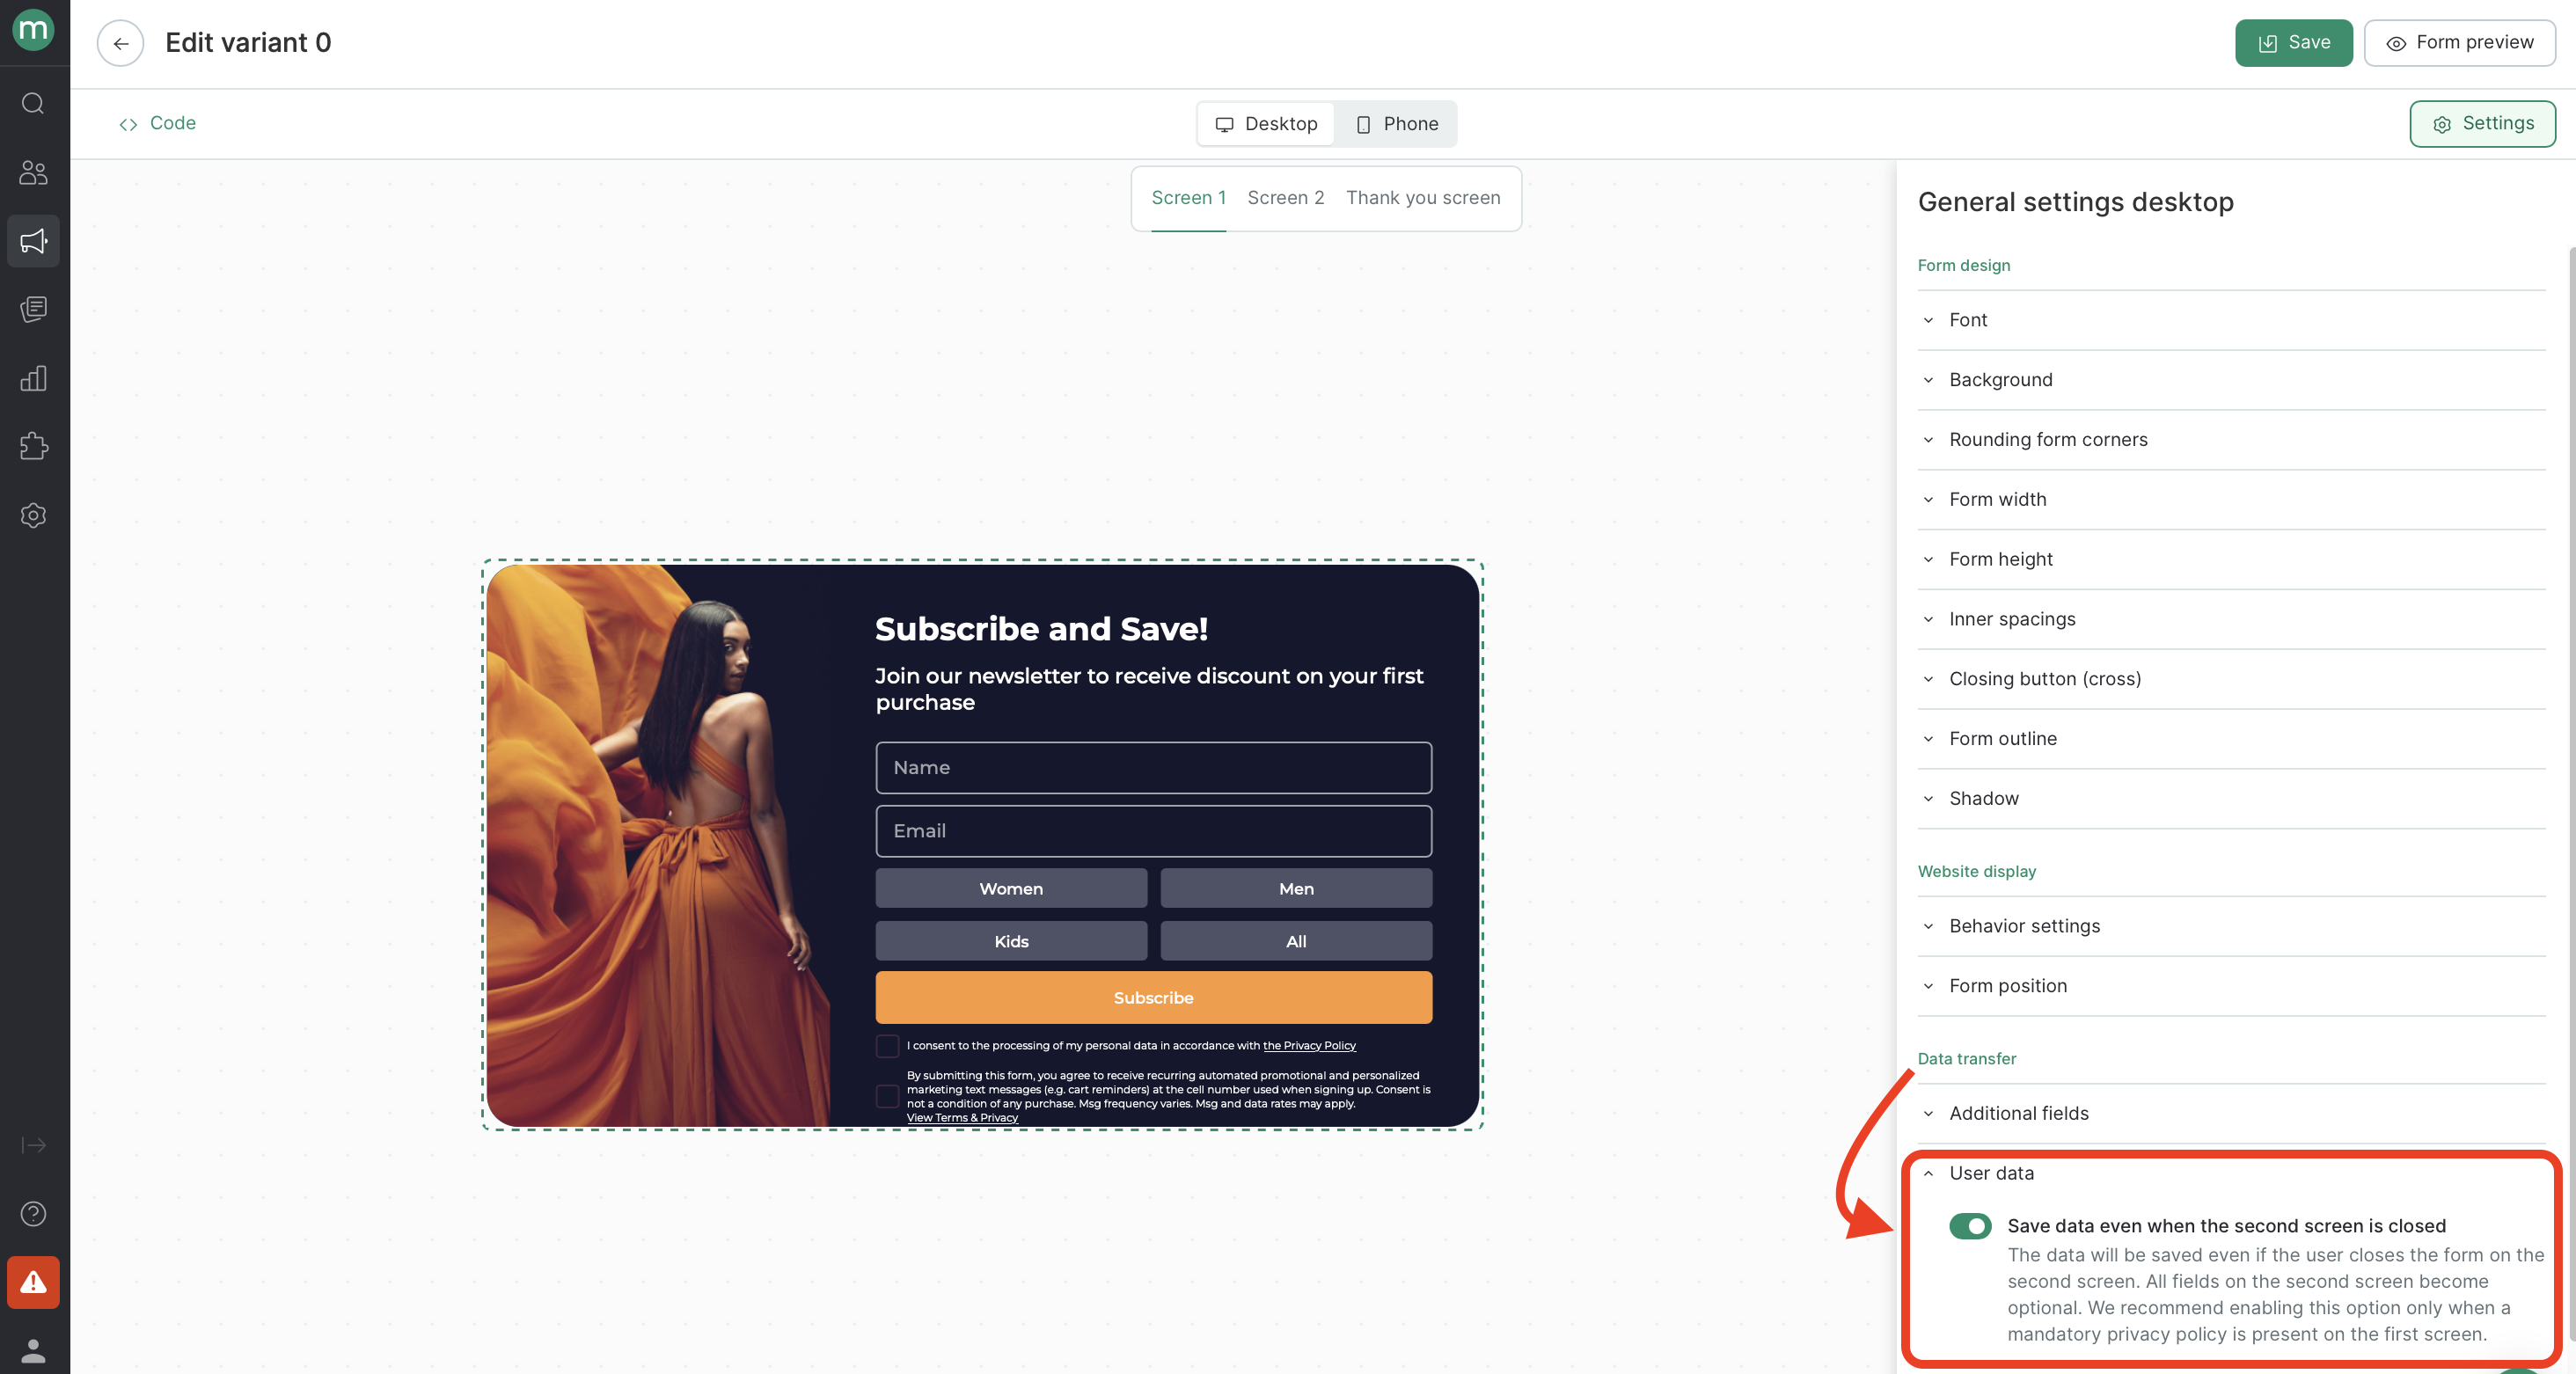 We recommend using this setting only if the first screen includes a required privacy policy, allowing the user to explicitly consent to data sharing and receiving communications.
## Targeting
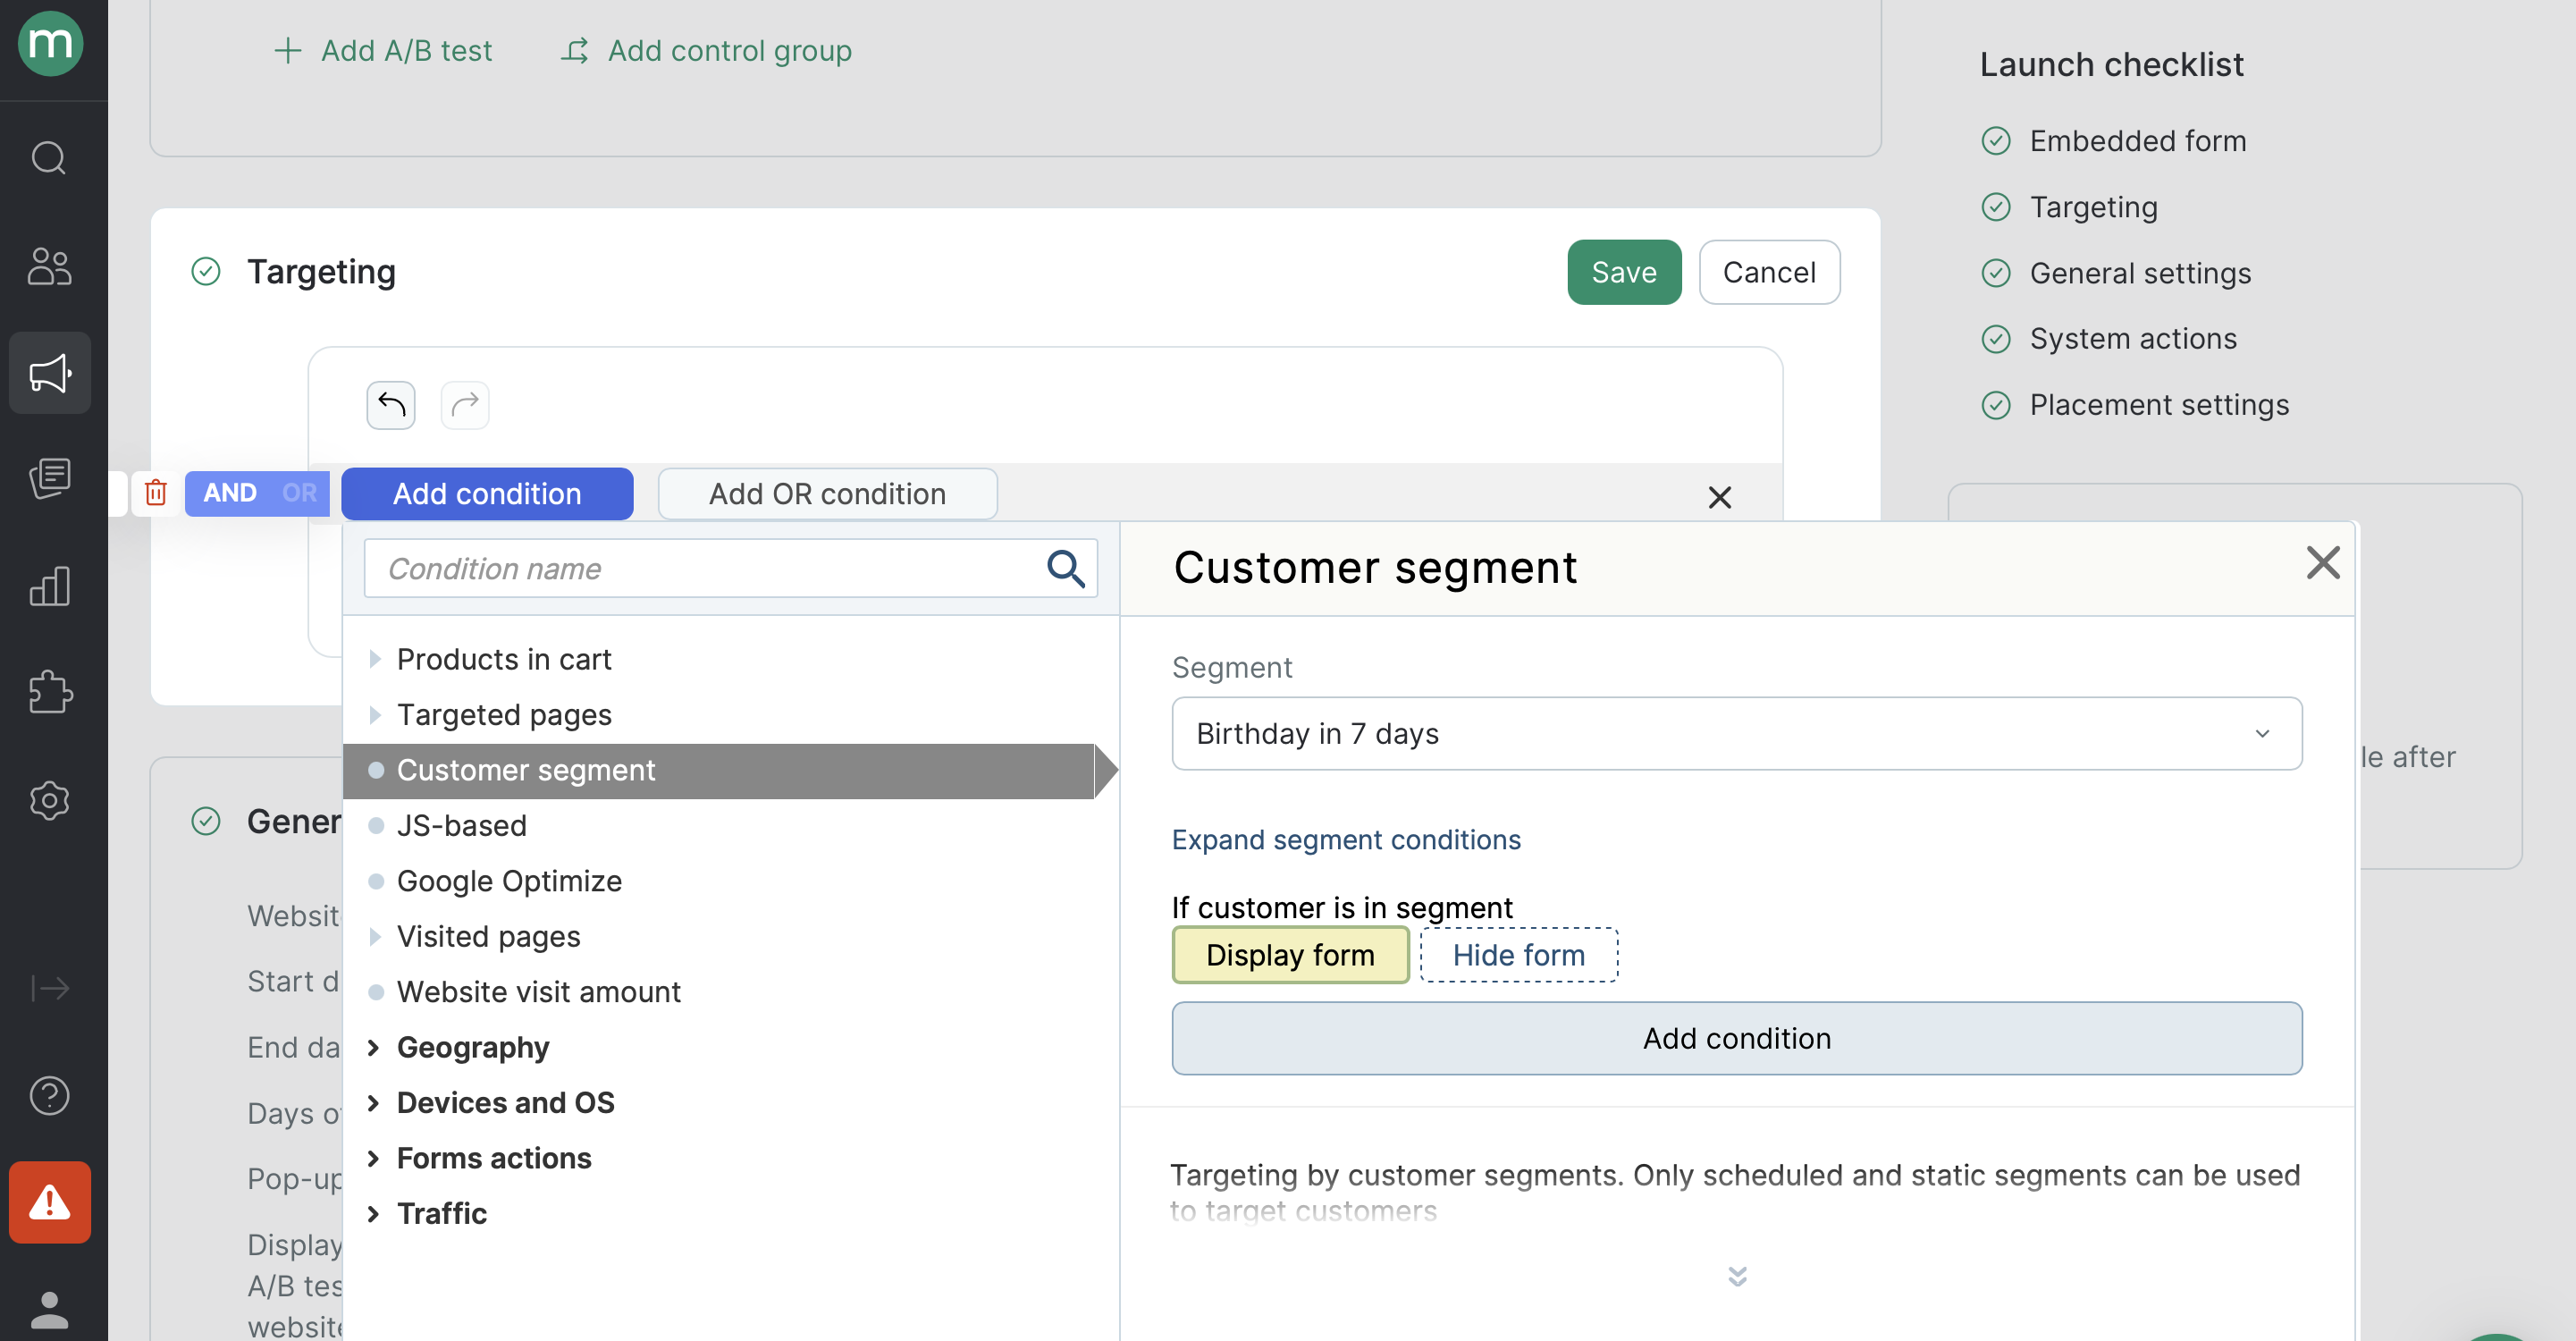
Specify who should see the form and under what conditions. You can limit the audience by segment, traffic source, and more.
For example, show the form only to segment of customers whose birthday is in 7 days:
We recommend using this setting only if the first screen includes a required privacy policy, allowing the user to explicitly consent to data sharing and receiving communications.
## Targeting
Specify who should see the form and under what conditions. You can limit the audience by segment, traffic source, and more.
For example, show the form only to segment of customers whose birthday is in 7 days:
 Learn more about targeting in this article.
## General Settings
## What happens after form was filled
Learn more about targeting in this article.
## General Settings
## What happens after form was filled
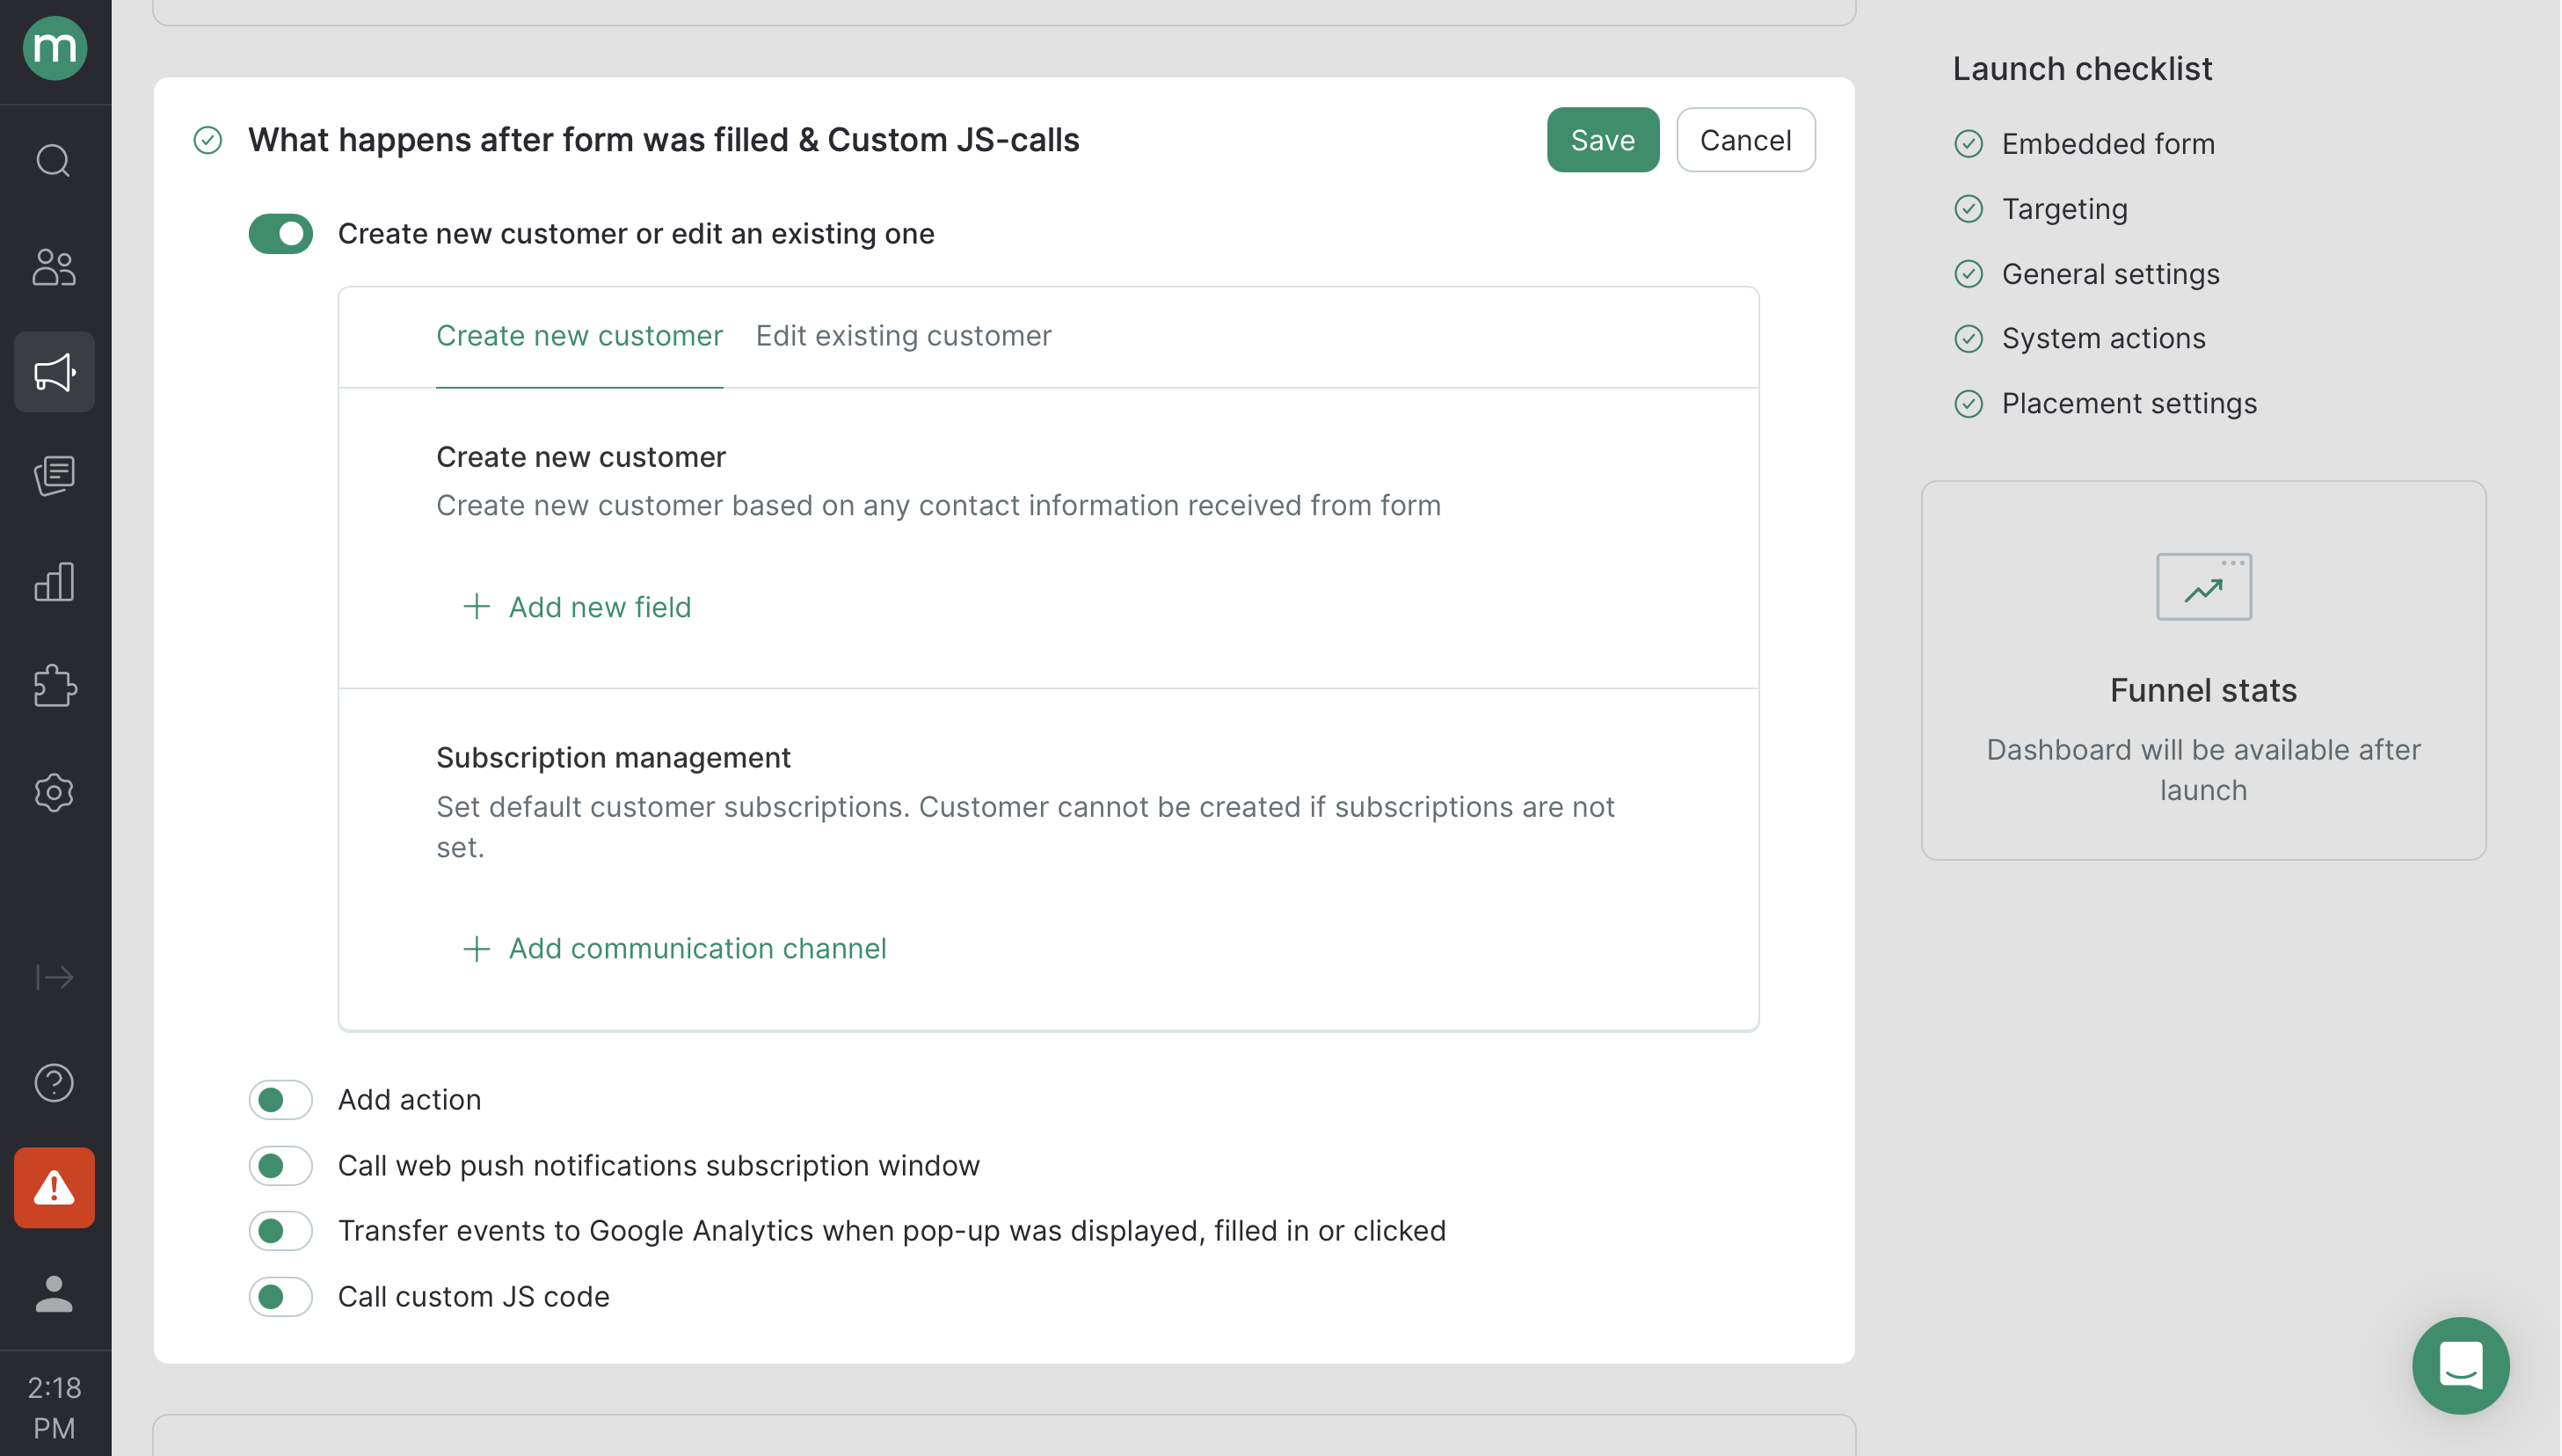 This section defines what should be done with the data collected in the form: add it to the database, send it to analytics, or trigger a custom method. The available actions depend on the selected template.
Learn more in this article.
## How to Add a Form to Your Website
**Placement Settings**:
* Embed content block into page selector:
* Embed form placement: before/after element, at the start/at the end of the block, replace content of the block, replace block
* Selector
This section defines what should be done with the data collected in the form: add it to the database, send it to analytics, or trigger a custom method. The available actions depend on the selected template.
Learn more in this article.
## How to Add a Form to Your Website
**Placement Settings**:
* Embed content block into page selector:
* Embed form placement: before/after element, at the start/at the end of the block, replace content of the block, replace block
* Selector
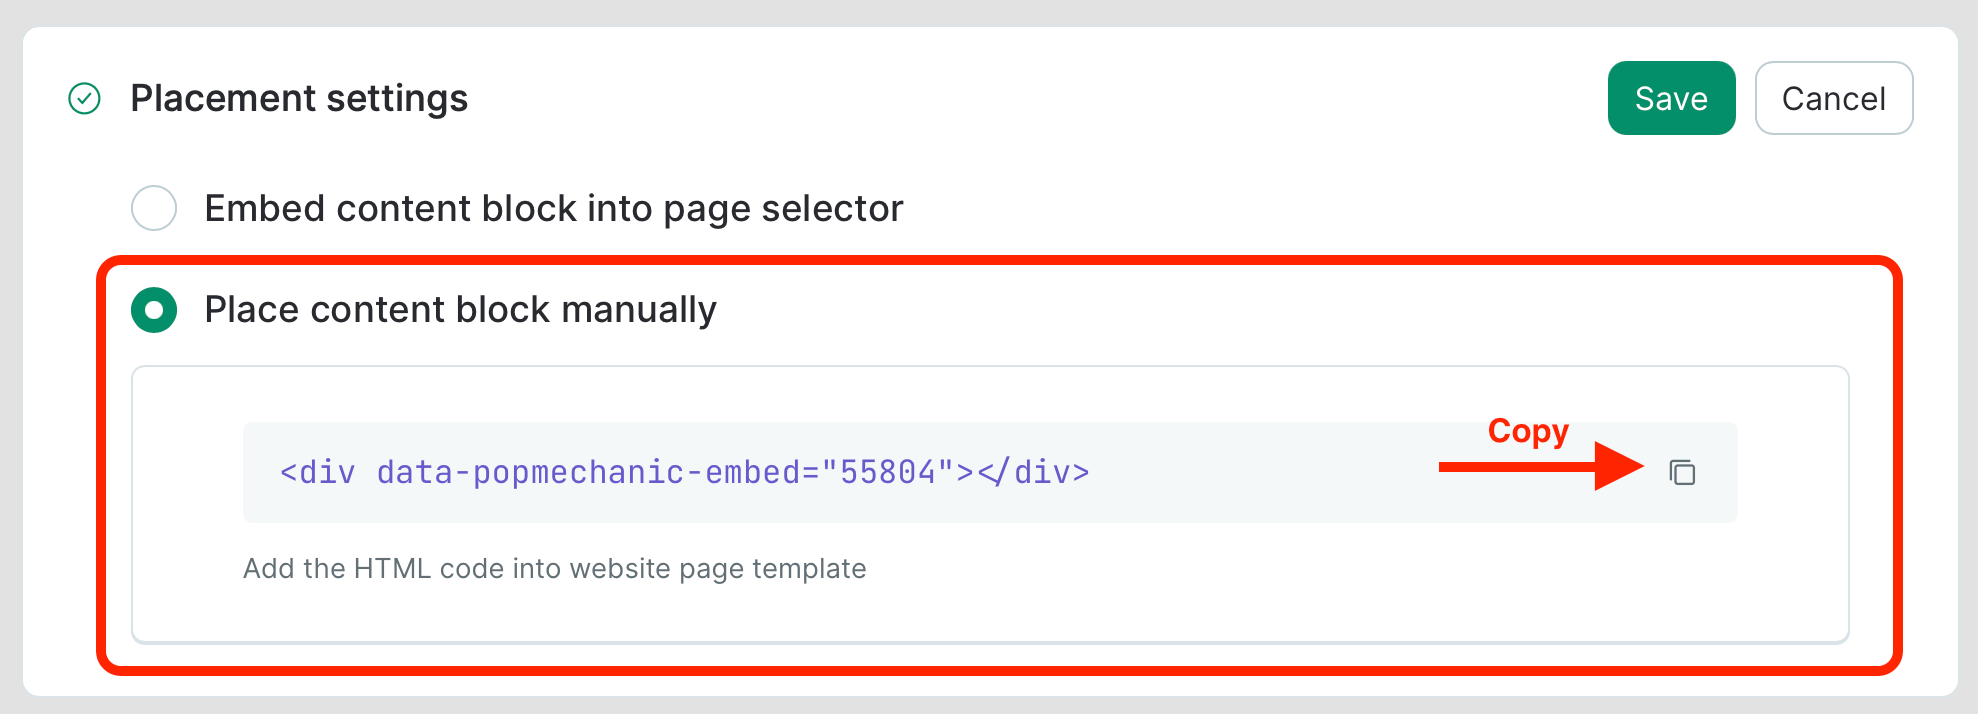
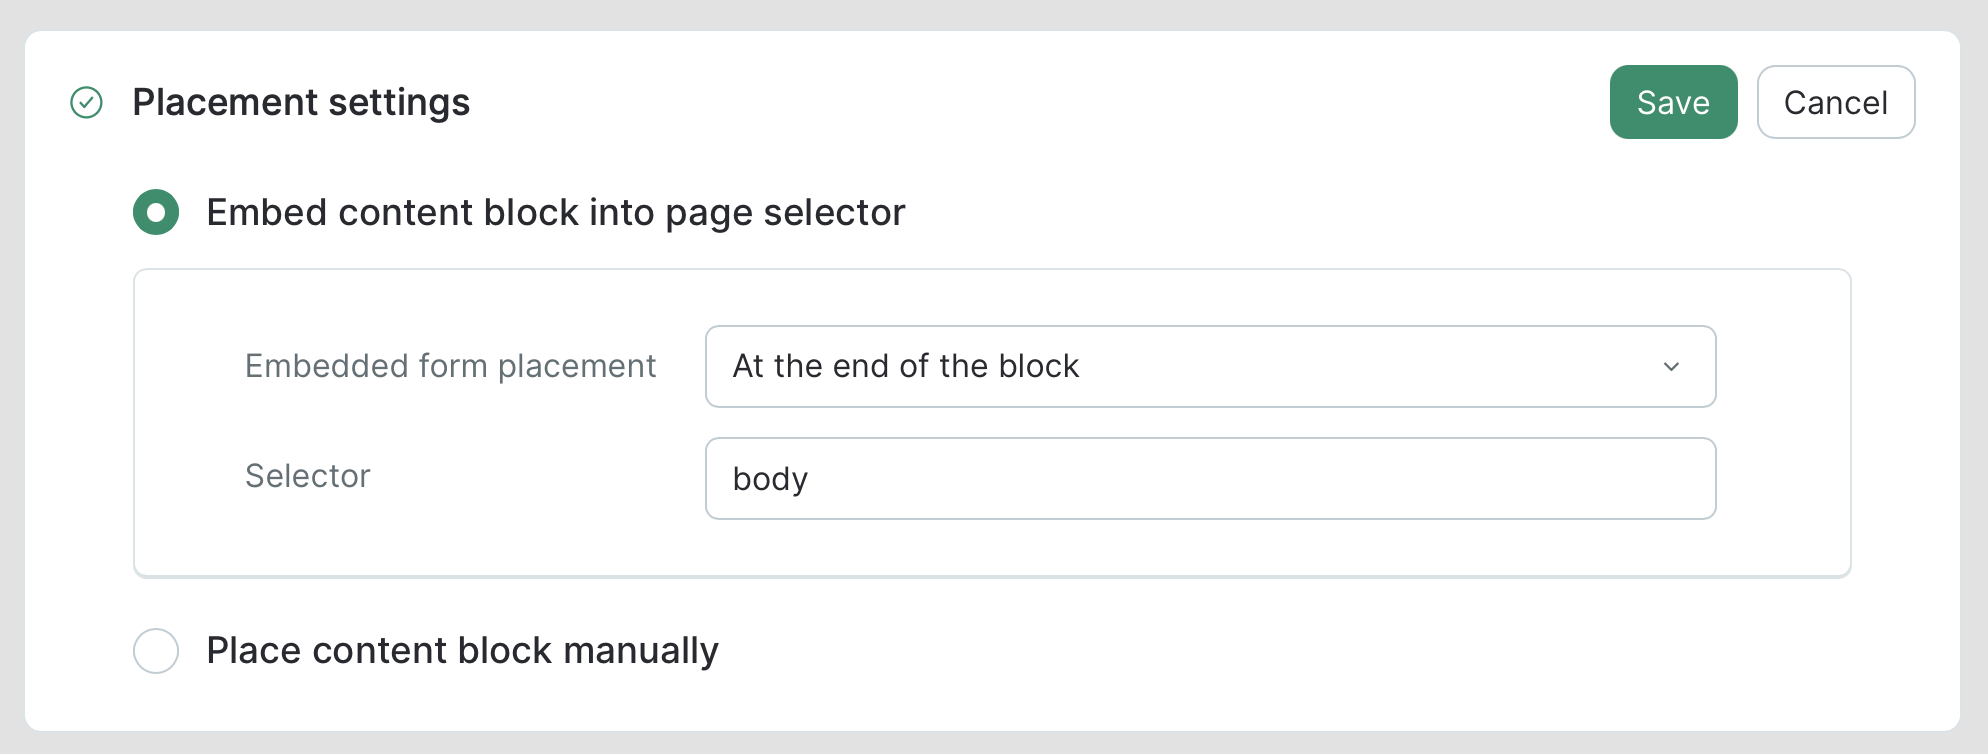 * Place content block manually Copy the code and paste it into the appropriate location in your website template.
 **How to Choose a Selector** A **CSS selector** is the element to which specific CSS properties will be applied.
1. Install the **[Selector Gadget](https://chromewebstore.google.com/detail/selectorgadget/mhjhnkcfbdhnjickkkdbjoemdmbfginb)** extension for Google Chrome. It significantly simplifies finding the correct selector.
2. Go to the website where you want to place the form and choose the location on the page where it should appear.
3. Activate Selector Gadget, hover your cursor over the desired area, and copy the selector.Common selector types:
* **`.someClass`** — targets any element with the class `someClass`
* **`#someId`** — targets the element with the `someId` ID.You can find a detailed guide on selecting the right selector in the article. If you need to use different selectors for desktop and mobile for the same form, use the following in the selector field:
```
`.popmechanic-desktop [selector_for_desktop], .popmechanic-mobile [selector_for_mobile]`
```
where you need to replace `[selector_for_desktop]` and `[selector_for_mobile]` with the corresponding selectors.
# Check how the form appears on the website.
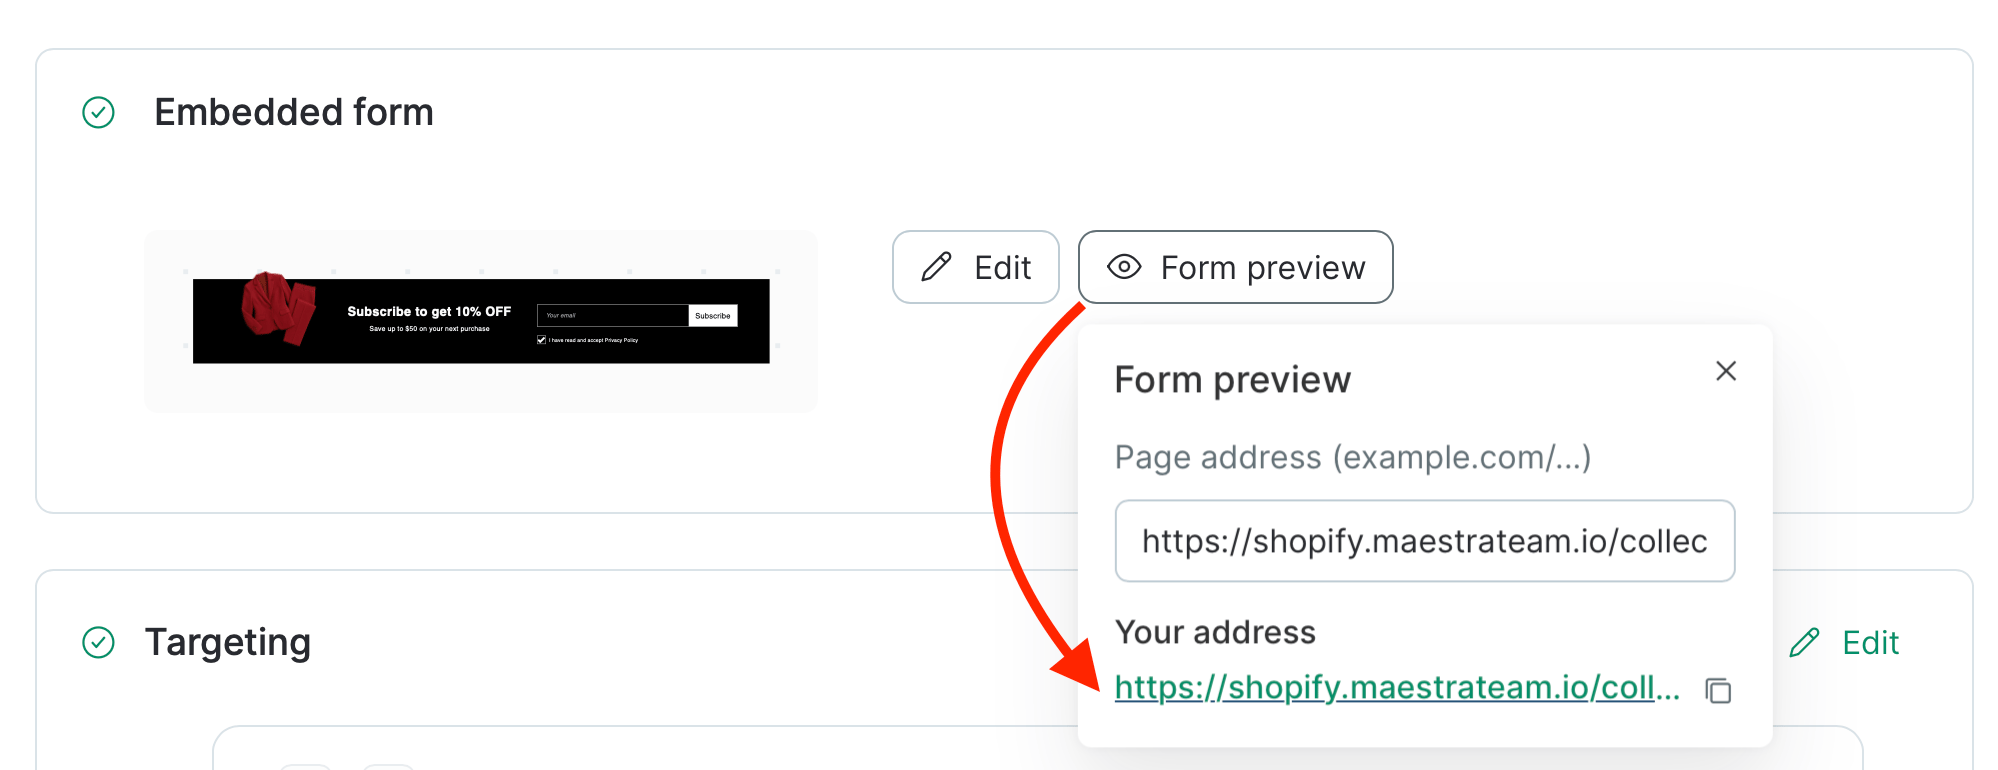
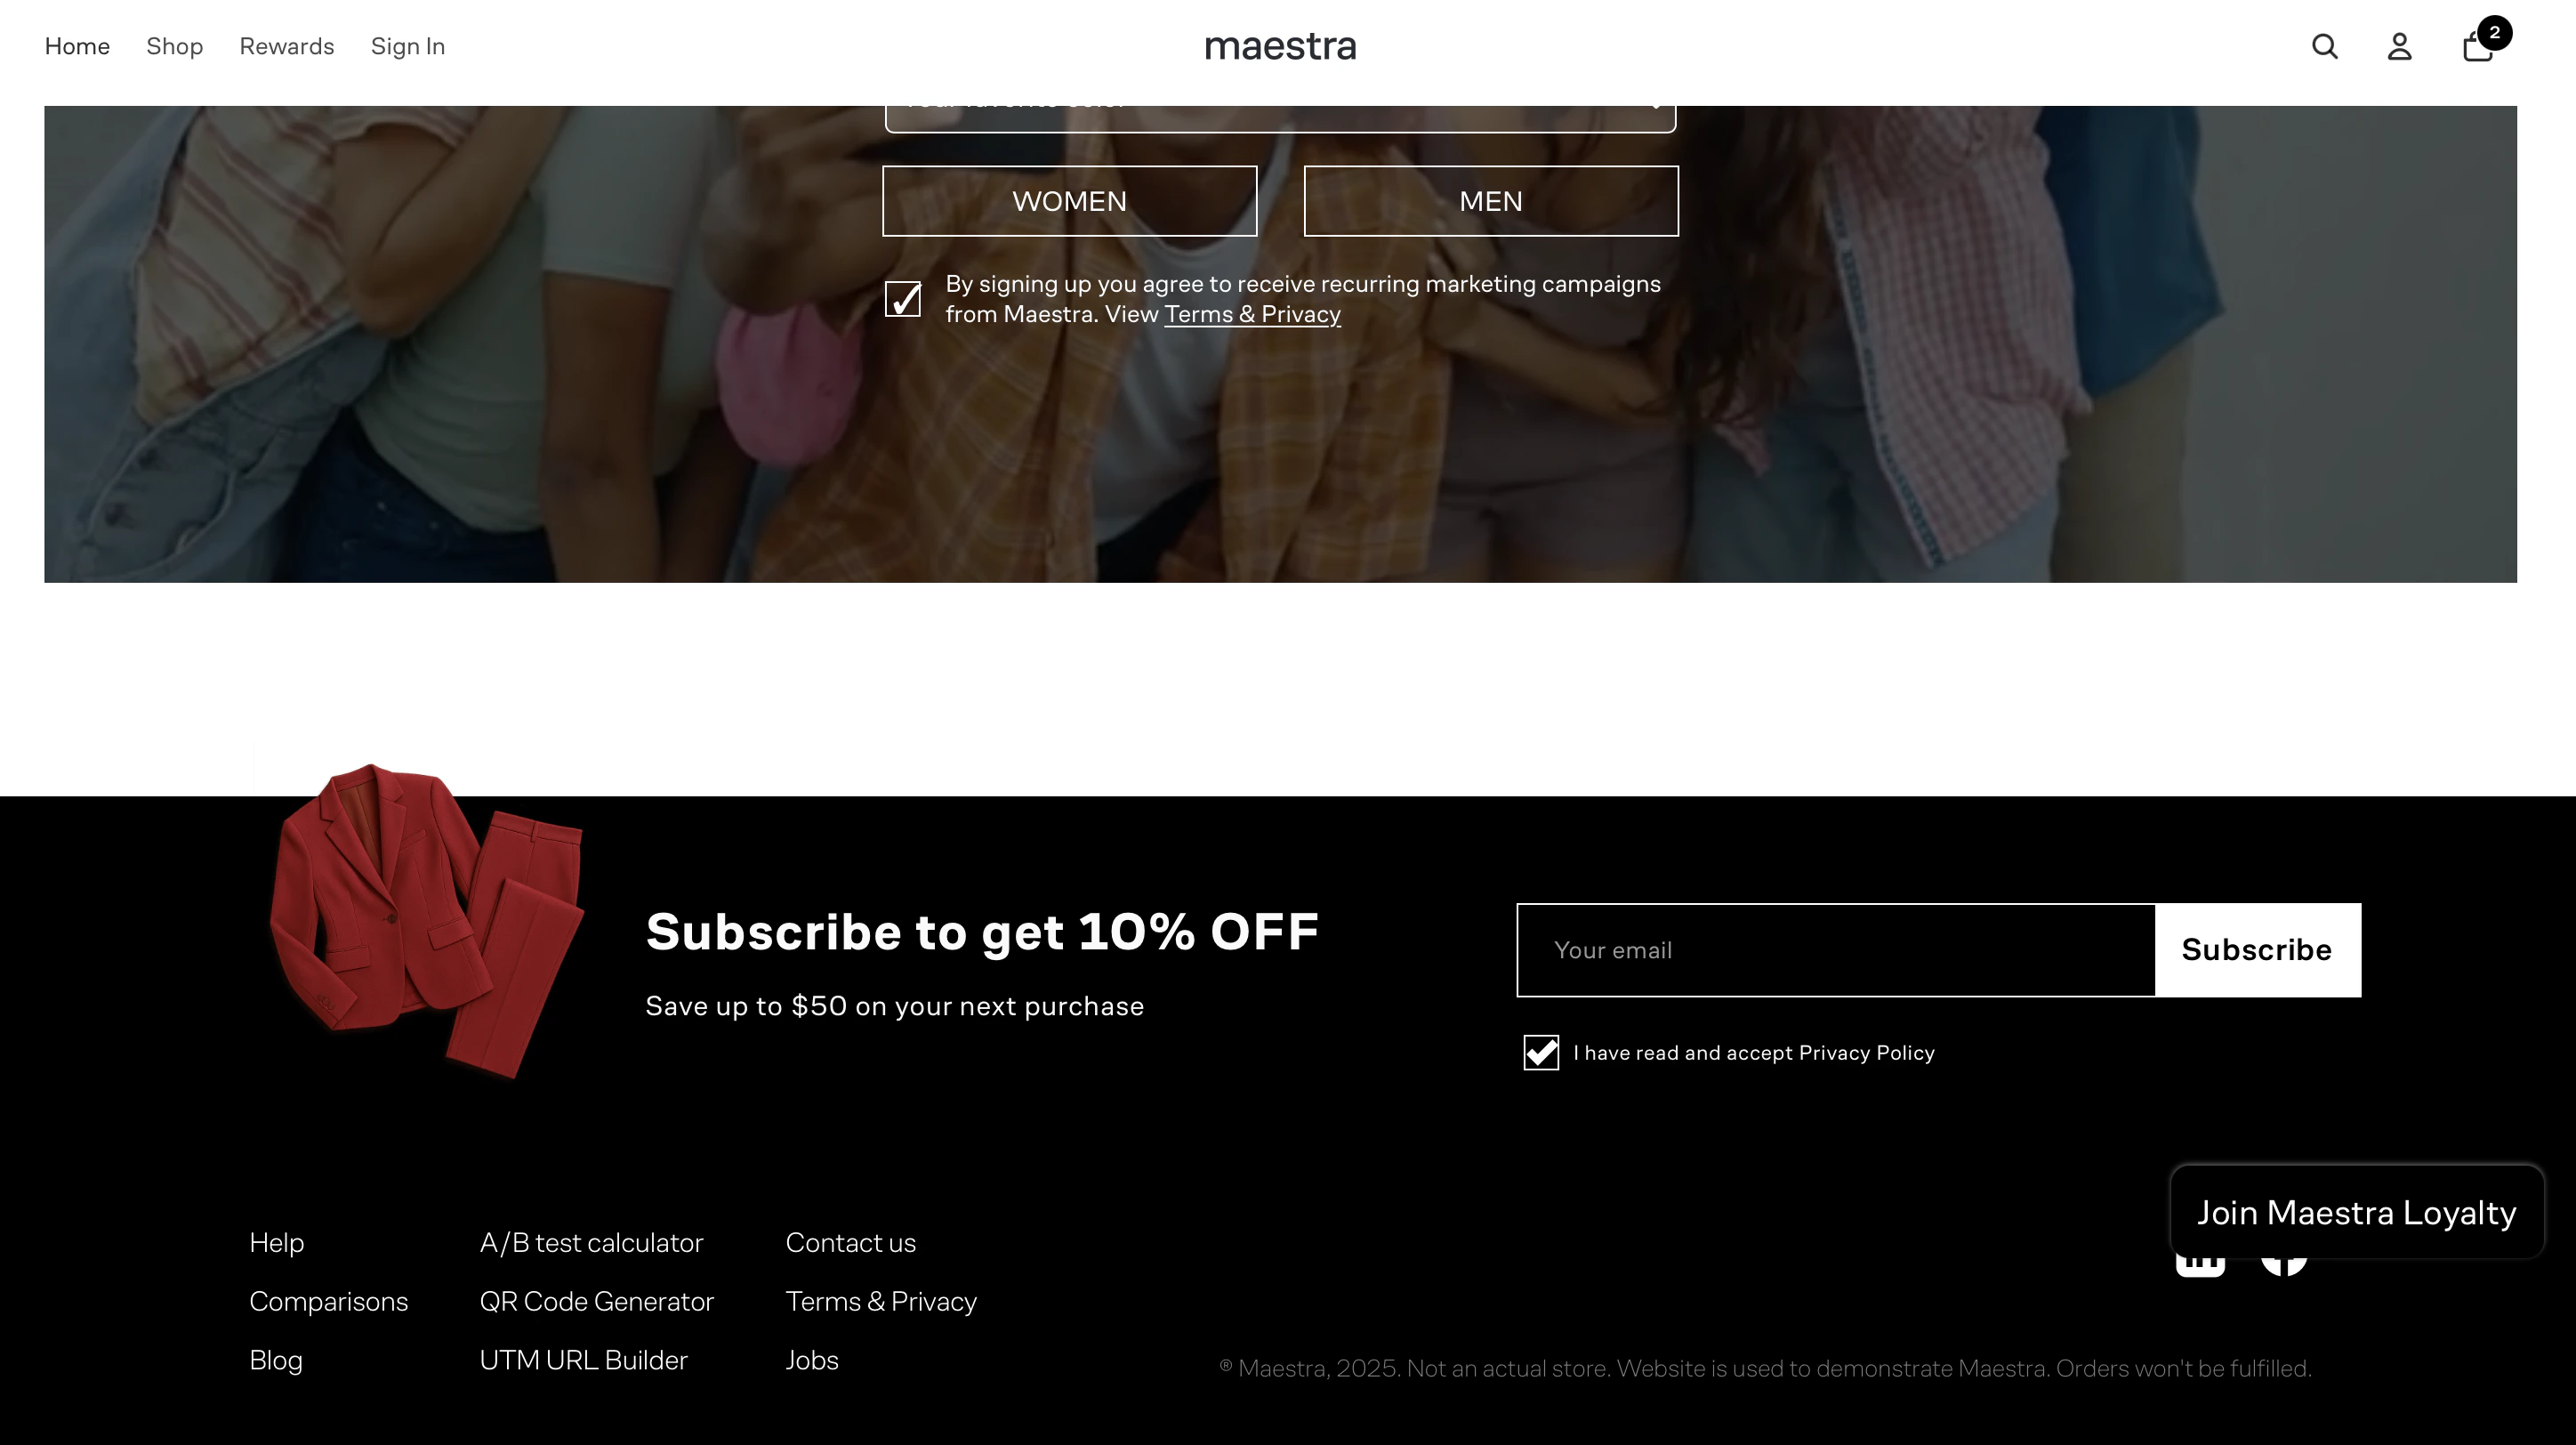
To preview the form on the website, make sure the Placement section is configured. This means either embedding a div block on the site (Place content block manually) or selecting display by selector and specifying the required selector (Embed content block into page selector).
Click “Form Preview” and follow the link under “Your address”:
**How to Choose a Selector** A **CSS selector** is the element to which specific CSS properties will be applied.
1. Install the **[Selector Gadget](https://chromewebstore.google.com/detail/selectorgadget/mhjhnkcfbdhnjickkkdbjoemdmbfginb)** extension for Google Chrome. It significantly simplifies finding the correct selector.
2. Go to the website where you want to place the form and choose the location on the page where it should appear.
3. Activate Selector Gadget, hover your cursor over the desired area, and copy the selector.Common selector types:
* **`.someClass`** — targets any element with the class `someClass`
* **`#someId`** — targets the element with the `someId` ID.You can find a detailed guide on selecting the right selector in the article. If you need to use different selectors for desktop and mobile for the same form, use the following in the selector field:
```
`.popmechanic-desktop [selector_for_desktop], .popmechanic-mobile [selector_for_mobile]`
```
where you need to replace `[selector_for_desktop]` and `[selector_for_mobile]` with the corresponding selectors.
# Check how the form appears on the website.
To preview the form on the website, make sure the Placement section is configured. This means either embedding a div block on the site (Place content block manually) or selecting display by selector and specifying the required selector (Embed content block into page selector).
Click “Form Preview” and follow the link under “Your address”:
 Check the embedded form on your site
 # Launch
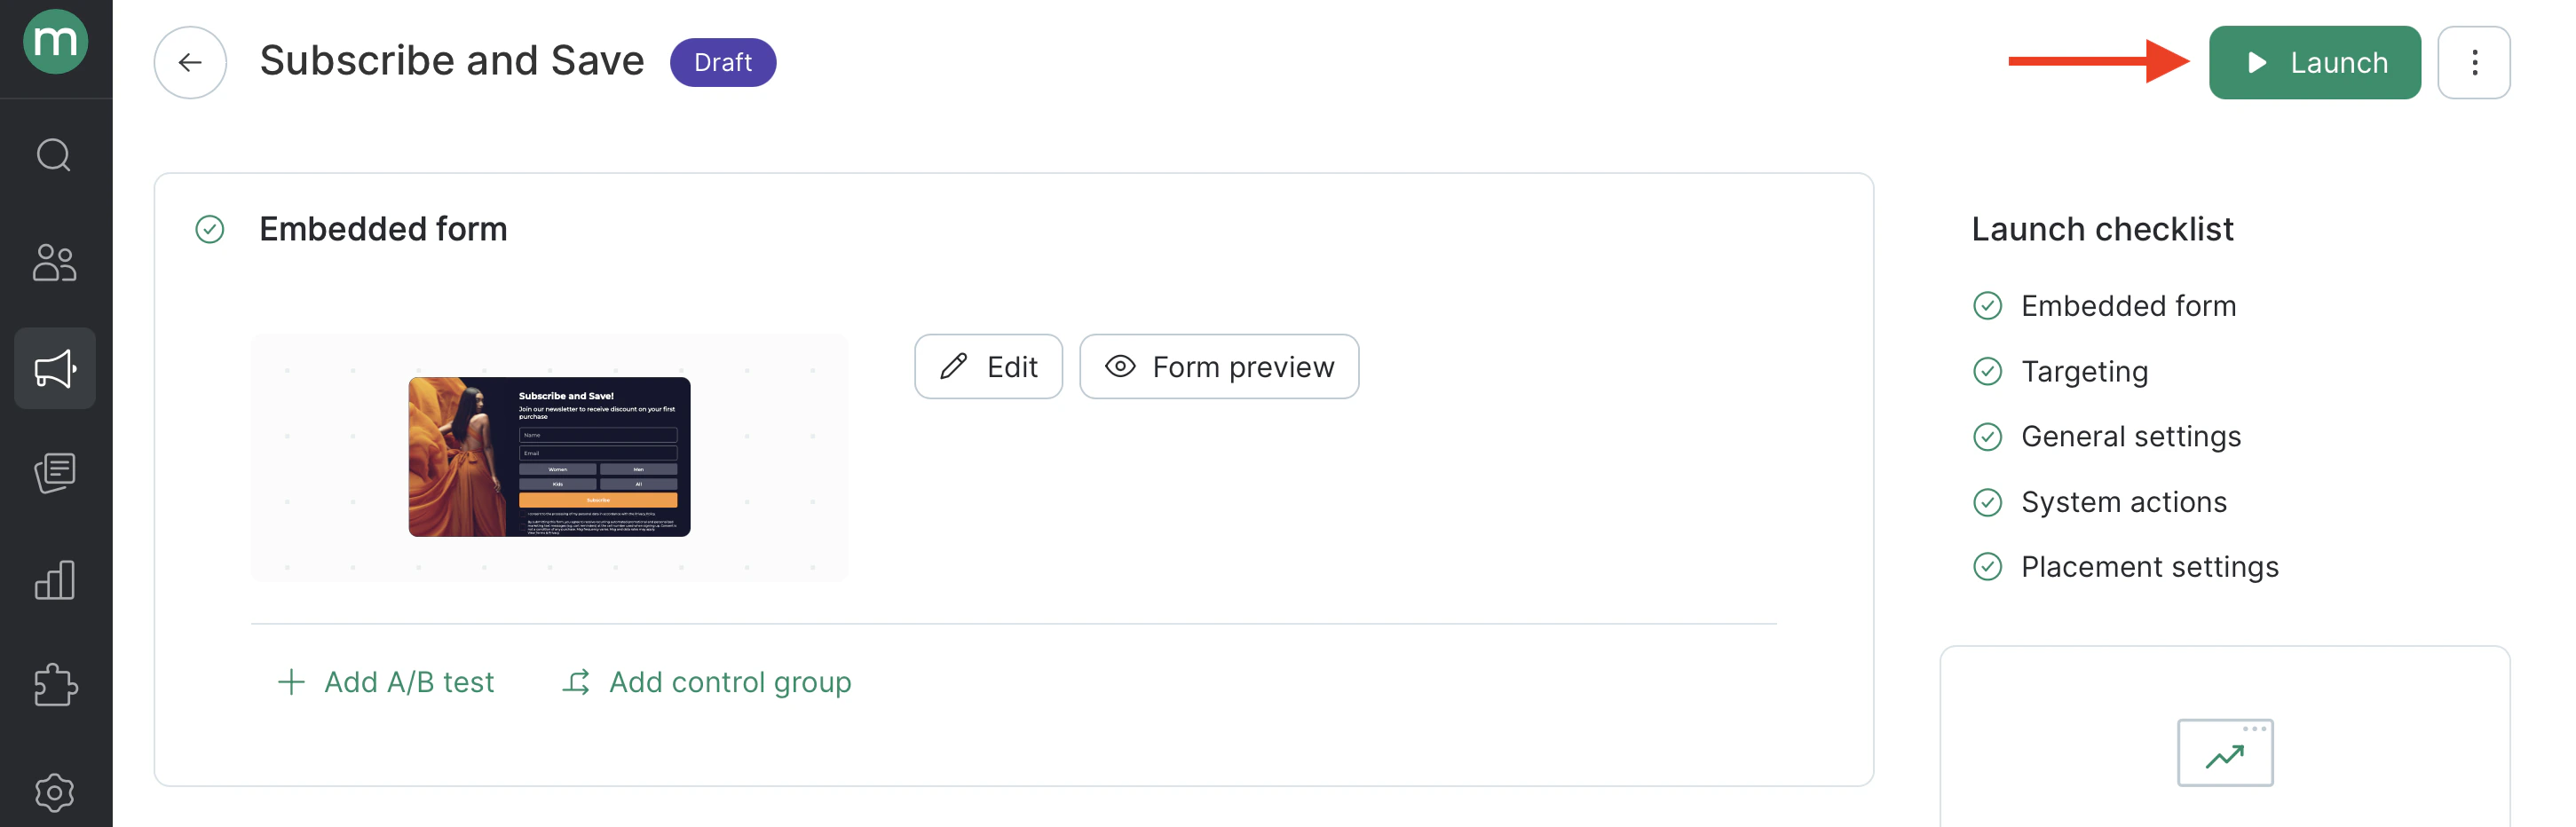
If the form meets the requirements, launch it.
# Launch
If the form meets the requirements, launch it.