How to add pop-up forms in Maestra
You can add a pop-up form using the UI.
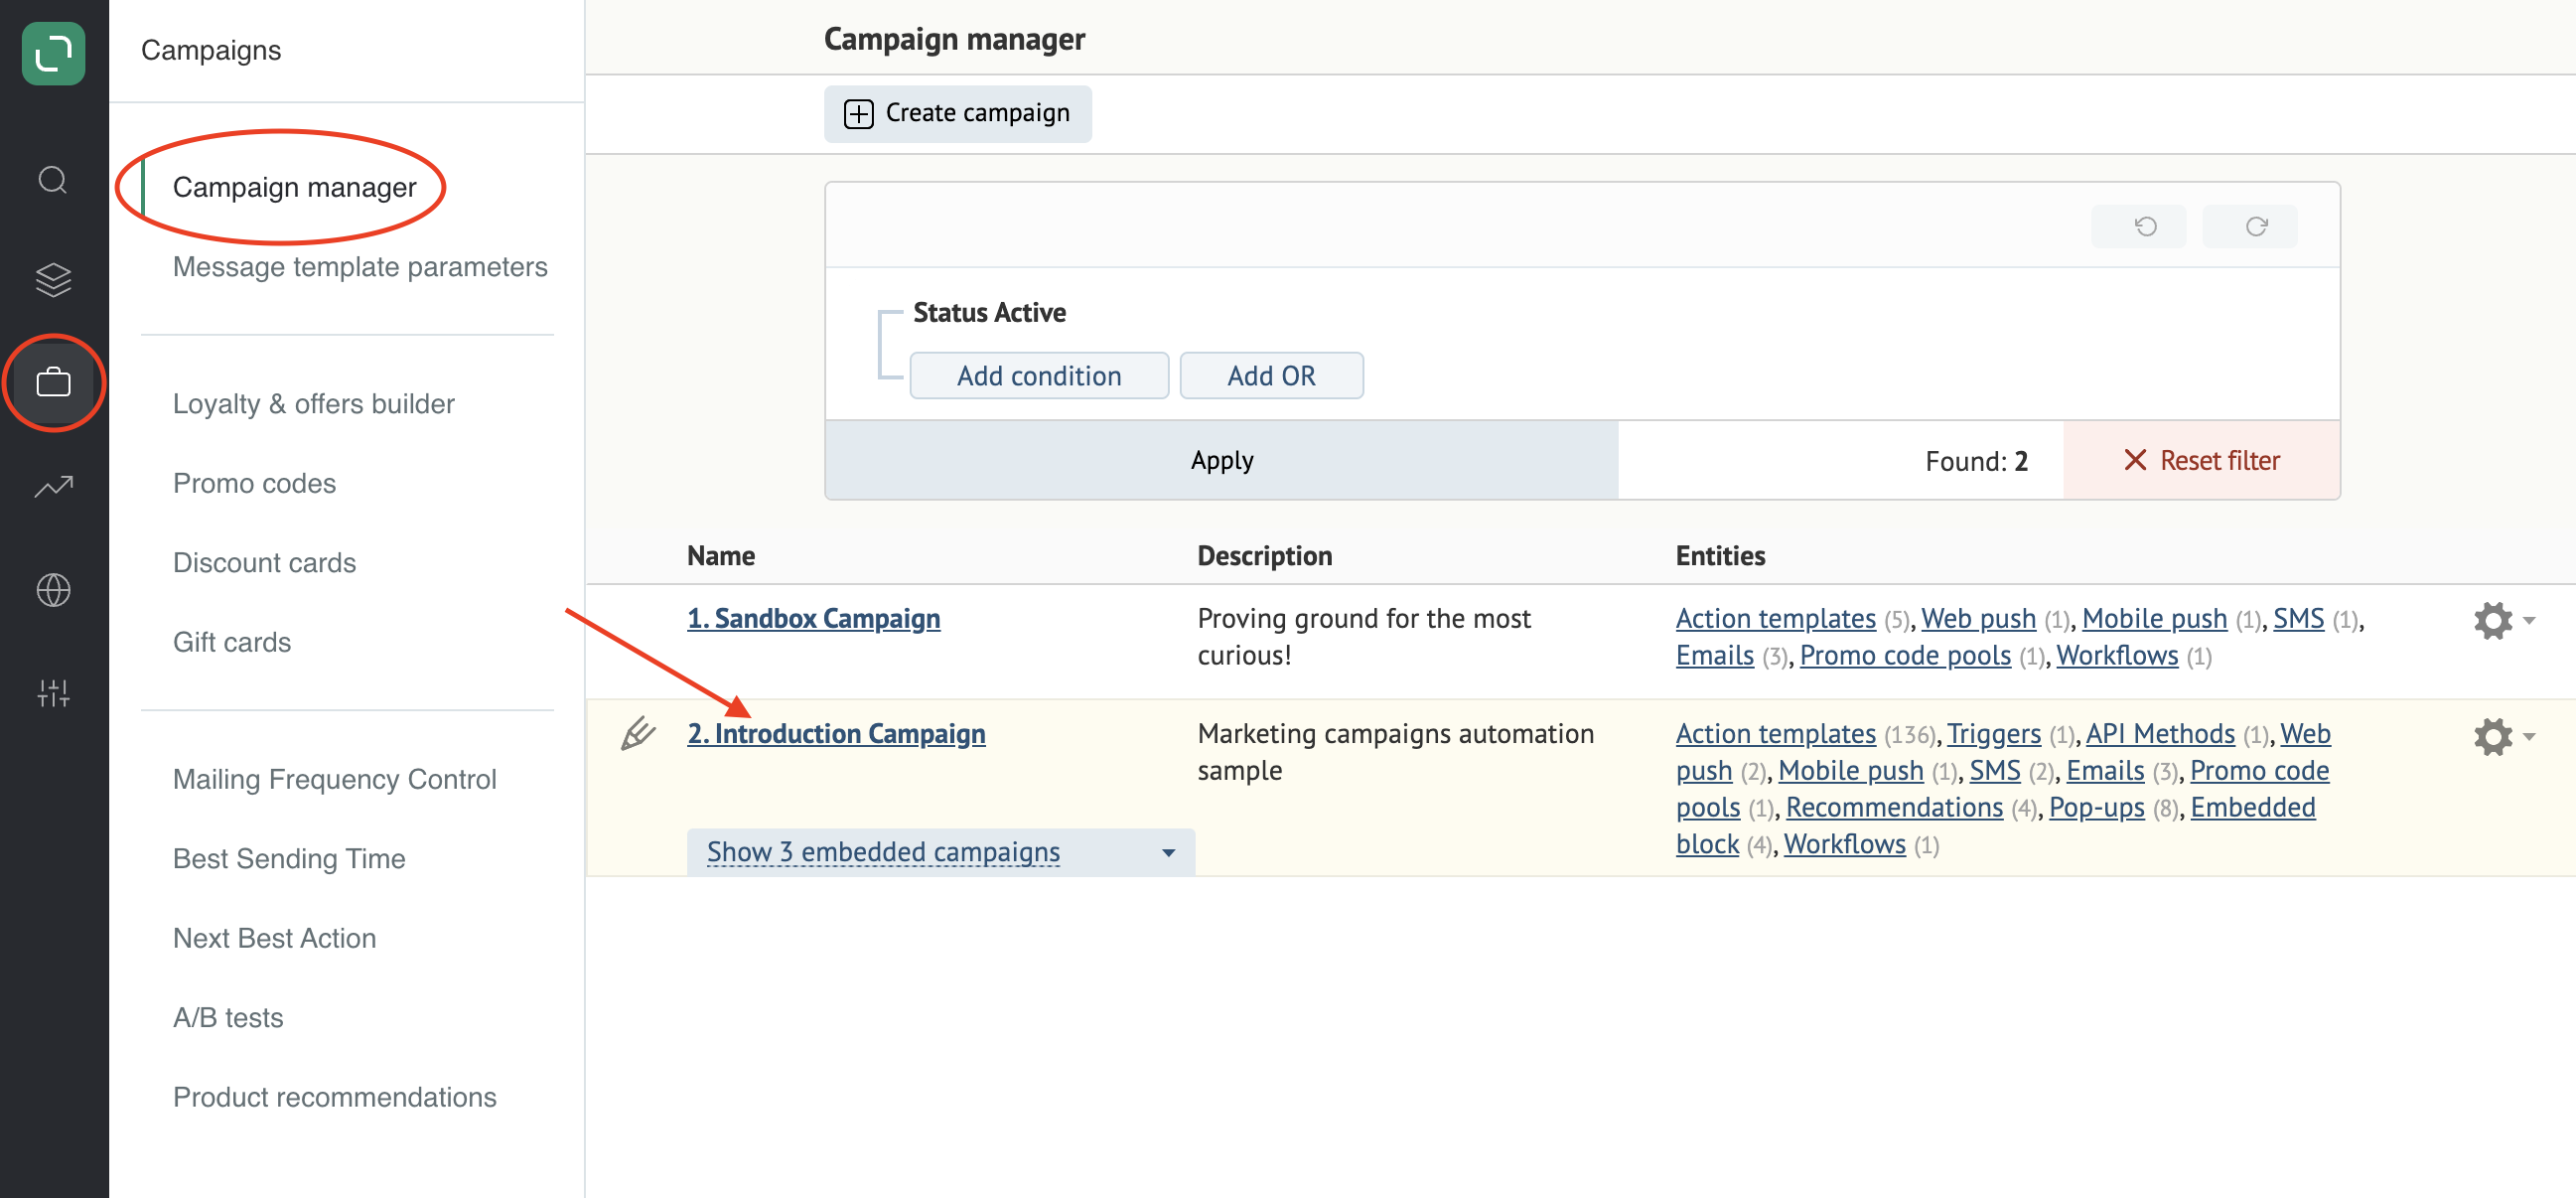
Go to Campaigns → Campaign manager and select a relevant campaign or create a new one for your pop-ups:
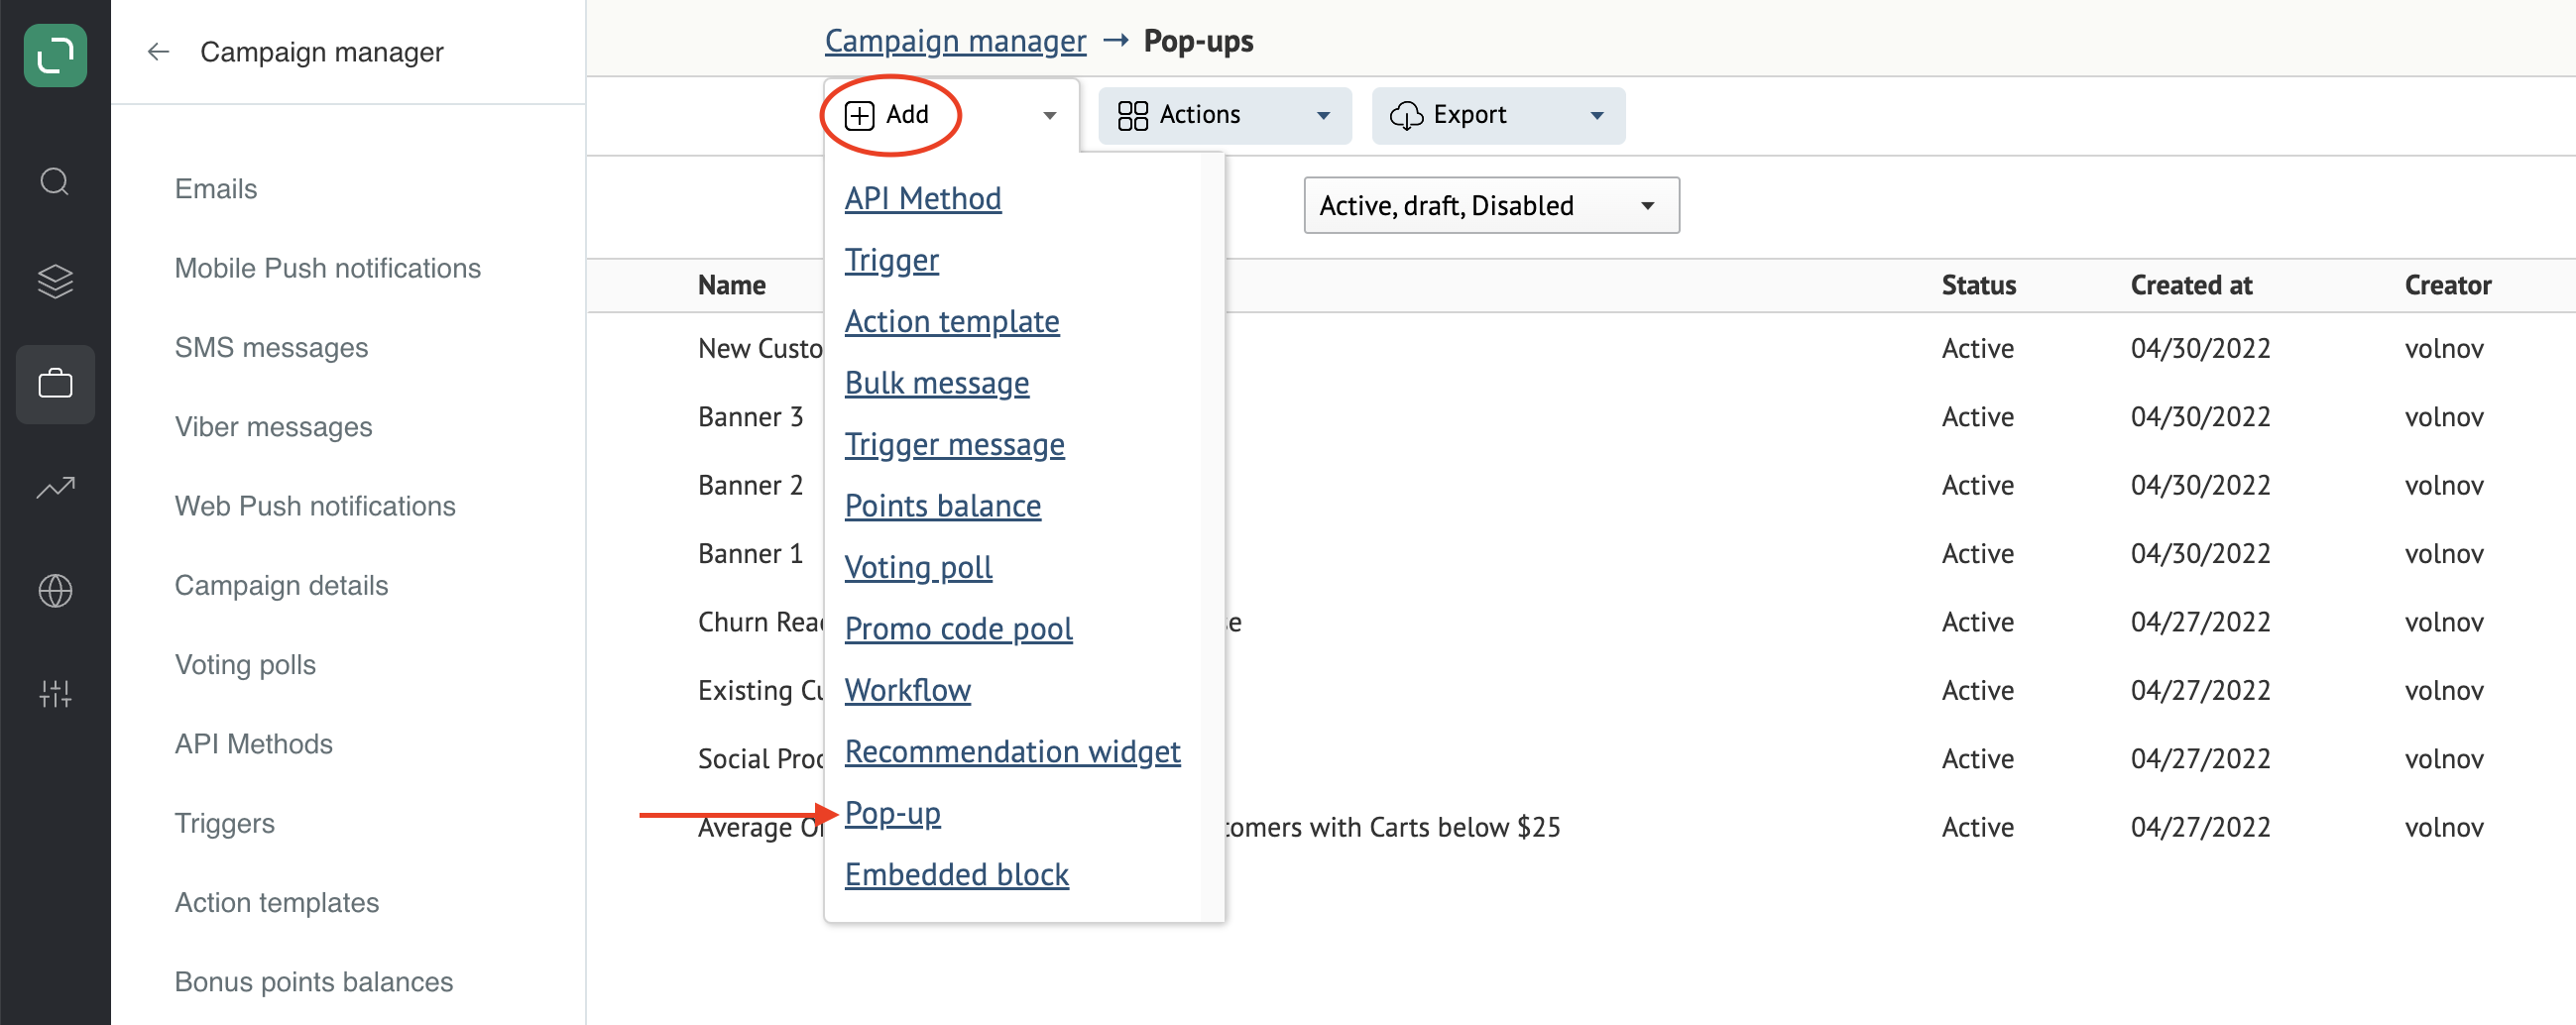
Click Add → Pop-up:
You need a full integration to be able to work with data from carts or pages visited. To do this, simply follow these guidelines: https://
Choose a template
Choose the template that works best for the purpose of your pop-up:
- Generate leads;
- Increase conversion & average order value;
- Notify visitors;
- Conduct a survey;
- Custom templates.
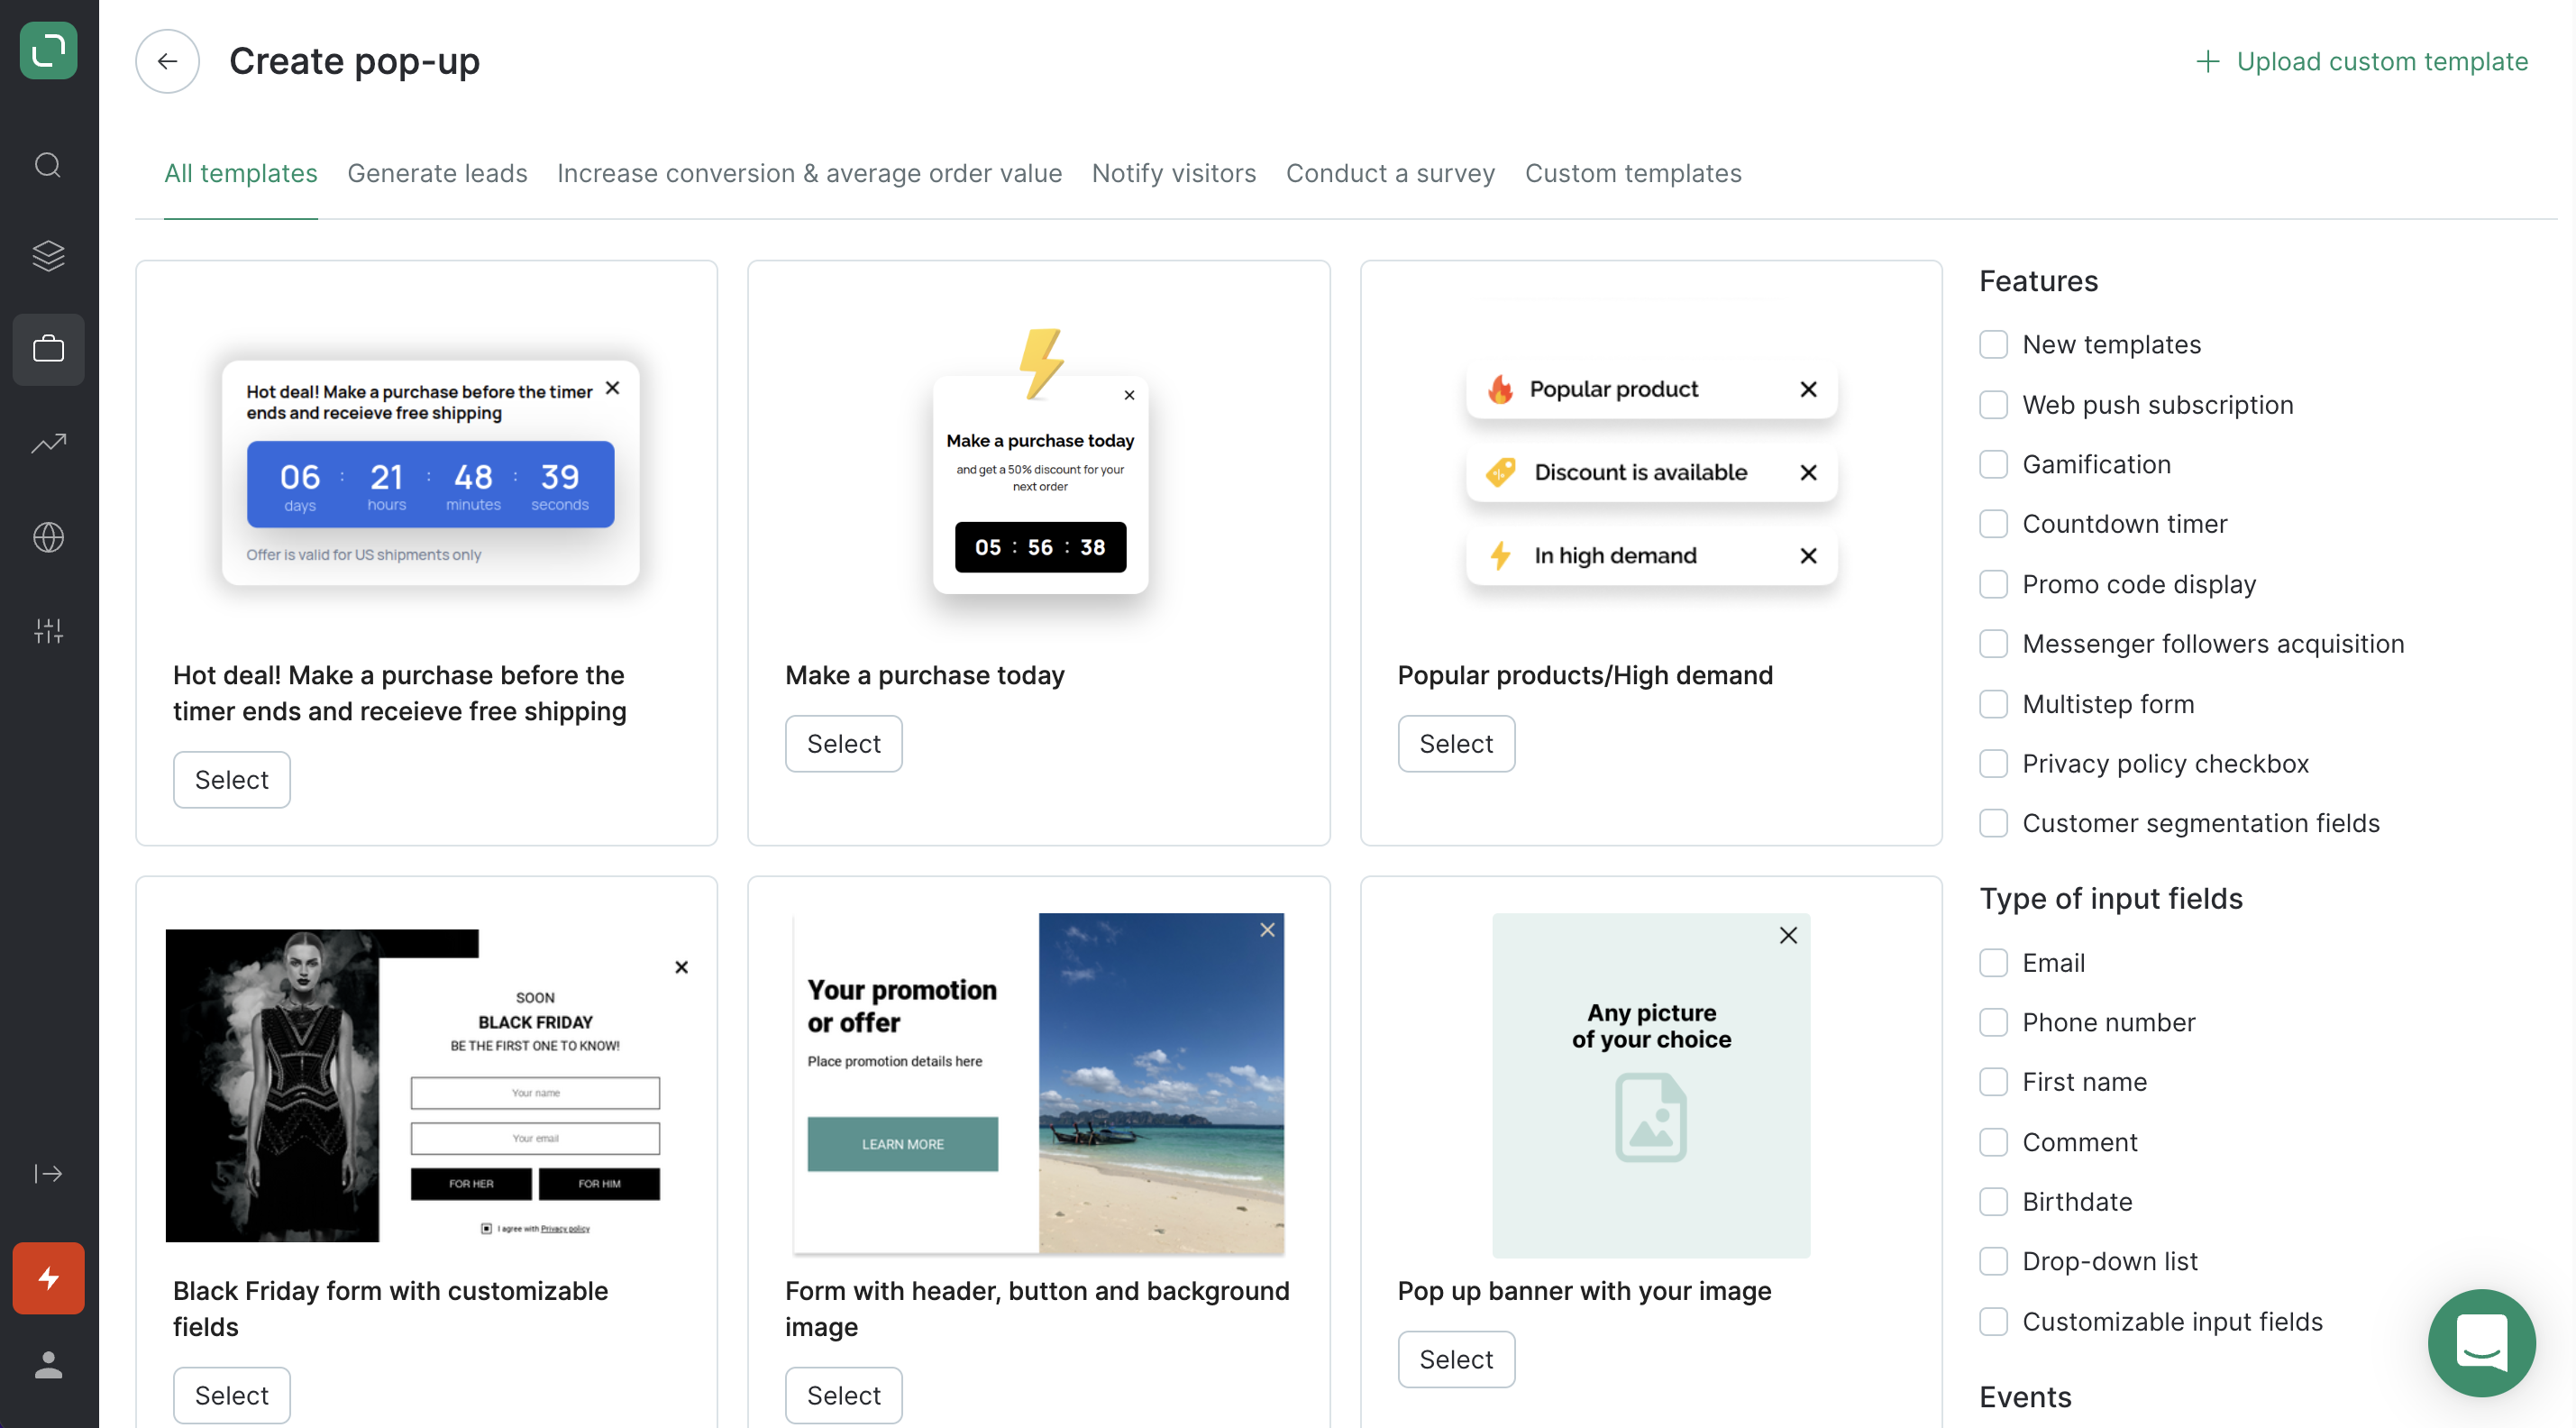
A marketer can customize a pop-up form template (text, position, or size) in Maestra. See more on this below.
You can find more details on the mechanics and their settings in relevant guidelines.
General settings
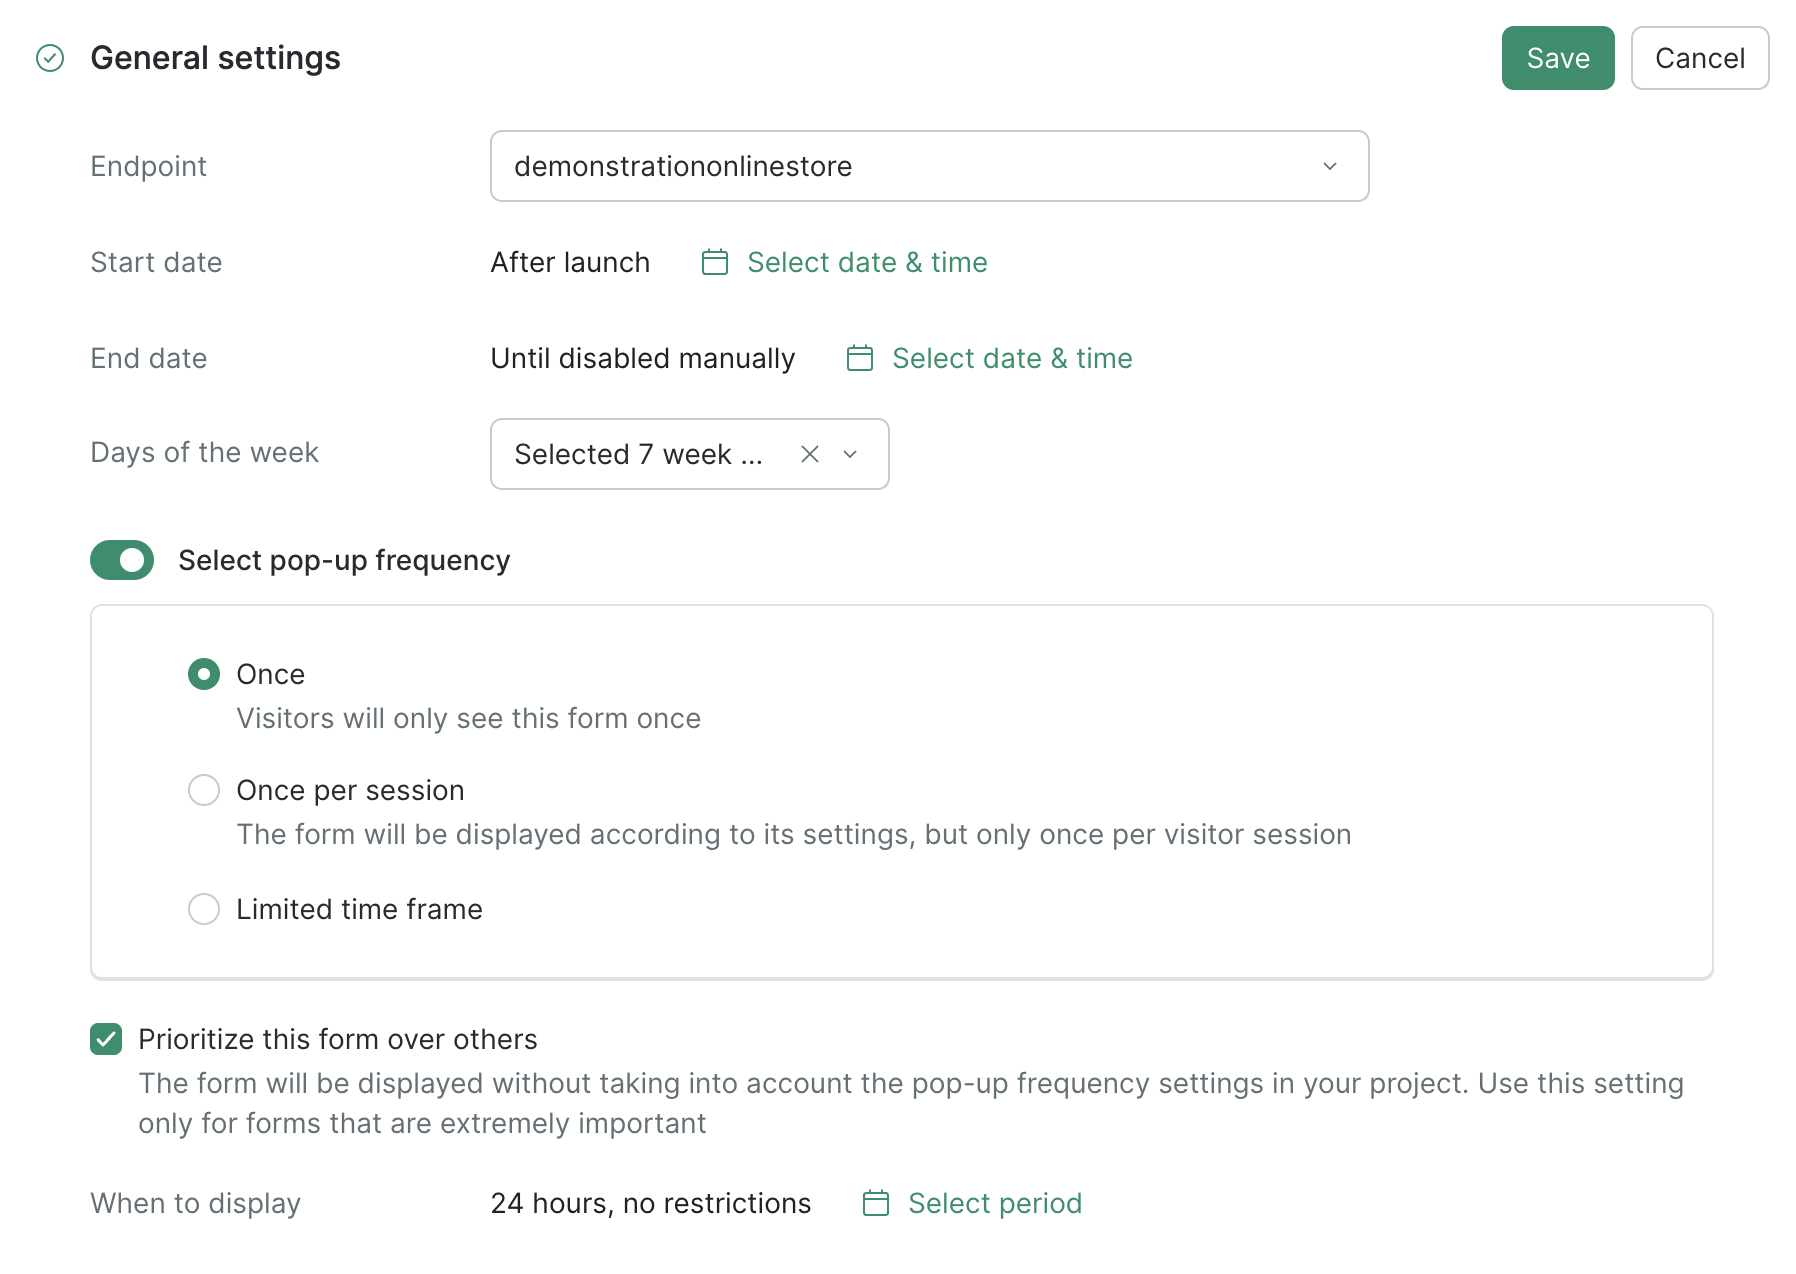
Go to General settings to select:
- Endpoint;
- Days of the week when to show the pop-up form;
- Pop-up frequency;
- Priority level of this form over others.
Here is an example of settings. This pop-up will be displayed each day of the week, but only once during a single user session on a website. This is also a high-priority pop-up form.
Display conditions
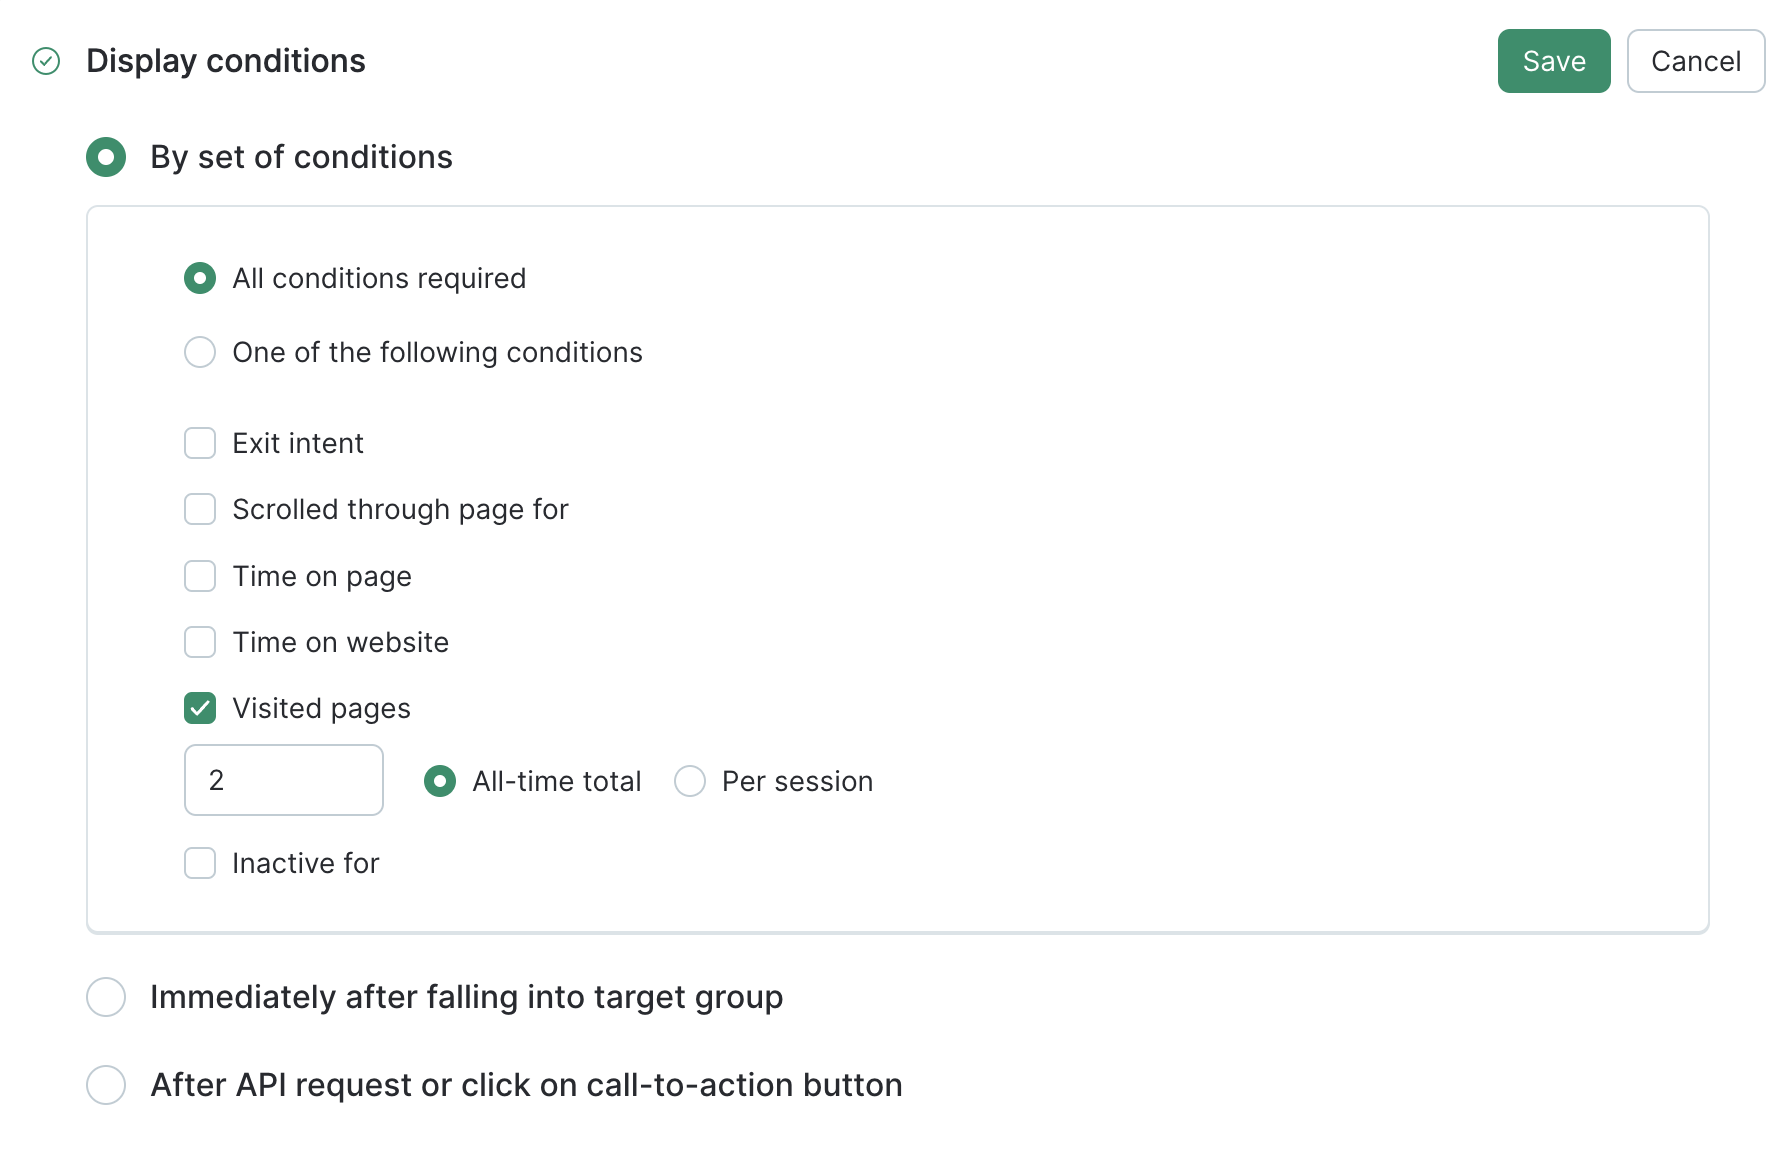
Select when you’d like to display the pop-up form:
- when a customer intends to exit a web page;
- when a customer spent a certain time period on the web page;
- when a customer has visited a certain amount of pages;
- when a customer has committed a triggered action on the website.
Here are settings of a pop up that will be displayed to a customer when 2 web pages have been visited all-time total.
The web page views and website visits are counted from the moment the pop-up script is set up on the website. So if you set up the script a day ago, views will be counted starting from that day.
Targeting
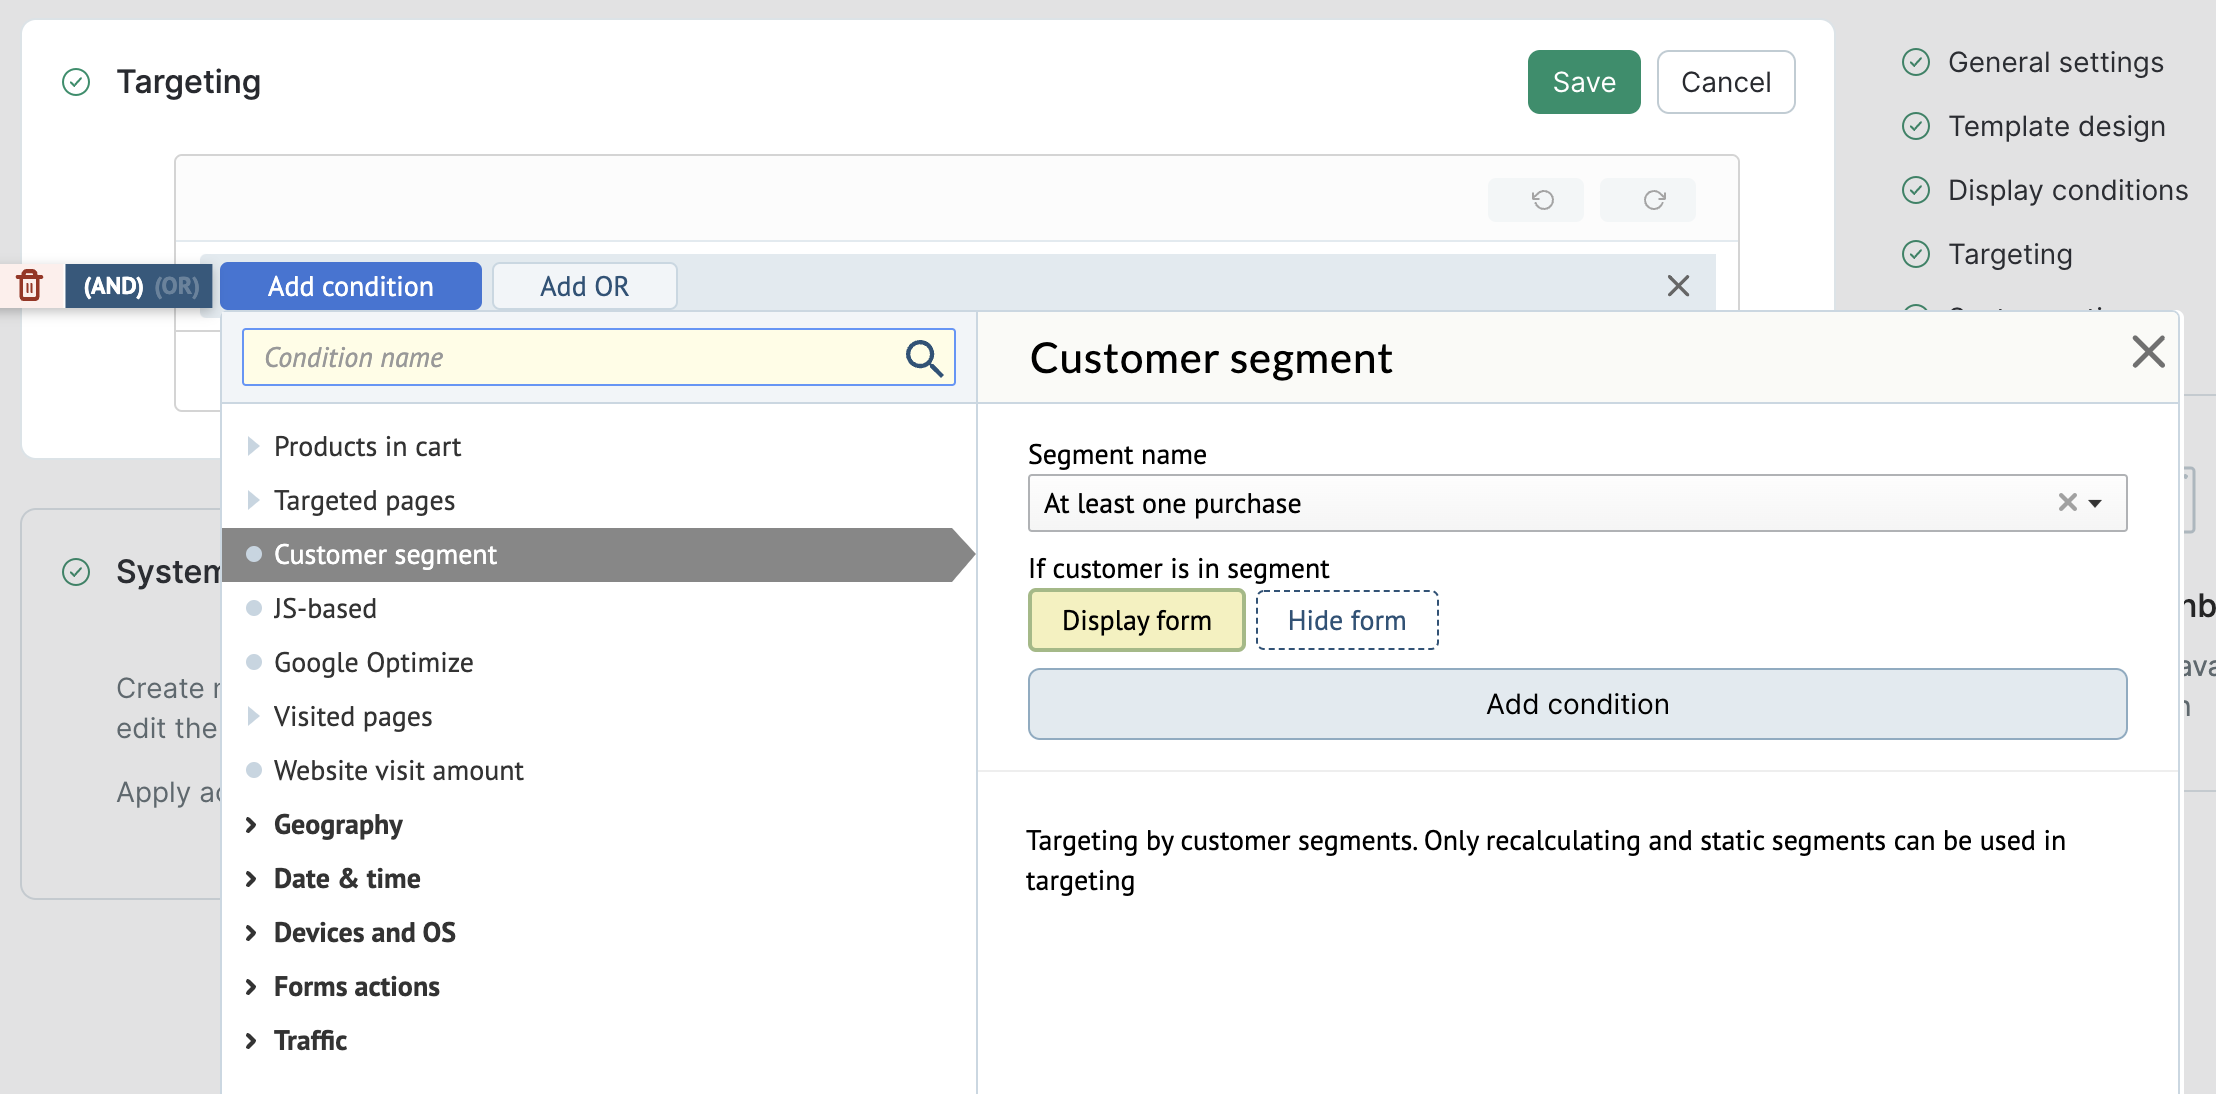
Filter the target audience of your pop-up and set the applicable conditions. You can set up a customer segment in Maestra in advance and decide whether the pop-up form will be displayed to these customers.
Here’s a sample filter for customers who have at least one purchase. You can set up any other customer segment according to your needs. For more info, please refer to this article.
What to do once the pop-up form has been filled in by the customer
There is no need to add any API methods when you add a pop-up through the Maestra interface.
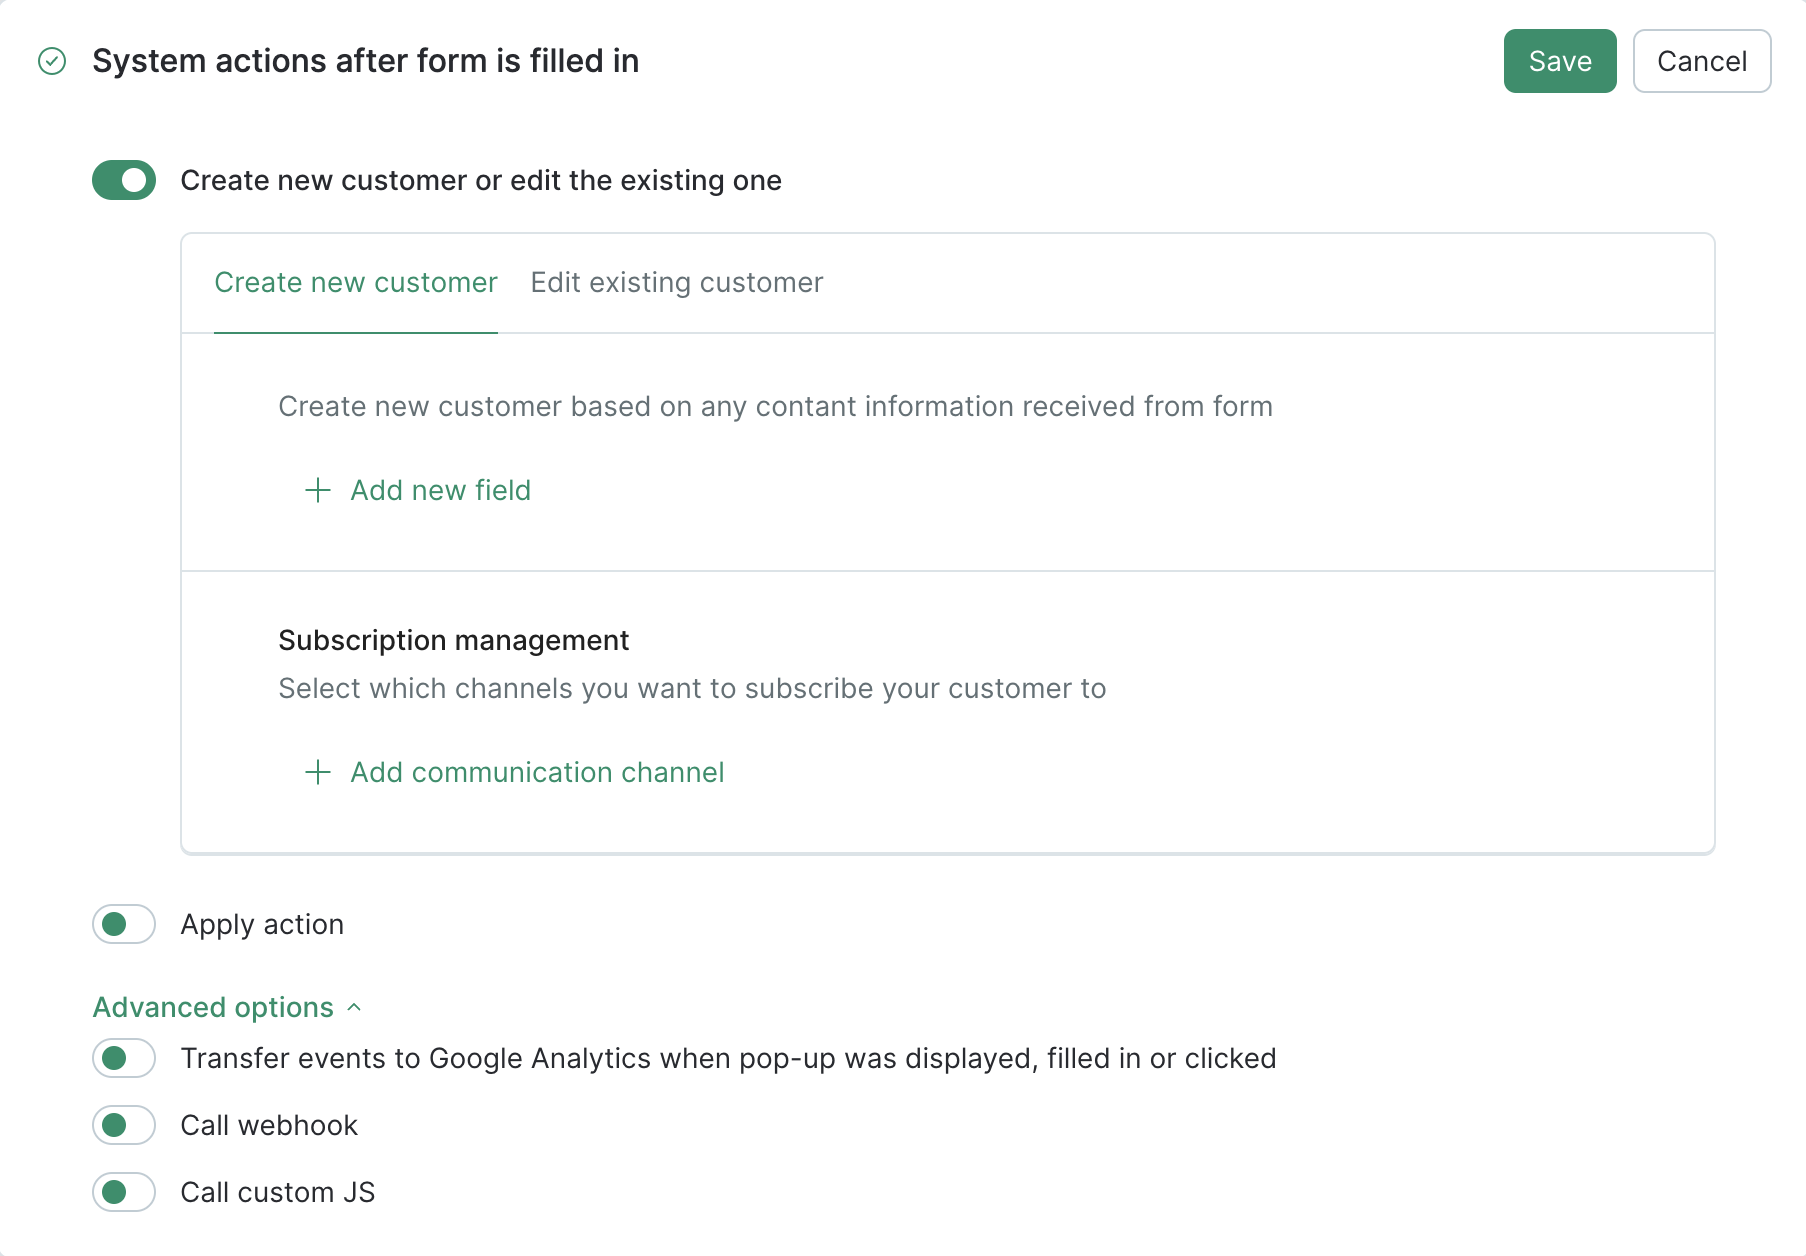
Create new customer
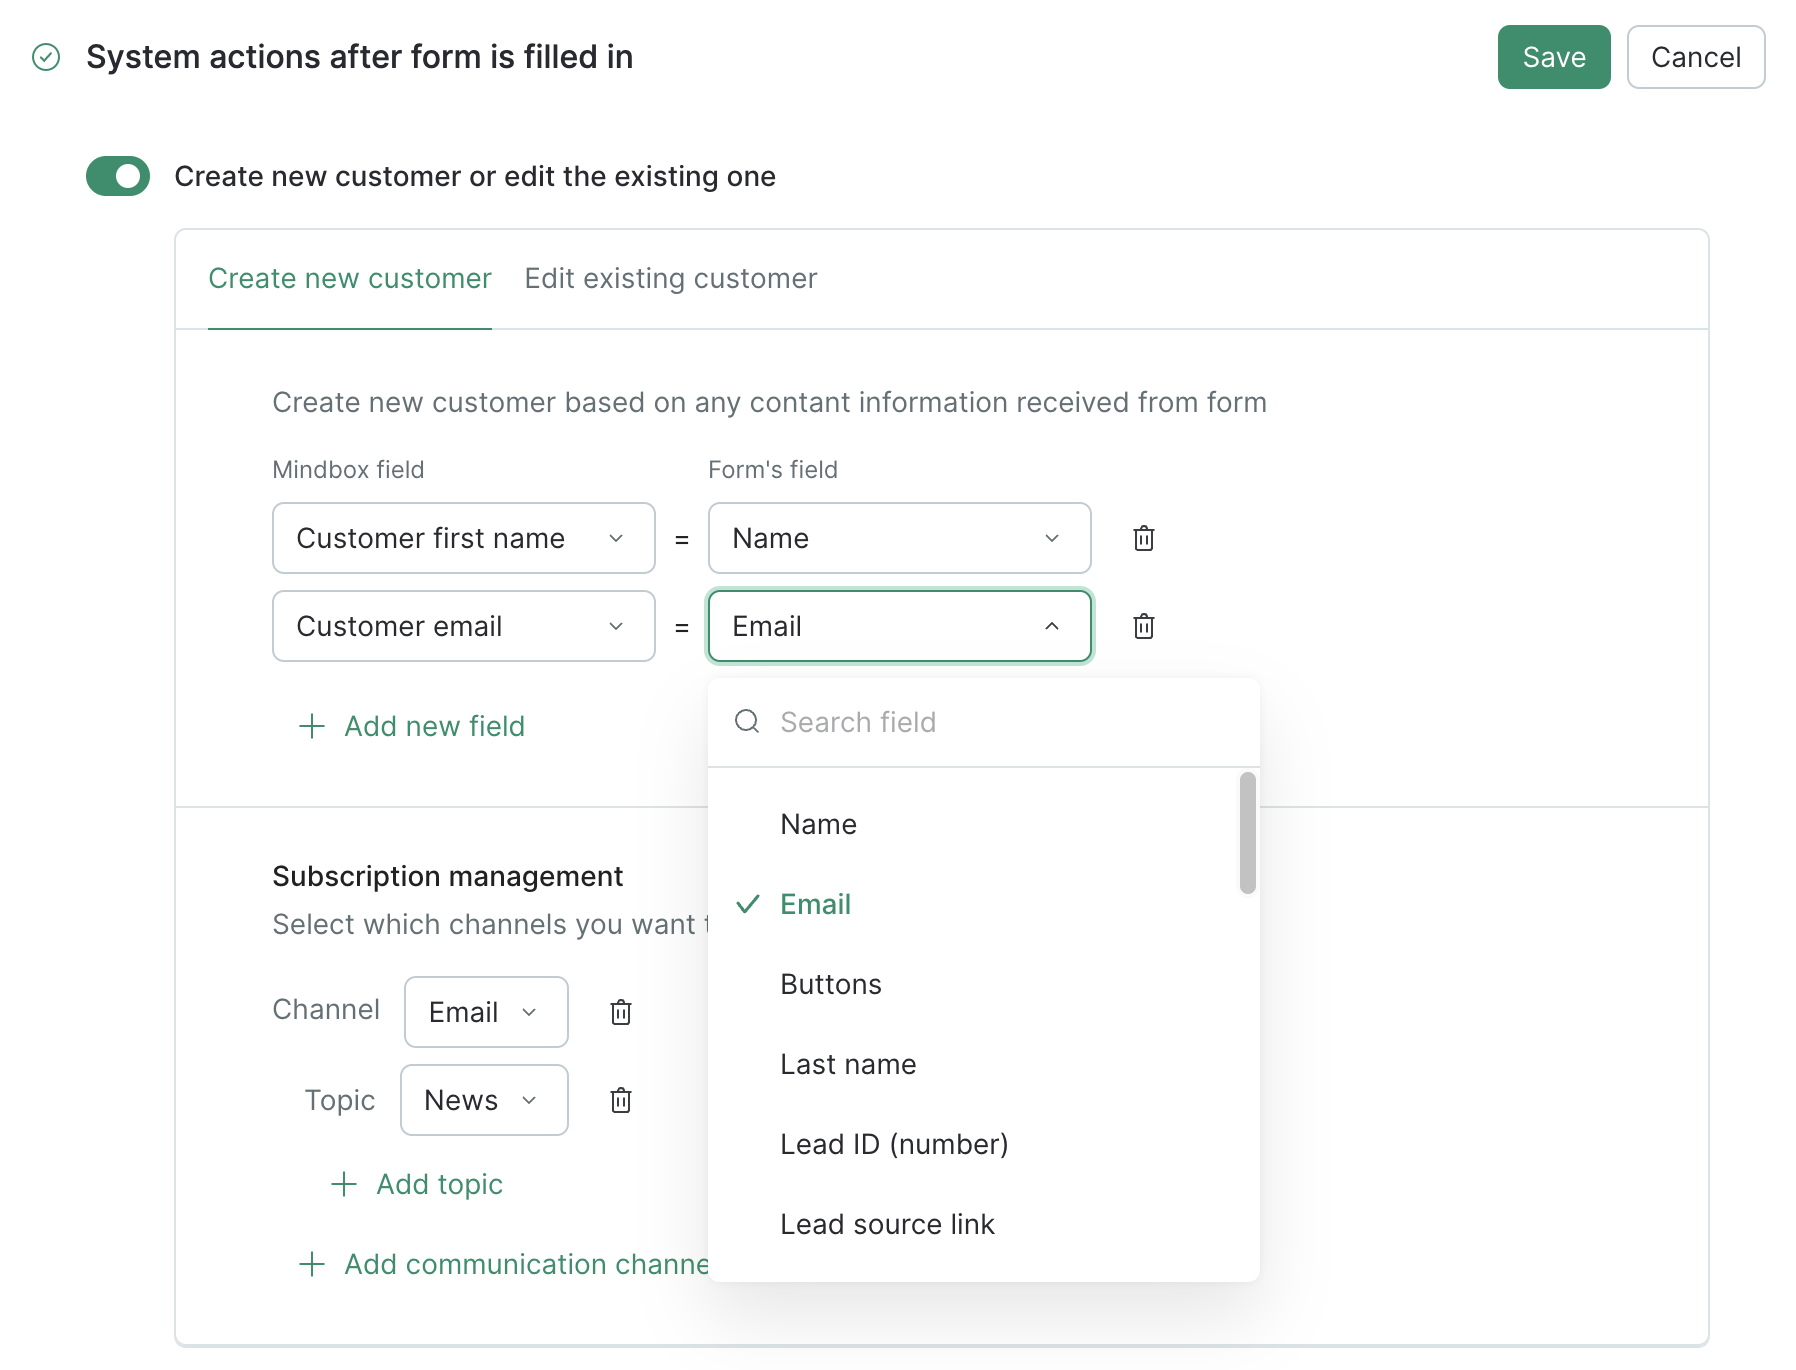
Maestra field: the target field in the customer profile in Maestra that you’d like to add the data from the pop-up to.
Form's field: the source field in the pop-up to export data from.
Subscription management: a customer will be automatically subscribed to the selected channel or topic.
Edit the existing one
Data type: the target field to record data in. You can edit the gender, area, and public custom fields.
Form field: the source field in the pop-up to export data from.
Here’s an example of a dialog form setup in which you can create a new customer: enter the name and email, select an email subscription for the News topic:
You can edit the gender, area, and public custom fields. If a custom field can be edited, this is indicated in Maestra settings.
Advanced options
— Transfer events to Google Analytics when pop-up was displayed, filled in or clicked:
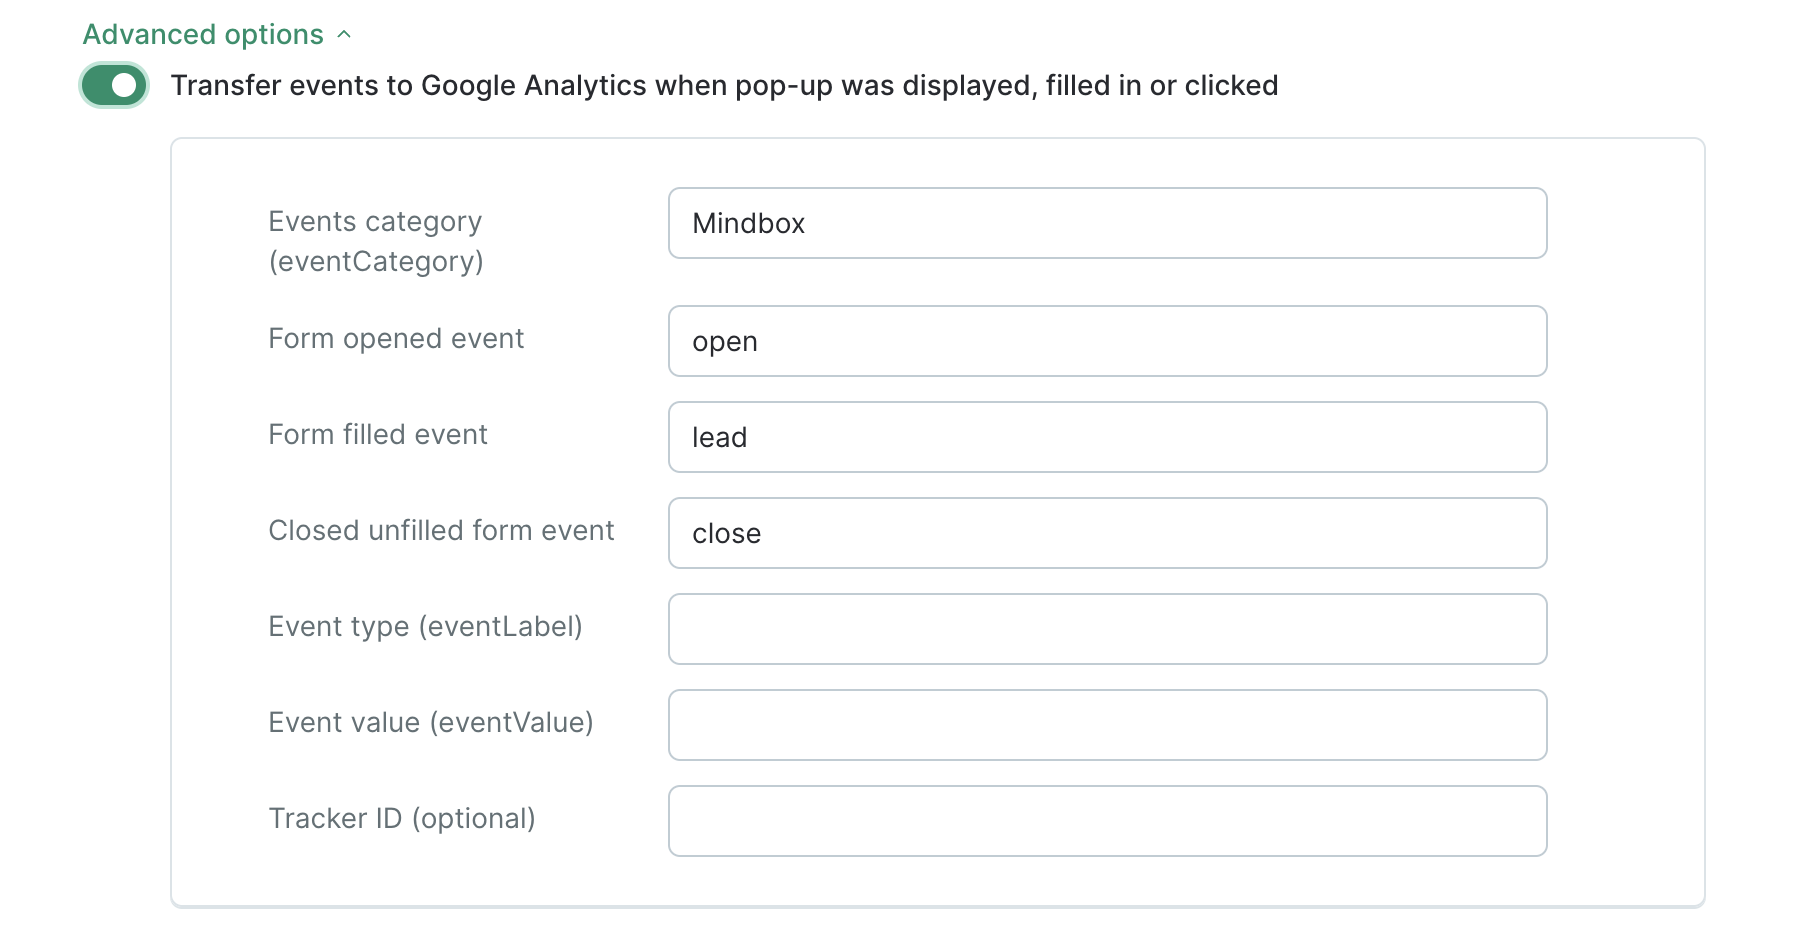
Follow these guidelines to configure the integration with GA.
— Call webhook:
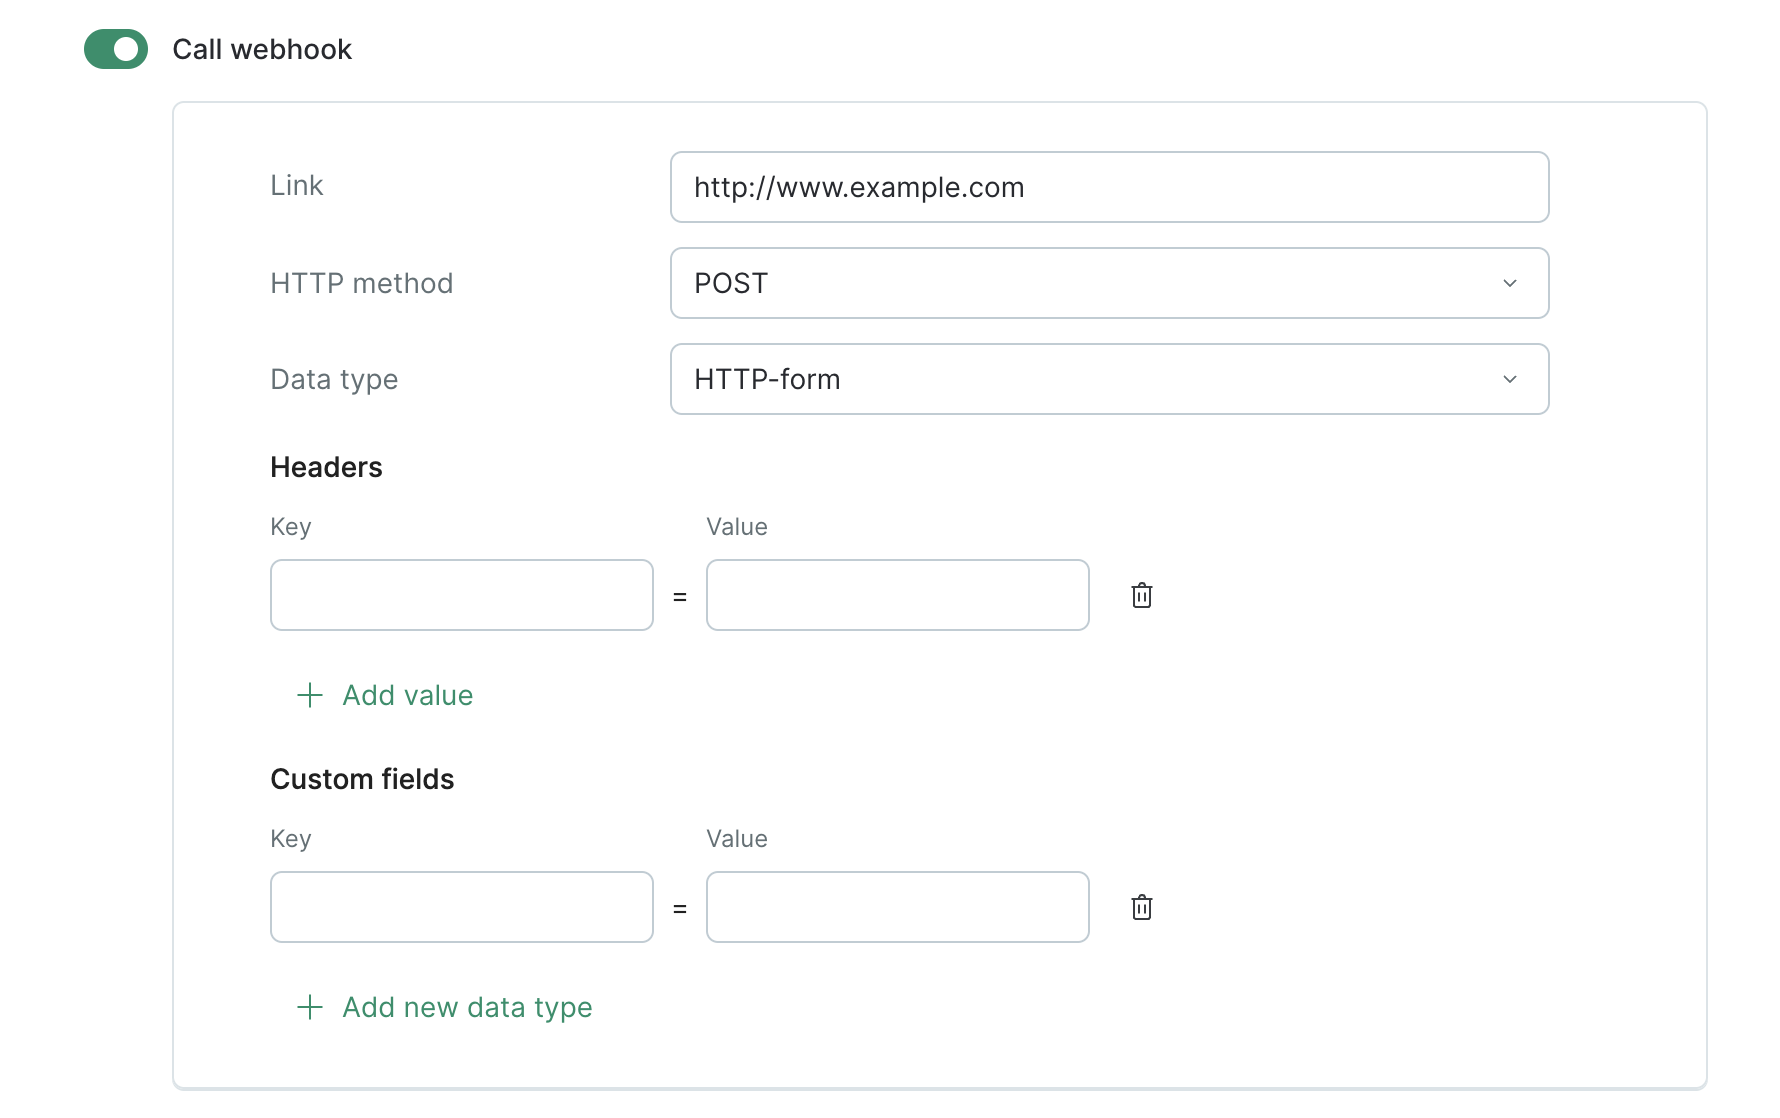
Set up a webhook call:
- Custom field key: a variable for data transfer
- Custom field value: a value exported from the pop-up form.
The form fields are described above where it is explained how to create/edit customers as well as in the Custom fields section where it is explained how to edit the design of your pop-up form.
— Call custom JS:
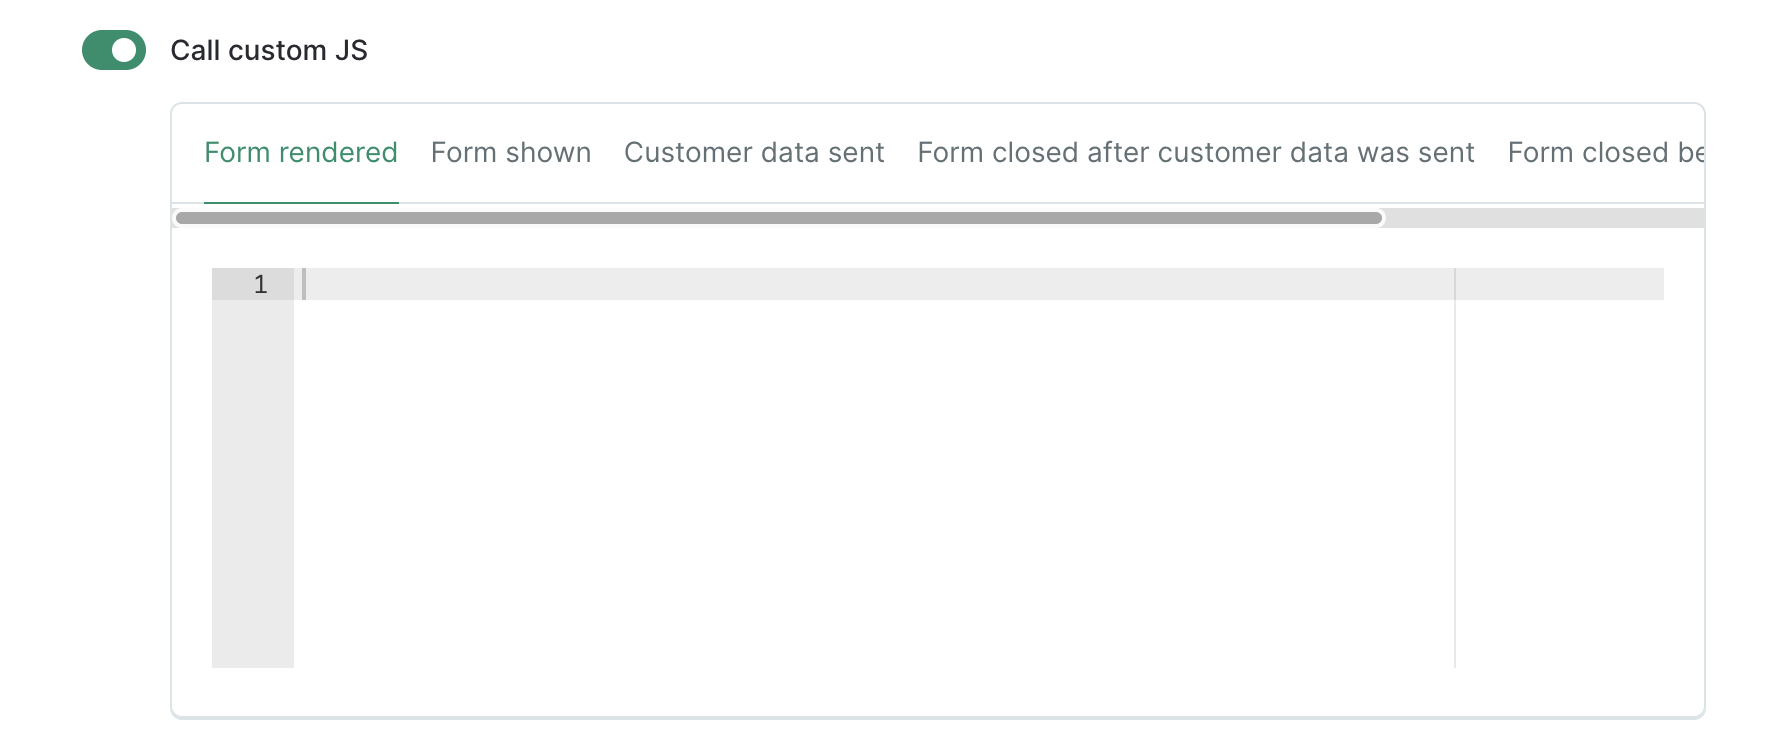
Insert the code that will run once the pop-up form is rendered, shown, or closed, or when a target action is performed.
How to edit a template
This is how the template editing window looks like:
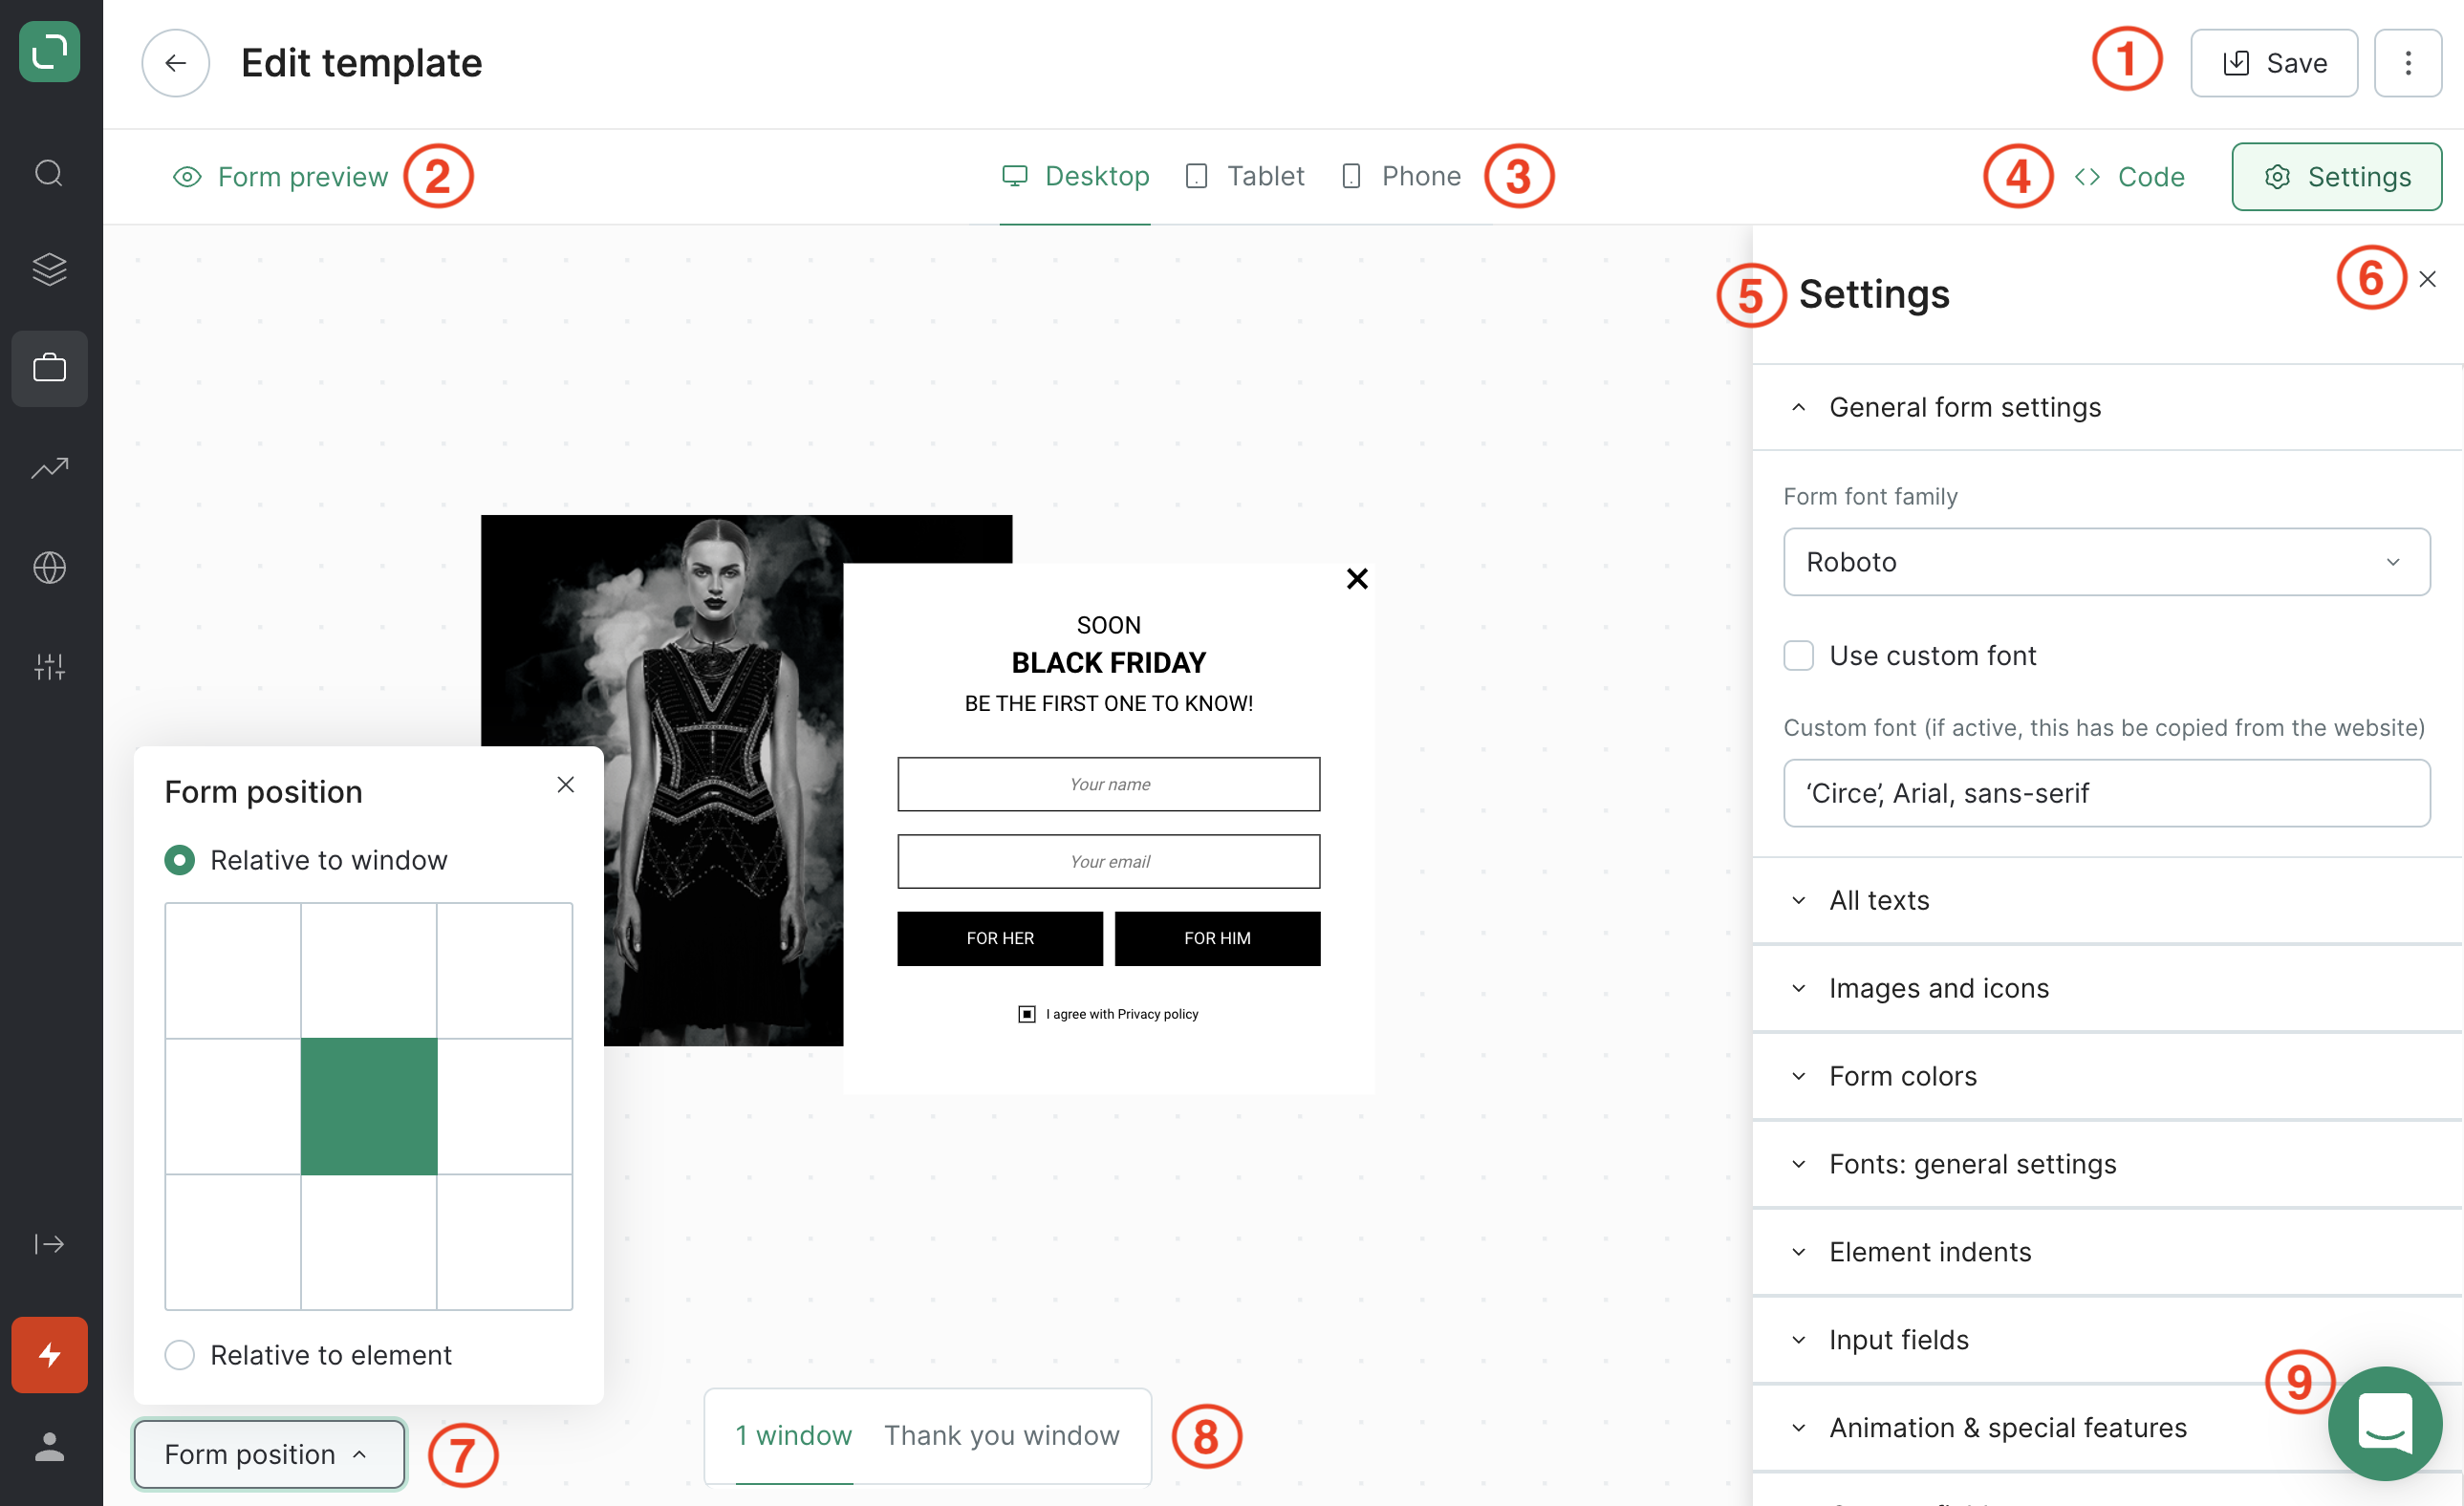
Here you can:
-
Save the settings;
-
Preview your pop-up on the website;
-
See how various devices will display your pop-up;
-
Set up your pop-up in the HTML code;
-
Select a background color, icons, frame size, and sizes of input fields as well as everything else you might need in your pop-up.
In this window, you can set up individual parameters for every selected form. Parameters include a timer, privacy policy checkboxes, and fonts;
-
Hide the Settings field to have a full view of a form;
-
Edit the position of a pop-up on a web page;
-
Set up the main screen and the screen displayed after a target action;
-
Write to the Maestra support chat if you have any questions regarding the editor.
How to preview a pop-up on the website
Click Form preview Insert your website URL and click it:

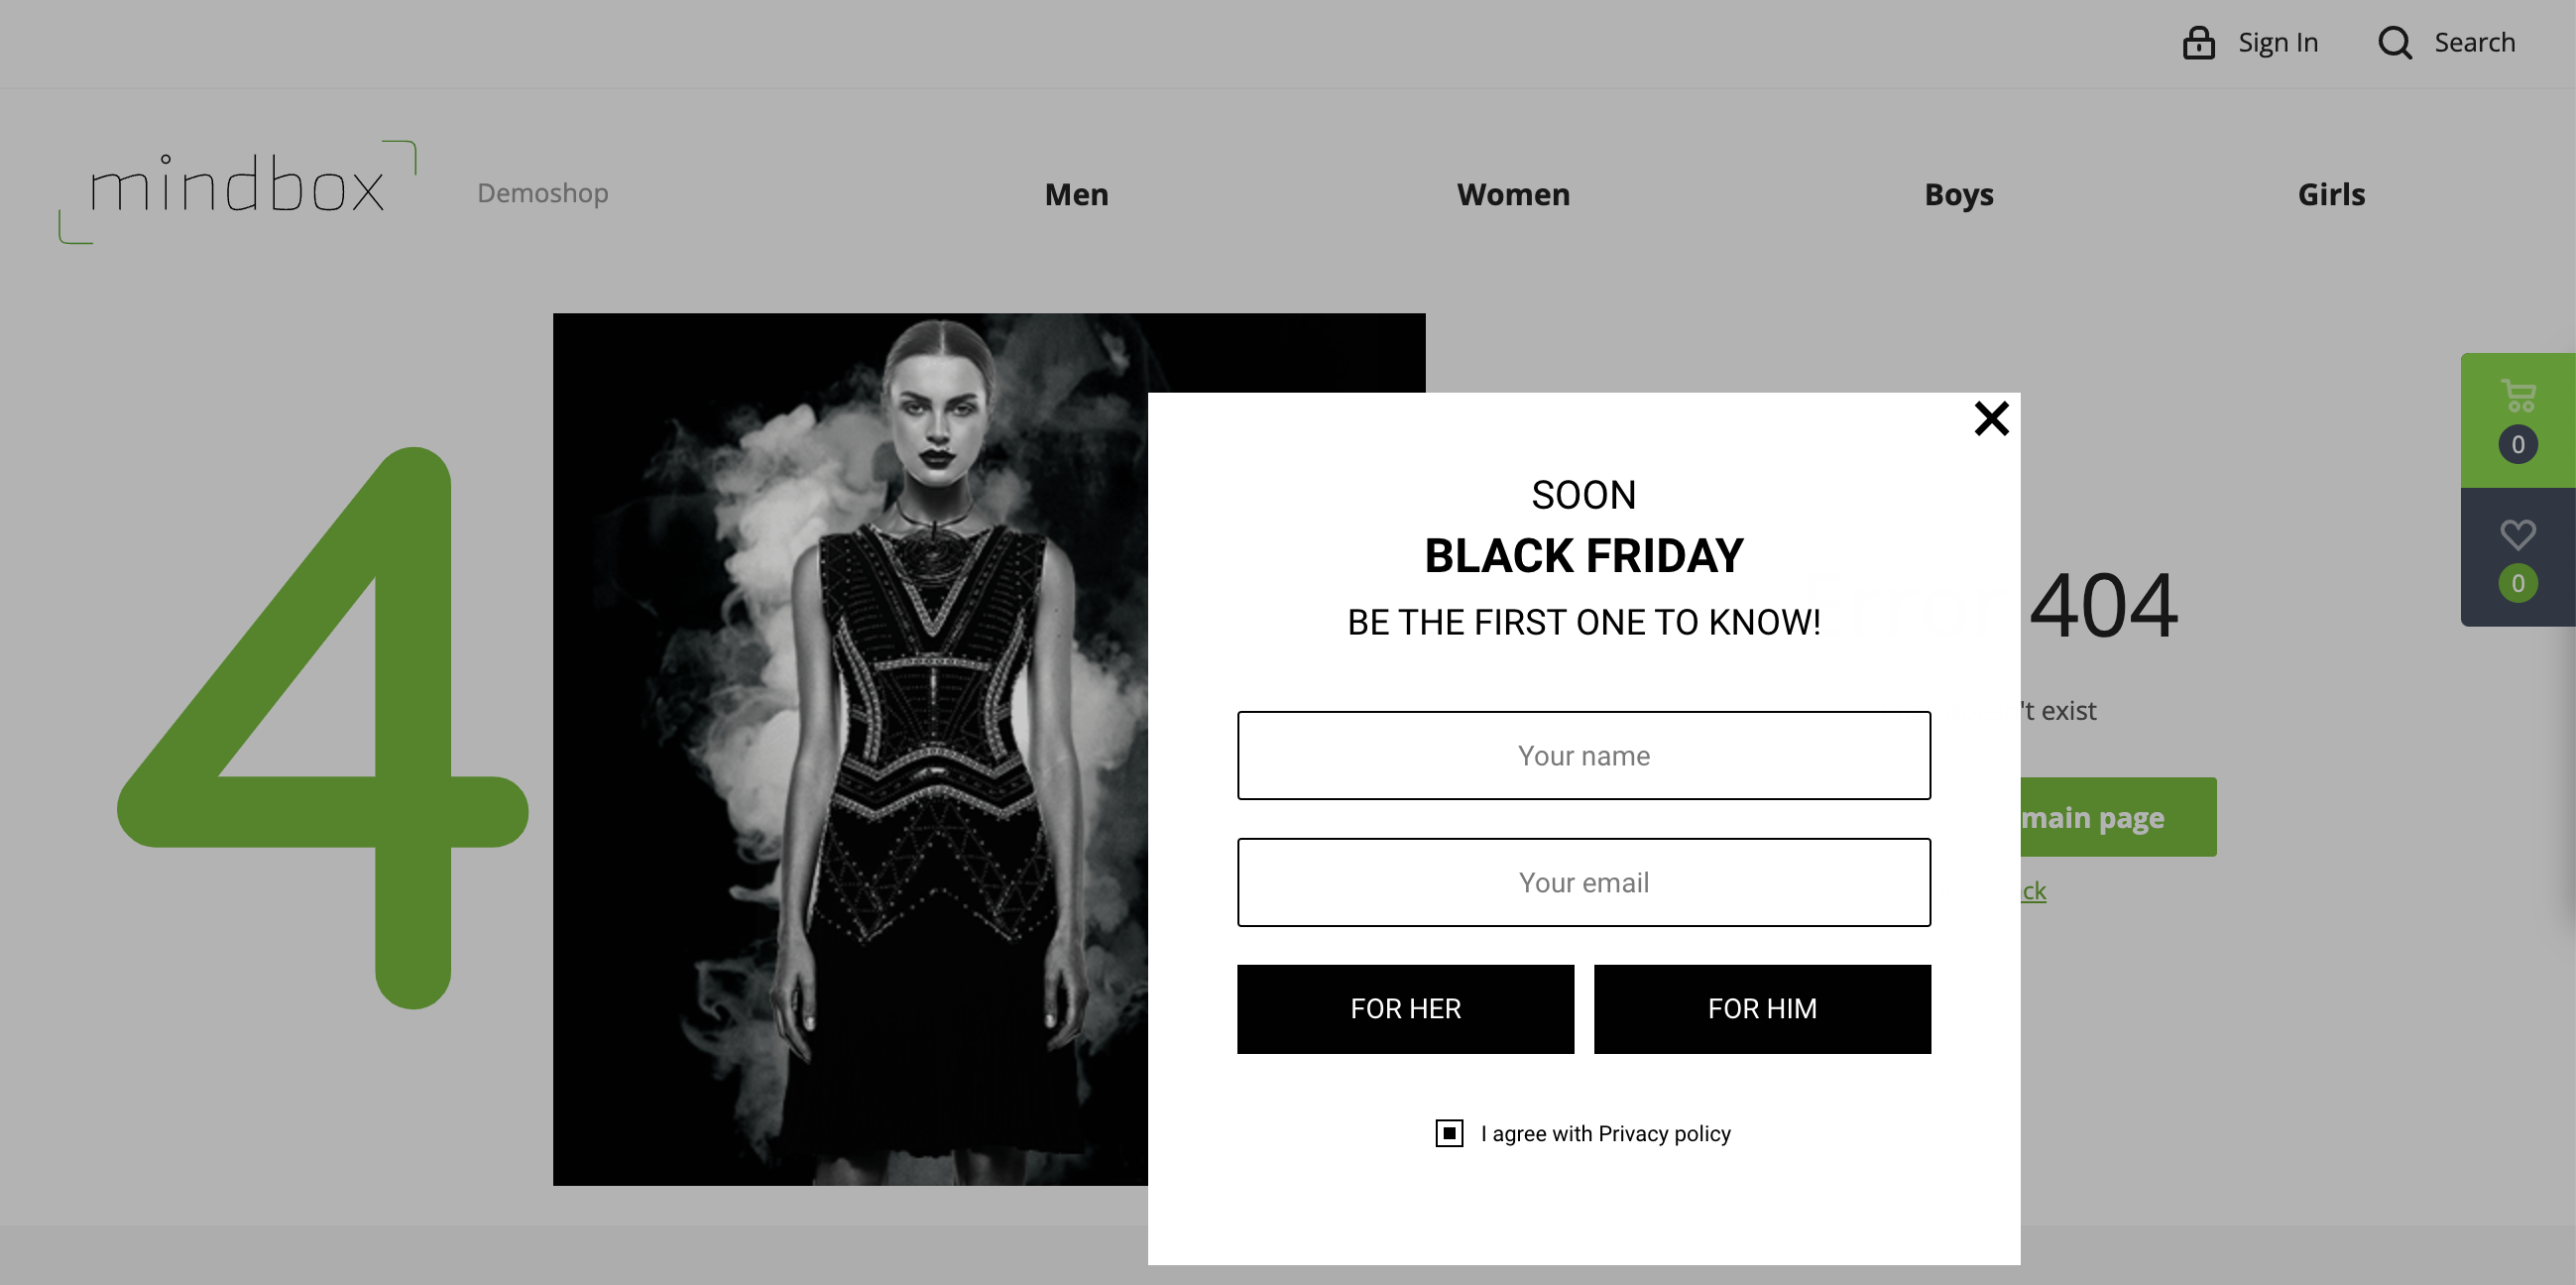
You will see the pop-up on your website:
If you have any questions, please feel free to contact our support chat.