As major authentication mechanisms DomainKeys Identified Mail (DKIM), and Domain-based Message Authentication, Reporting, and Conformance (DMARC) are designed to protect mail servers from domain name abuse.
DKIM authenticates the originating domain and the emails sent from this domain, otherwise the sender’s emails will be rejected or identified as spam.
DMARC is an authentication protocol that protects and authenticates emails.
DNS
All signatures are set up using client DNS records, the dashboard for which is available from your hosting provider.
Once the records are published on the domain’s DNS, it may take up to 24 hours for external servers to see the filters both on Maestra’s side and through mxtoolbox.
Example of DNS records:
If you occasionally see an error message informing you that no DKIM record has been found, please contact your hosting provider’s support team. This might mean that external servers sometimes cannot see your domain records.
DKIM
As an email forgery detection method, DKIM (DomainKeys Identified Mail) confirms that the email sender’s server is authorized to send messages from a given domain name. DKIM improves sender reputation and delivery rate by applying private and public keys to check emails.
Setting up DKIM
A public & private keys pair is generated individually for every email sender’s server. A public key is added to the DKIM record published on the sender’s domain DNS, while a private key signs outbound messages.
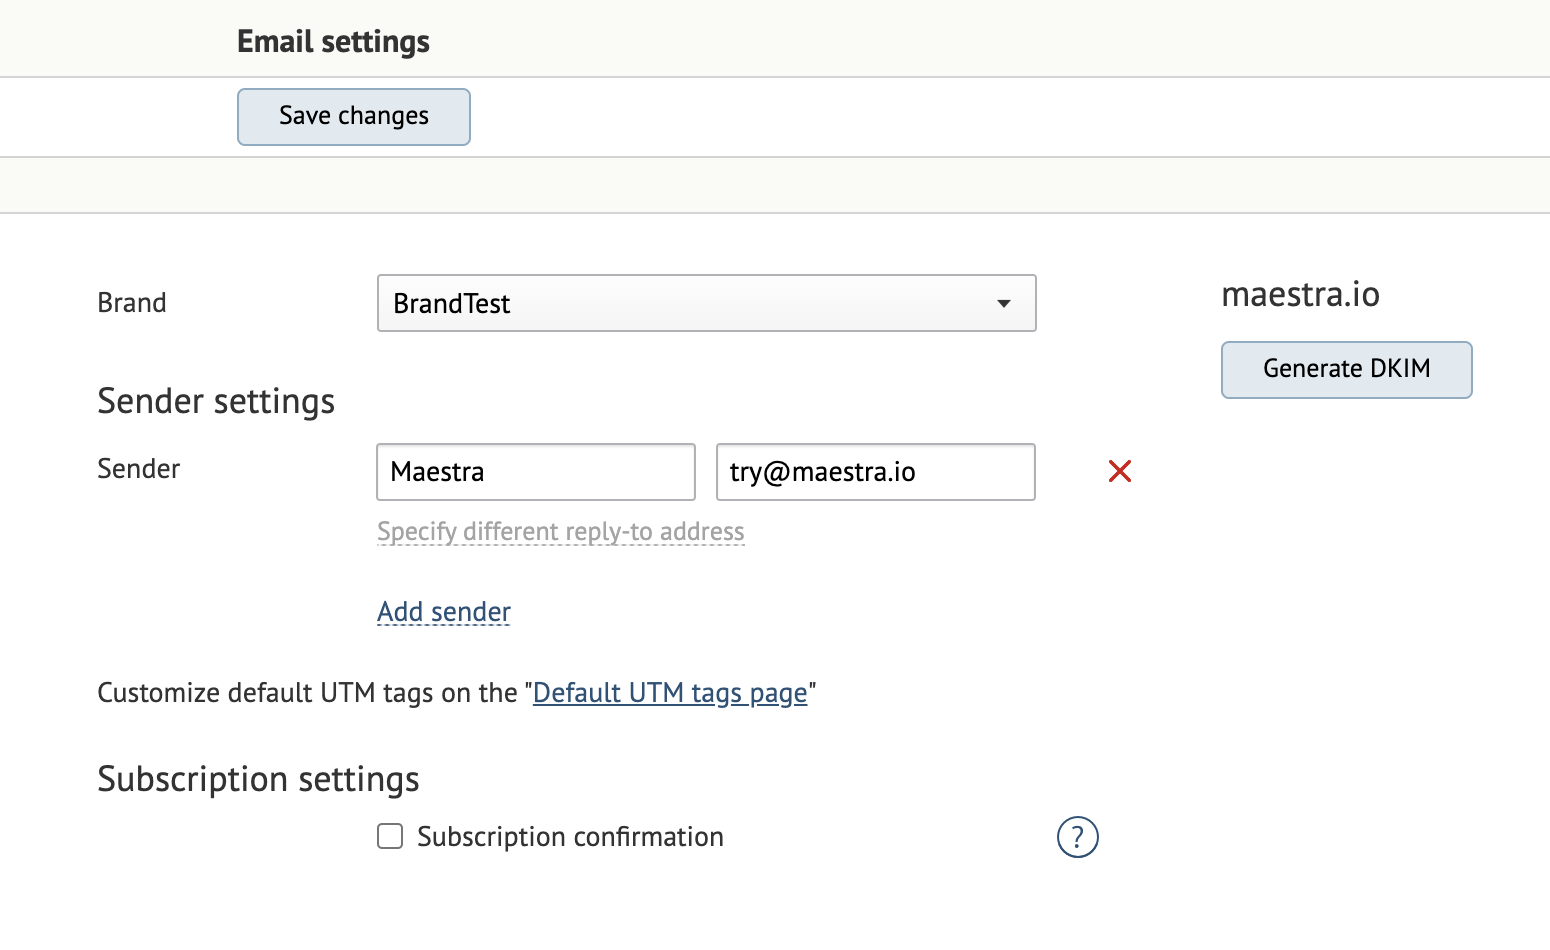
In Maestra, you can generate the key pairs in Admitinstrative Settings → Communication → Email settings.
Once you add and save a sender, the "Generate DKIM" button will appear. You can find instructions on how to generate DKIM from the system in this guide.
Once you click this button, a string is generated and displayed for the domain. Add it to the DNS record.
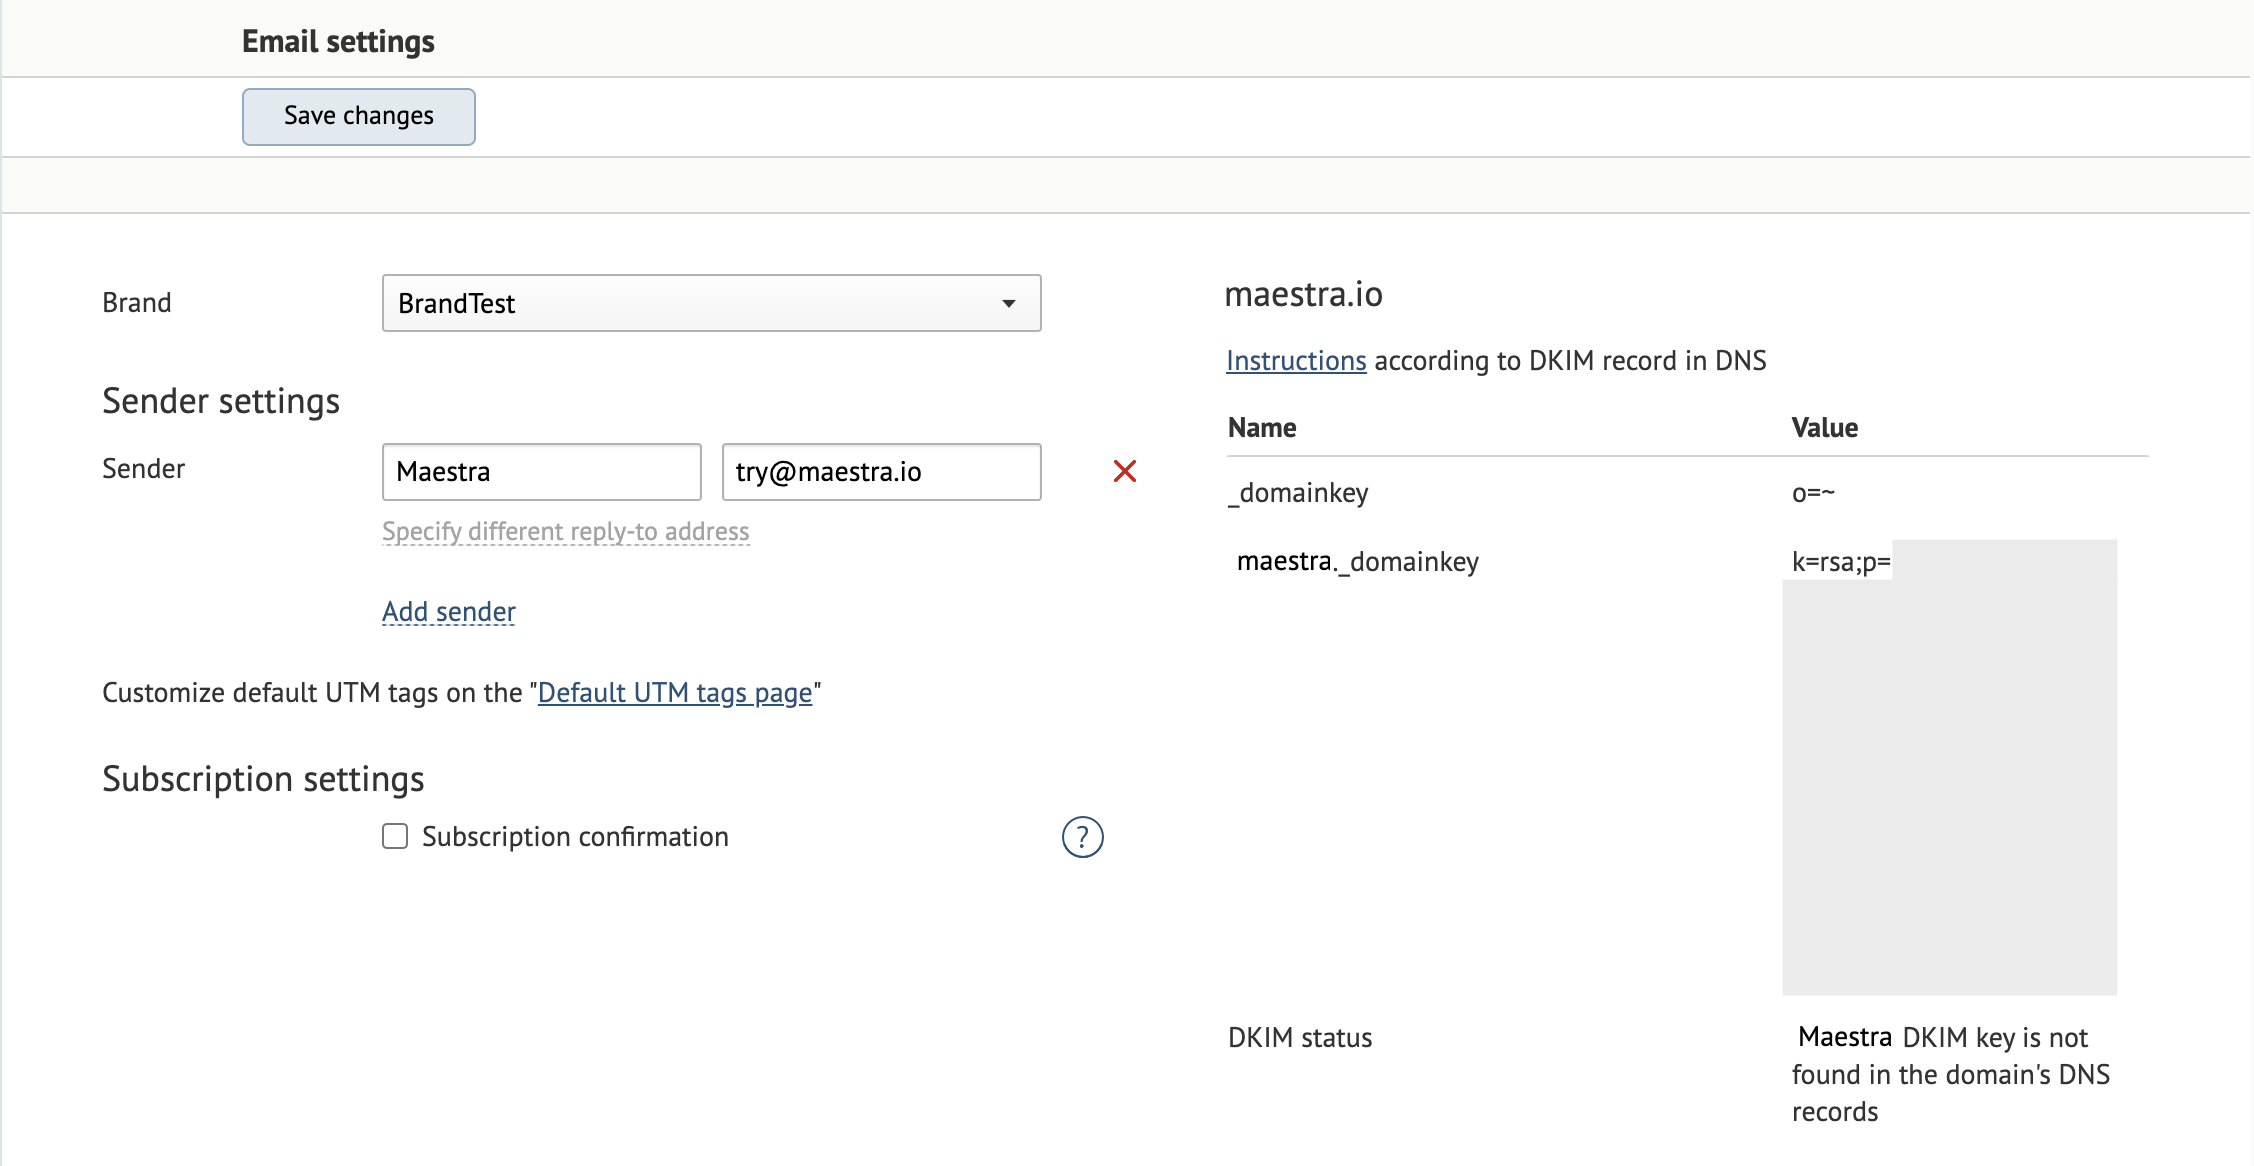
Add the second record _domainkey o=~; to indicate that this domain can send messages without a DKIM signature.
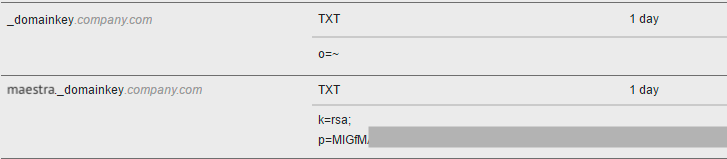
| Name | Type | Value |
|---|---|---|
| _domainkey | TXT | o=~; |
| maestra._domainkey | TXT | a text from a column Value (k=rsa; p=MIGfMA0...) |
Checking the DKIM record
Look up the DKIM record in mxtoolbox.
Make sure that the key displayed in mxtoolbox matches the exact string in Maestra’s email settings. Otherwise, the DKIM record setup will be invalid. If this issue occurs in Maestra’s settings, compare the strings manually.
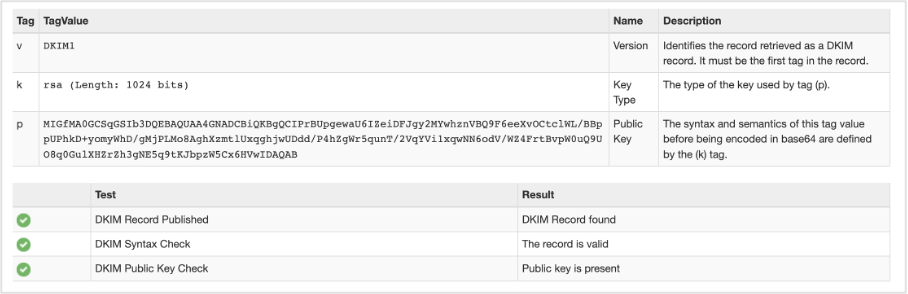
Make sure that the key contains the relevant selector. In our case, this is Maestra.

If the key does not contain this selector, check the maestra._domainkey record because a missing selector means that there is no DKIM record set up or the record name contains an error.
You can also send an email to the gmail server and click "Show original" to check DKIM setup.
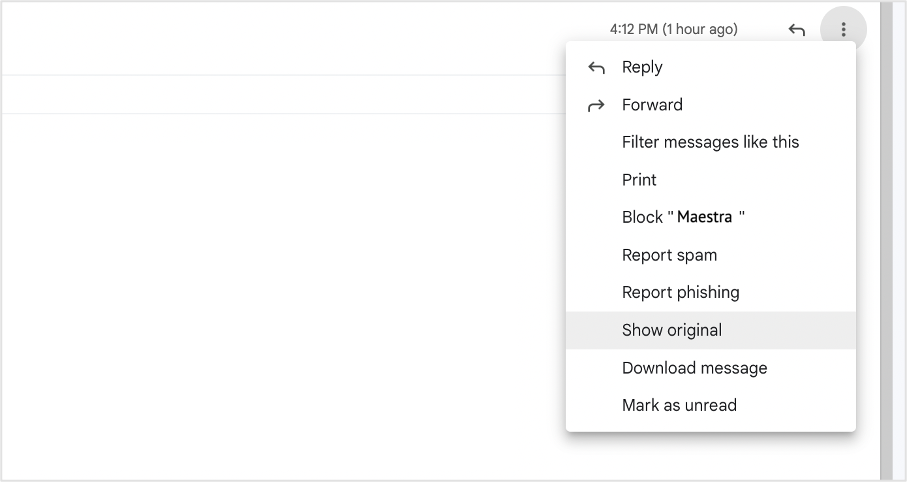
If you can find dkim=pass in the original email, your DKIM setup is correct.

DMARC
A DMARC digital signature allows you to set specific steps that will be applied to emails that failed DKIM checks at the time of sending.
Having found that emails mismatch the DKIM records, i.e., the sender’s IP address and server are blocklisted, the mail receiver server checks the DMARC record to determine what to do with the email: reject, mark as spam, or do nothing.
Setting up DMARC
A basic DMARC record will be structured as follows:
Record name: _dmarc.company.com
Value (TXT): v=DMARC1; p=none
There must only be one DMARC record for each domain and its subdomains.
v= is a record version;
p= is the policy used to handle emails that failed DKIM records checks.
p=nonemeans that the recipient’s mail server should receive the message and apply its local message classification as usual, whatever the results of the DKIM checks.p=quarantinemeans that the mail server must place the email that fails the DKIM checks in the spam folder.p=rejectmeans that the mail receiver must totally reject the email that fails the DKIM checks.
Use the rua= tag to specify an email address where you’d like to receive reports on all emails with their DMARC check results.
Use the ruf= tag to specify an email address where you’d like to receive reports on each specific email that failed DKIM checks and had DMARC policies applied.
You can read more about DMARC reports more in Google’s Workspace Admin Help guide.
Use the pct= tag to specify a percentage of messages to which to apply a certain DMARC policy (enter a number from 1-100).
Recommendations
The p=quarantine or p=reject policies can be set up as you prefer.
If you decide to make your DMARC policy more strict, proceed gradually:
- First, configure the
p=nonepolicy and DMARC reporting in theruaandruftags to ensure that you monitor how many messages fail DMARC checks and to resolve the issues. - Once most issues are solved, you can introduce stricter policies using the
pcttag, but make sure to monitor reported issues.
Reports will show results for all messages sent across the entire domain rather than from Maestra only.
Important notes
- Once you select the
p=quarantinepolicy, the email receiver will mark certain emails as spam, which will affect delivery and open rates. - Once you select the
p=rejectpolicy, the email receiver will reject certain emails, which will affect the delivery rate.
In both cases, you should first address any digital signatures issues.
Checking the DMARC record
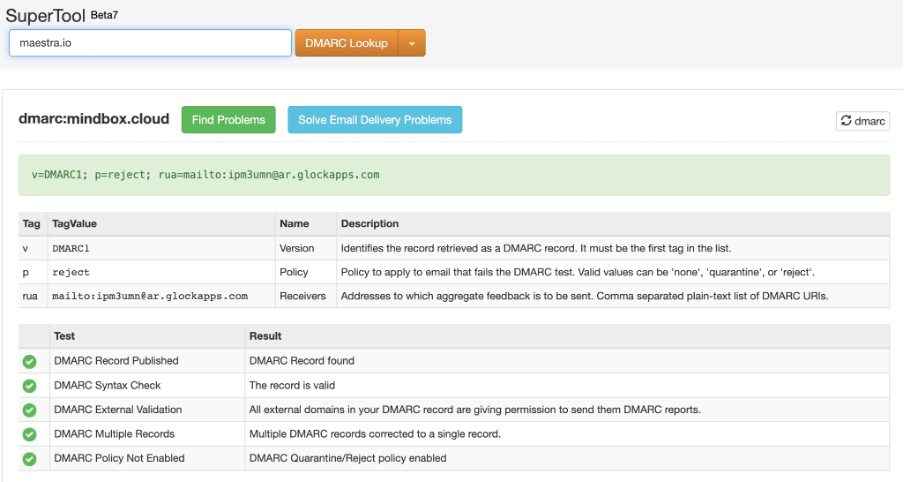
To check the DMARC record, go to mxtoolbox and enter your domain name.
If the DMARC record is set up, you see a detailed table:
To check DMARC, send a message to gmail.com and click "Show original".
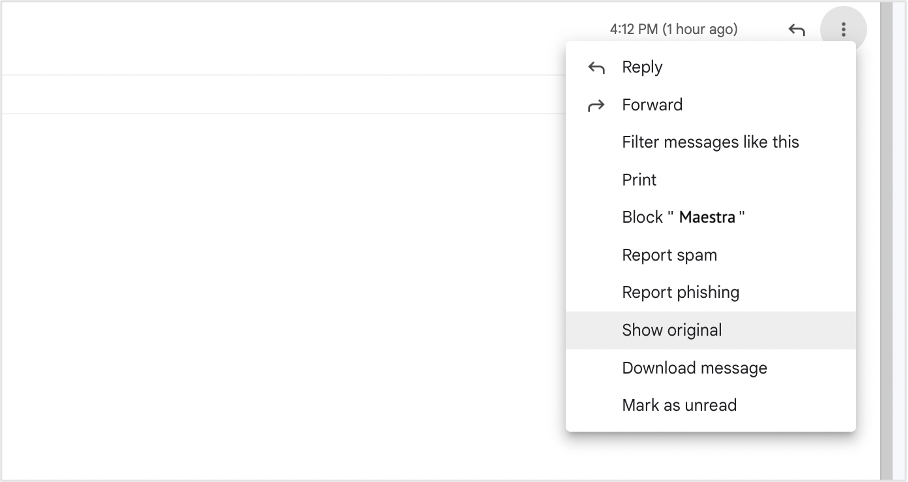
You can find the DMARC authentication result in the headers:
