In-apps are notifications sent to users within the app.
It is not required that customers subscribe to or allow your notifications for you to display in-apps. Therefore, you can use them to increase the number of subscribers to mobile push notifications: encourage users to allow notifications with a free in-app, and when clicked, show them a system window with a request to allow push notifications.
Before creating an in-app
To use the scenario, the following conditions are required:
- enabled mobile push notification module;
- integration with the mobile app to display in-apps
- the app with SDK 2.9.0 or higher.
There is no limit to the number of free in-apps.
Subscribing to push notifications and allowing them
To receive mobile push notifications, the user must:
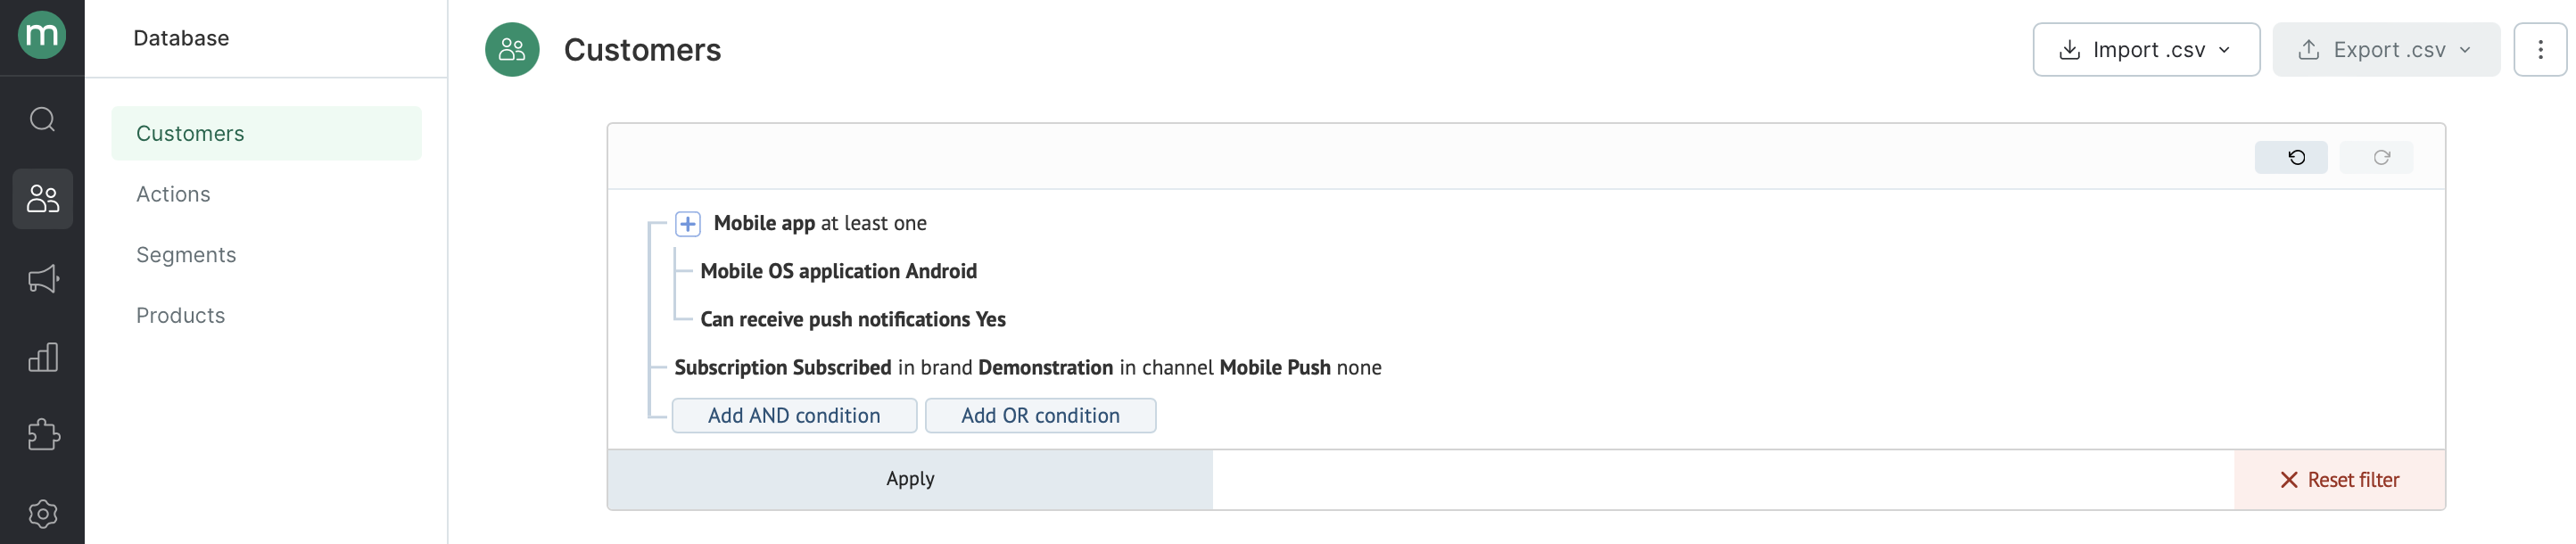
- fit the filter “Push notifications can be sent — yes”:
- allow push notifications;
- have an active device token;
- subscribe to the mobile push notification channel.
In-apps can collect push notification permissions. However, for users to subscribe to your marketing campaign, you need to use other mechanics: scenarios, operations, and import.
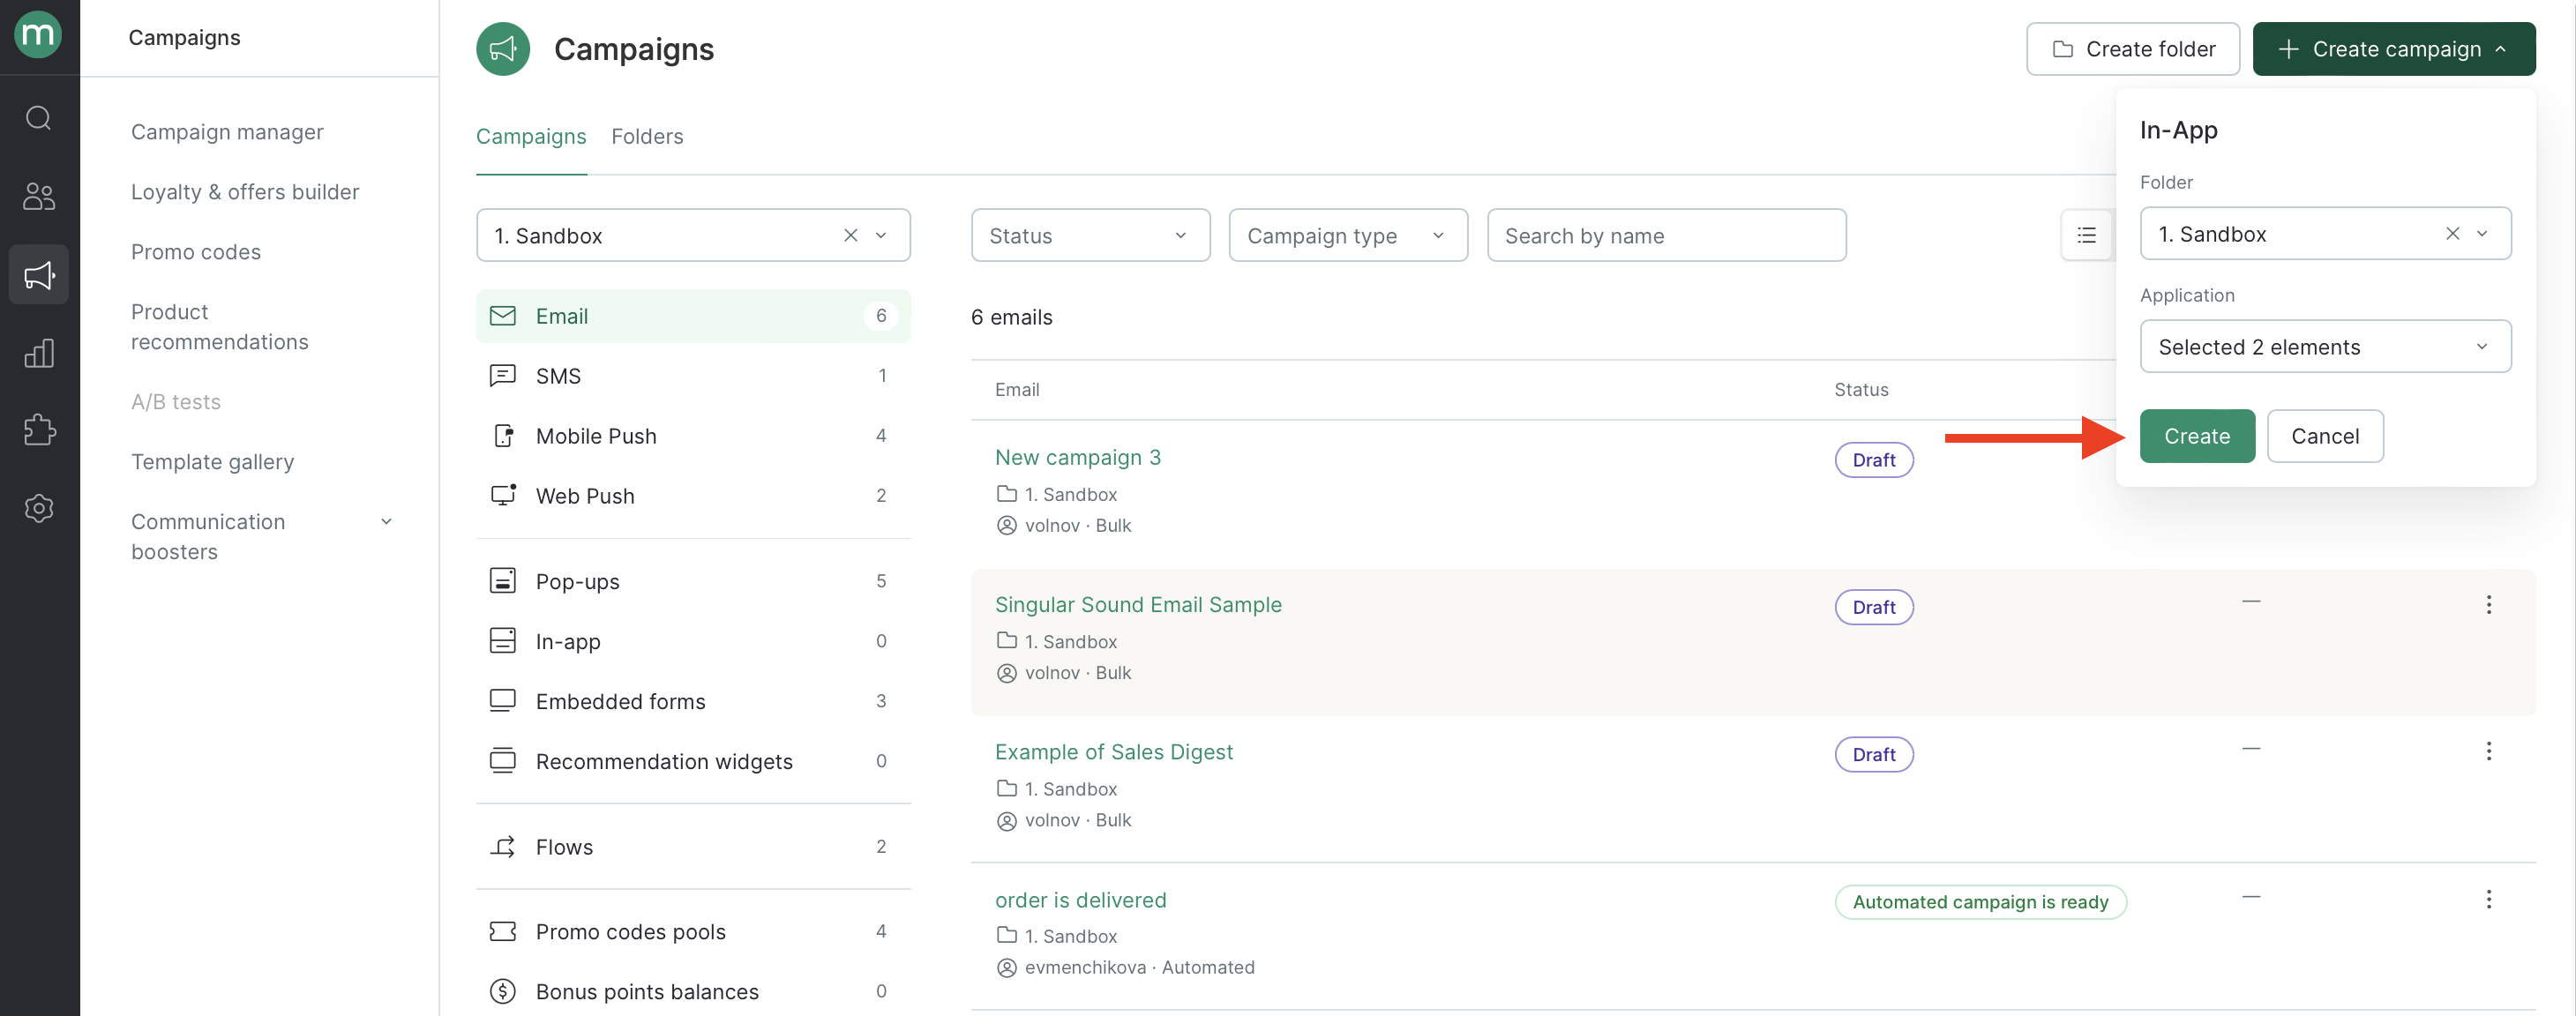
How to create an in-app to collect subscriptions
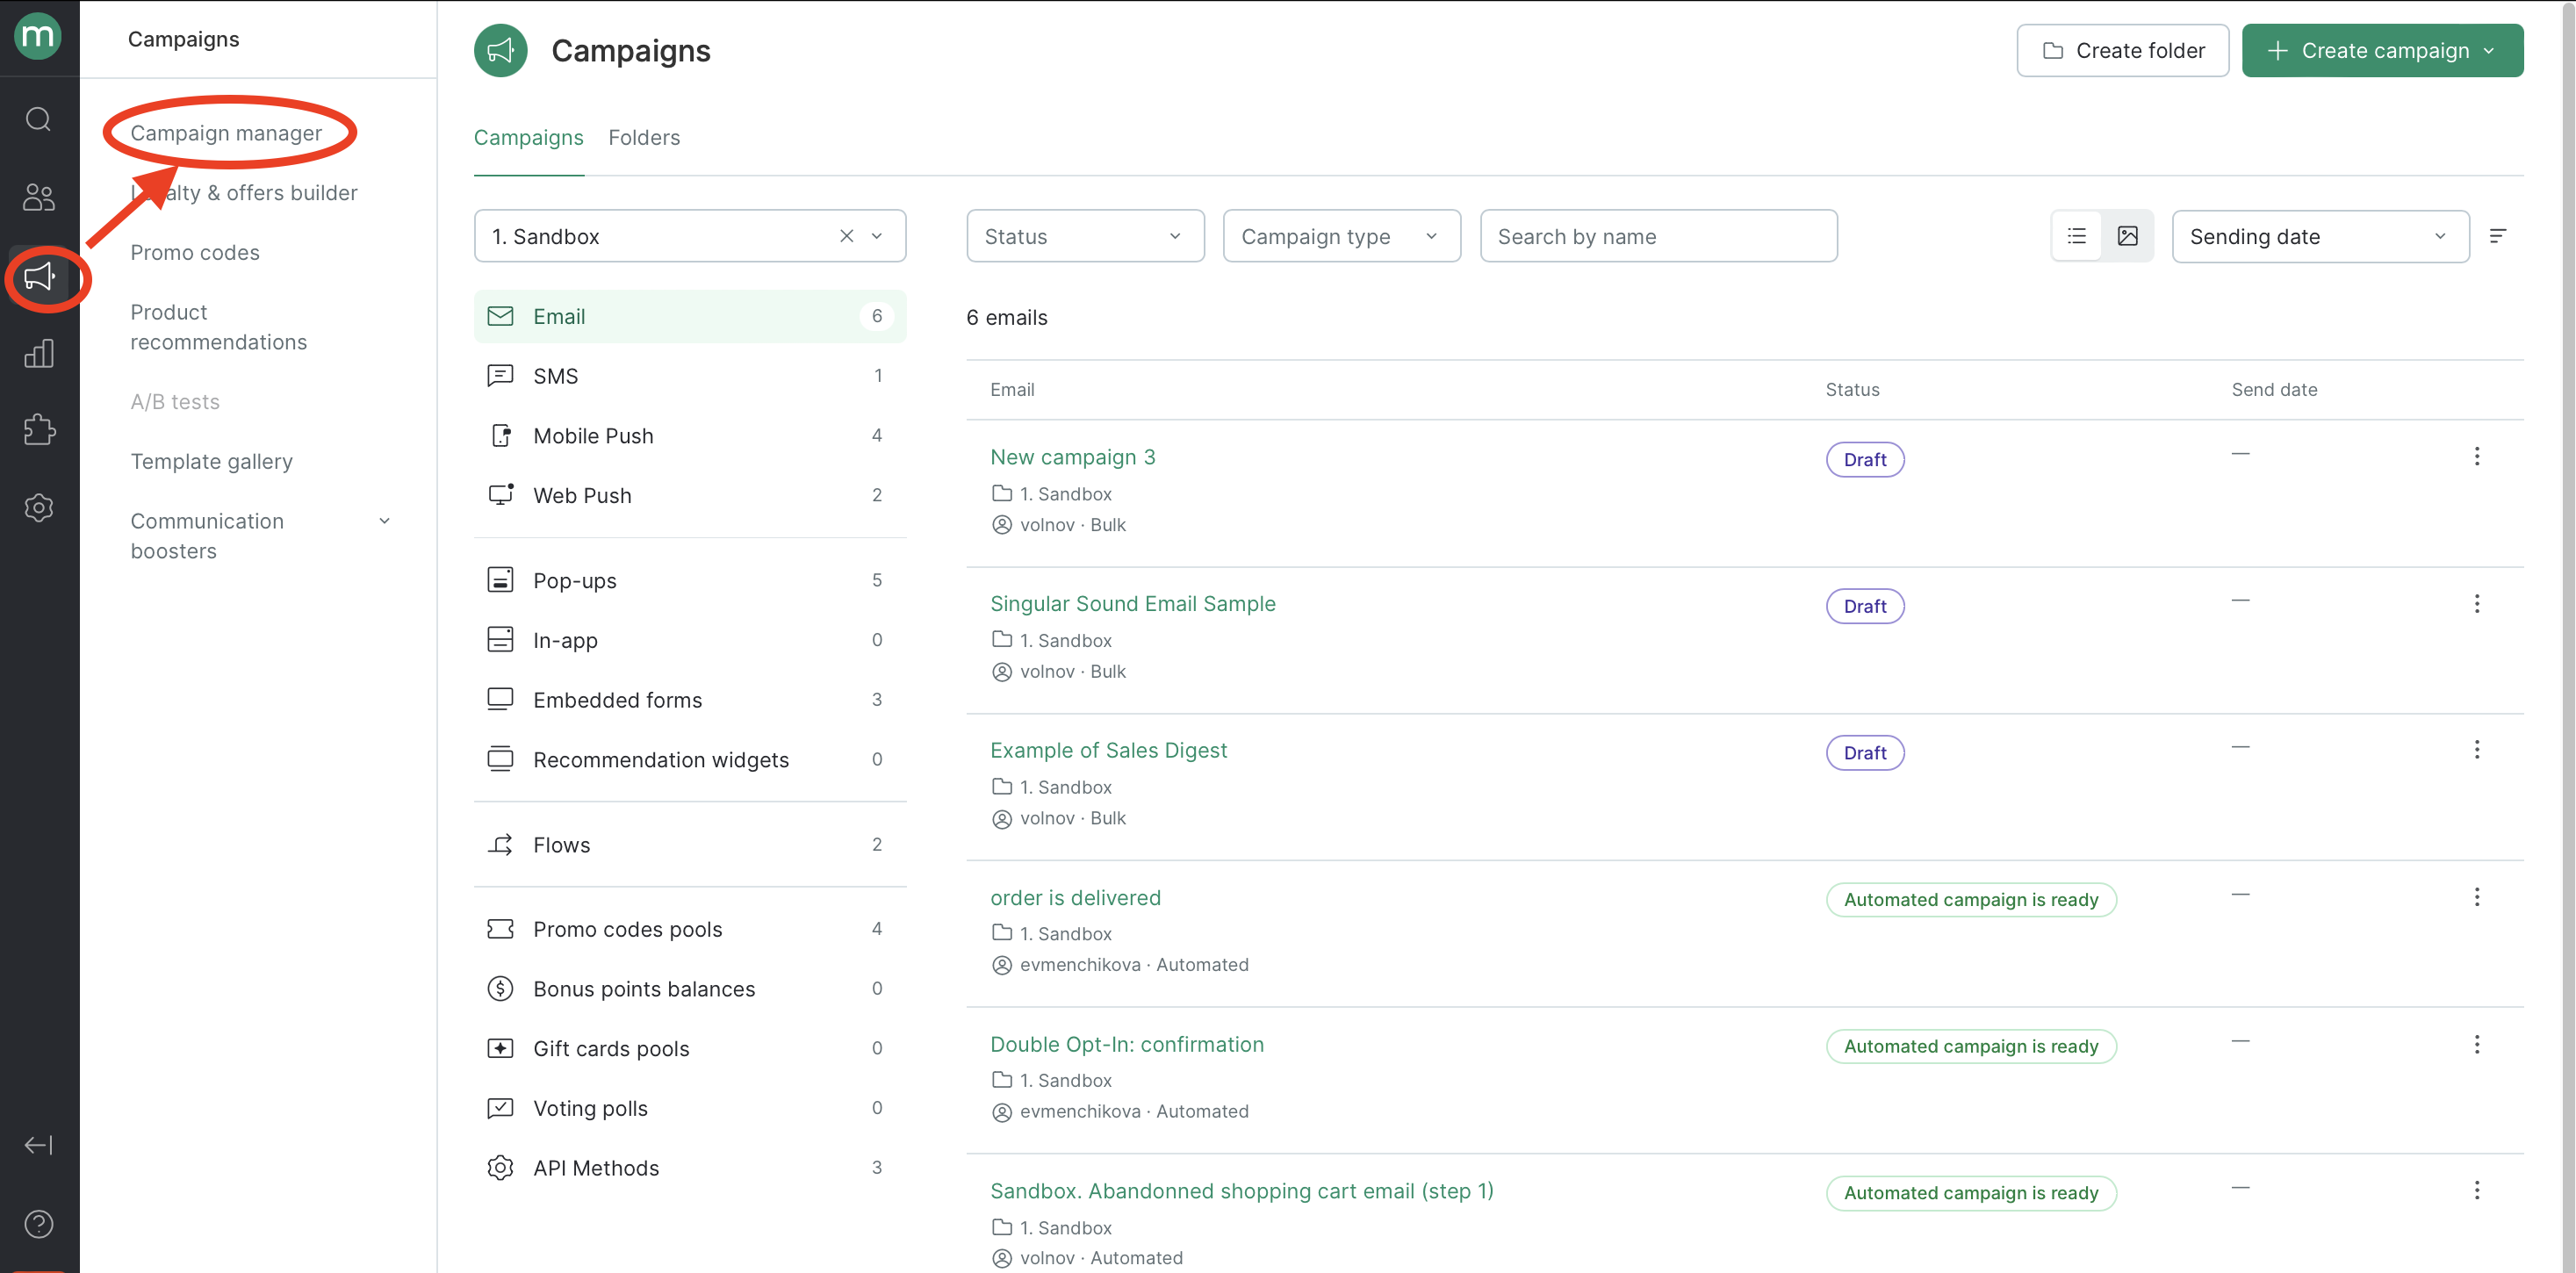
- Go to “Campaigns” → “Campaign Manager”:
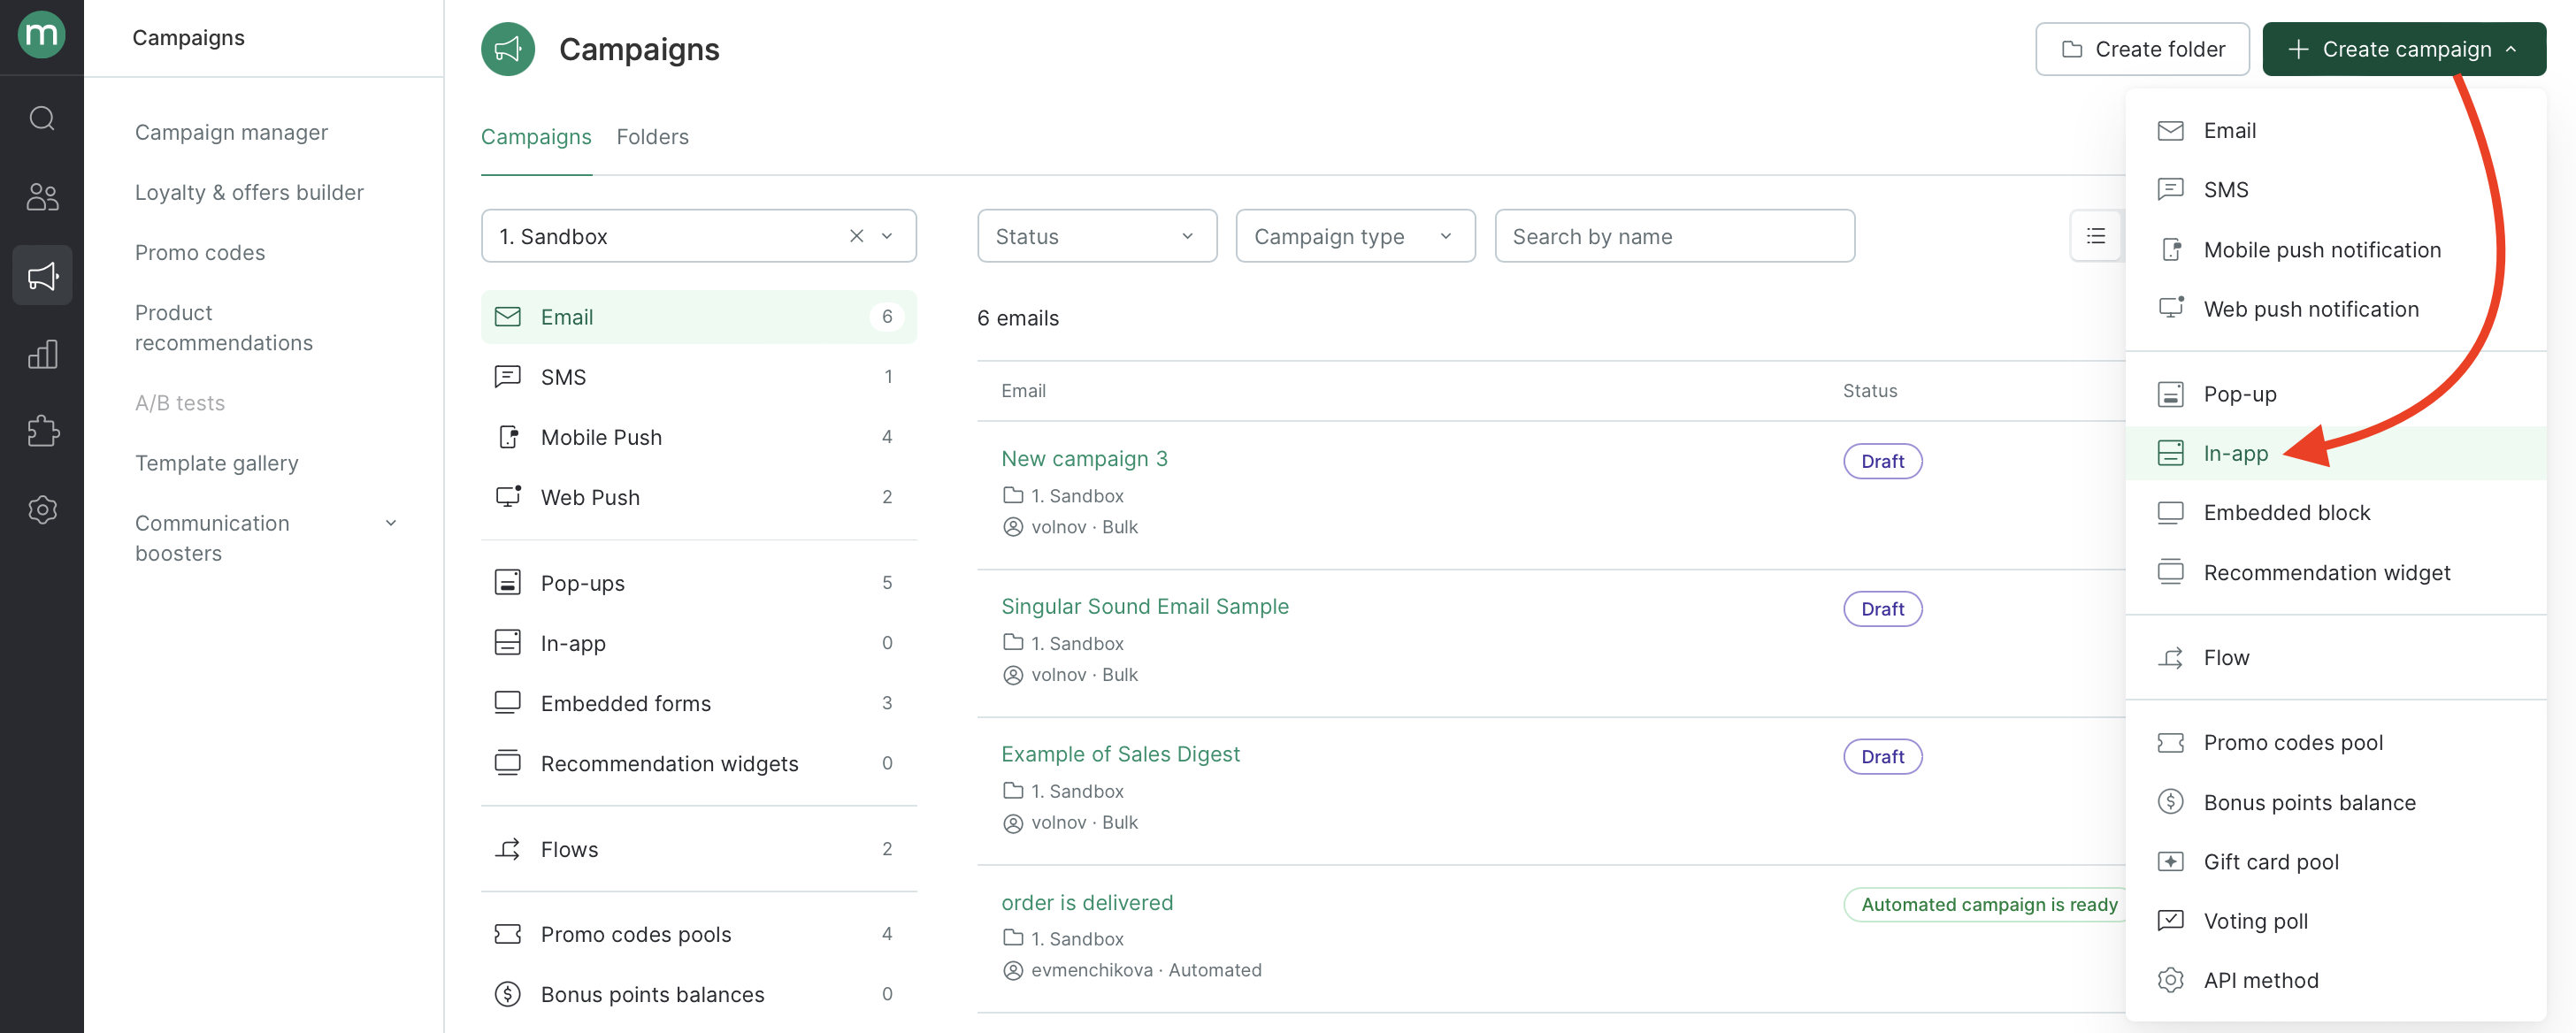
- Click “Add Campaign” → “In-App”:
- Select the folder to save the in-app and the app to display it:
- Select a template type:
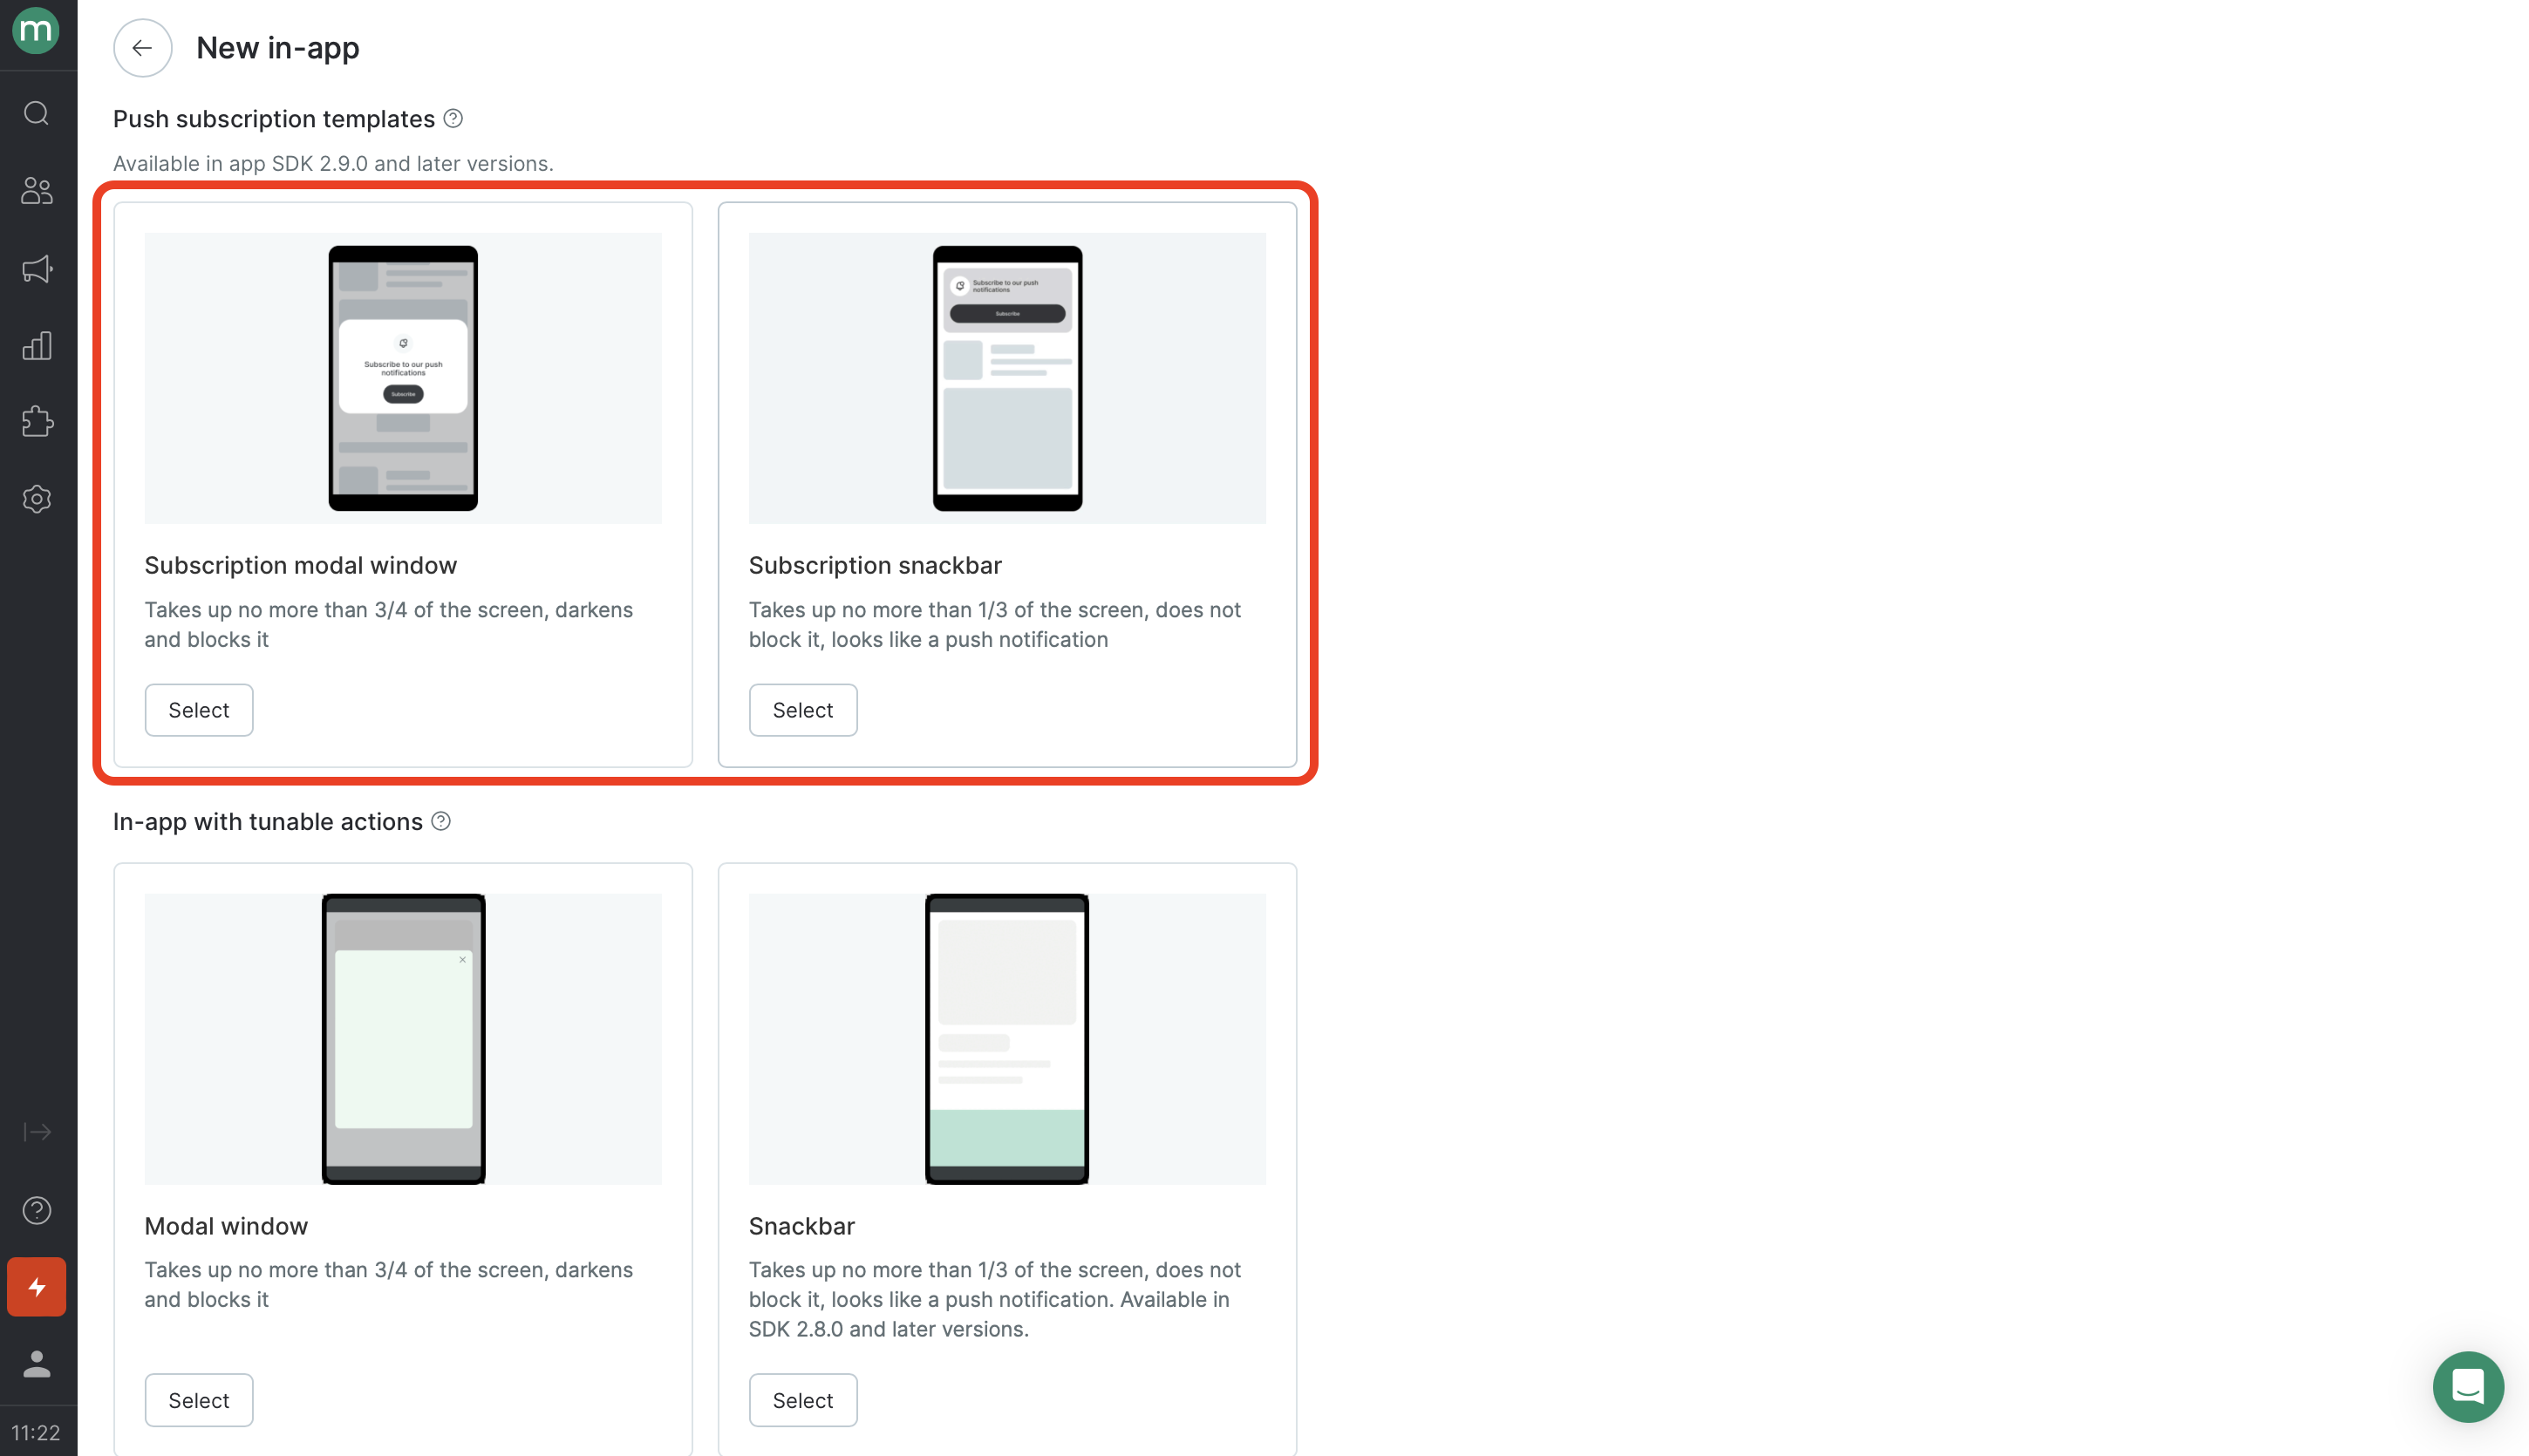
-
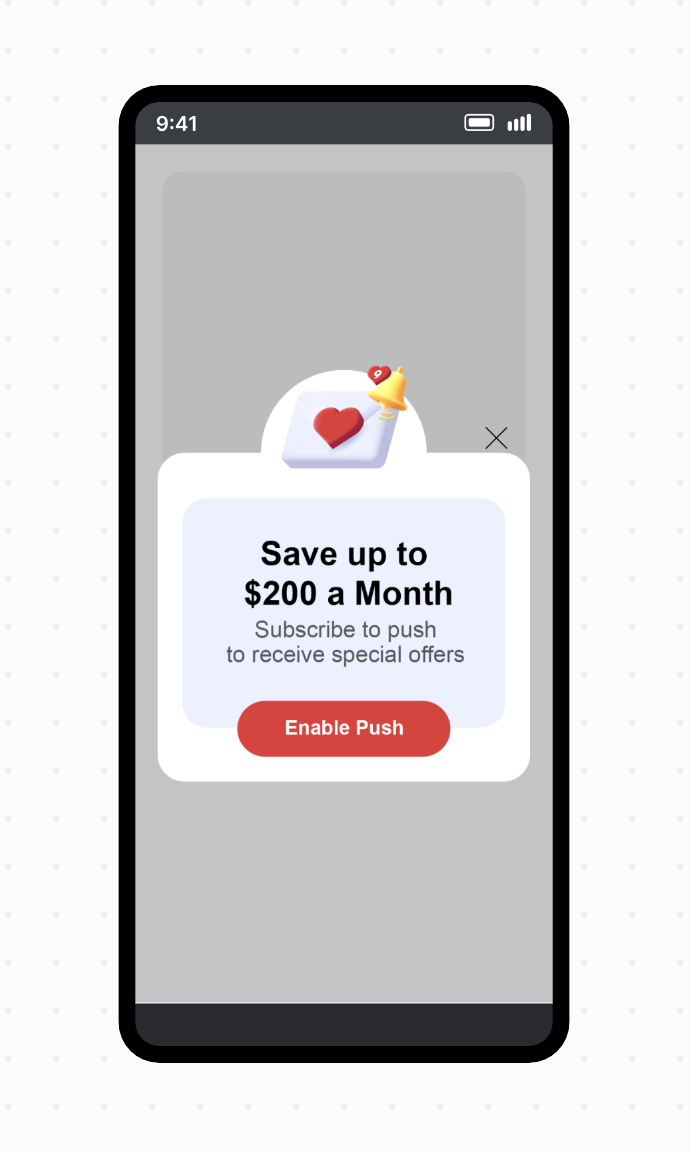
Modal window with a subscription prompt
- Occupies no more than 3/4 of the screen.
- Completely blocks the screen and any other activity in the app until the user closes the notification.
- Closes by clicking on the cross.
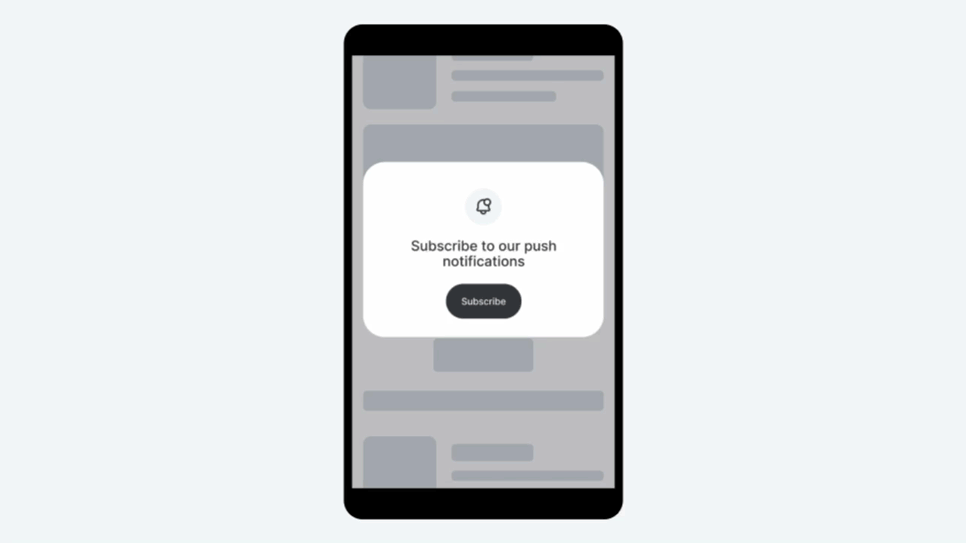
- Snackbar with a subscription prompt
- Occupies no more than 1/3 of the screen.
- Appears from the top or bottom.
- Looks like a push notification.
- Does not block the screen or any activity in the app.
- Closes with a swipe or a click on the cross.
- Specify the in-app name:
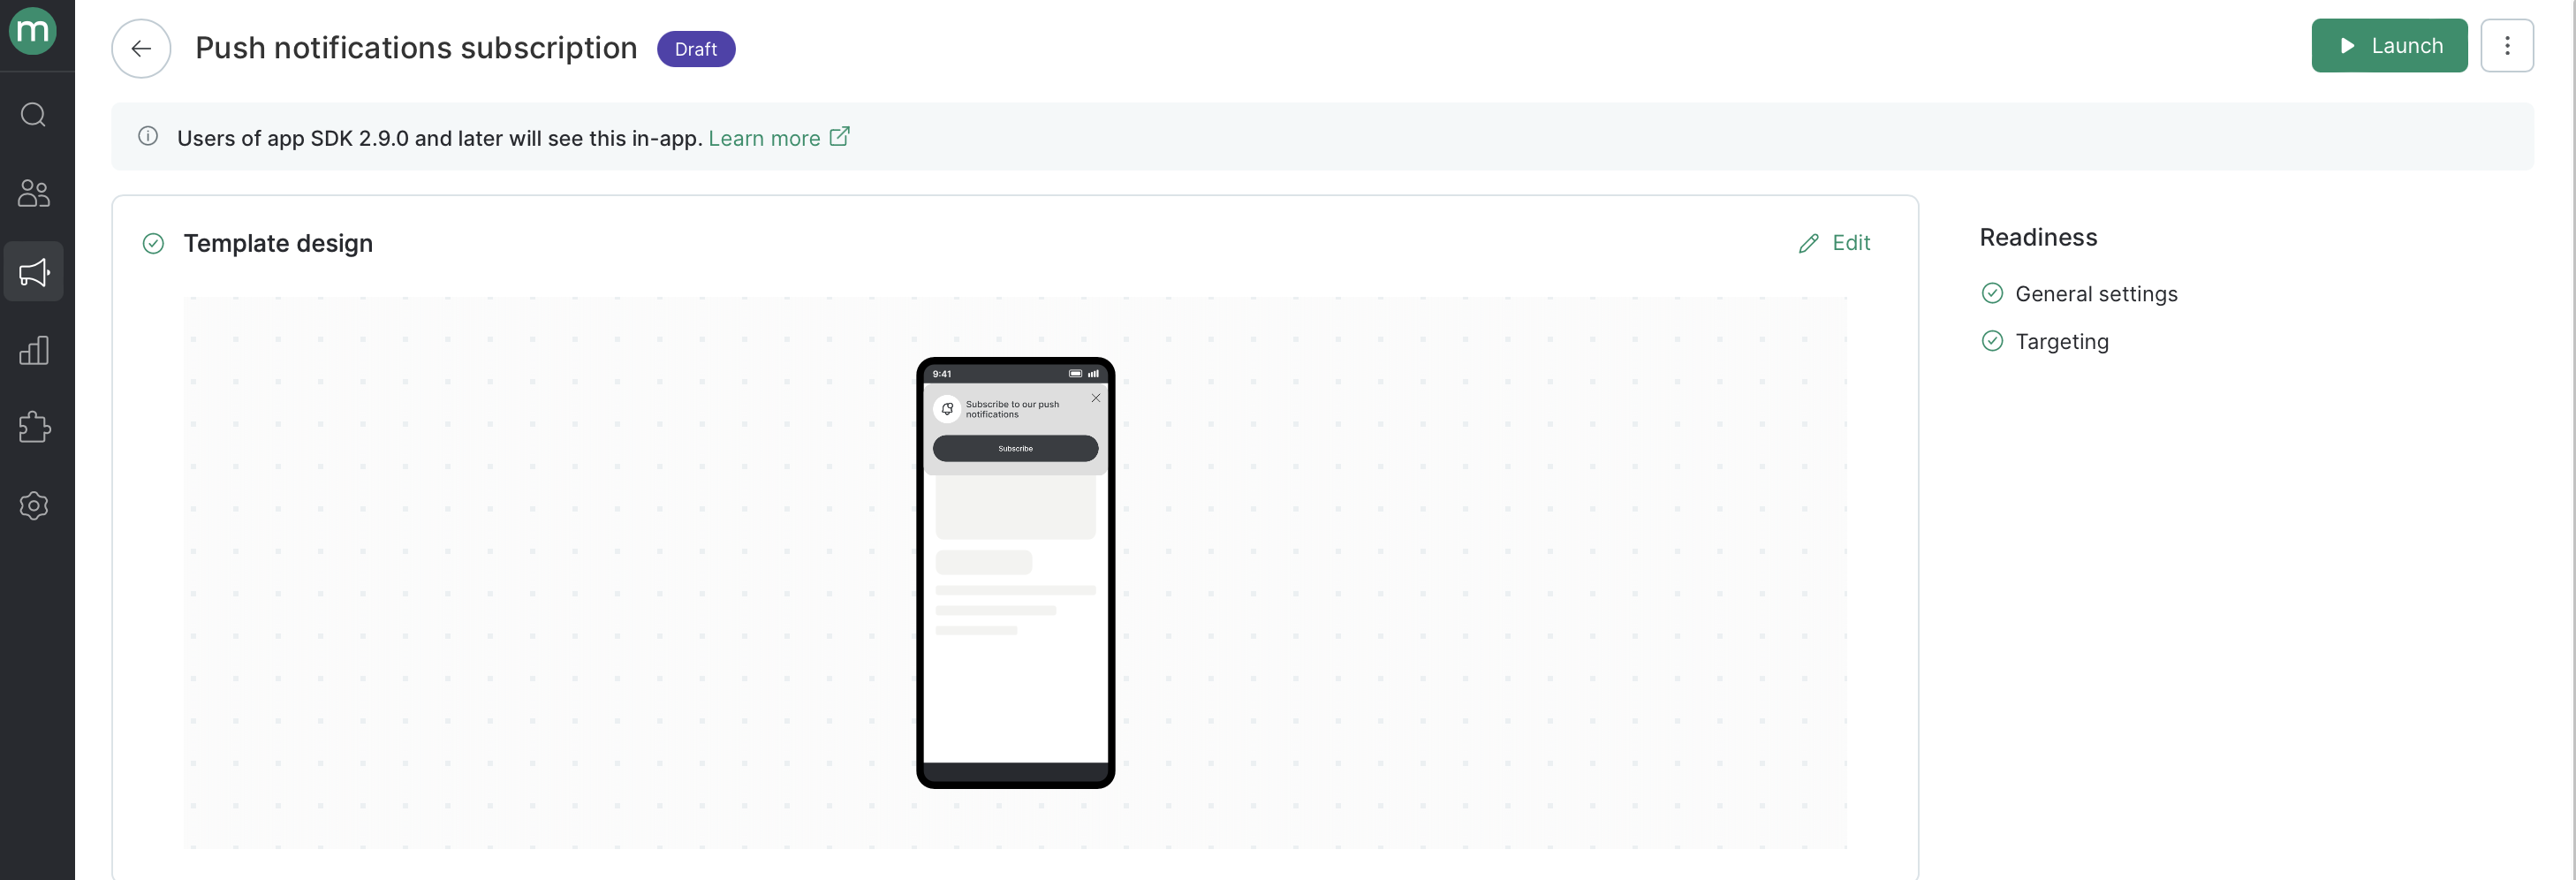
- Set up the in-app appearance.
Settings are different for each template.
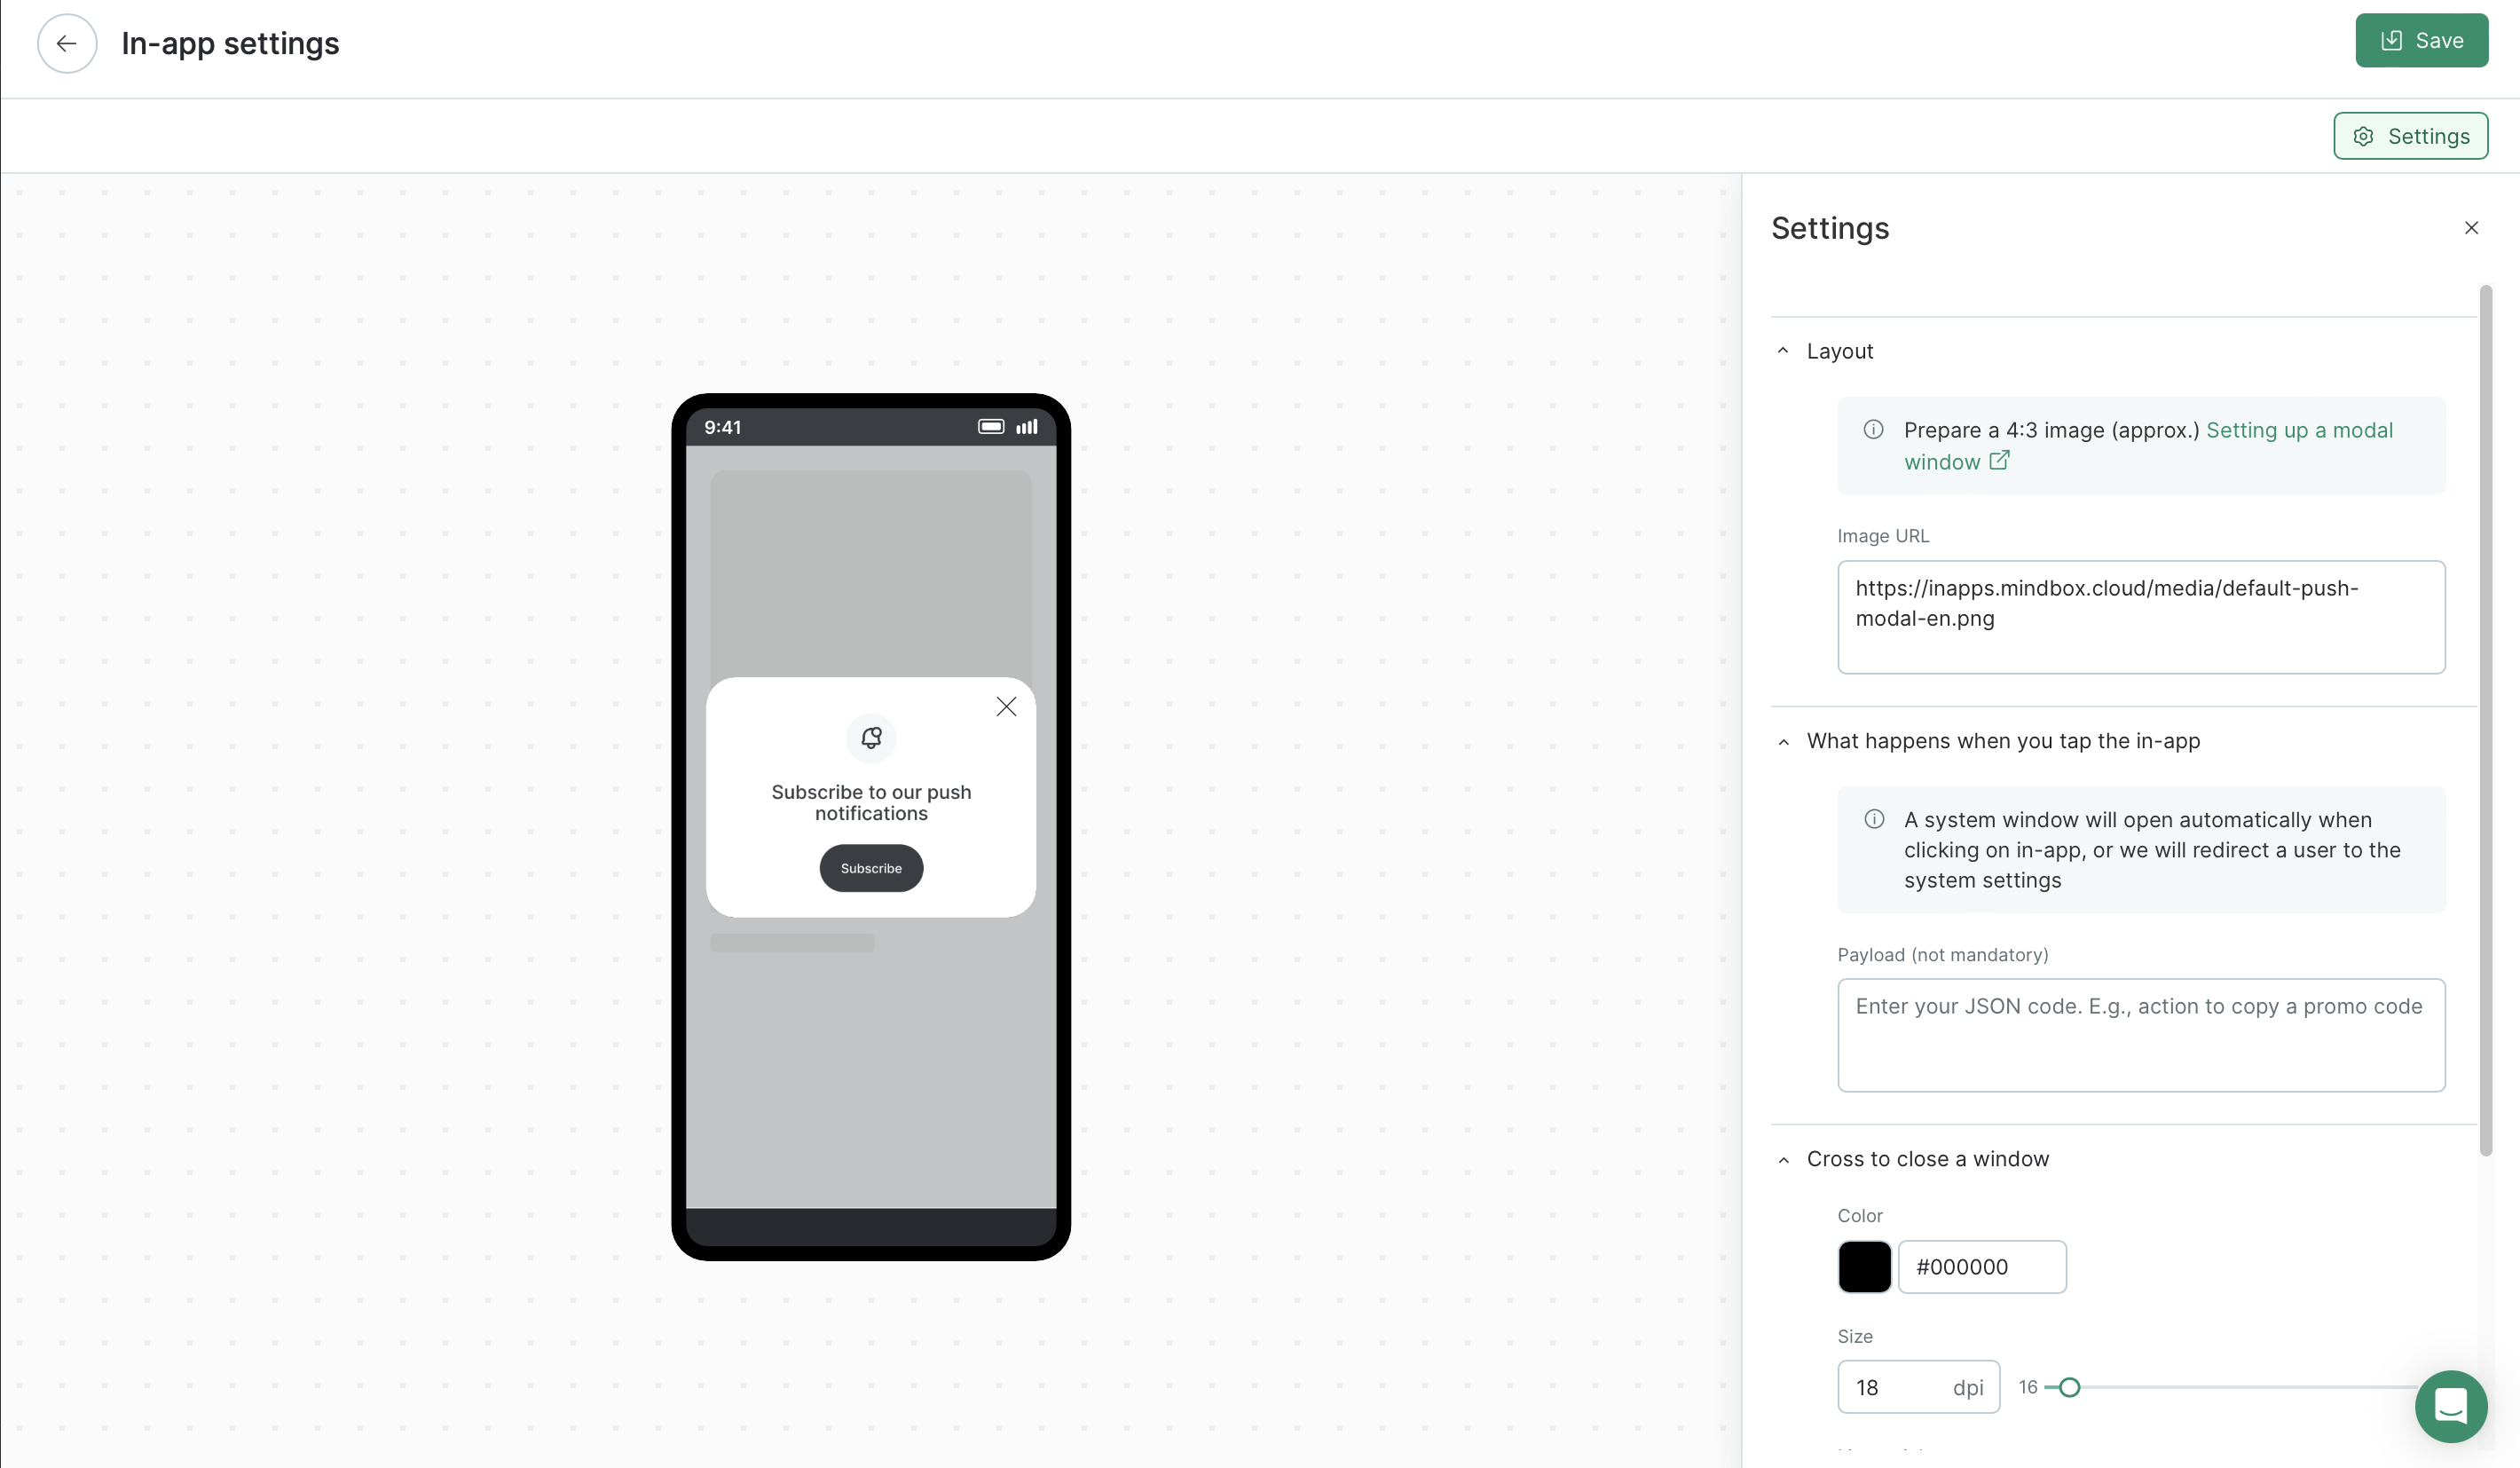
The “Modal Window” template
- Appearance:
- Link to an image. There is a default image. You can replace it with your own vertical image with an approximate aspect ratio of 4:3. If your image is wider, it will be cropped evenly on the sides to 4:3.
- Behavior after clicking on the in-app:
- Default behavior. The system will automatically open a window or the app settings with the option to allow notifications (depending on whether the system has already shown the system window to the user).
- Payload is JSON code to send JSON data to the app. If you specify plain text instead of code, it will be copied to the user’s clipboard when clicked.
- Cross to close the notification:
- You can set the color, size, thickness, and position of the cross.
- You can set the color, size, thickness, and position of the cross.
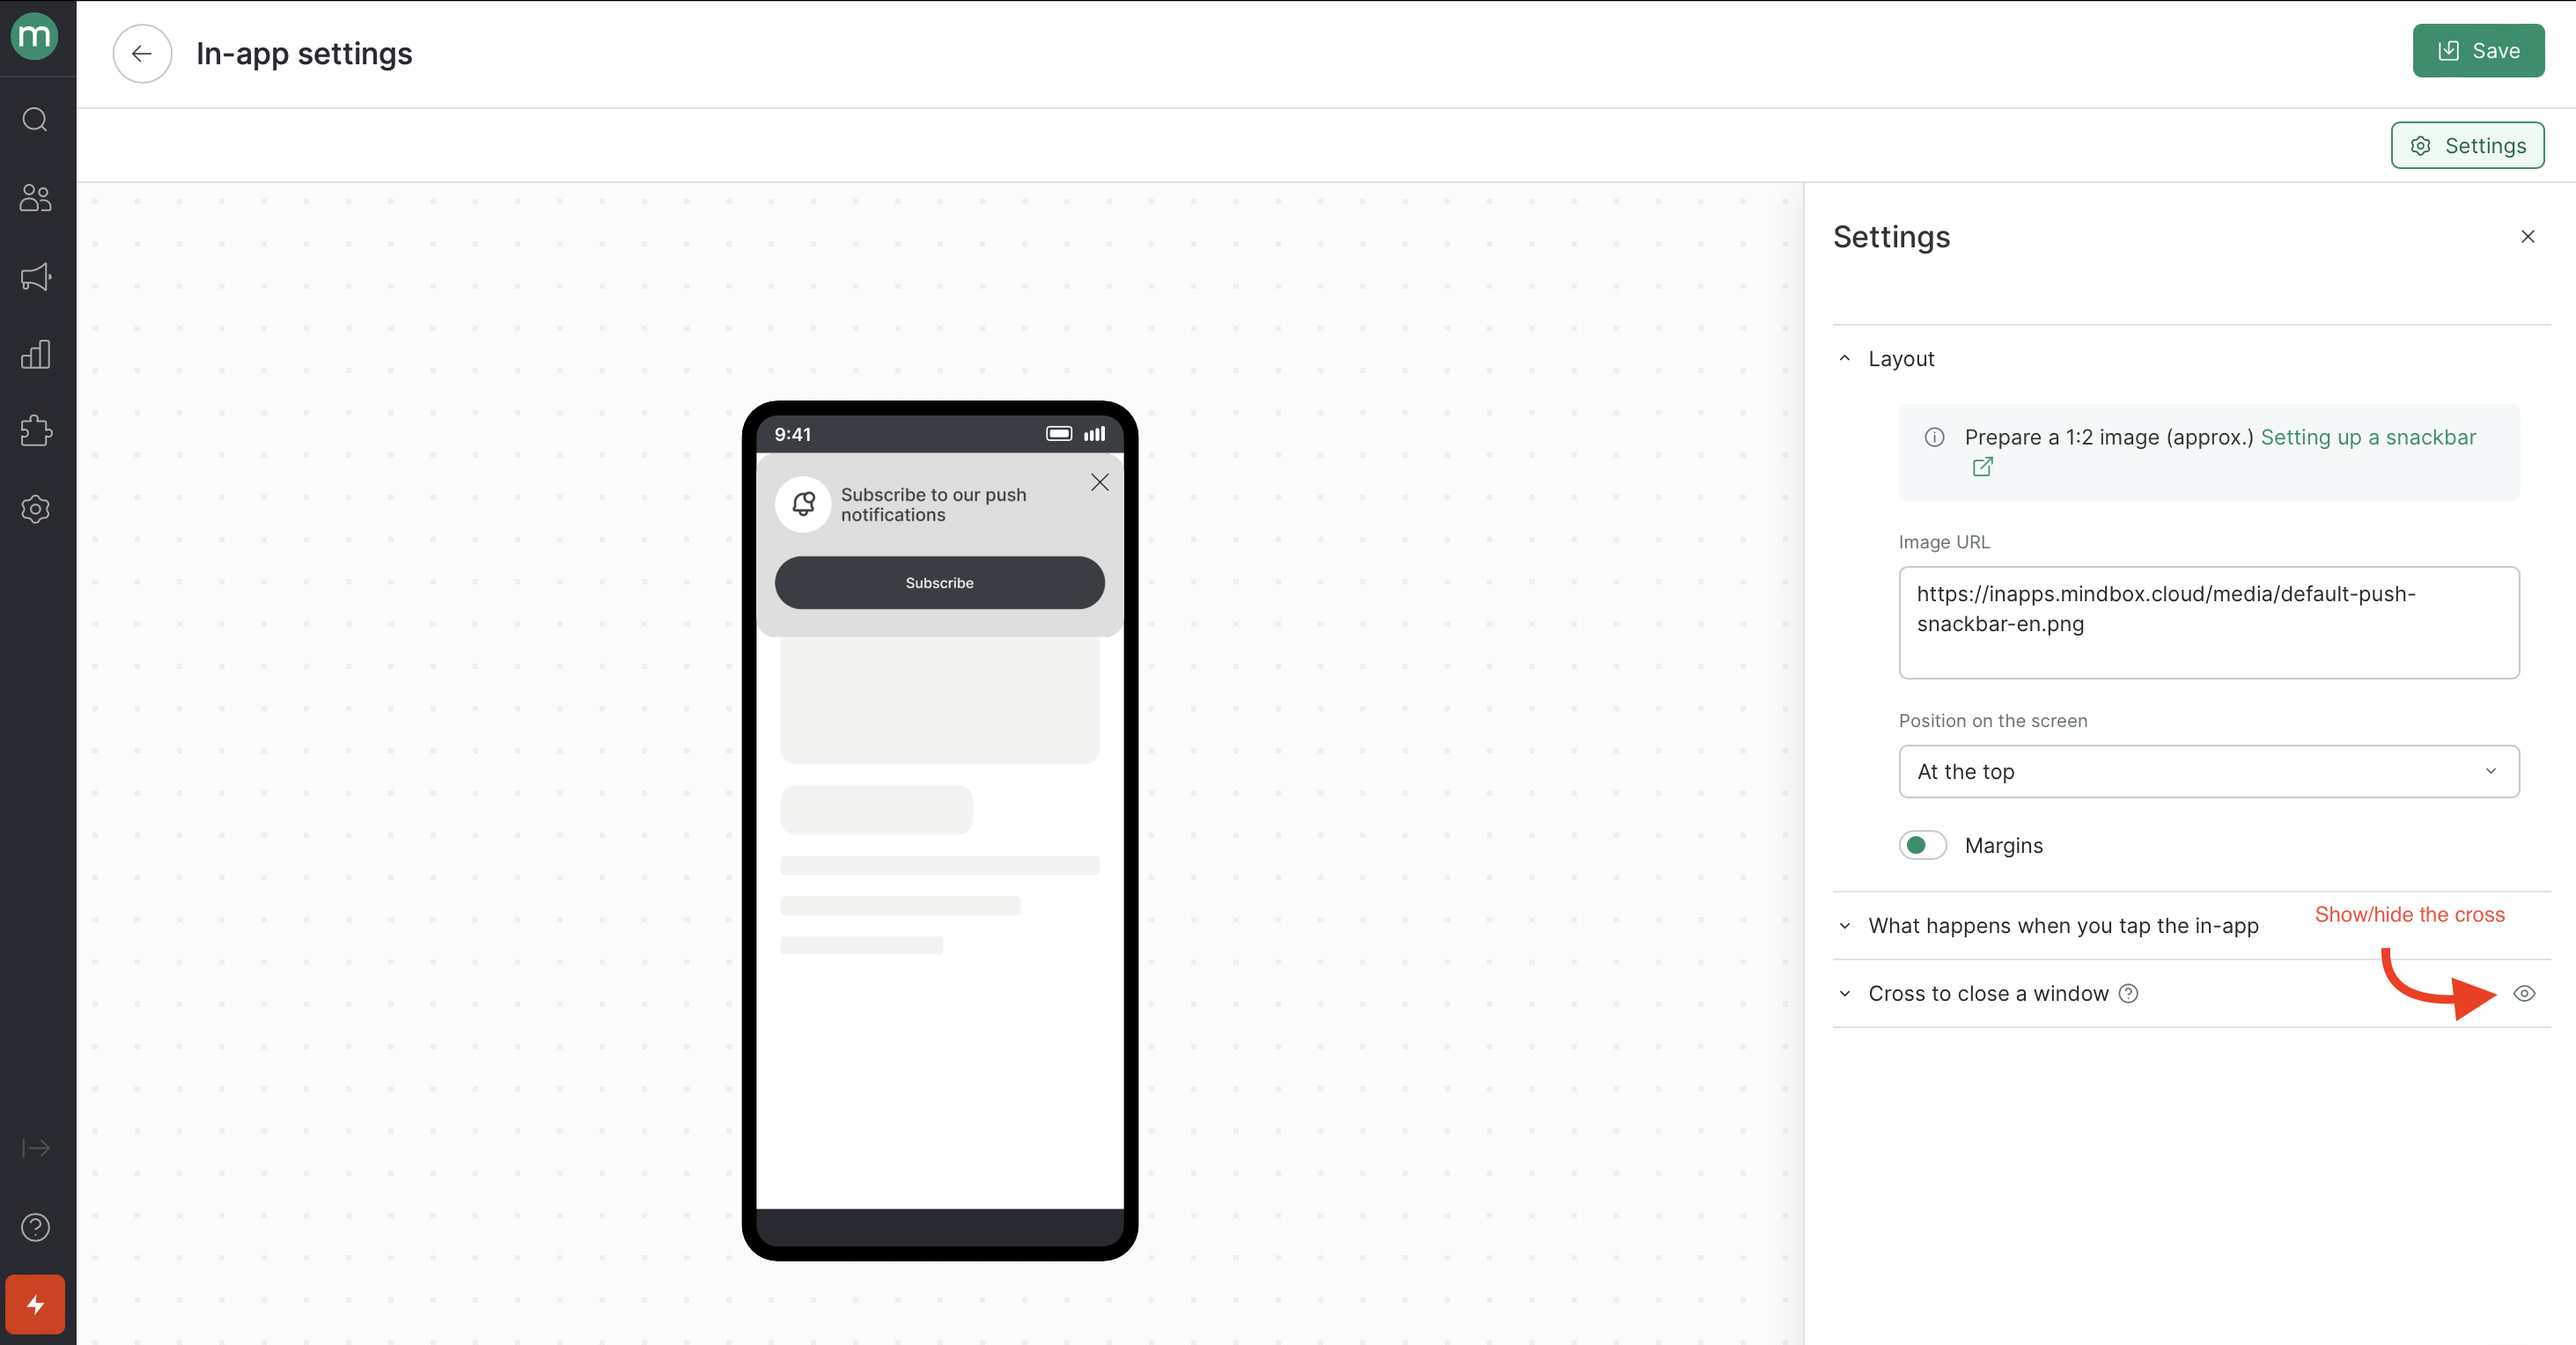
The “Snackbar” template
- Appearance:
- Link to an image. There is a default image.You can replace it with your own horizontal image with an approximate aspect ratio of 1:3. If the image is narrower, it will be cropped evenly at the top and bottom to 1:3.
- Position on the screen: top or bottom.
- Indents from screen borders: transparent borders approximately 5% of the screen width on each side.
- Behavior after clicking on the in-app:
- Default behavior. The system will automatically open a window or the app settings with the option to allow notifications (depending on whether the system has already shown the system window to the user).
- Payload is JSON code to send JSON data to the app. If you specify plain text instead of code, it will be copied to the user’s clipboard when clicked.
- Cross to close the notification:
- You can set the color, size, thickness, and position of the cross.
- If you do not want the cross in the snackbar, click on the icon to remove it.
- You can add more mobile apps to display the in-app in the general settings:

- Target the audience by specifying the following parameters:
- recalculated or static customer segment;
- operation that will trigger the in-app when invoked;
- number of logins to the application—for example, if the request to allow push notifications appears immediately after the app is installed or during the app onboarding, show the in-app starting with the second login or later to avoid overspamming a new user;
- display screen—a category or product page to display;
- geographical location of users (country, region, city), based on IP address. Available with SDK 2.3.0 or higher.
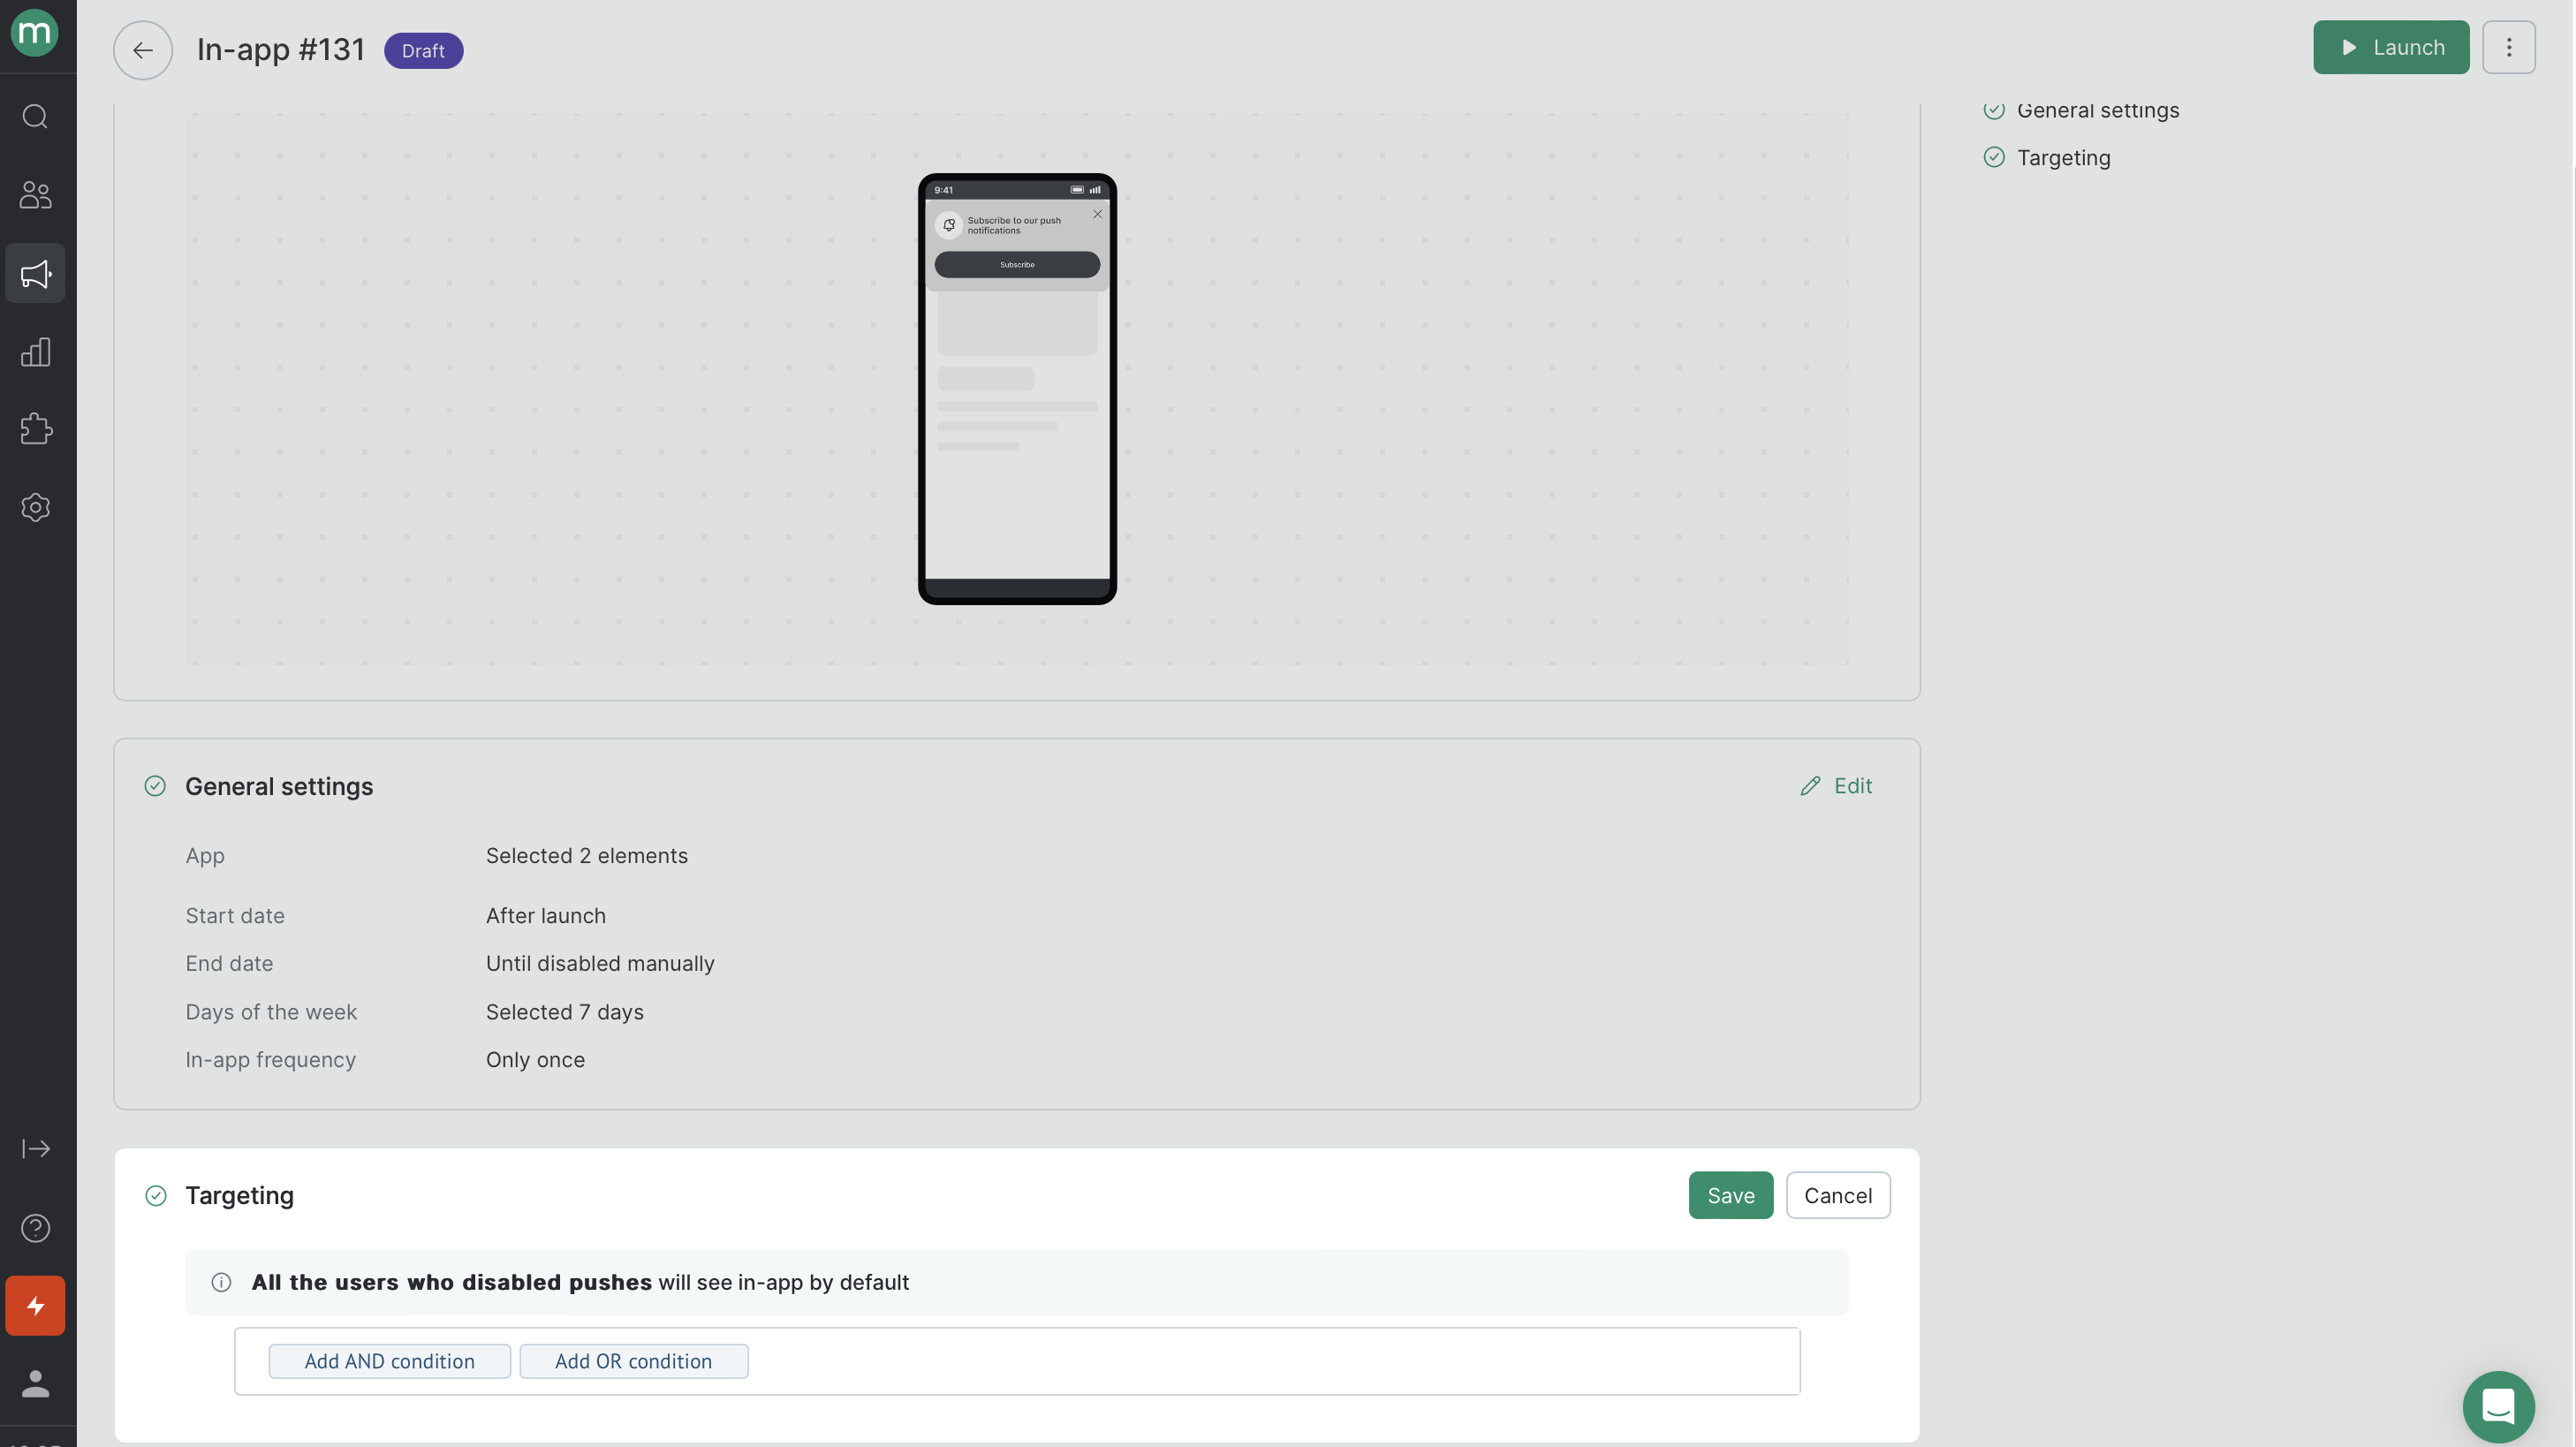
The system will display the in-apps without targeted audience to all users of the selected apps who have prohibited notifications.
Users will not see the same in-app twice on the same device.
However, if there are several suitable apps installed, users will see the in-app in all of them.
- Launch the in-app:
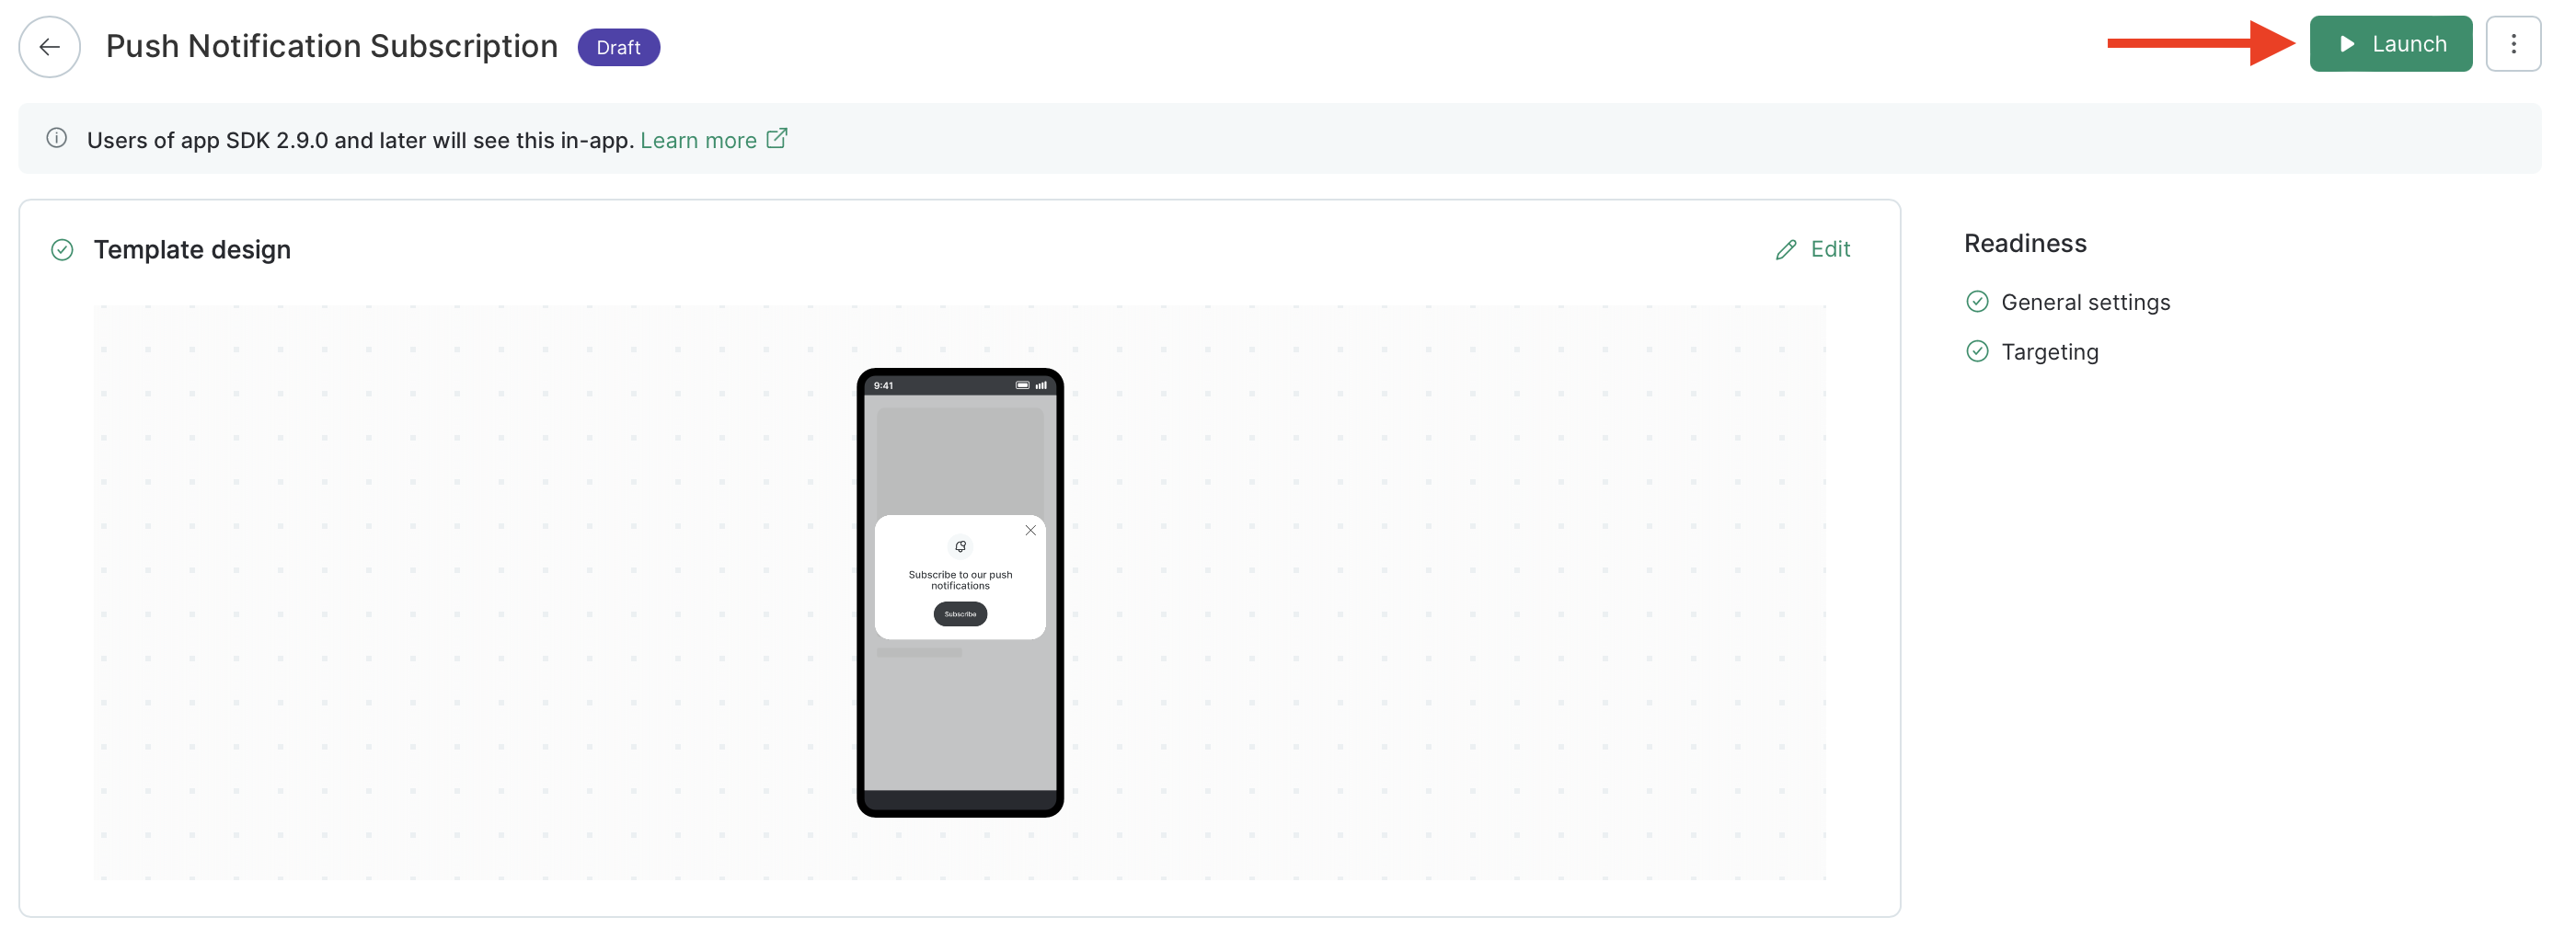
How to evaluate the in-app efficiency
Calculate the subscription conversion rate
Giving push notification permission does not create any actions in the customer card. Therefore, check if the mechanics worked for the user by adding tags from the scenario:
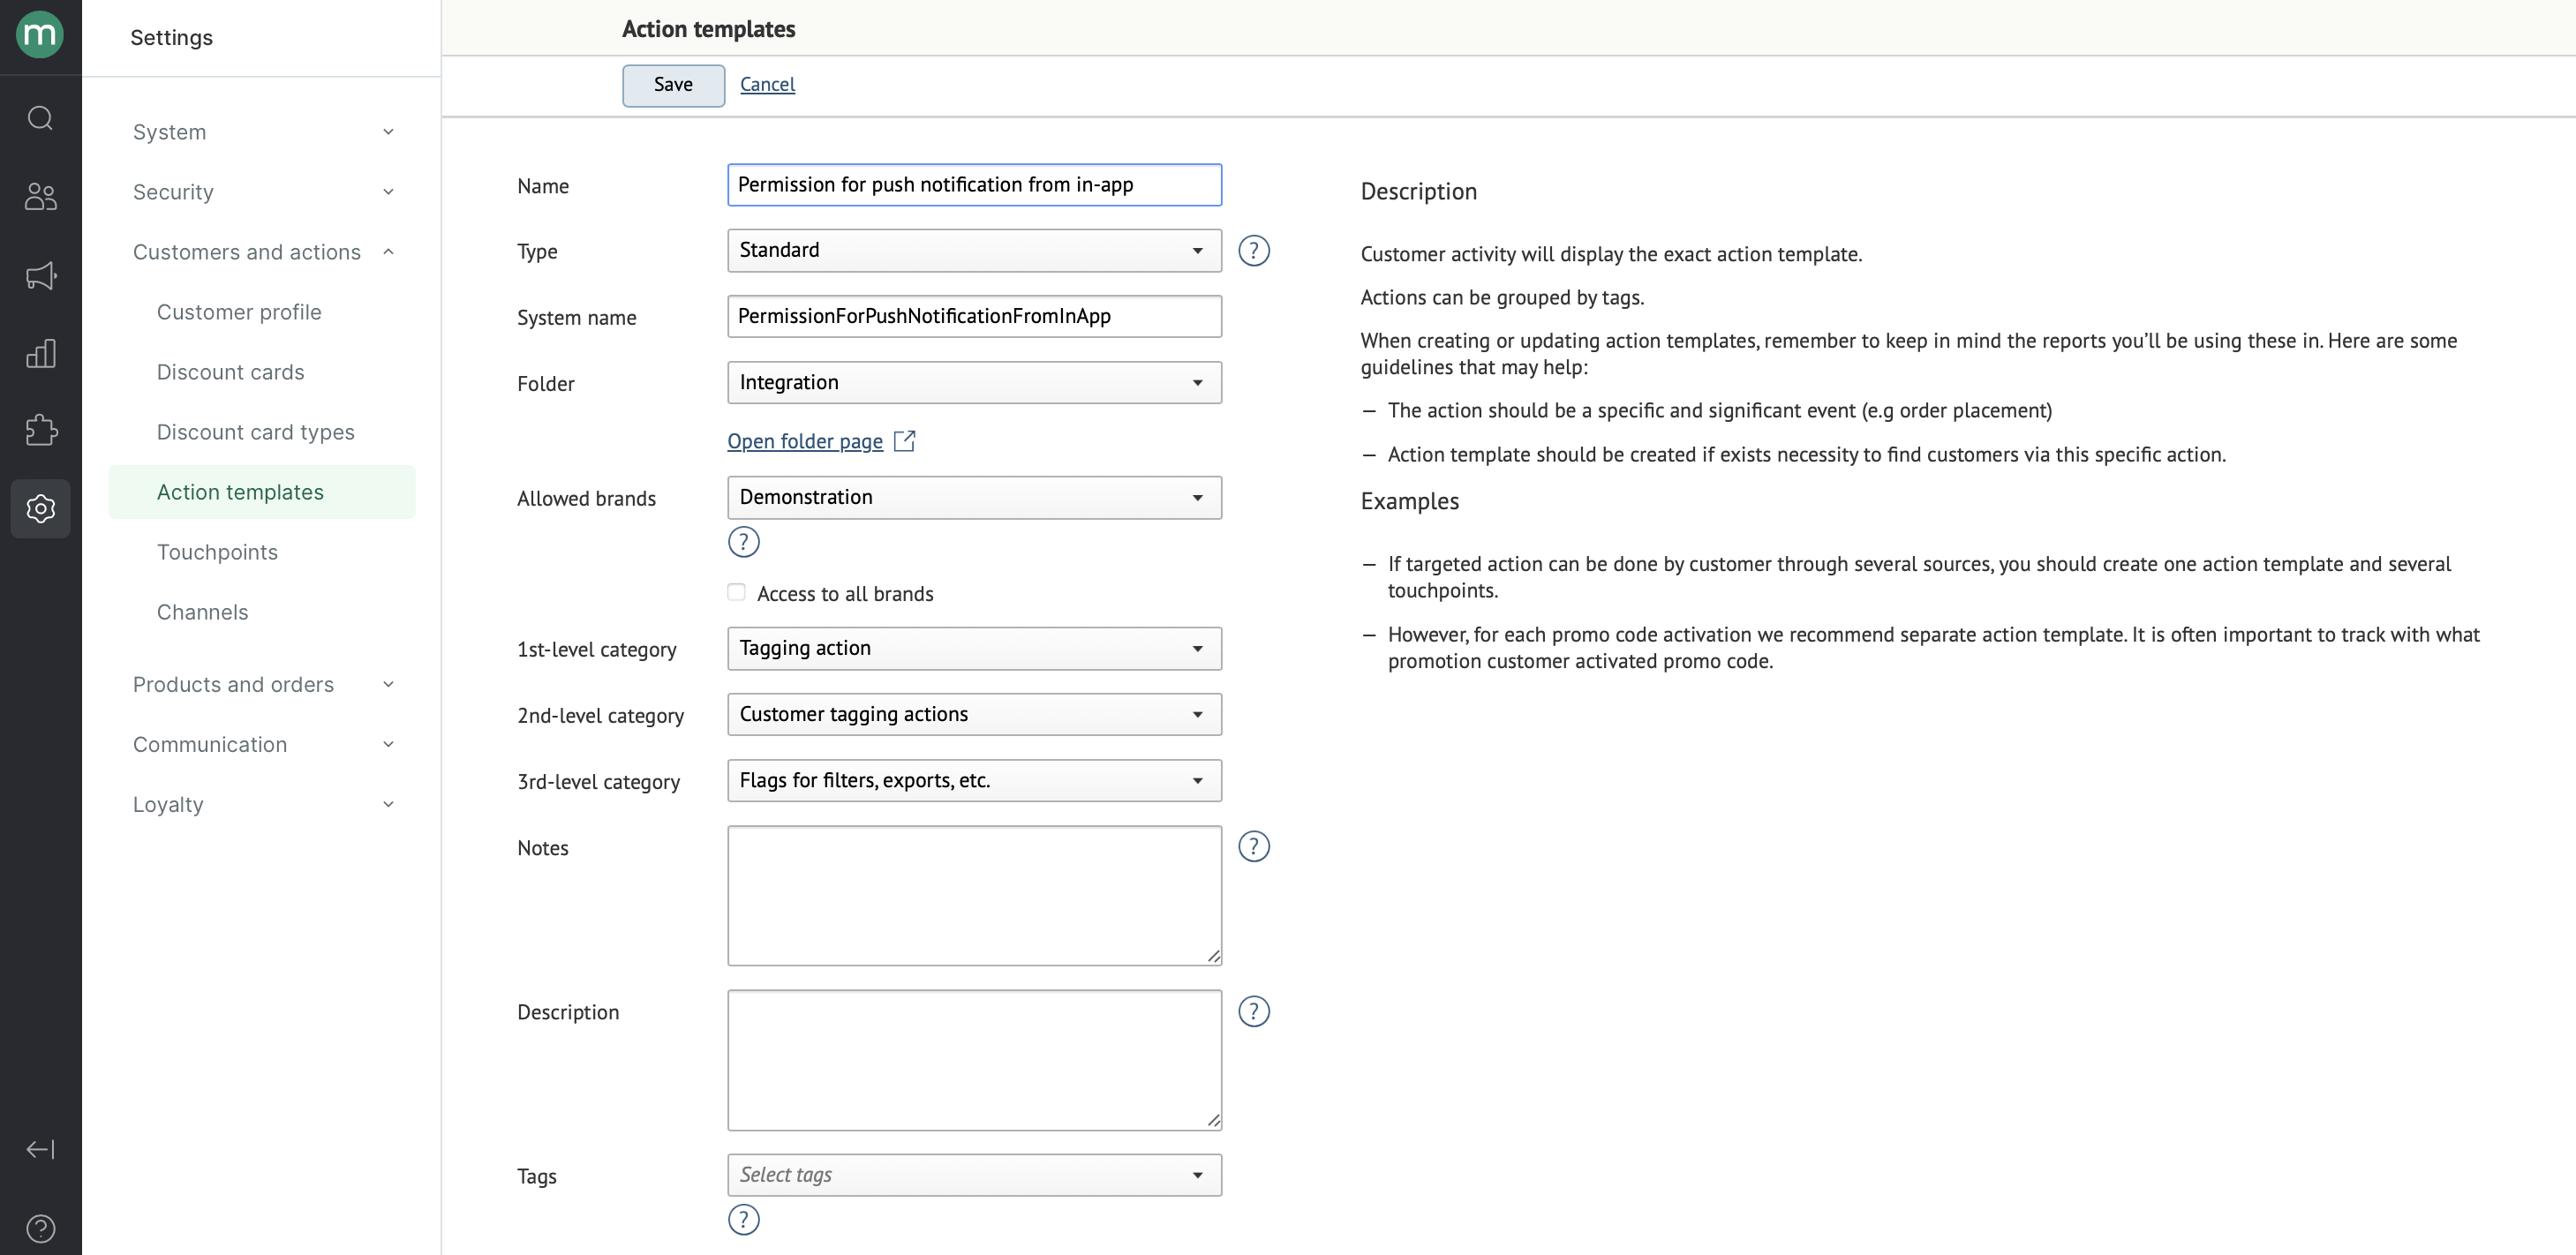
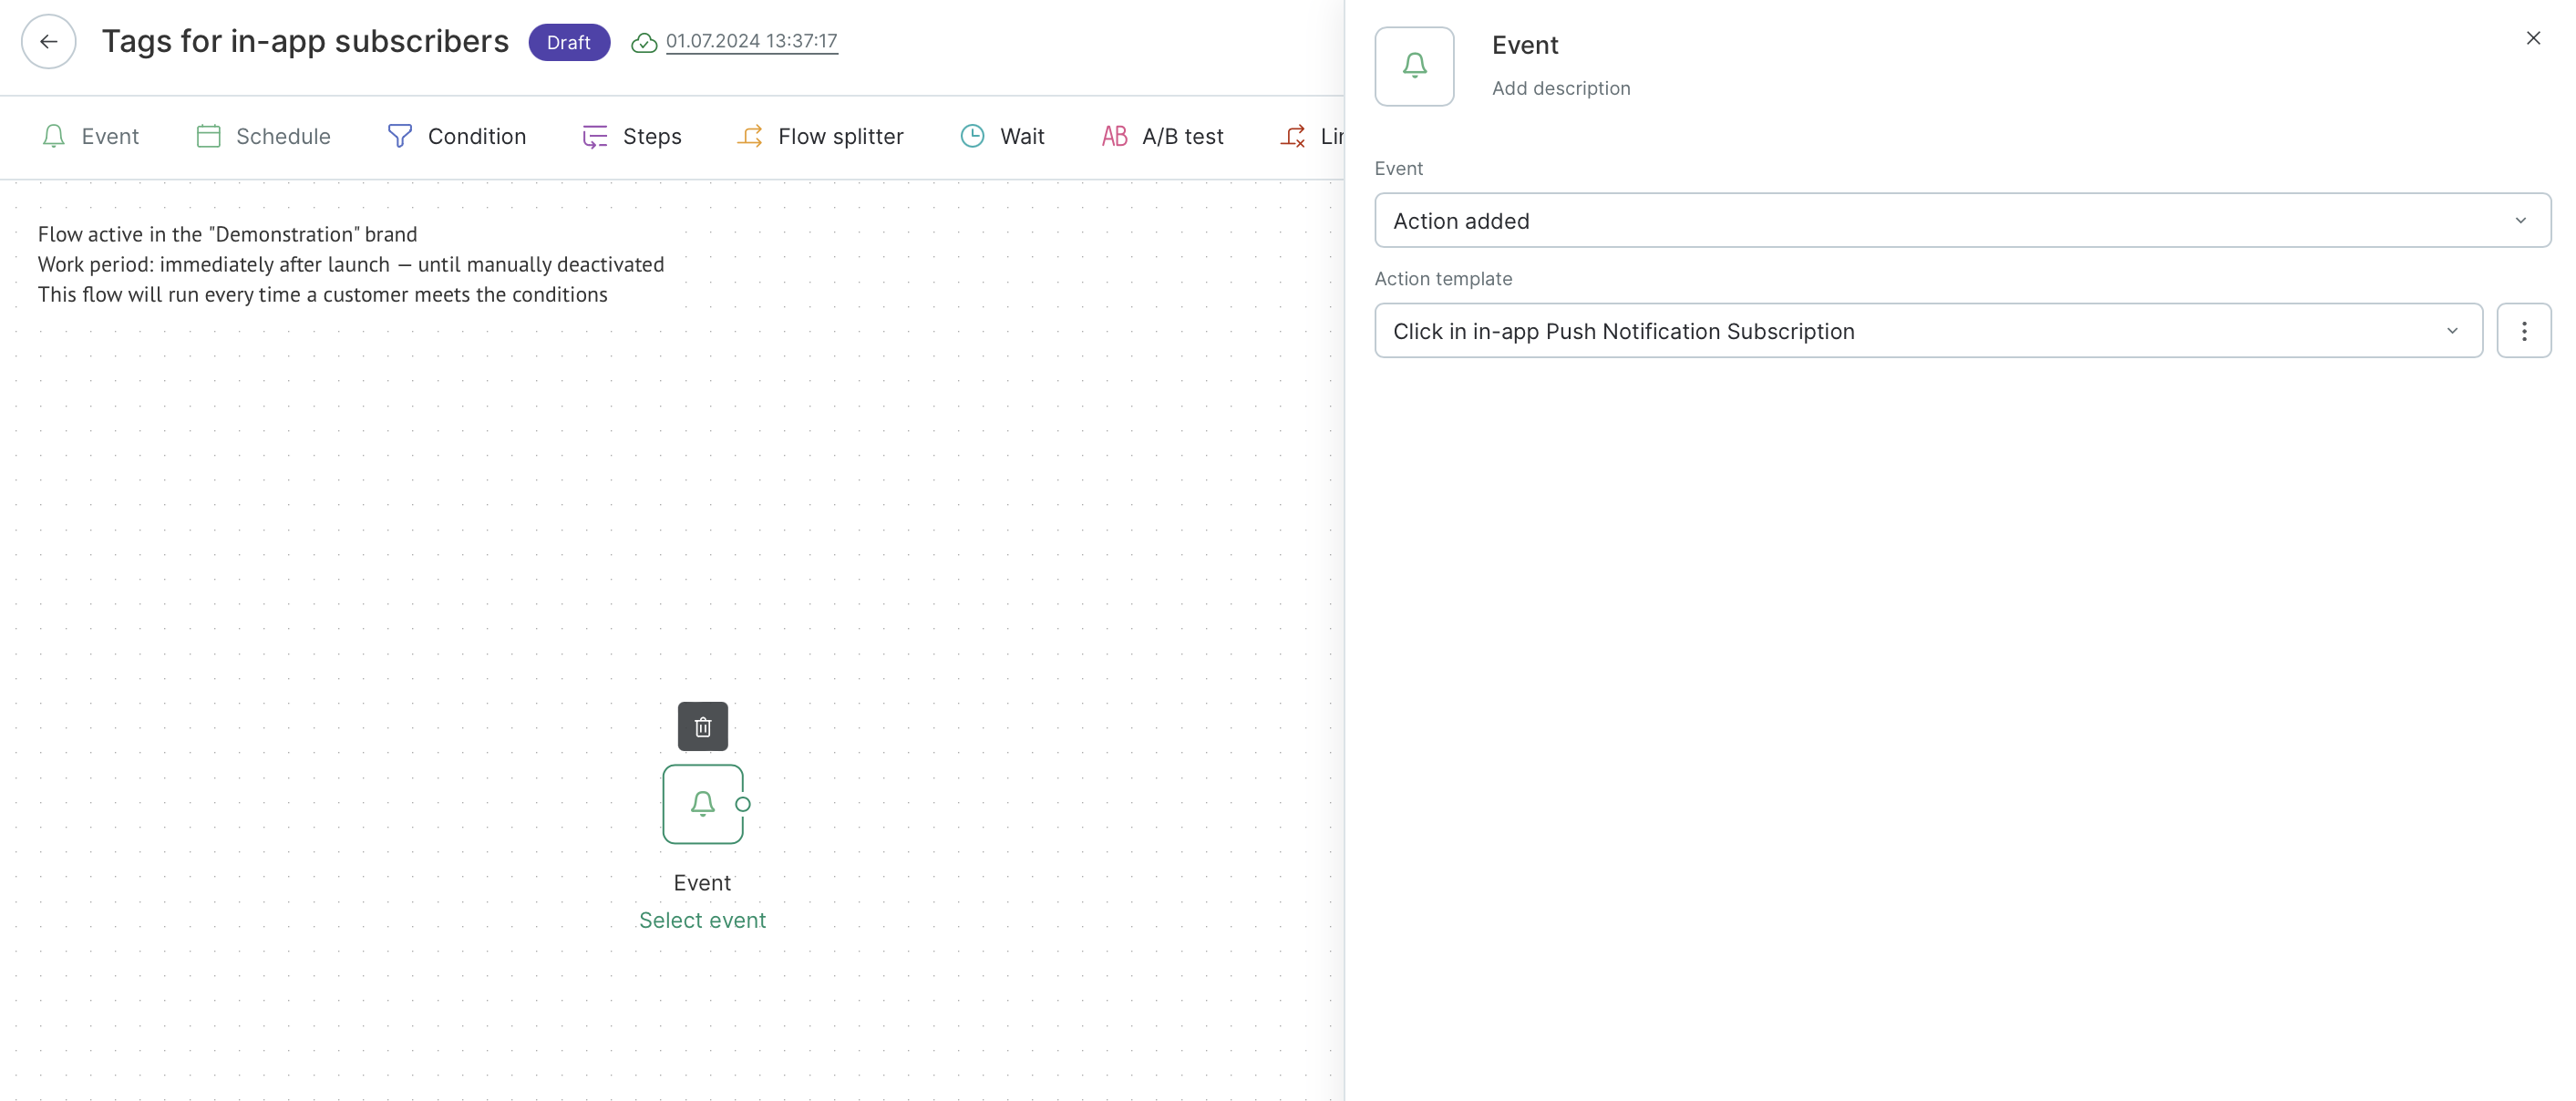
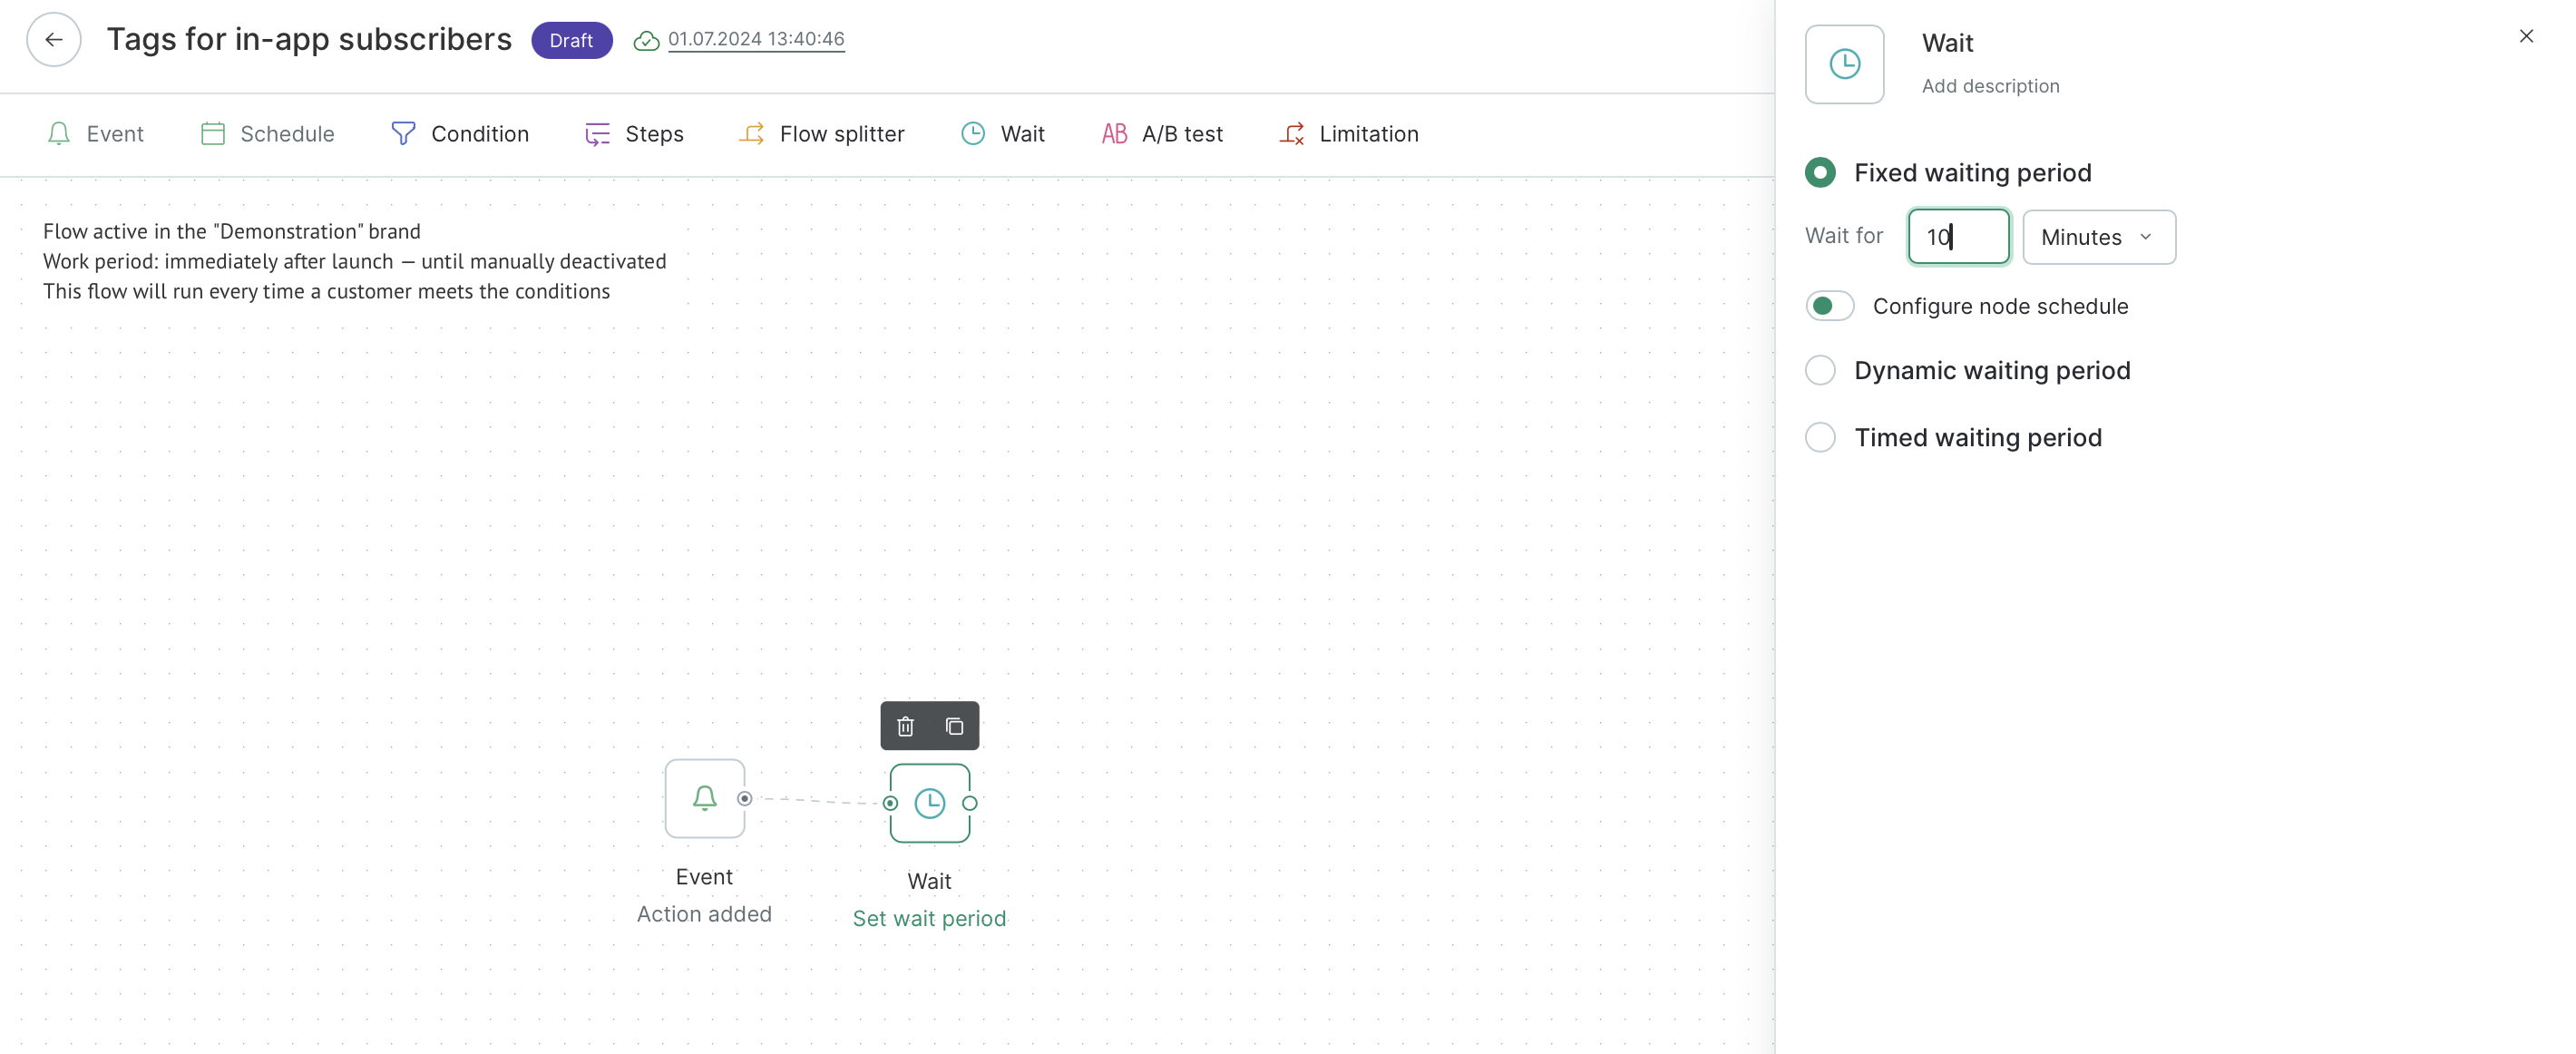
To do this, add the following flow:
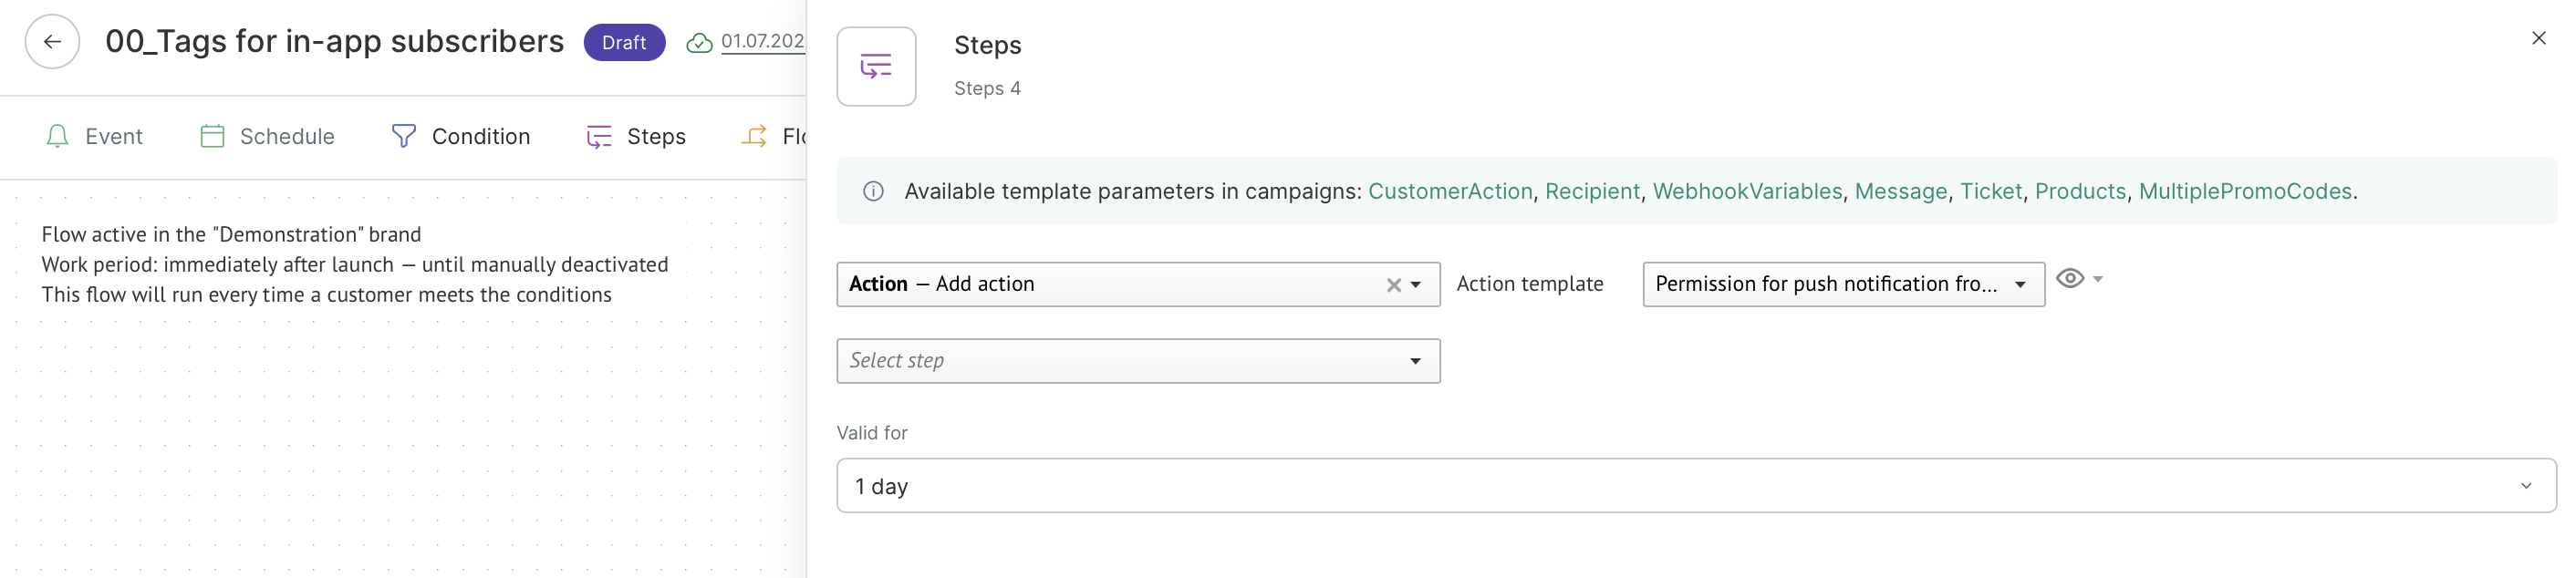
- Launch—by clicking on the in-app. Select the auto-generated template:
- Set up the waiting time for the user to perform the target action:
- Verify that push notifications can now be sent to the user:
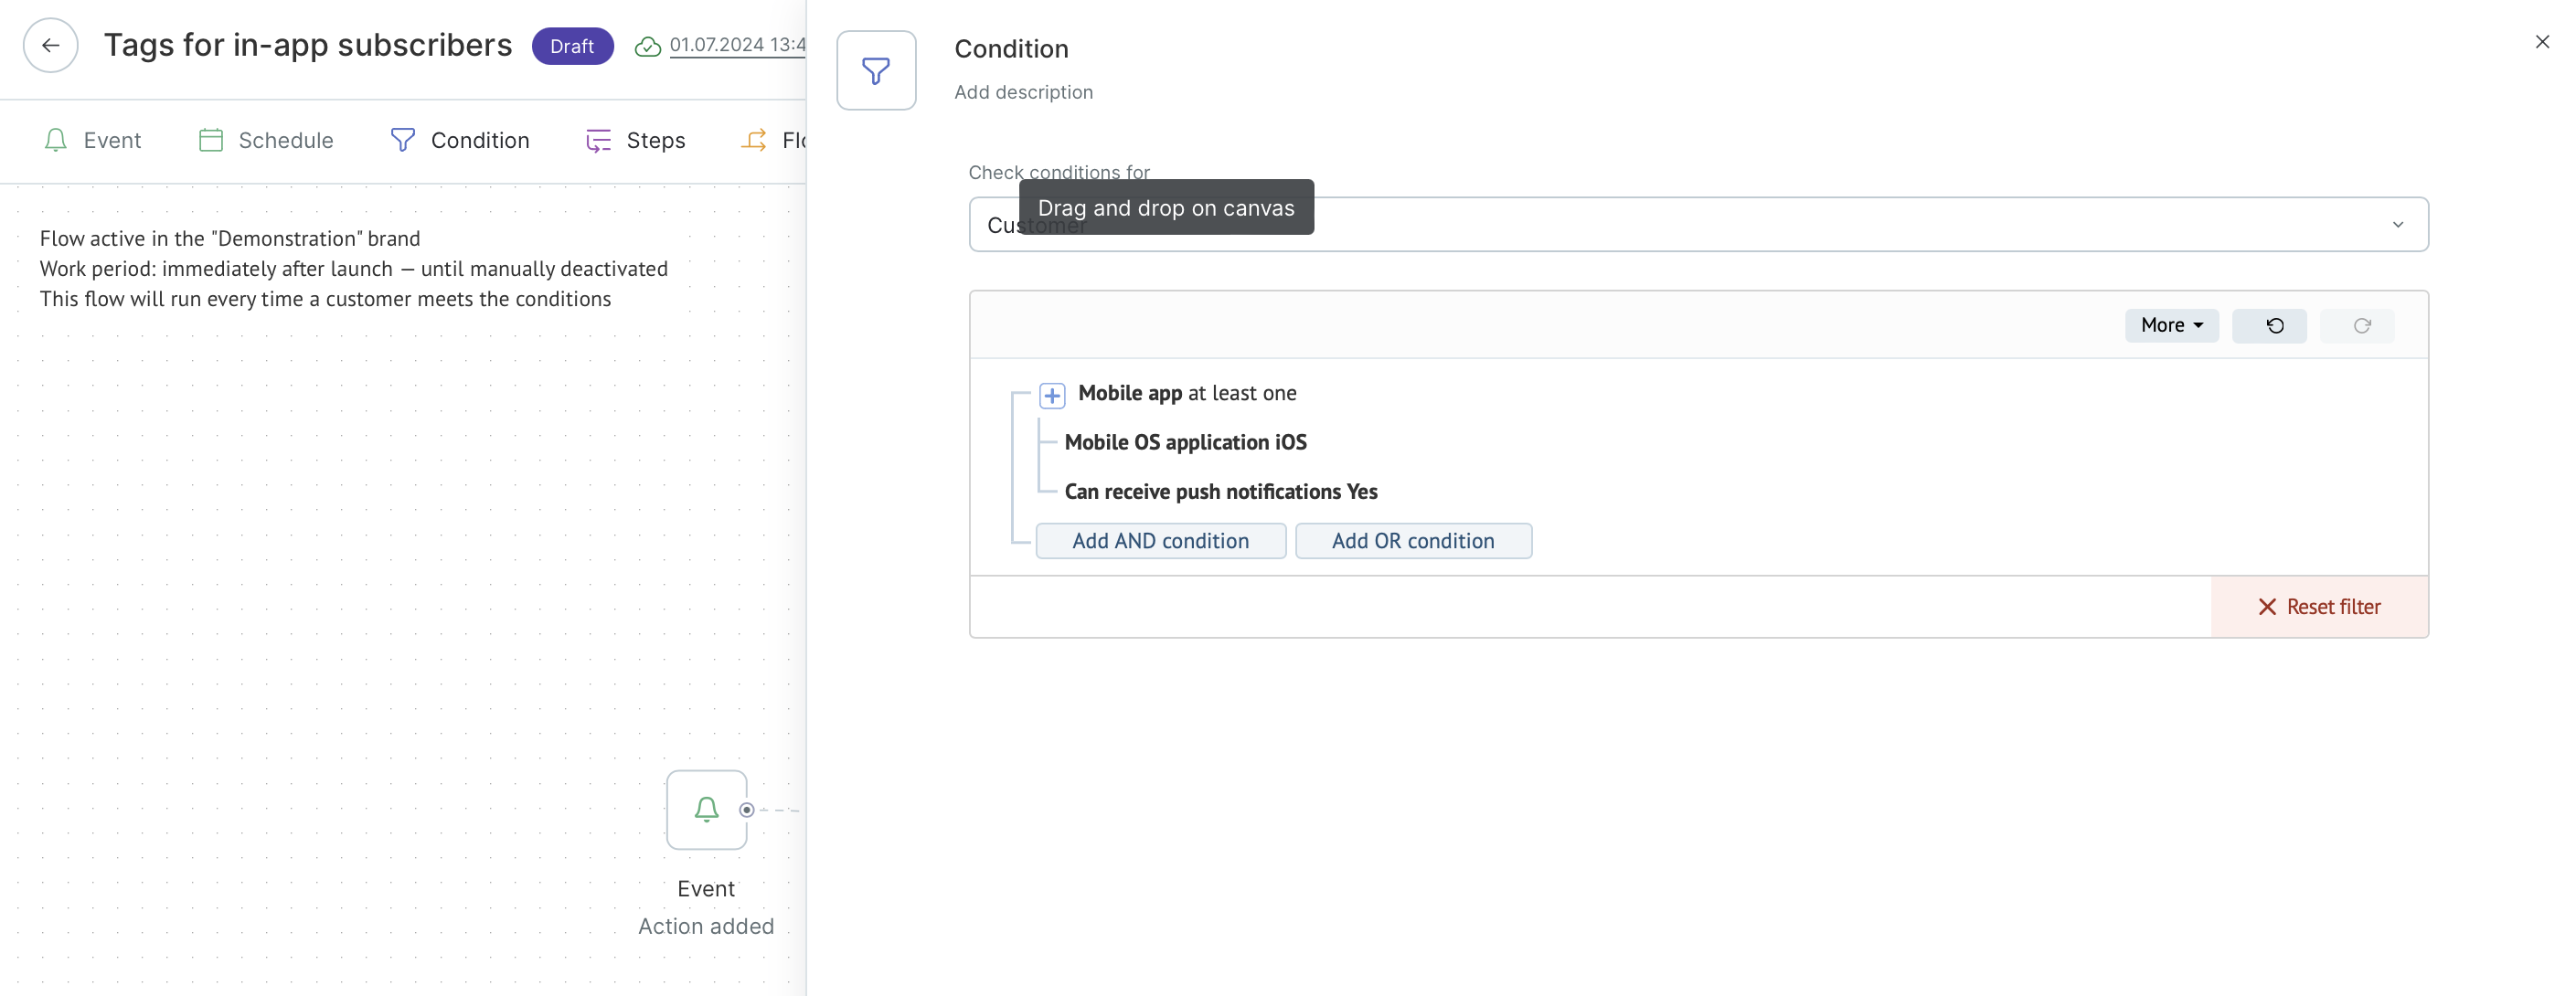
- If “Yes” appears next to the filter, add a tag to the user:
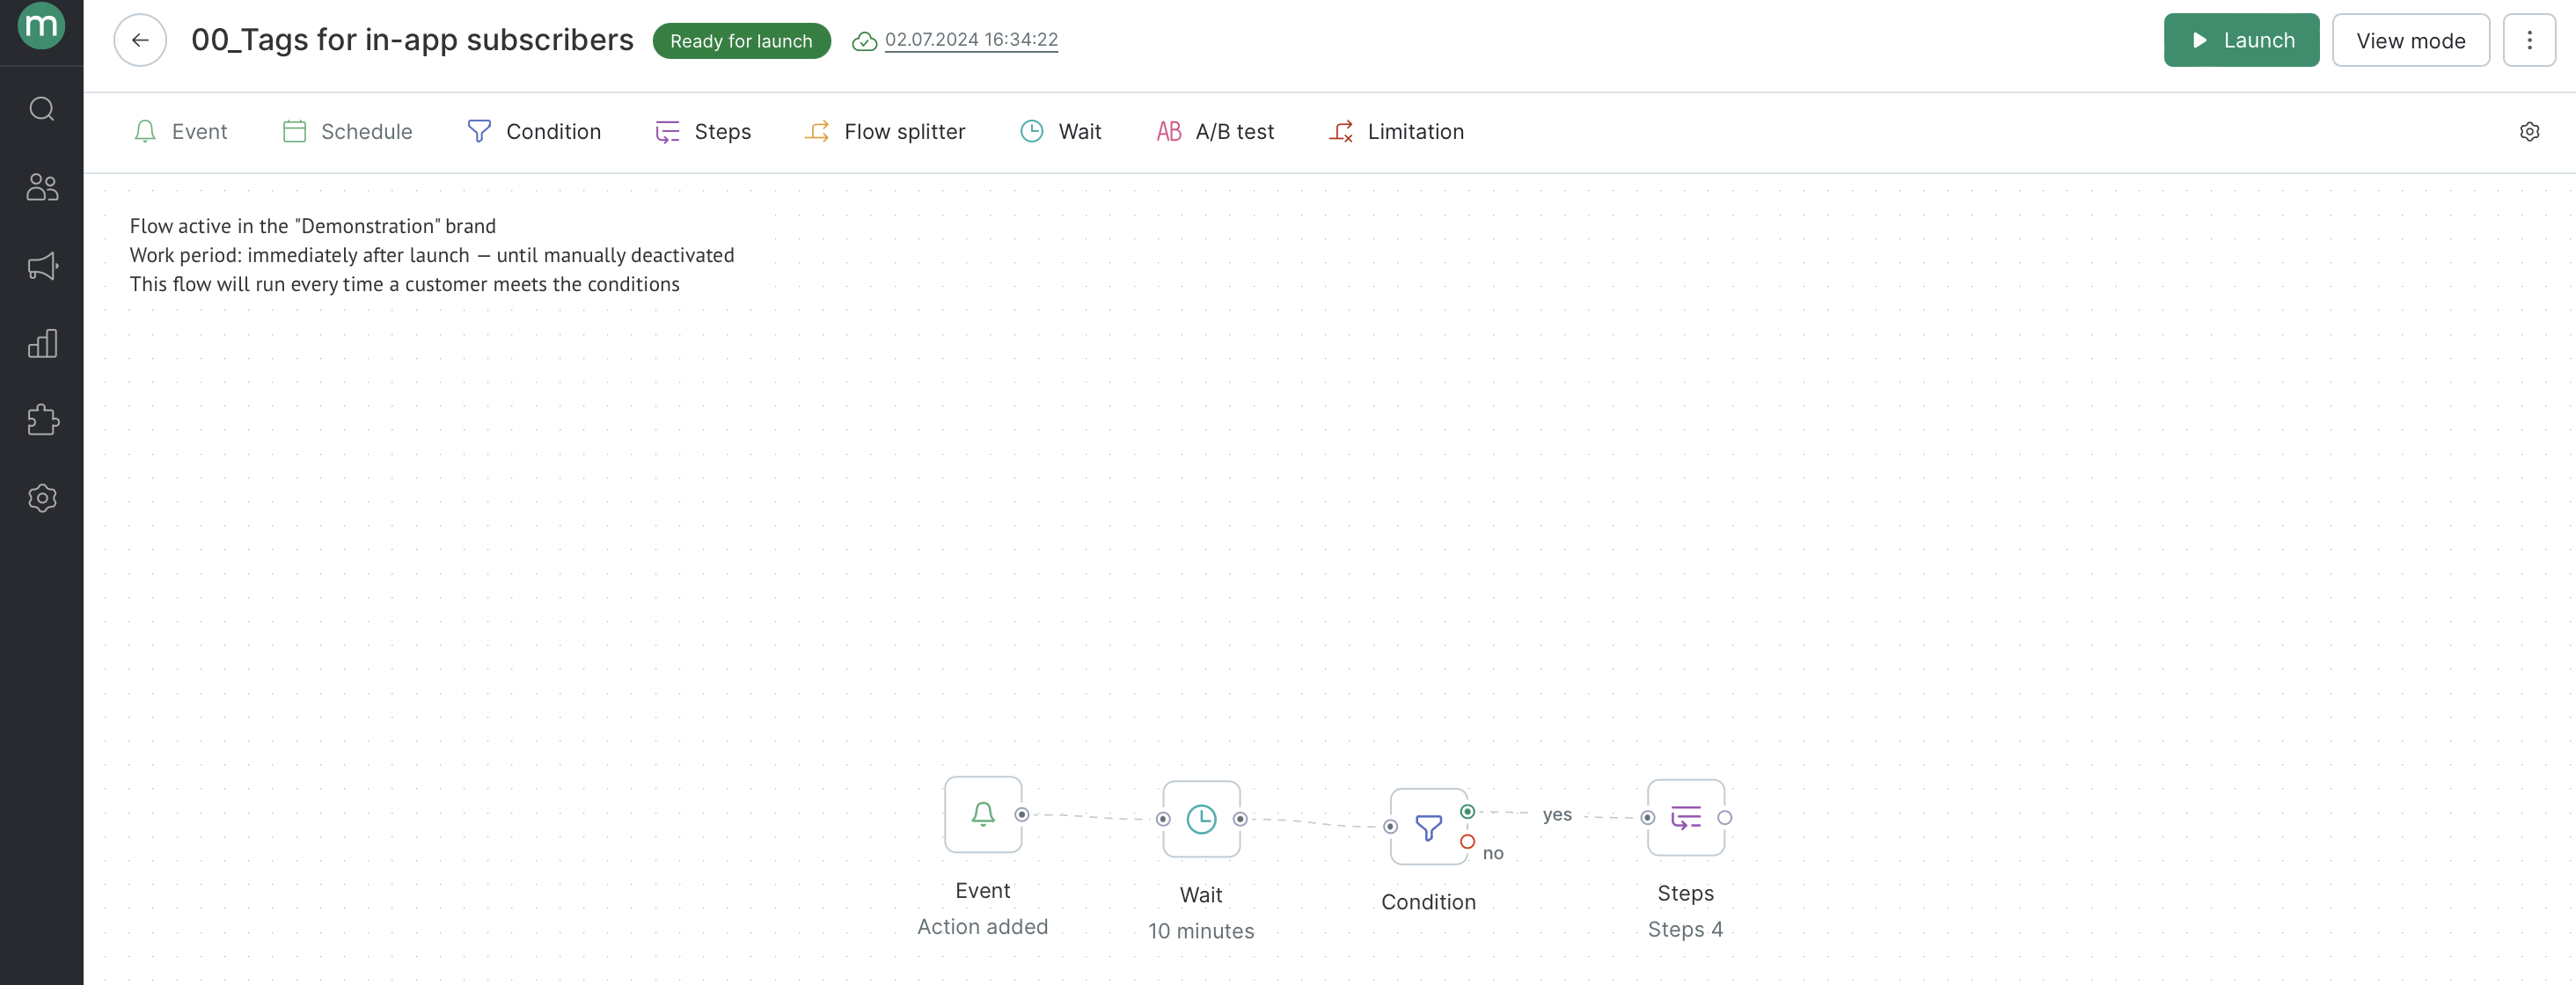
The scenario is ready to run:
To determine the conversion rate related to subscriptions from the in-app, calculate the ratio of the customers who allowed notifications to the total number of times the in-app has been displayed:


A/B testing
To compare how efficient several campaigns are at attracting subscribers, do the following:
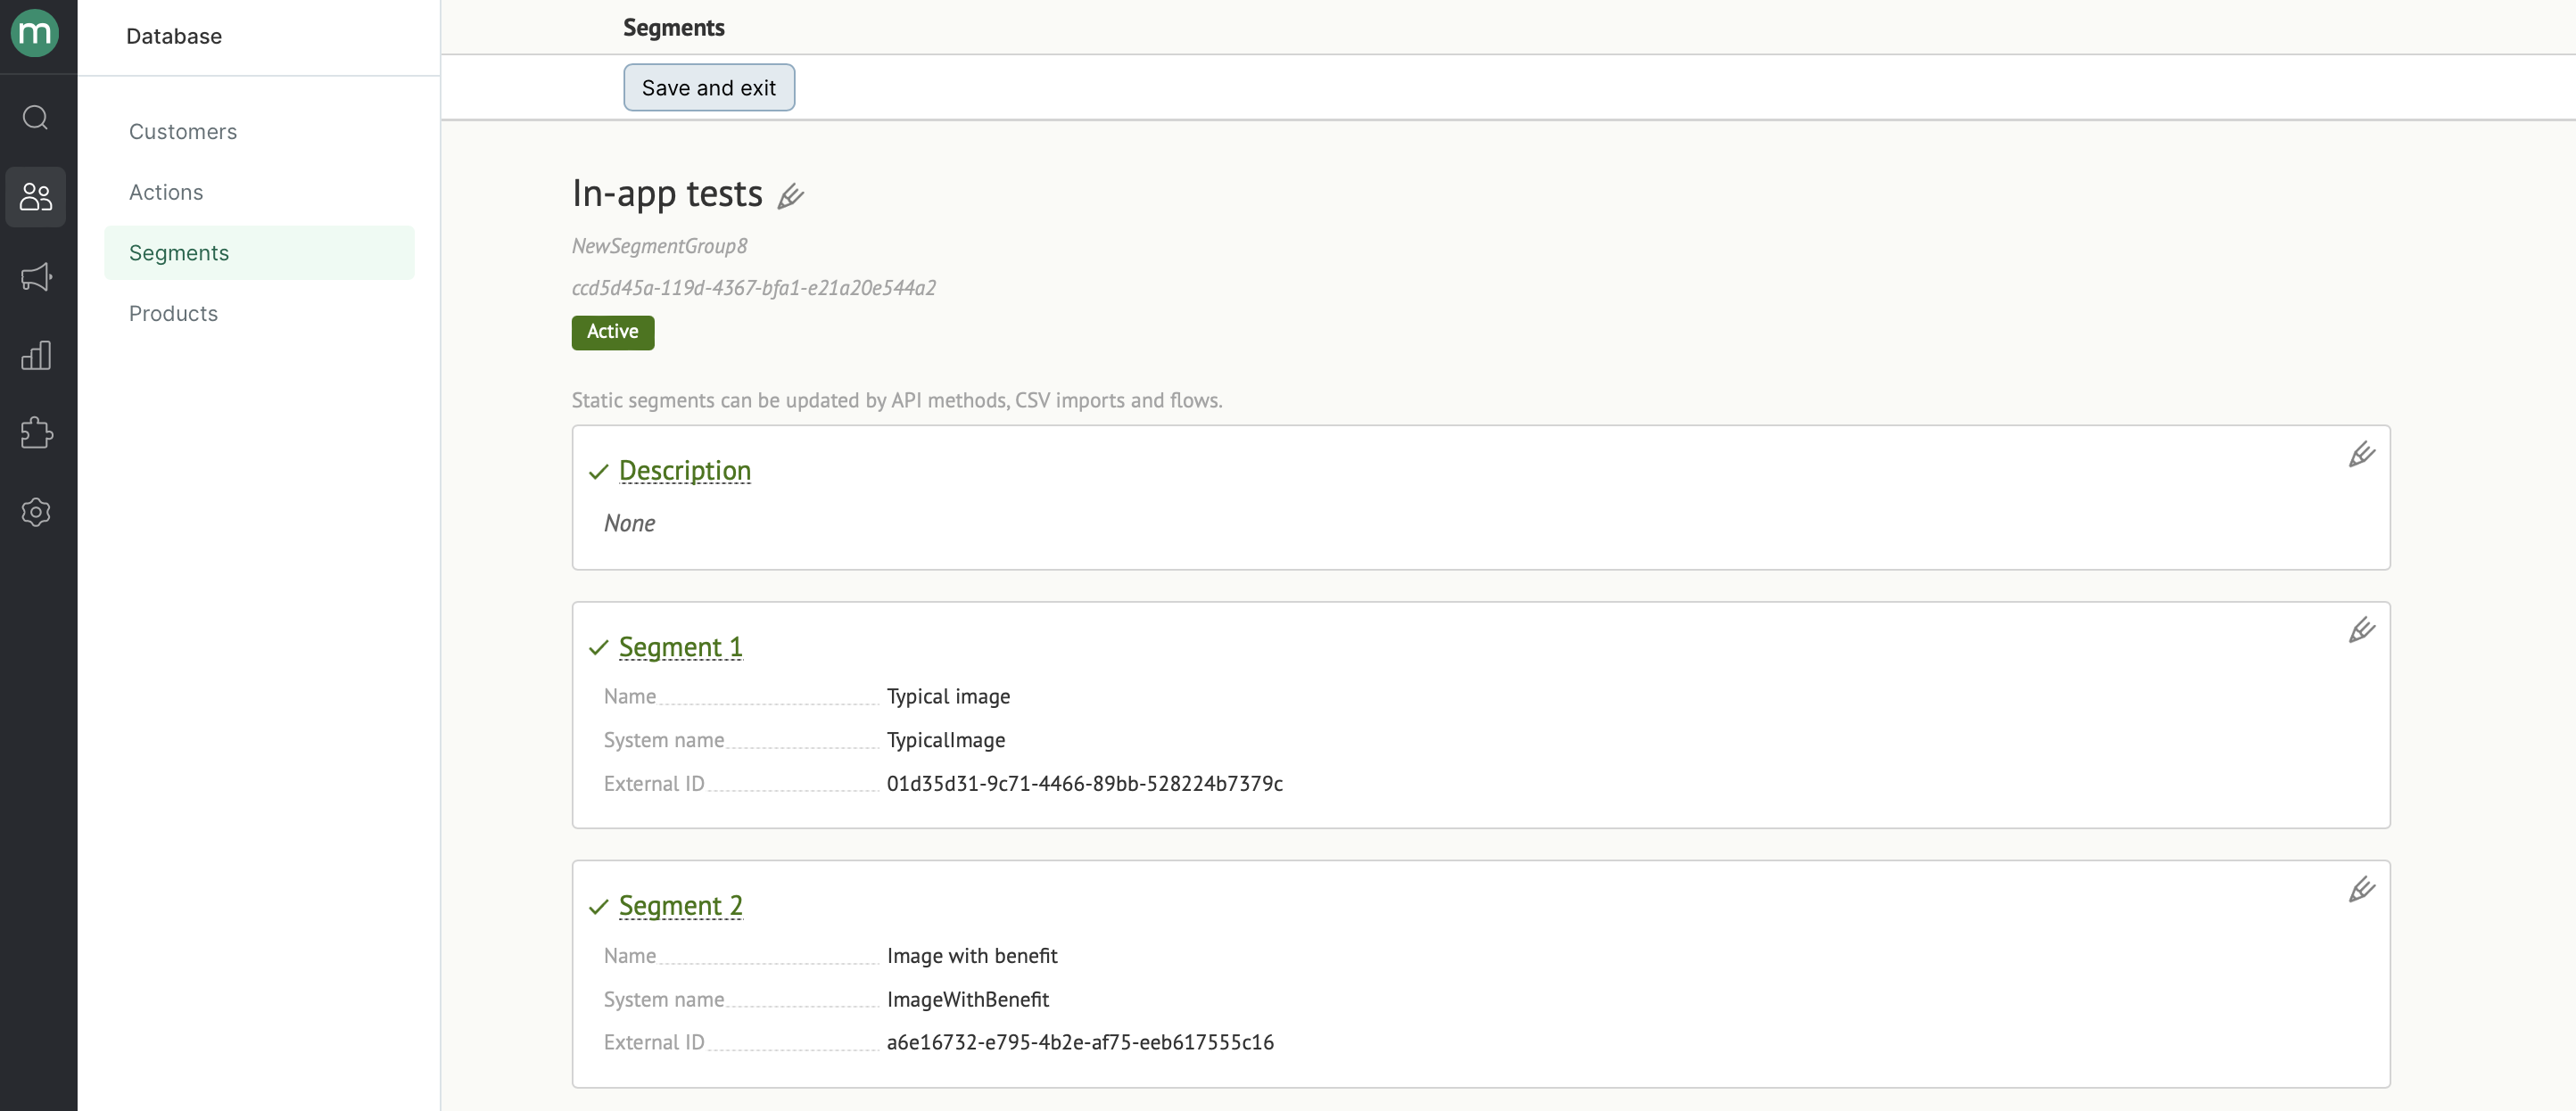
- Create a static segment to distribute the recipients of each in-app.
- Add users to these segments with a scenario.
- Set up in-apps to test.
- Set up scenarios to track push notification permissions.
- Calculate the conversion rates for each in-app.
Let’s take a closer look at these steps:
- Add a static segmentation by customer with segments for each in-app to test:
- Add a workflow to distribute the recipients among the test segments:
2.1. Launch—once a day for the users who are not subscribed to notifications:
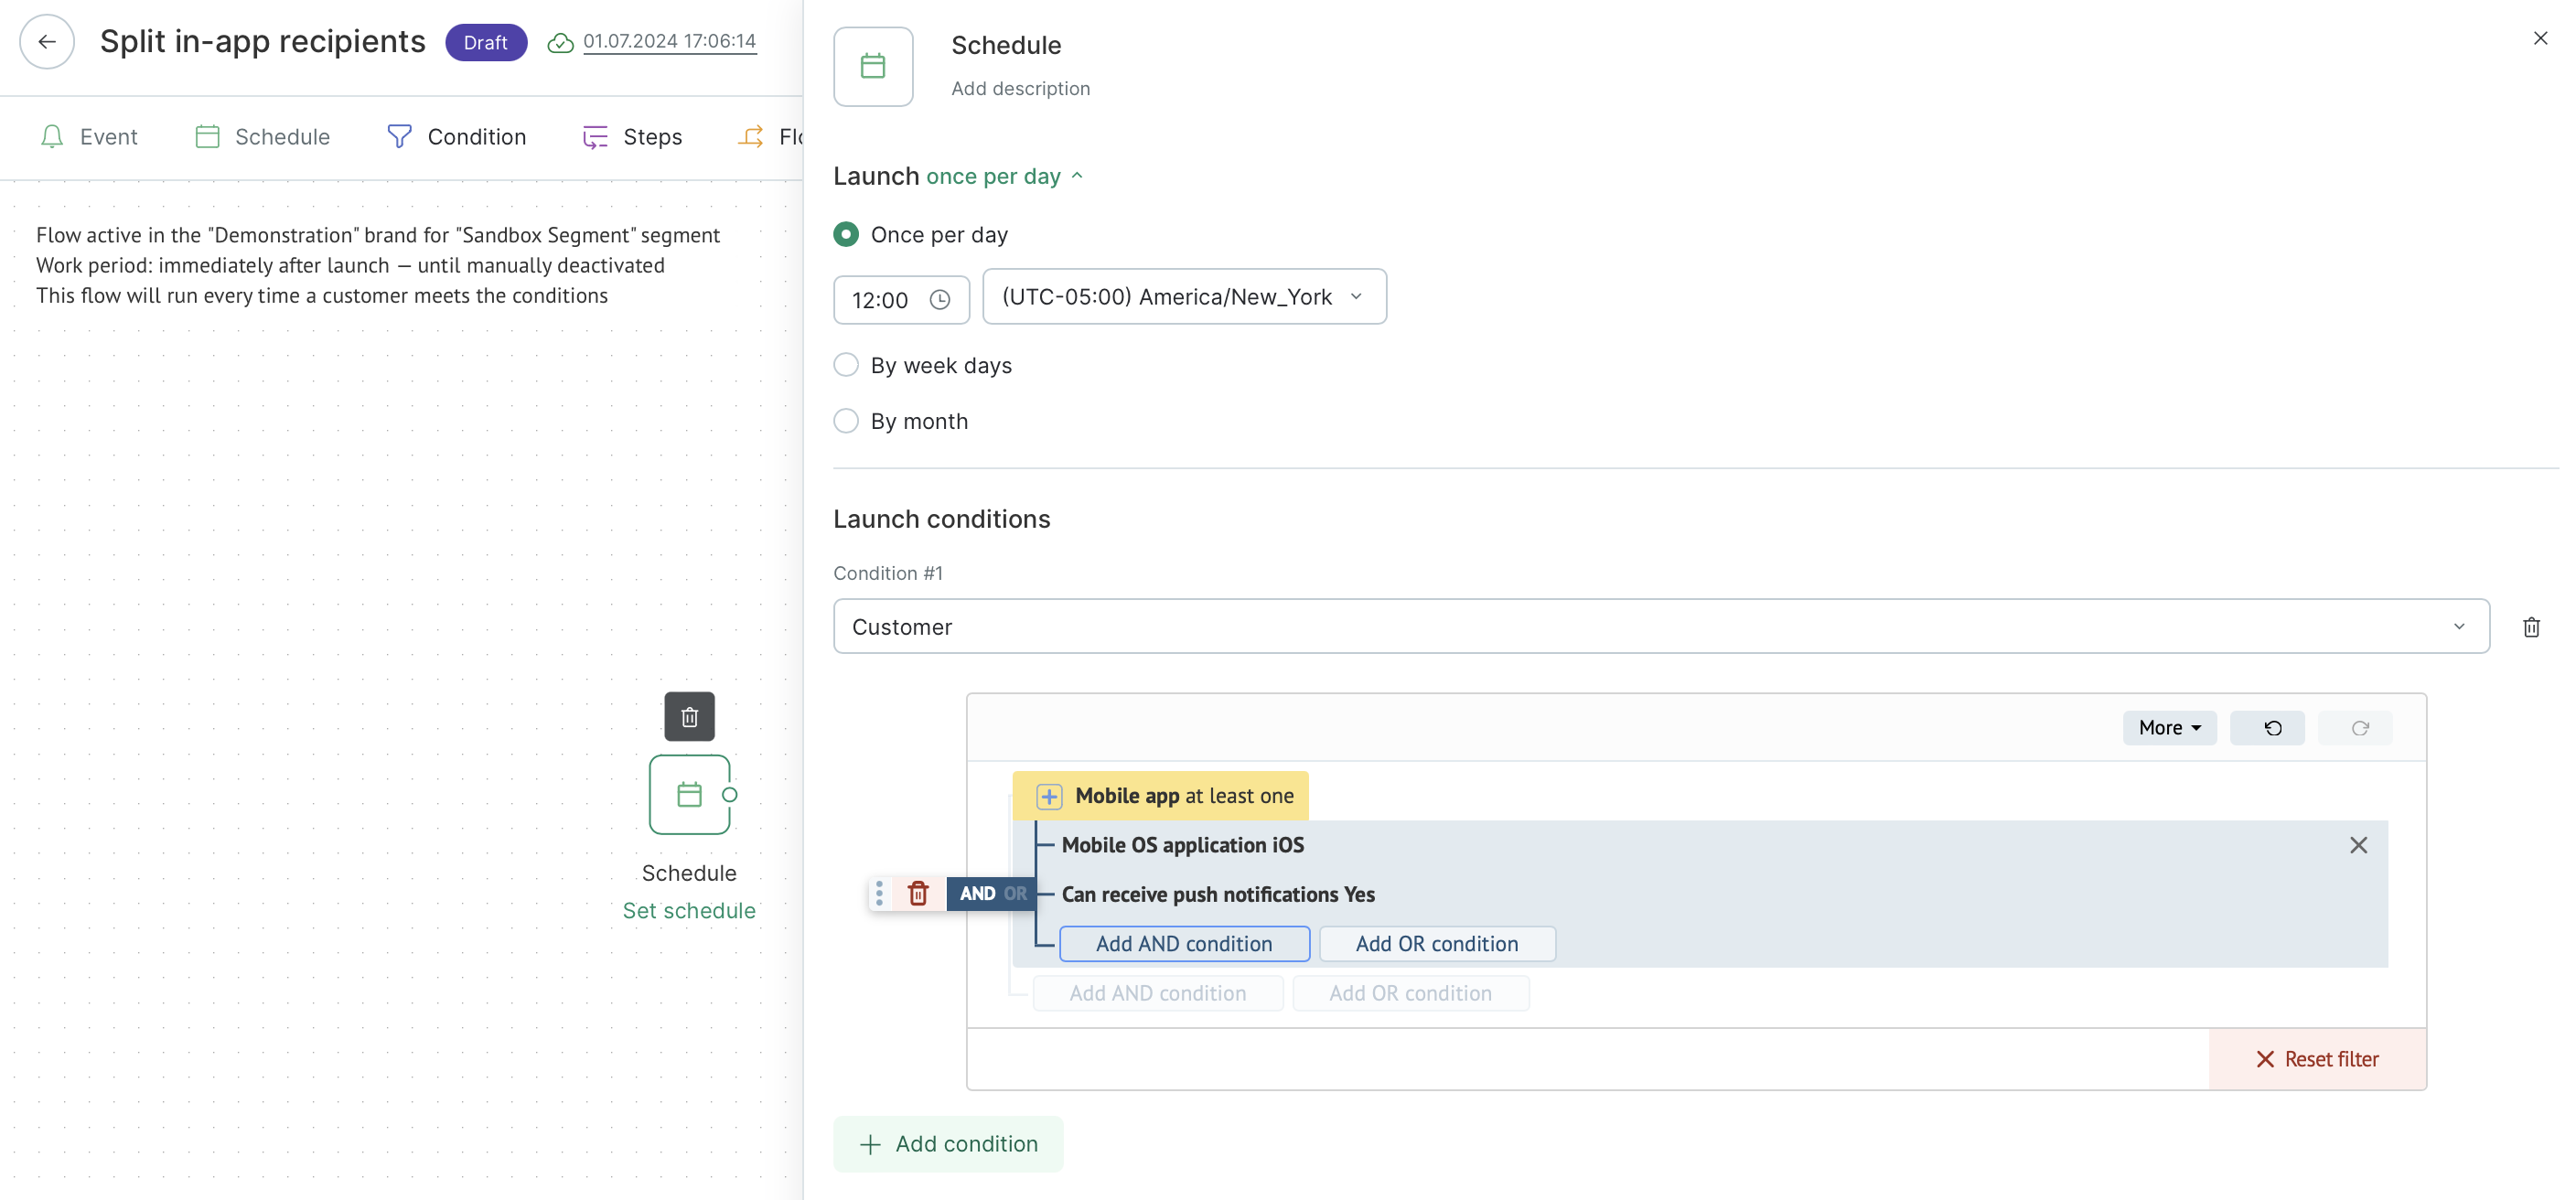
2.2. Split the flow into two equal parts:
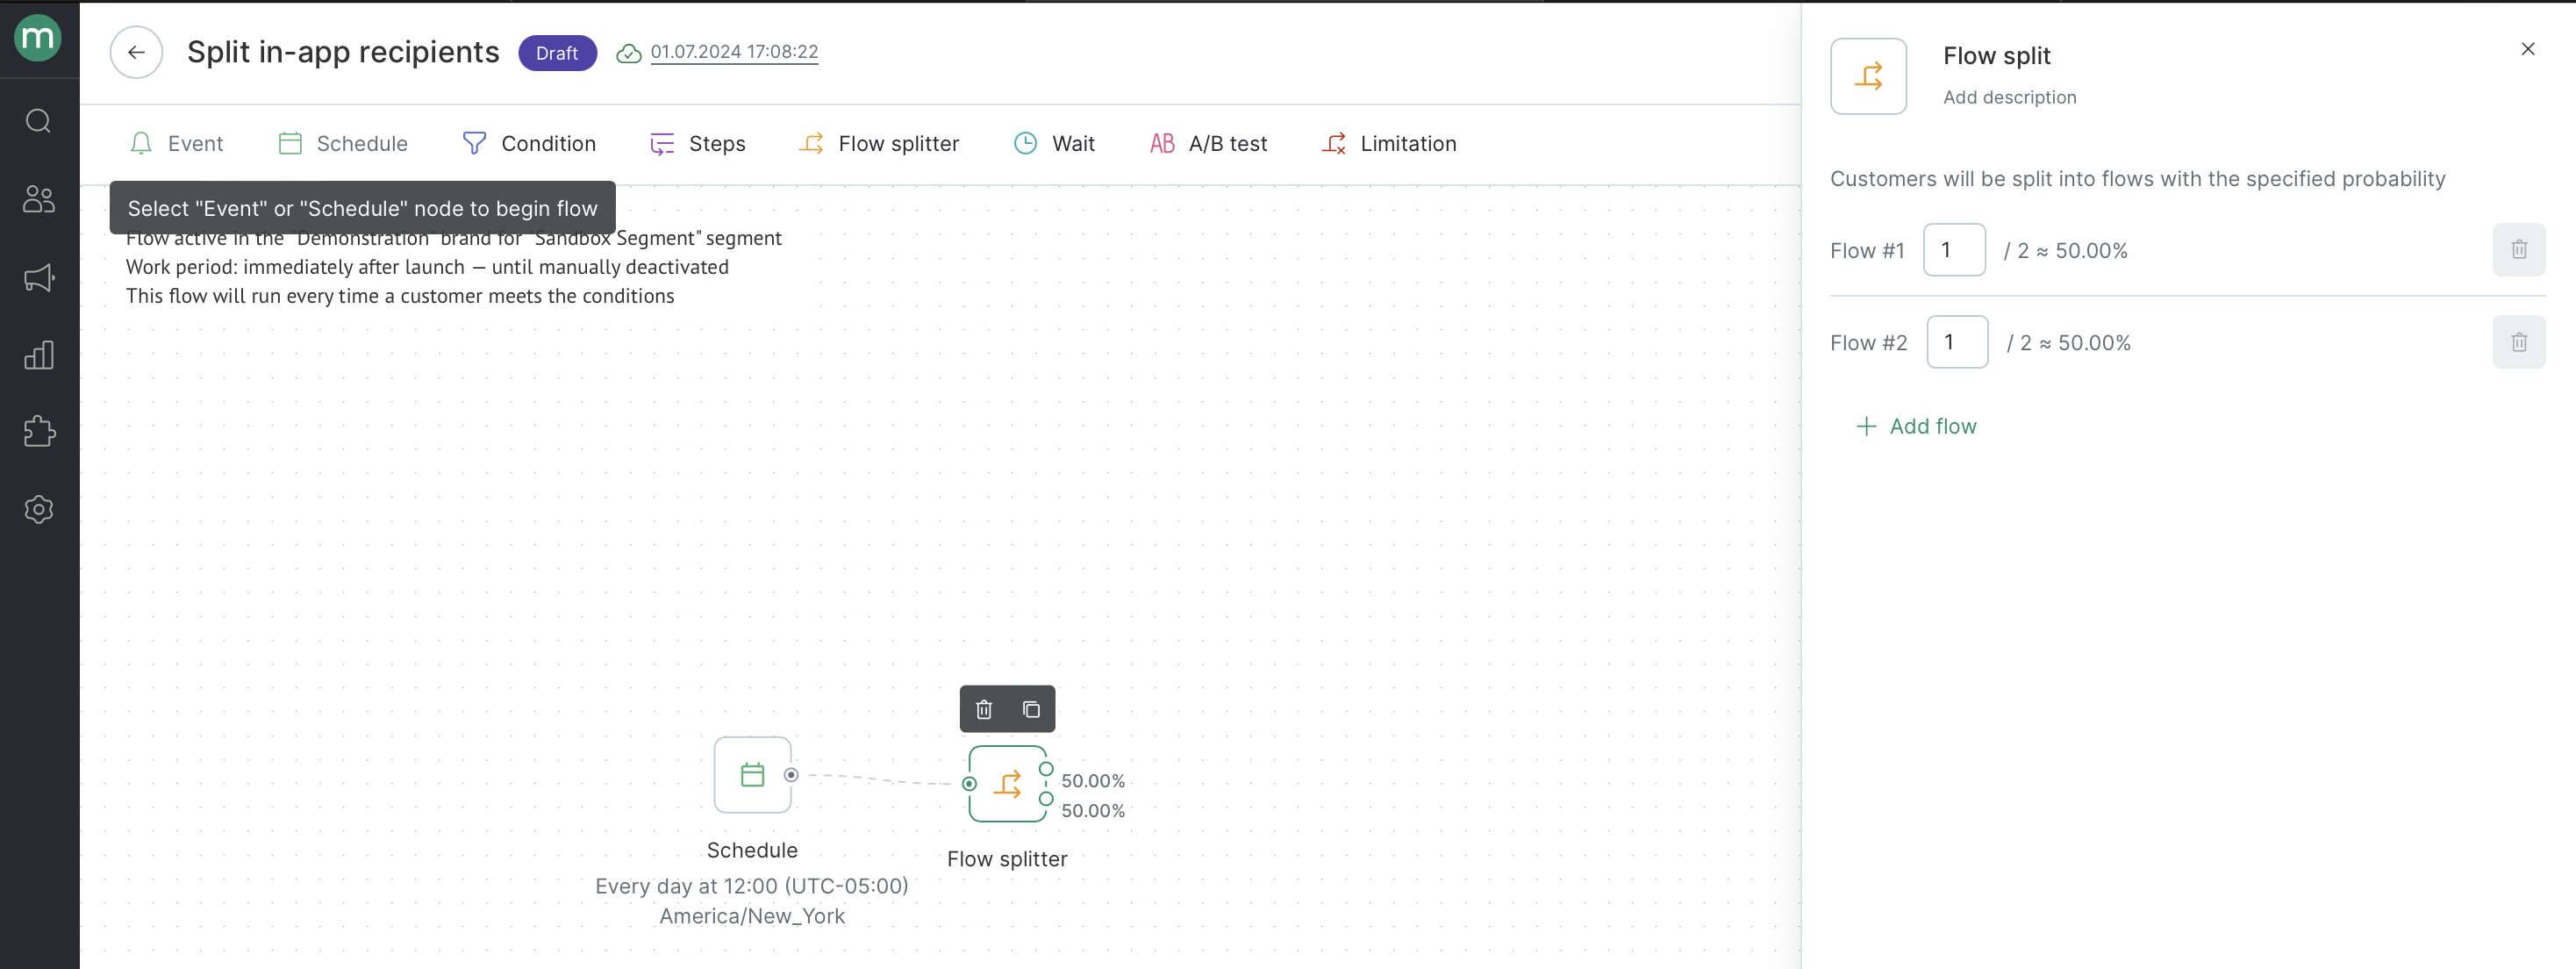
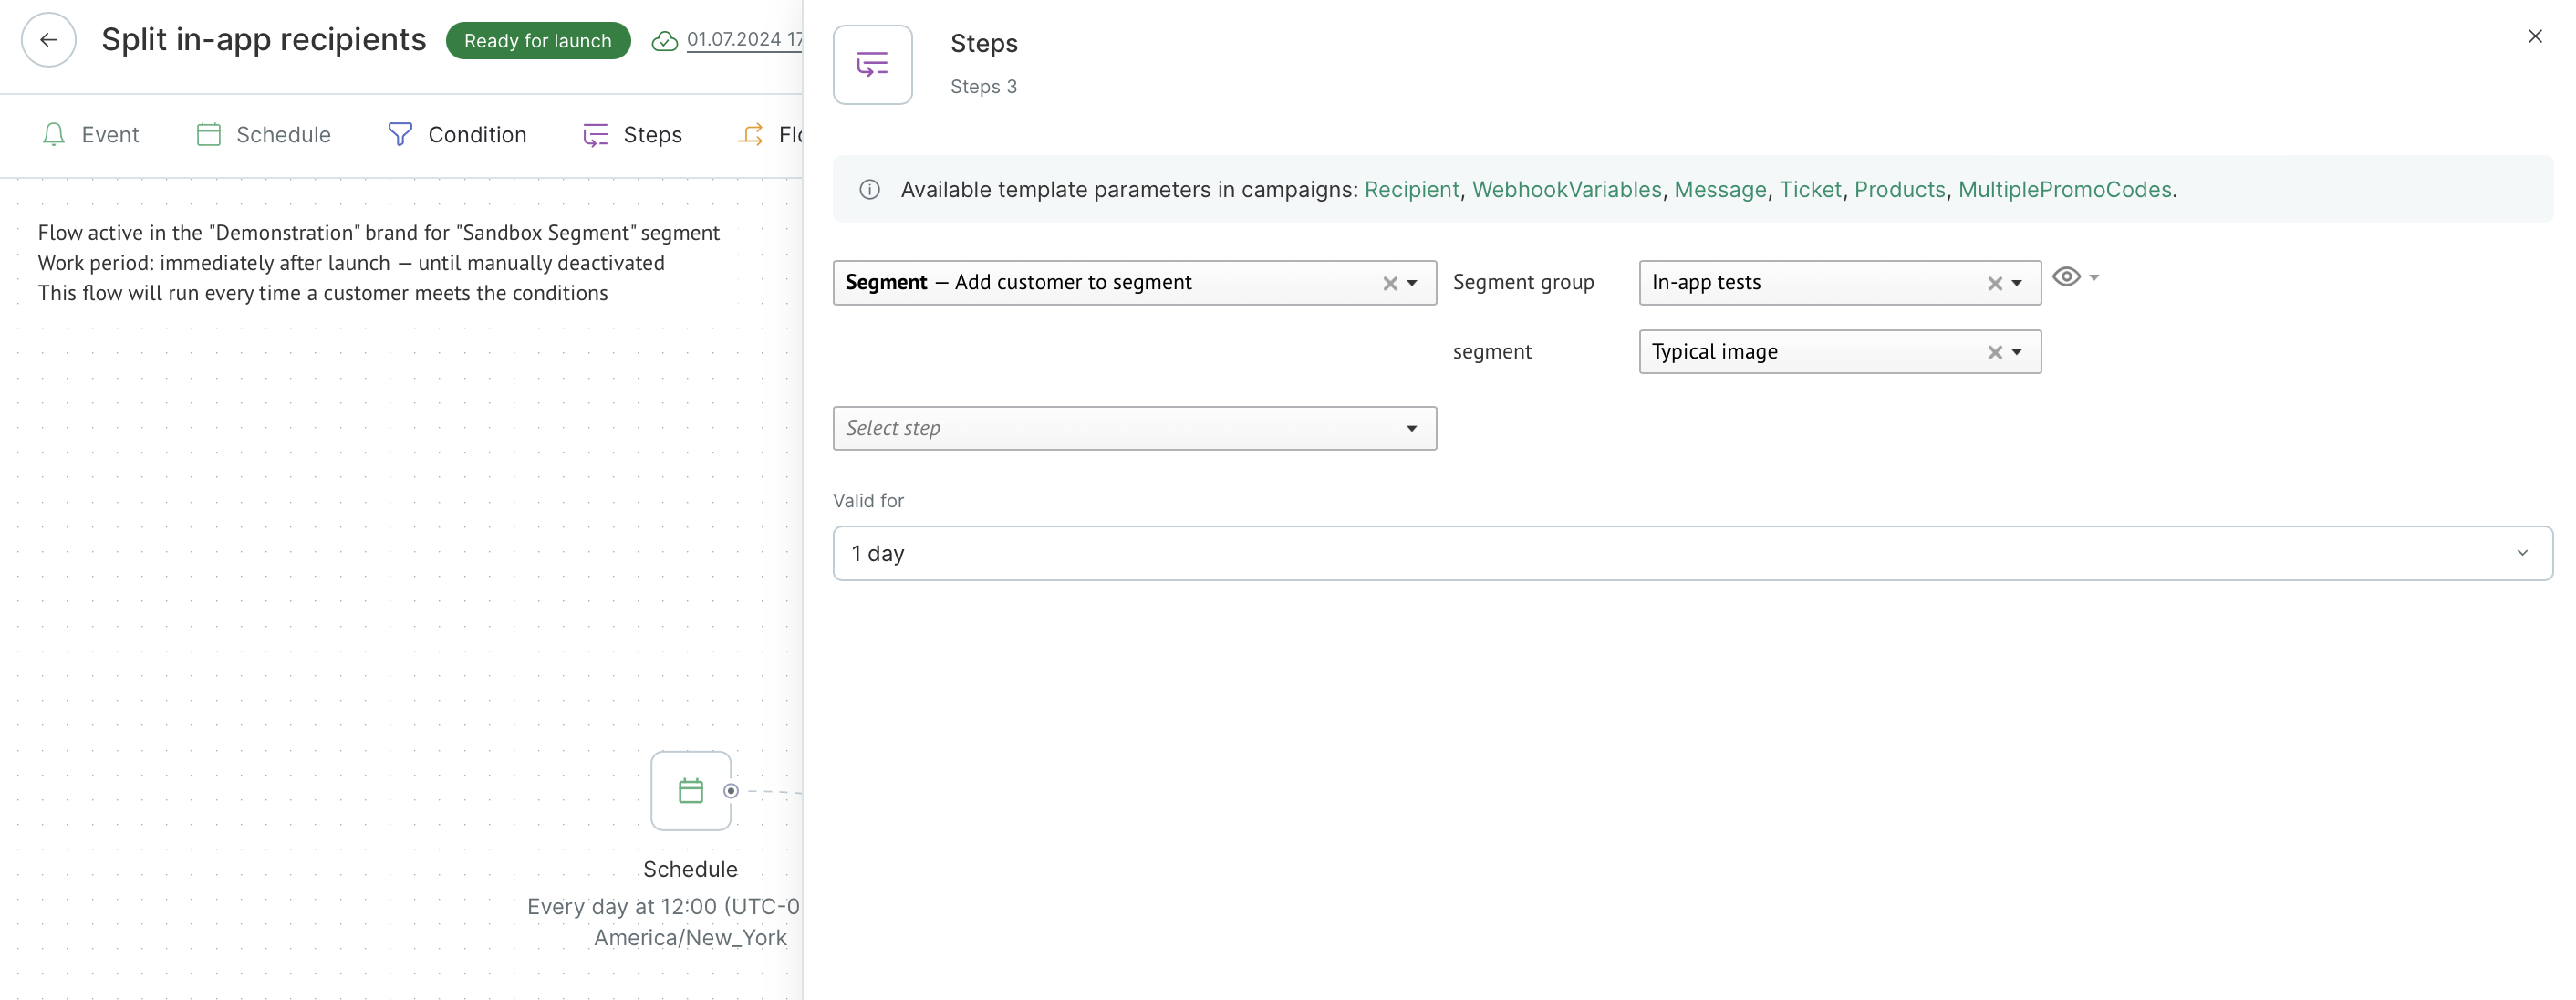
2.3. Add customers from each branch to the appropriate segment:

2.4. Configure the flow to run once for each customer:

The scenario is ready to run.
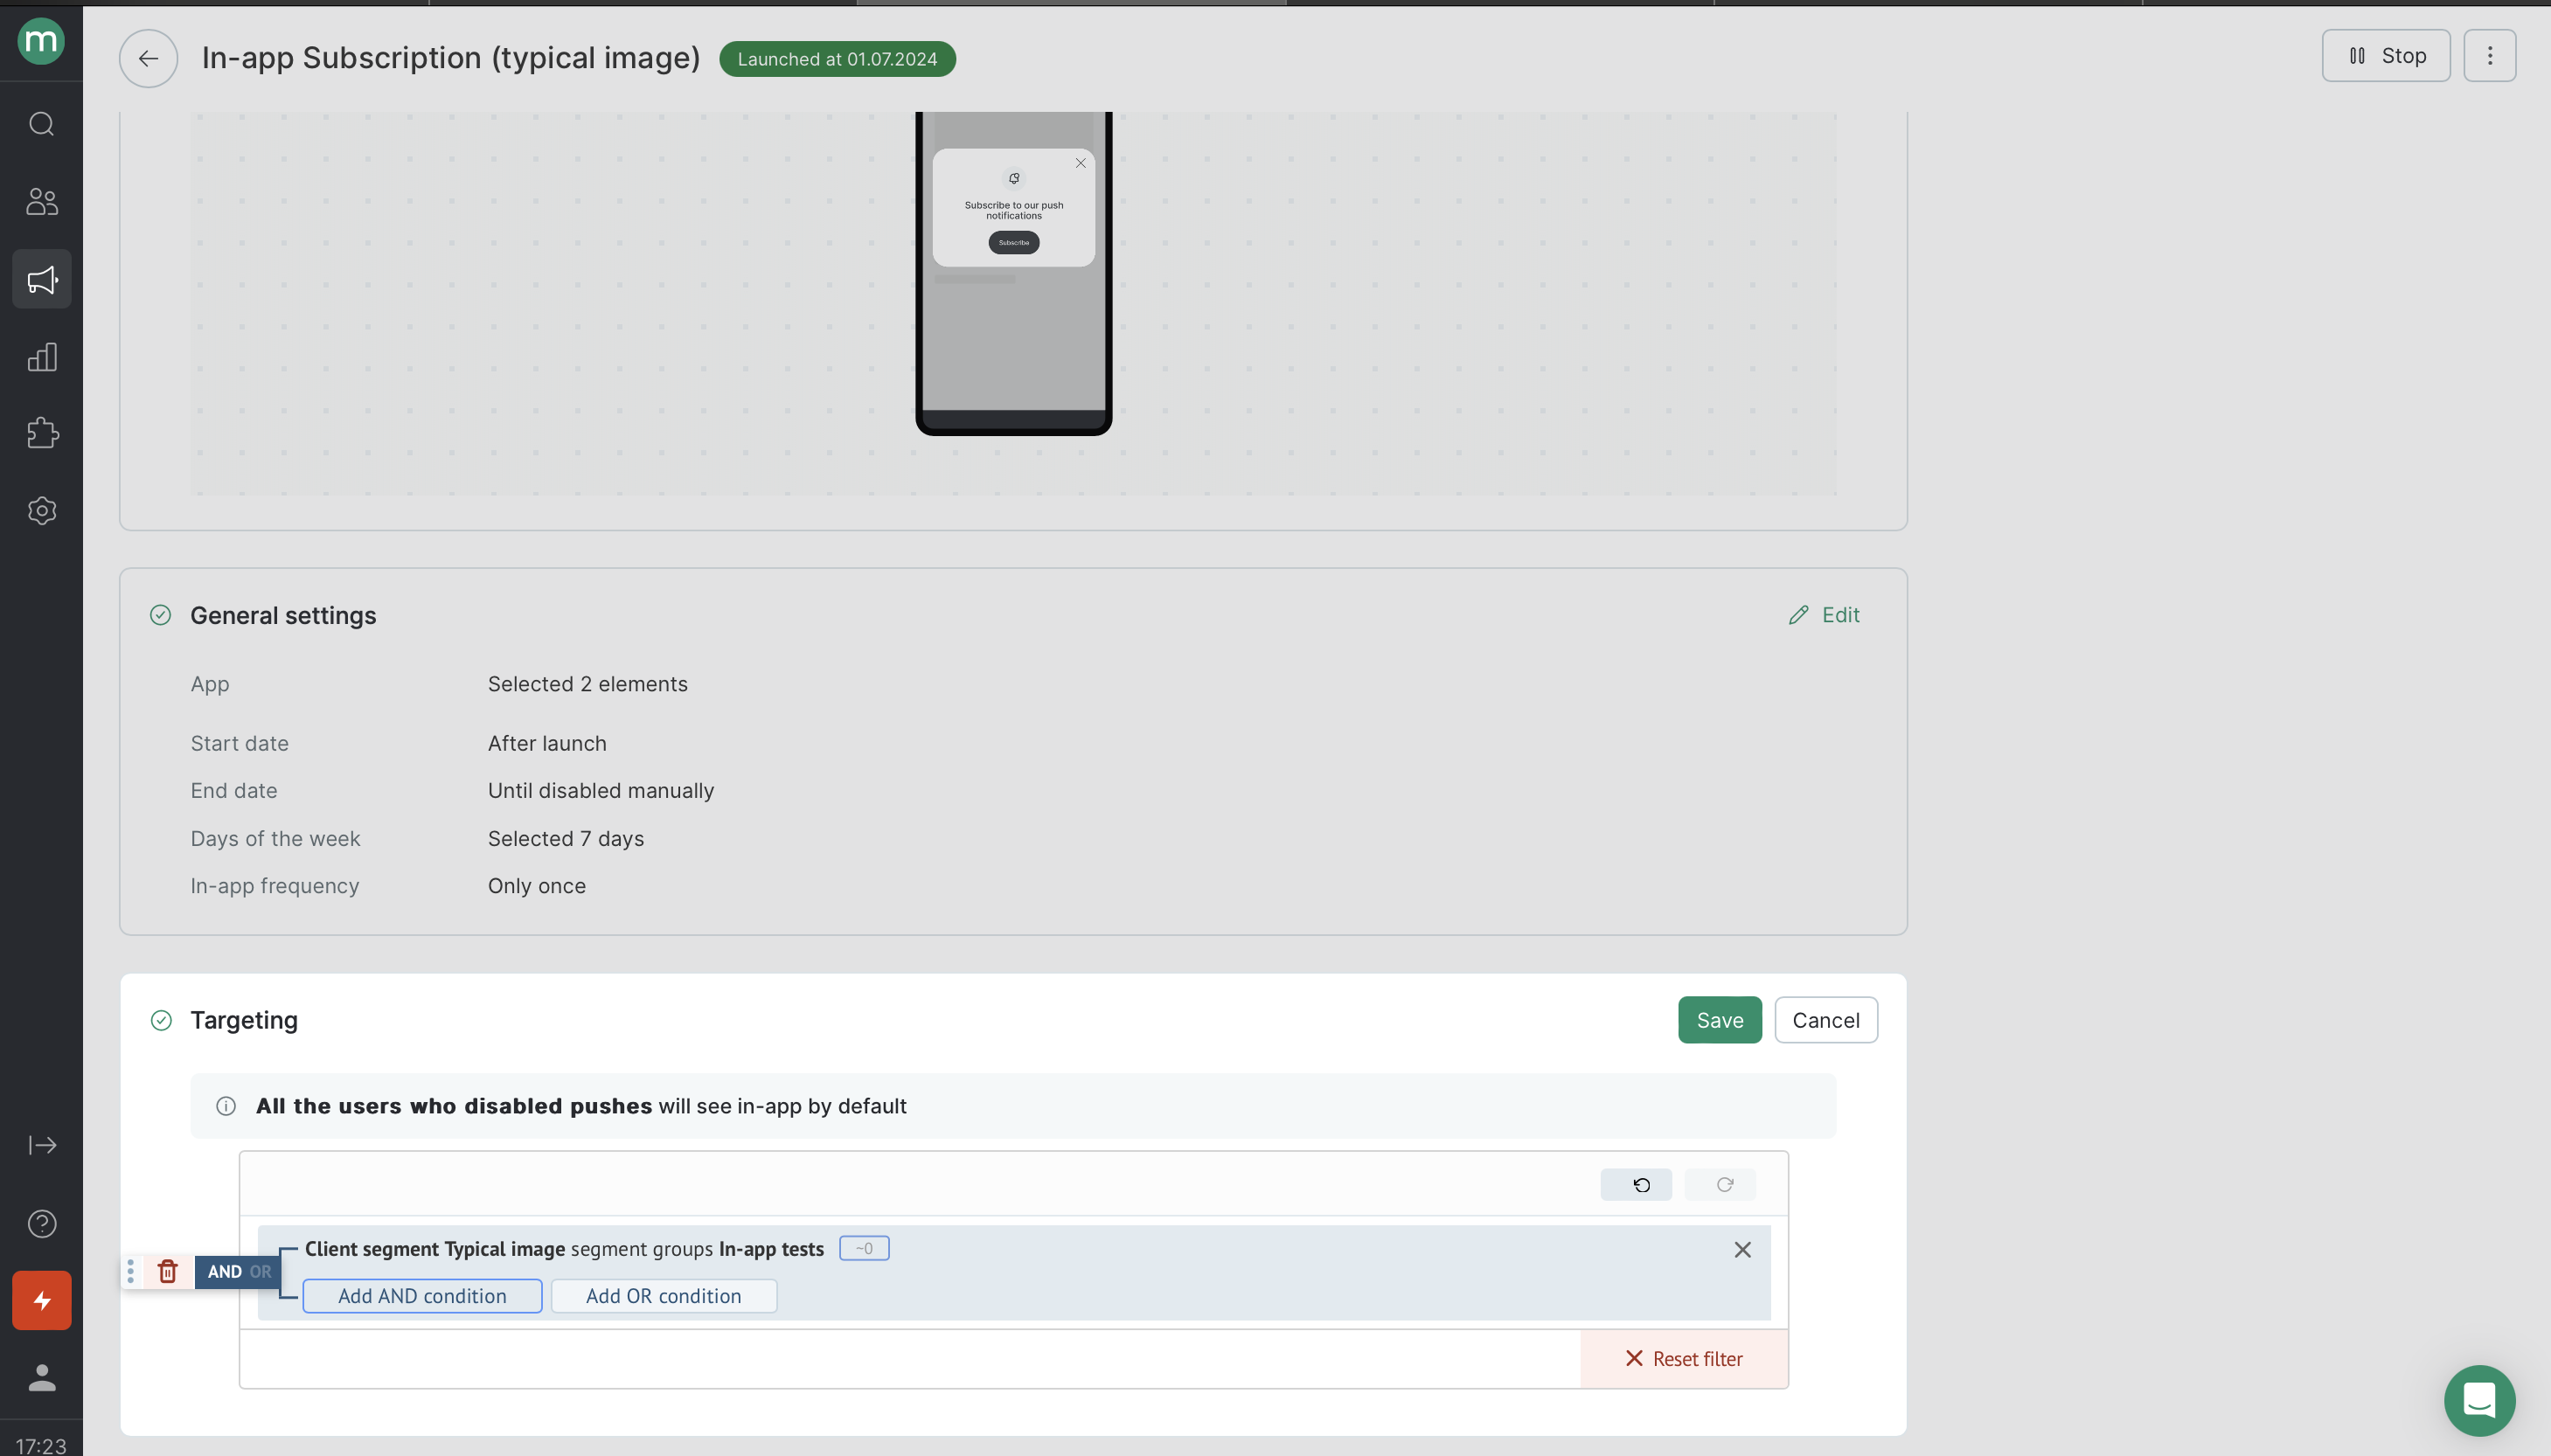
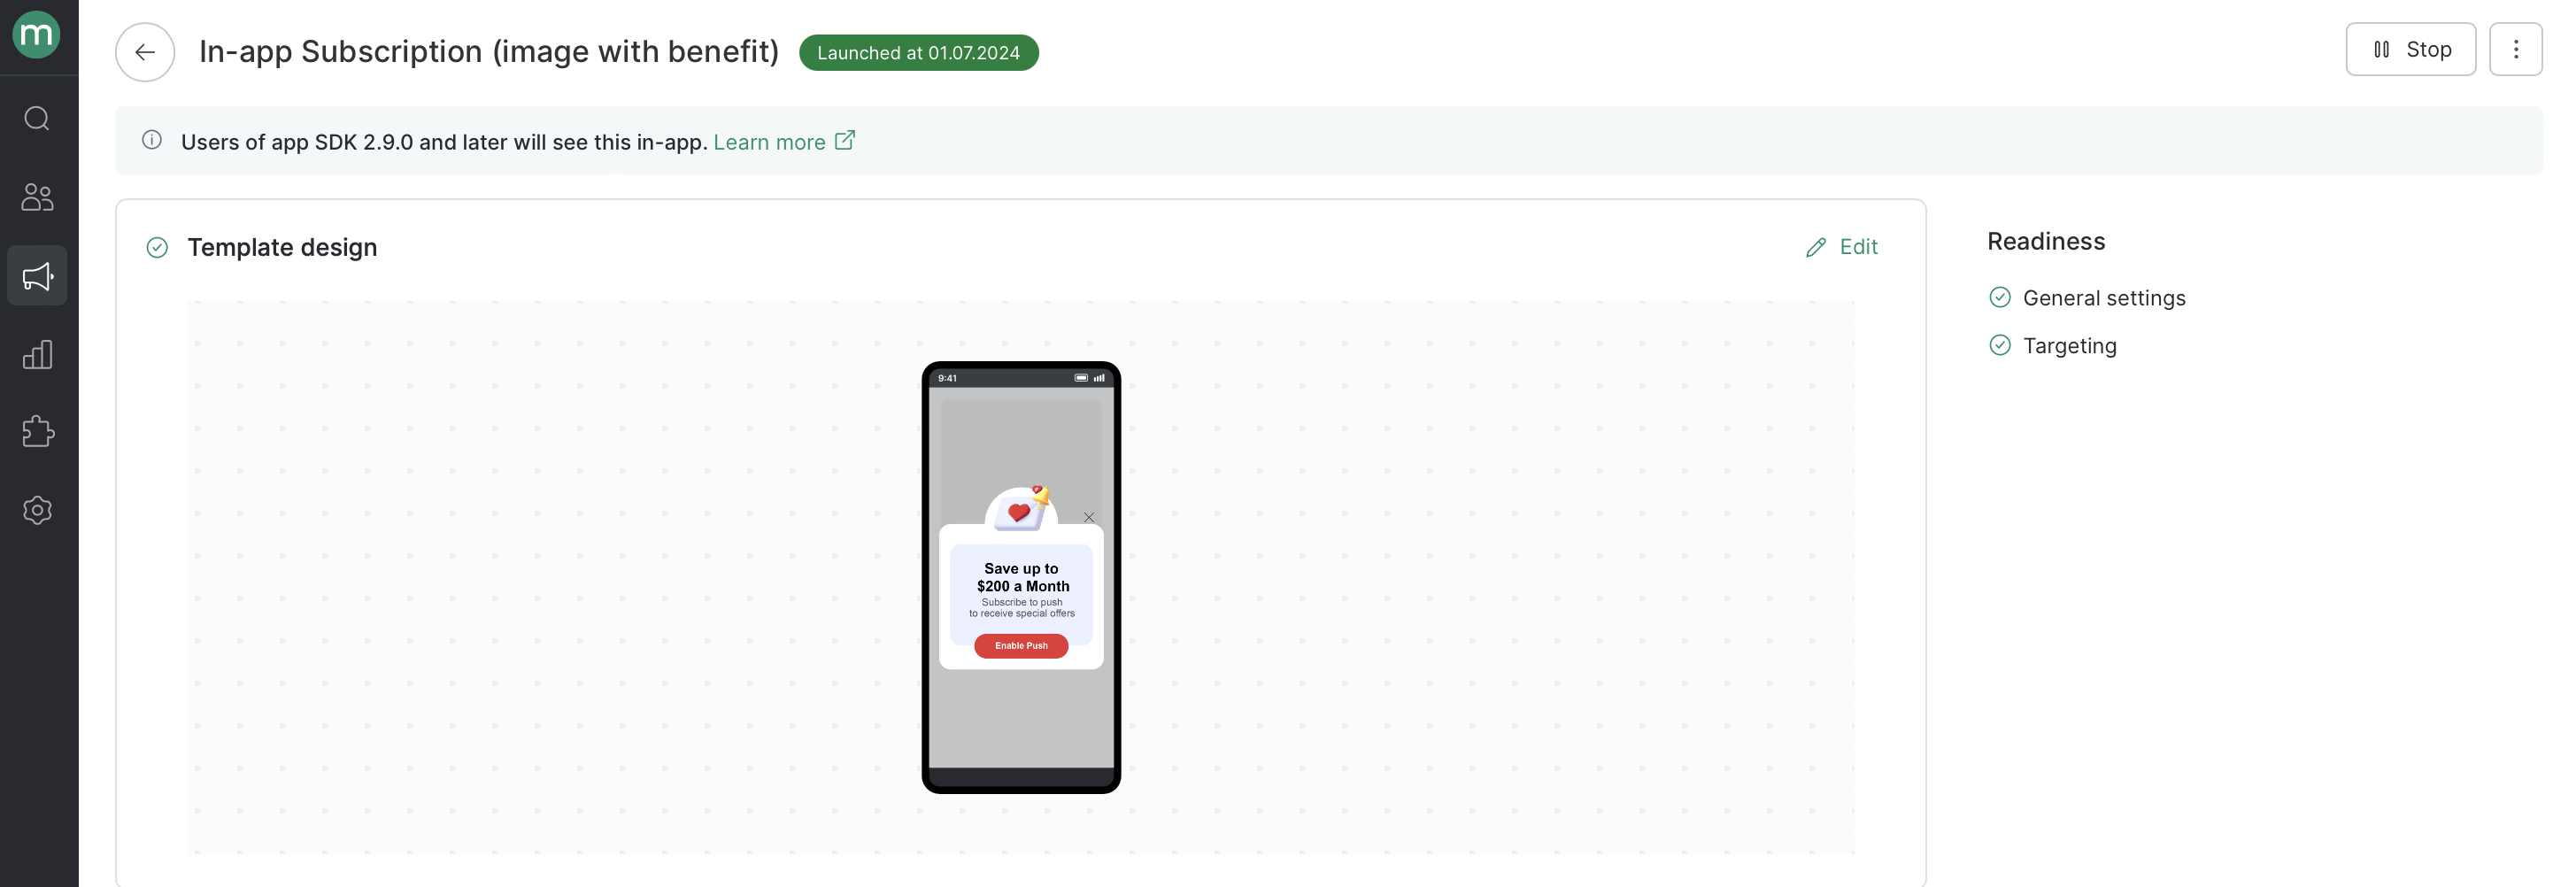
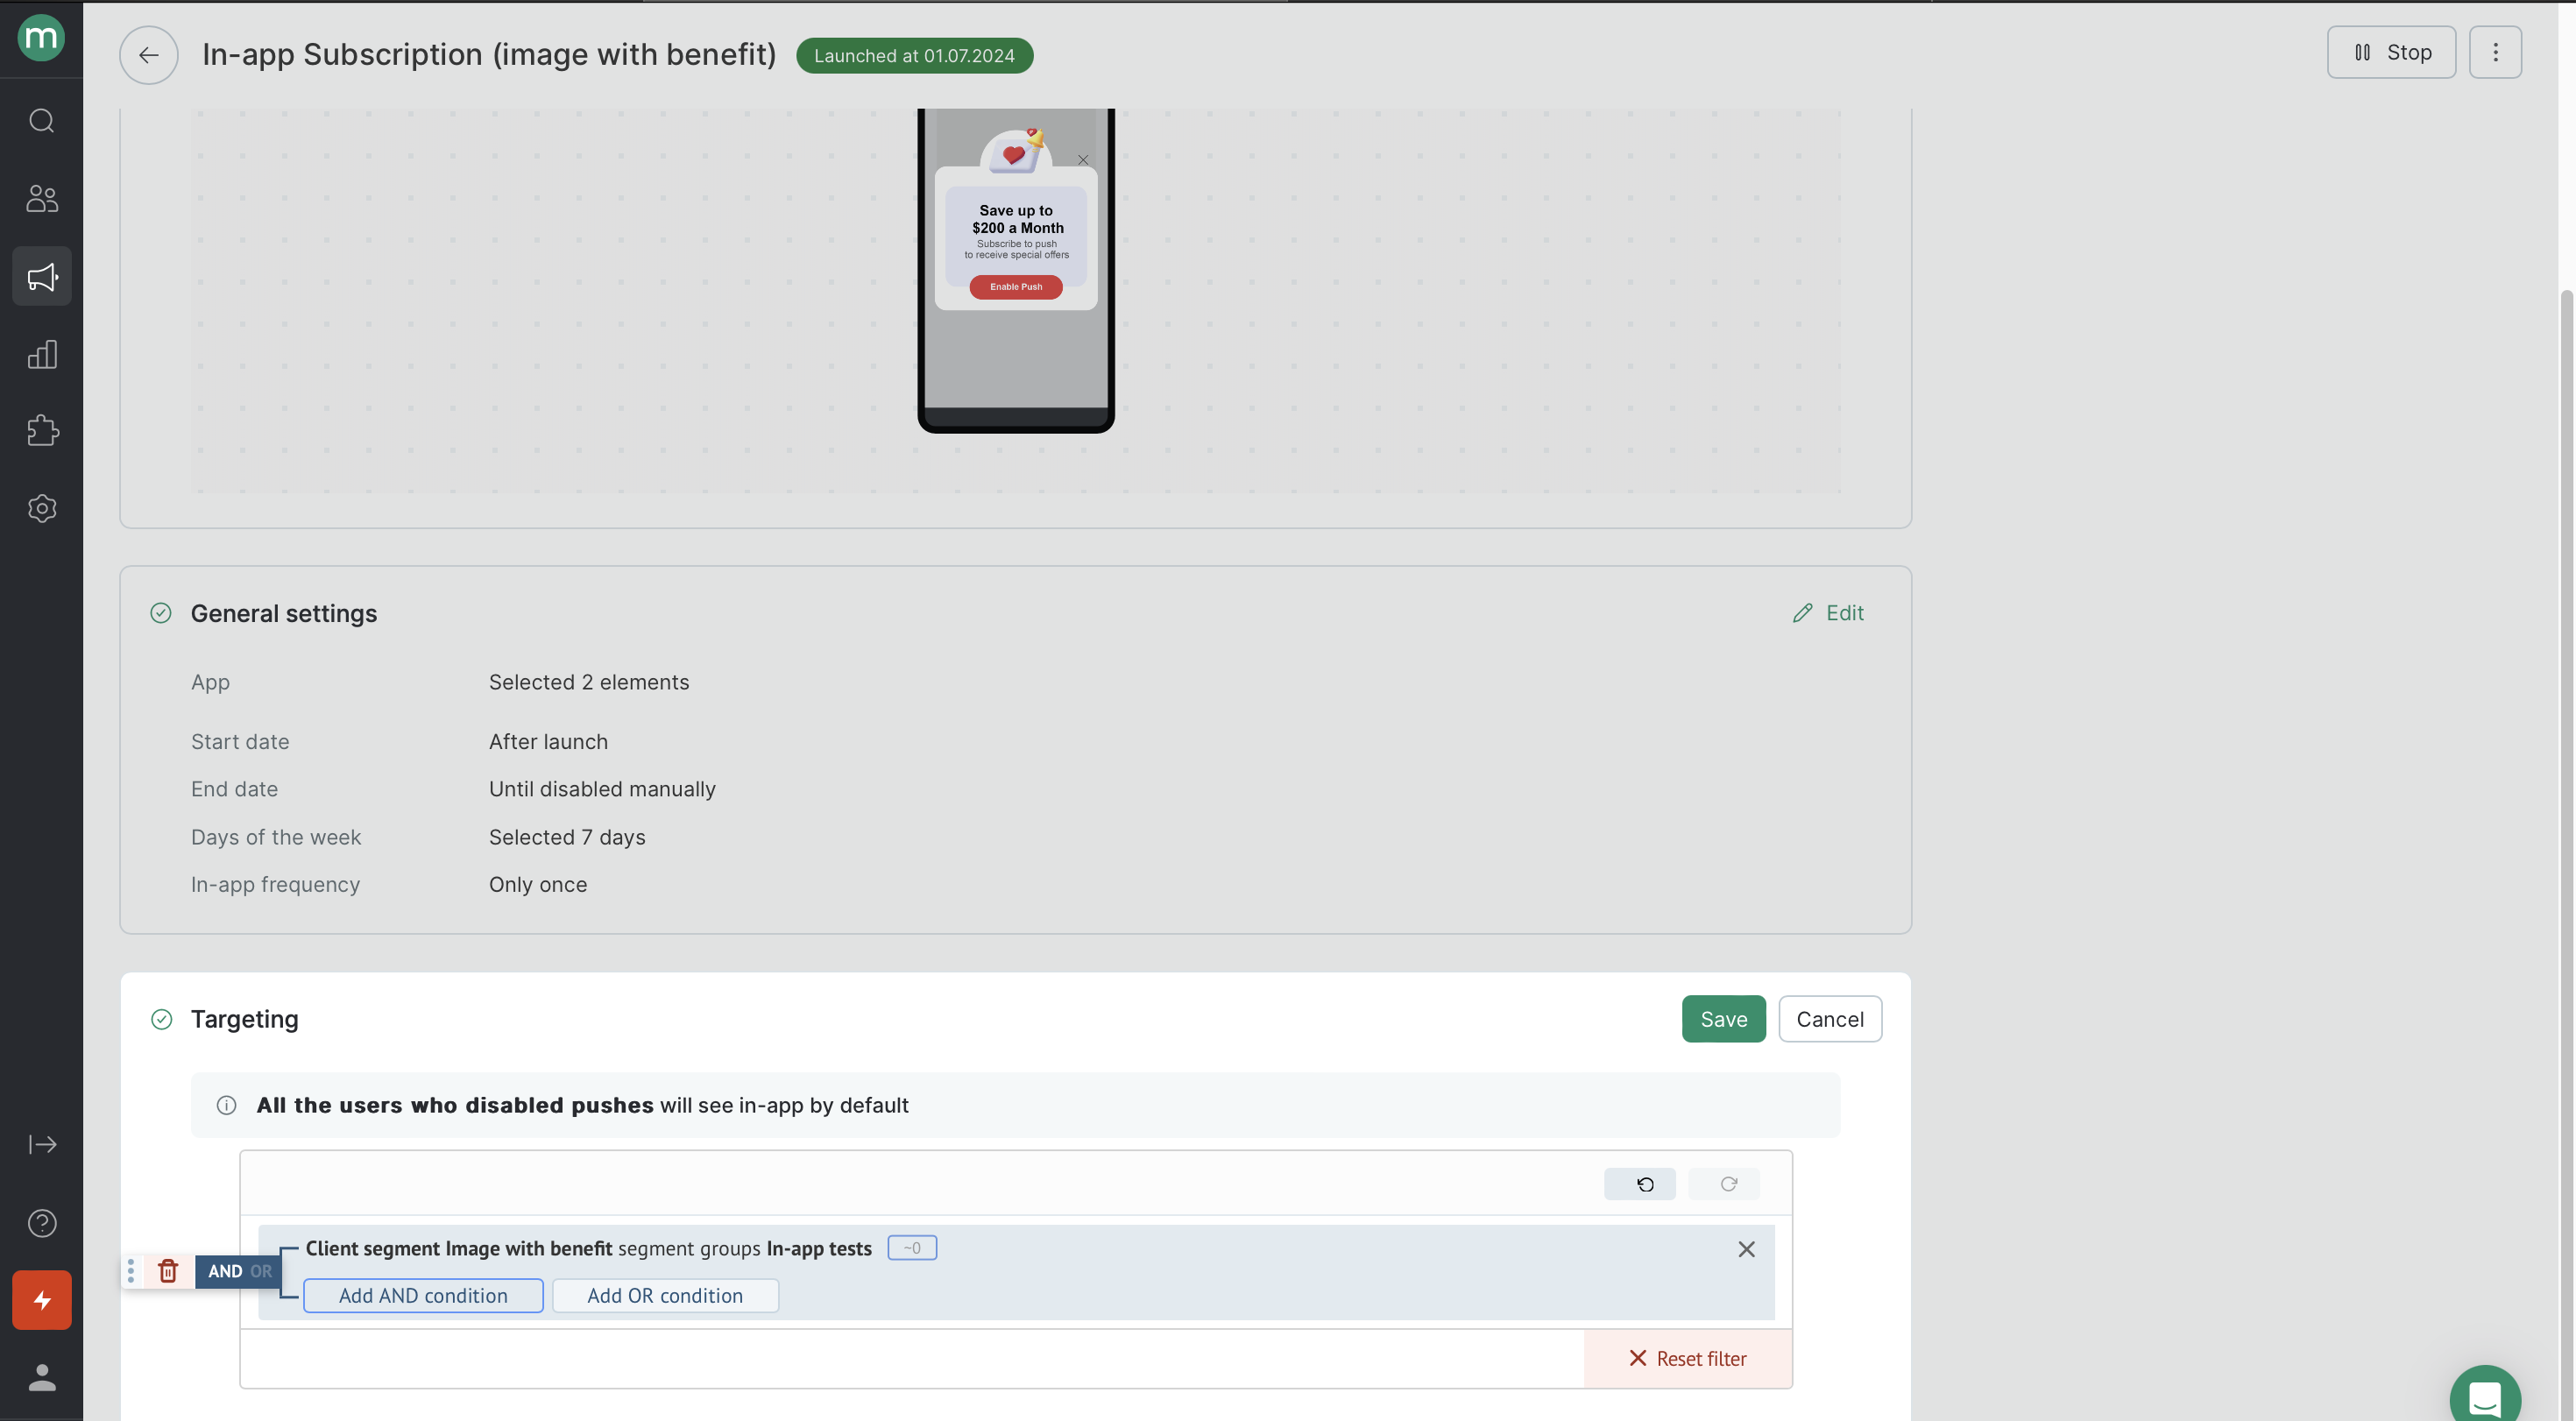
- Add in-apps to test and specify the appropriate segment in the targeting settings.
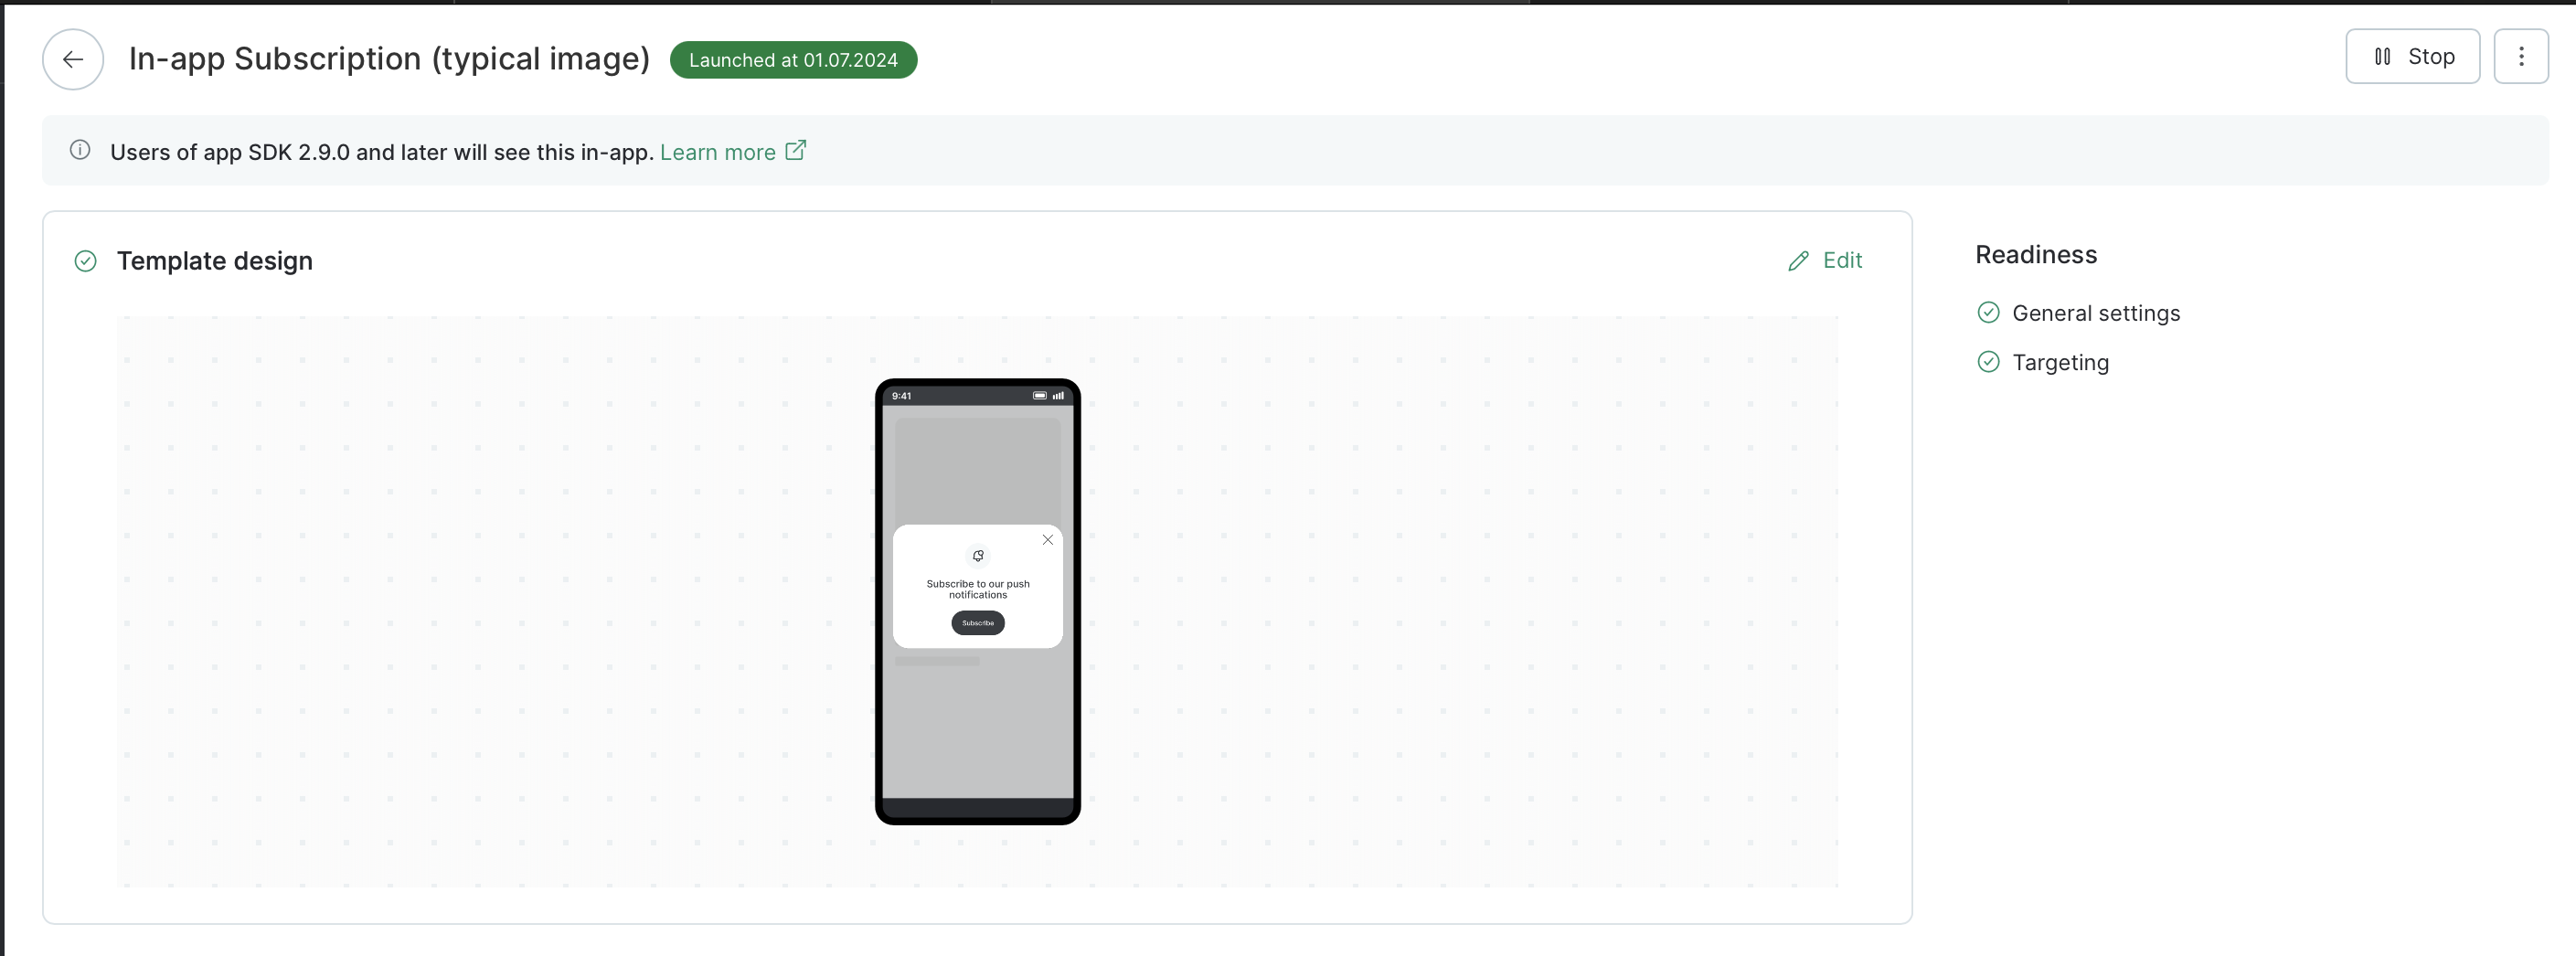
The first in-app:
The second in-app:
- Add a scenario to track push notification permissions according to the guide above.
The only difference is that the scenario is launched by clicking on each of the two in-apps:

The scenario and in-apps are ready to run.
- Compare the conversion rates of the two campaigns to determine which in-app is more attractive.
To determine the conversion rate related to subscriptions from the in-app, calculate the ratio of the customers who allowed notifications to the total number of times the in-app was displayed.
Look at the possible filters for the first in-app:

