A webhook is a mechanism that sends automatic notifications and data between your services when certain events occur.
Using webhooks in Maestra, you can react to various events, launch relevant flows, and automate customer interactions.
To send a request to a service with a webhook, you should first integrate this service and then set up necessary webhooks.
Creating an integration point
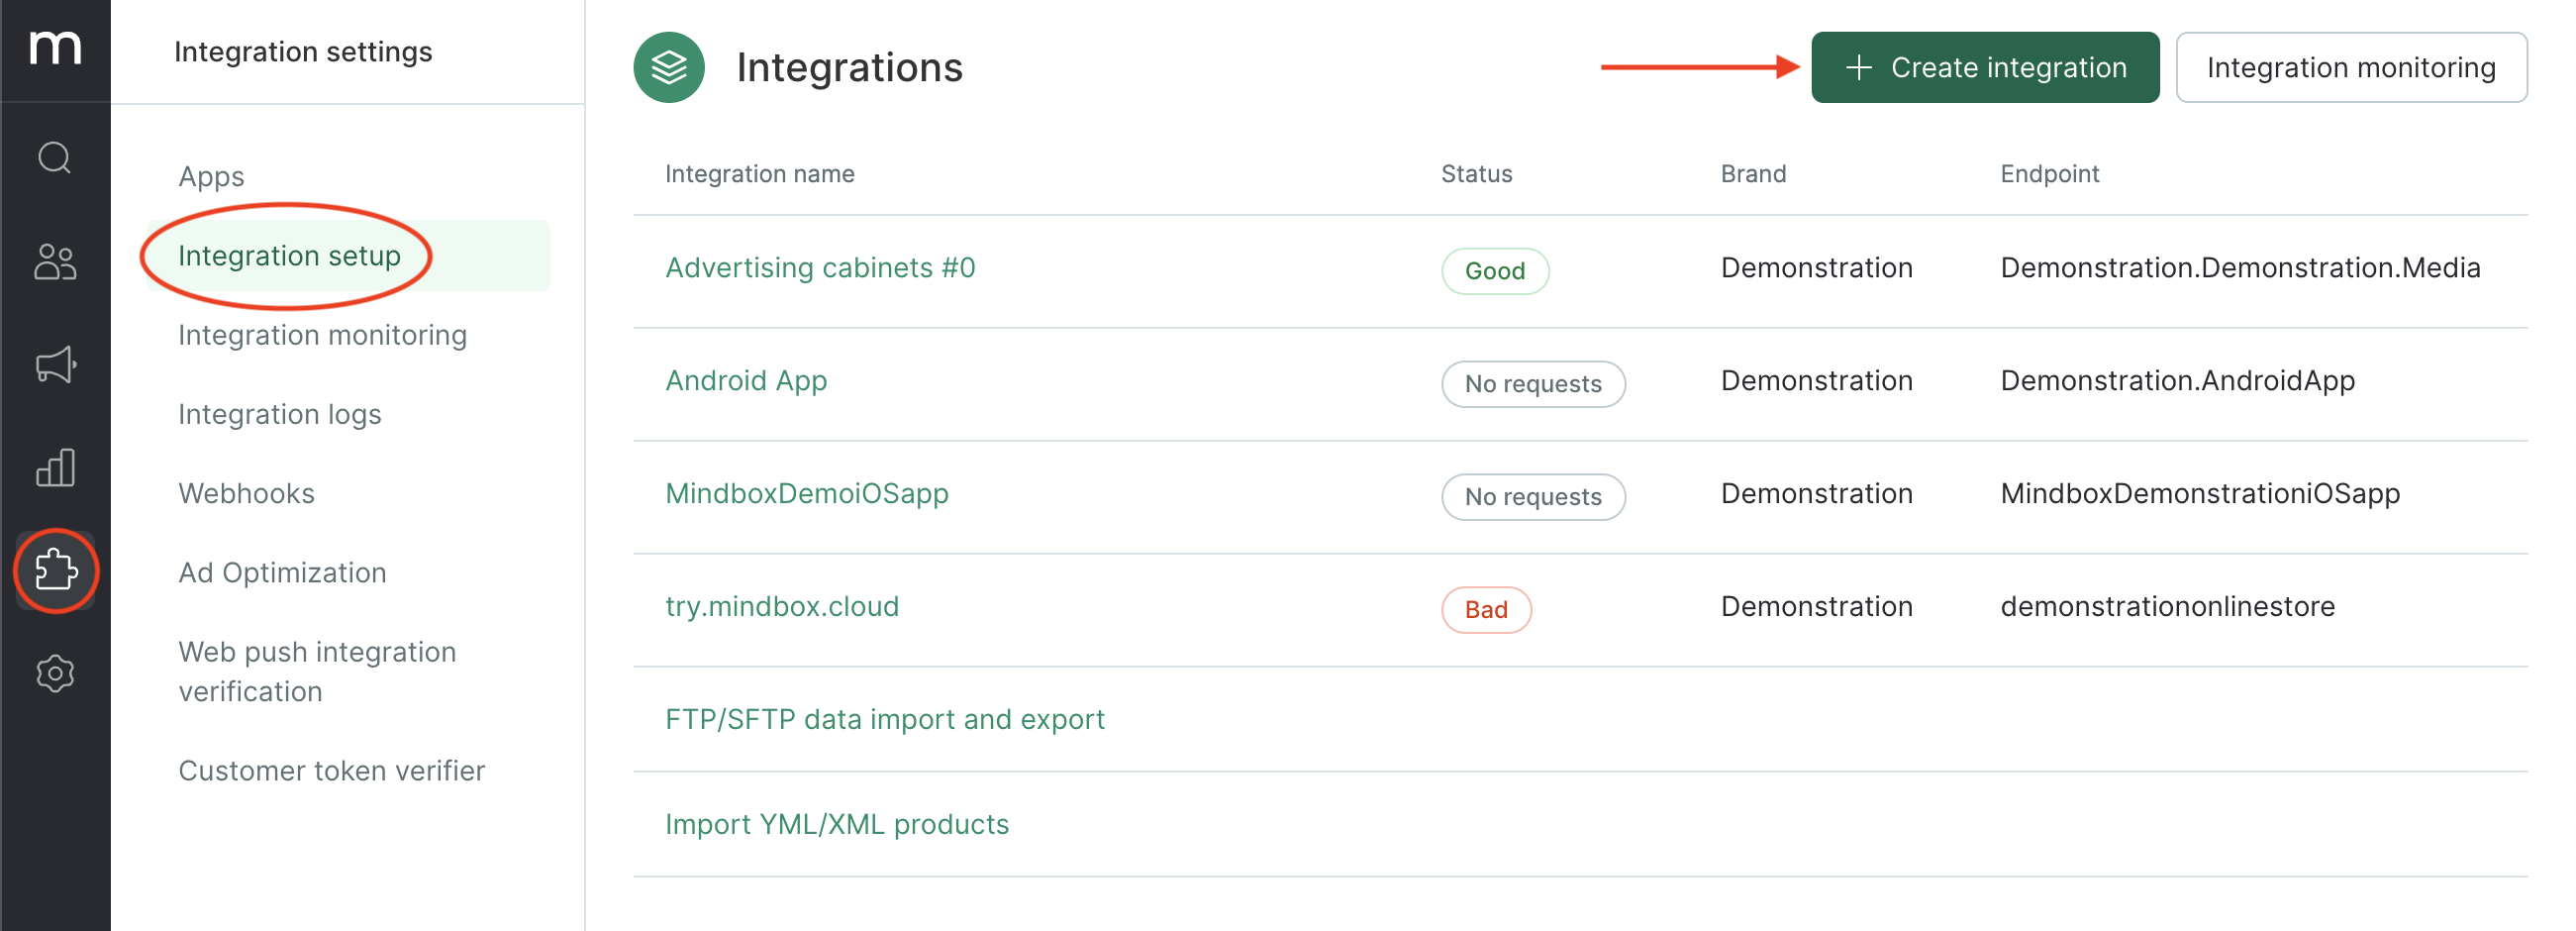
- Go to the "Integrations" section and click "Add Integration":
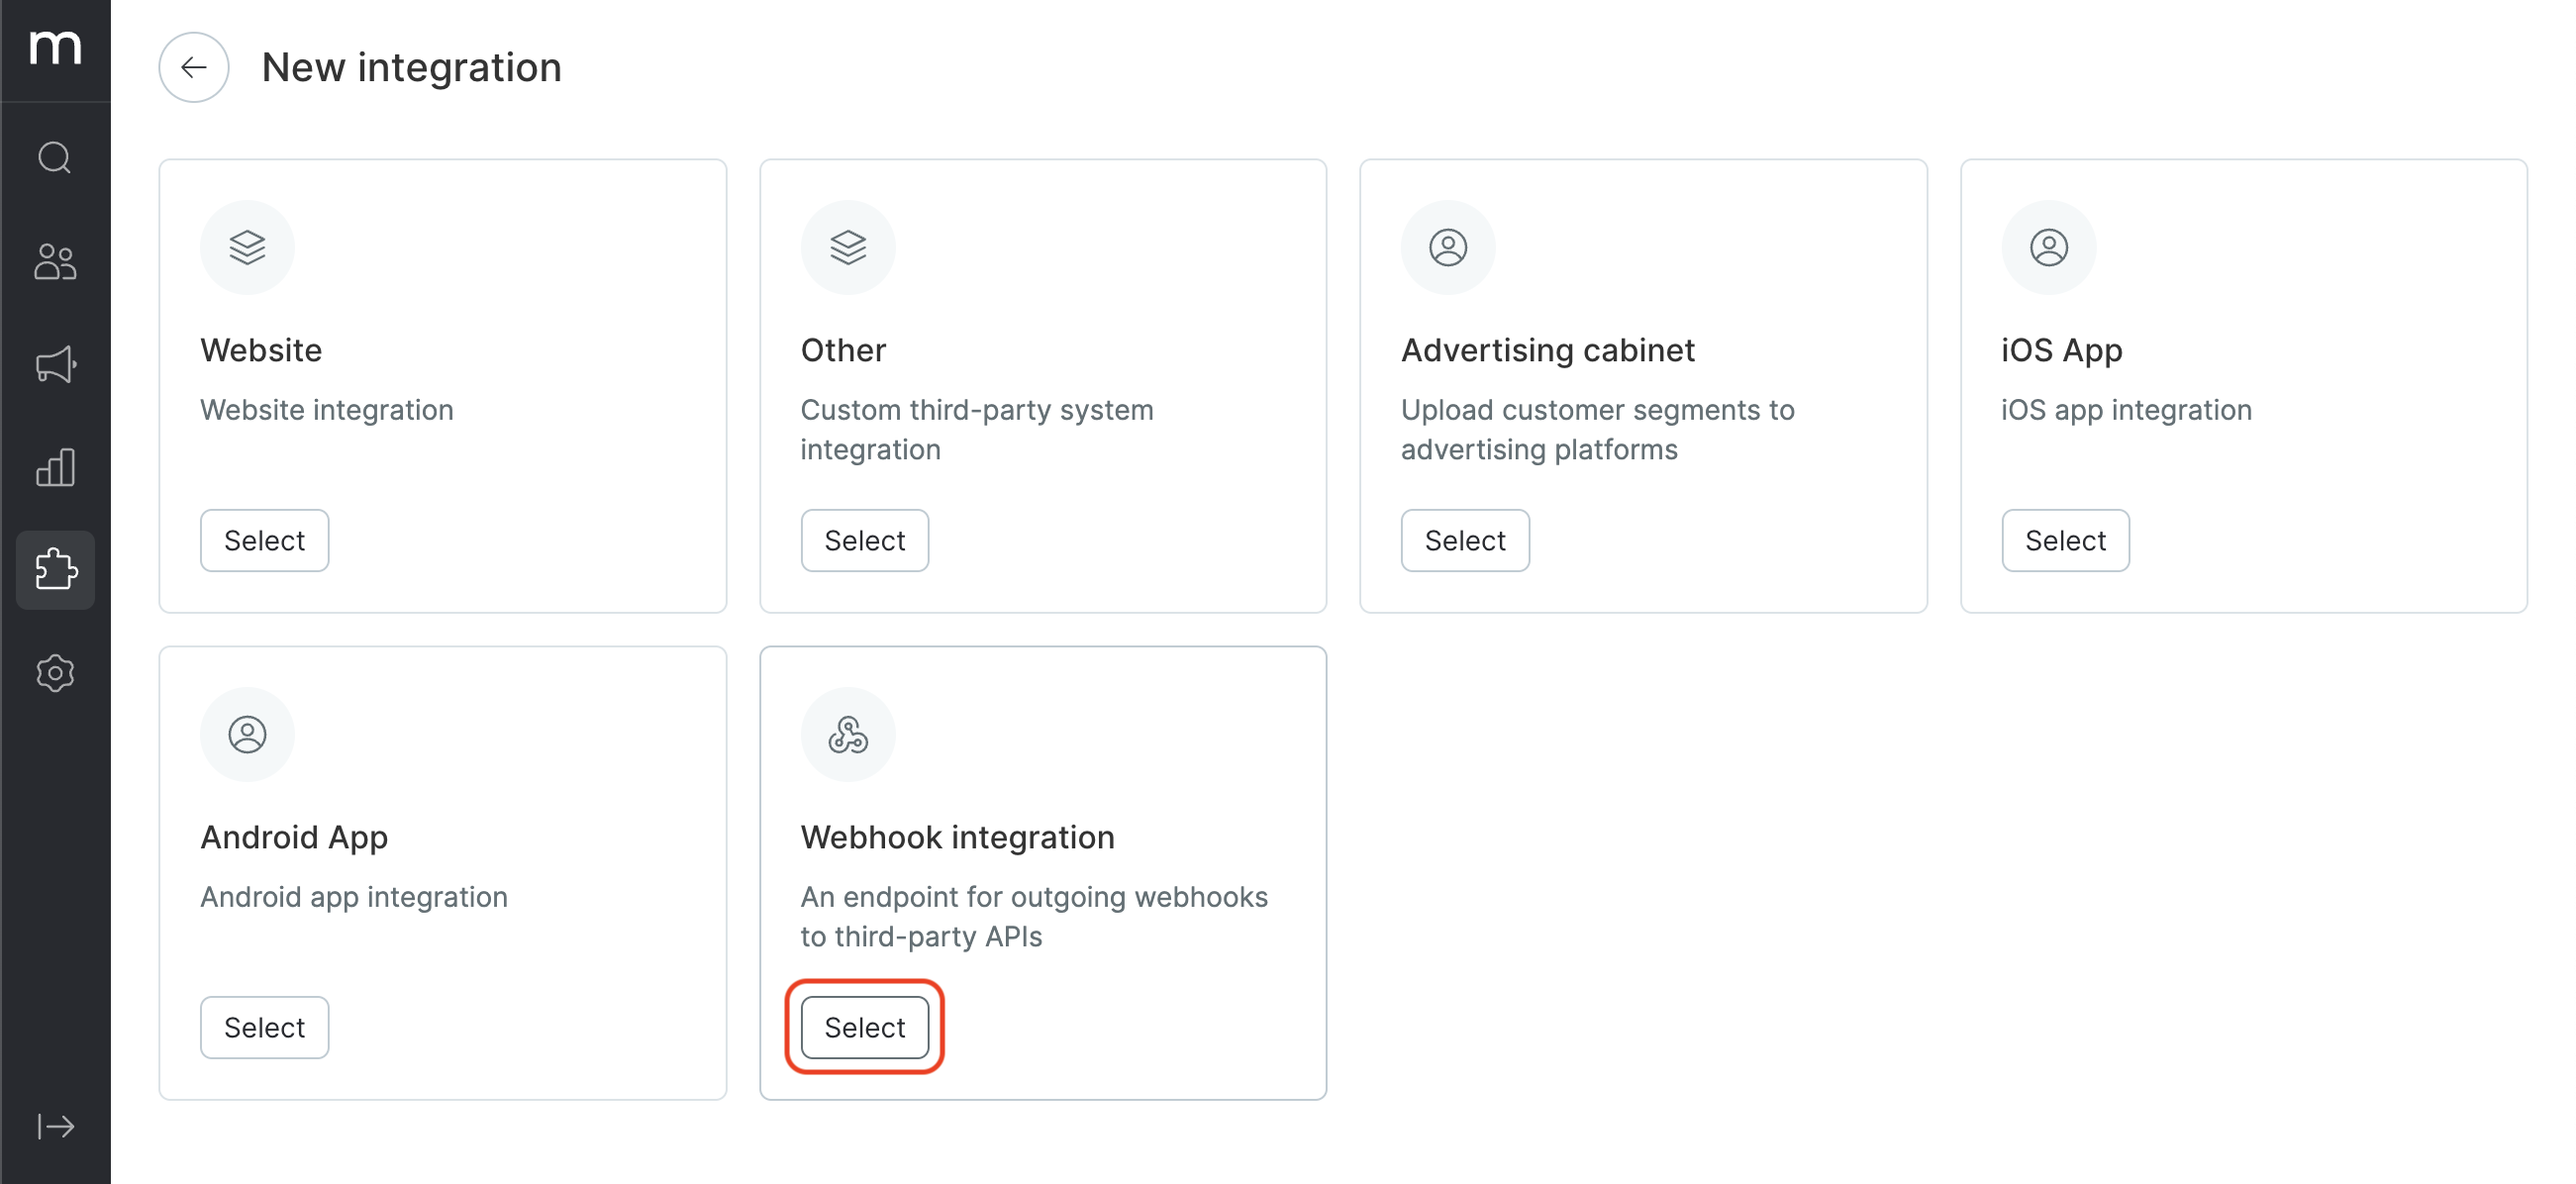
- Select the "Webhook Integration" preset:
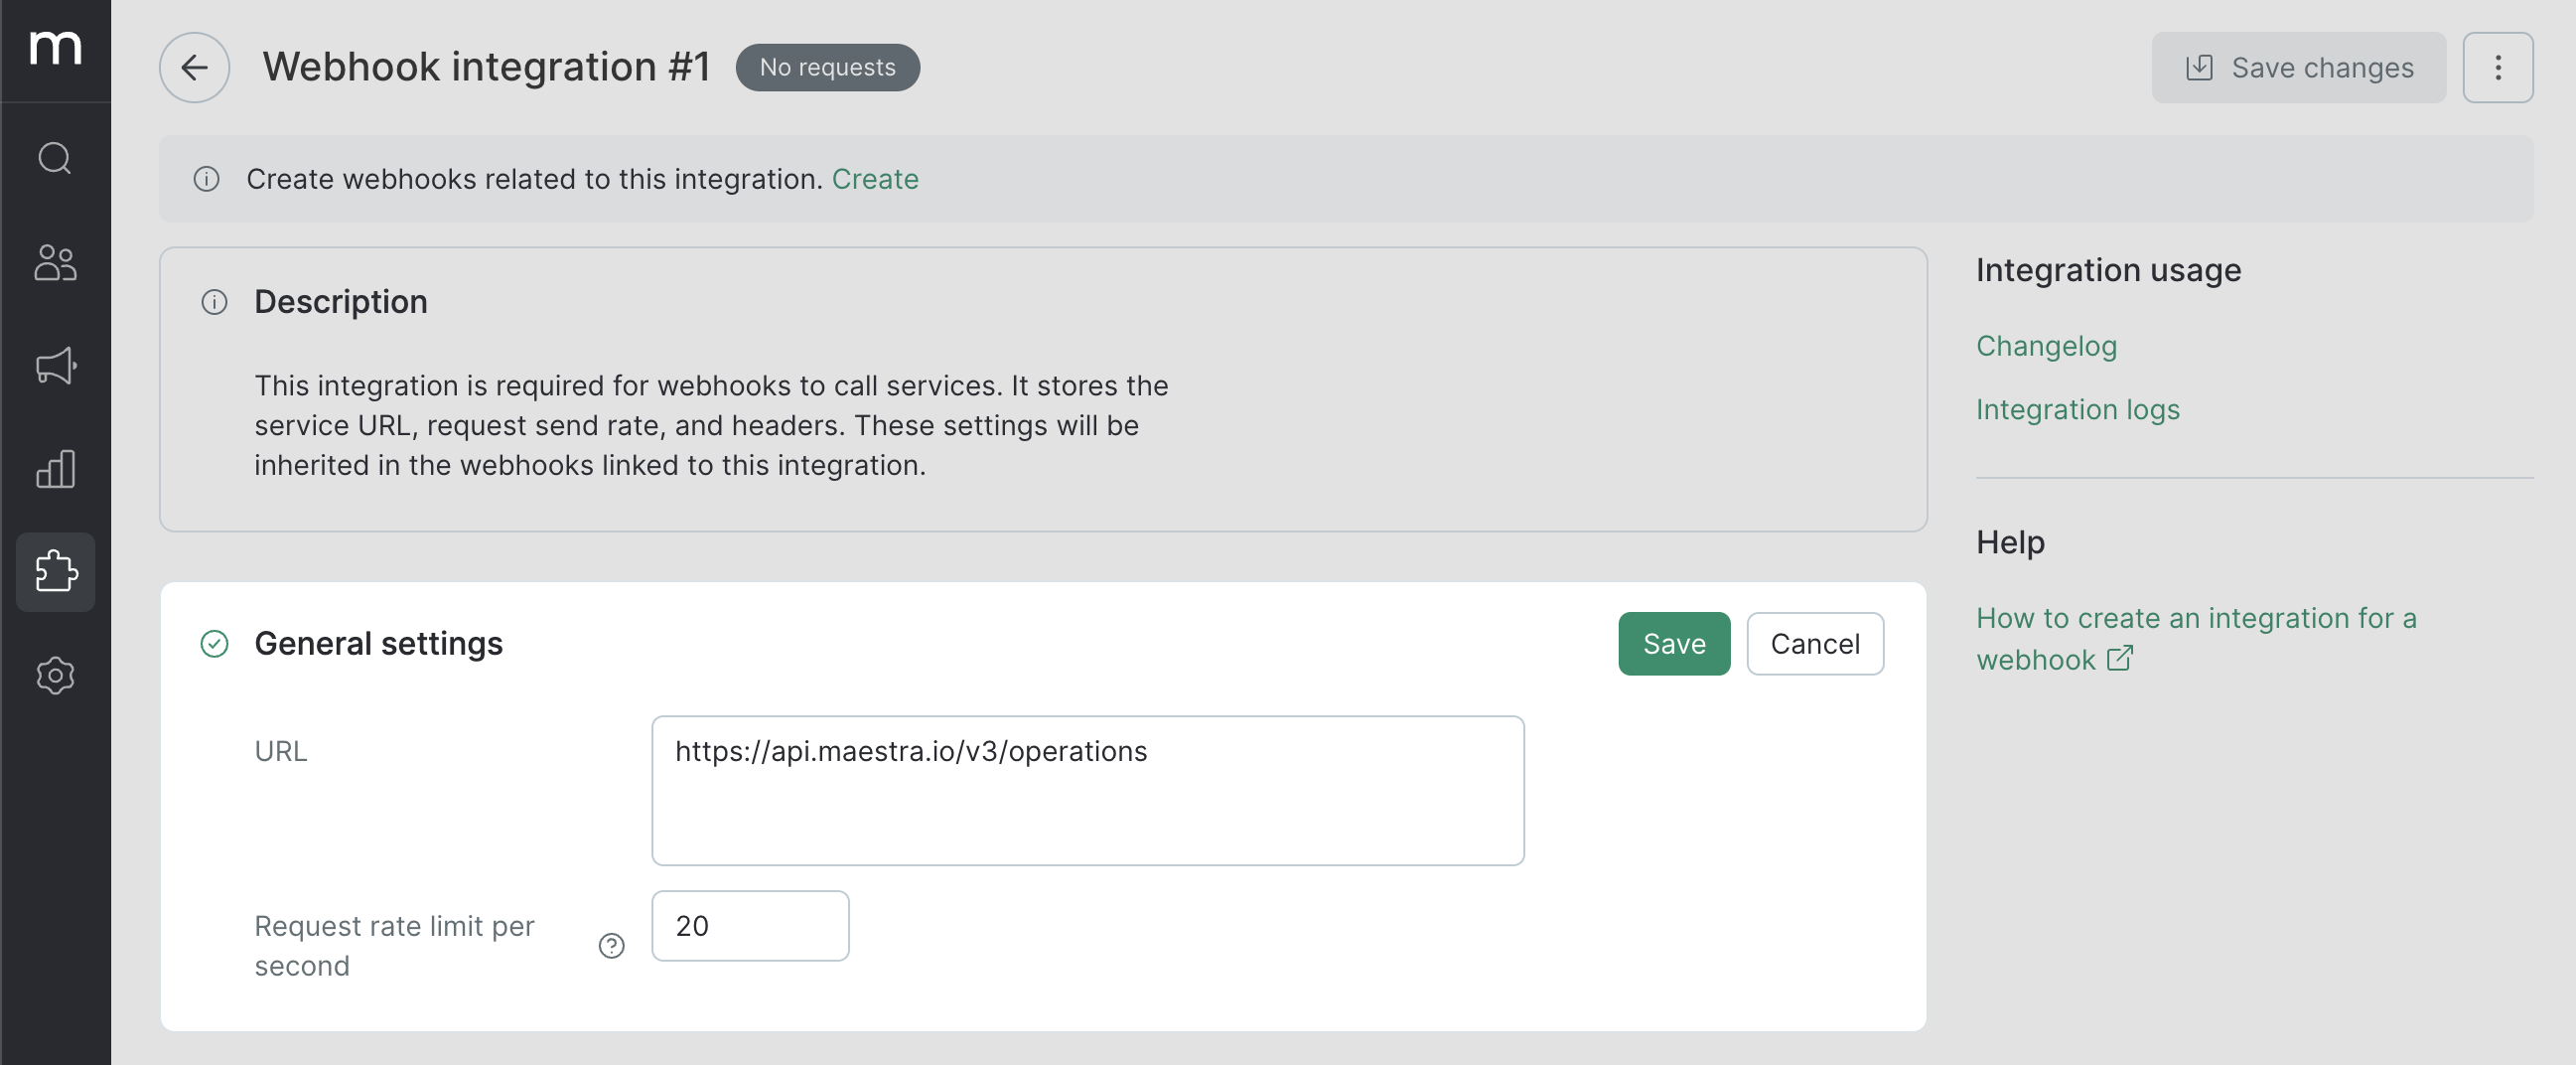
- Set up your integration.
3.1. Enter a name.
3.2. Specify general settings.
- URL is the root URL, generated by your client, which is used by all your webhooks. You can either set the entire URL or just specify the root part and add unique URL parts for each individual webhook.
Example: Maestra’s root URL
is https://api.maestra.io/v3/operations/ with various service requests. In a case like this, you can set the part common for all your webhooks using the integration and only specify a unique ID for each individual webhook.

- Set the maximum number of requests per second allowed — a useful workaround for services with a limited processing speed.
All the webhooks in the integration share the same processing limit.
Please note the estimated restriction as the actual number of requests per second may vary based on the network delays. We recommend setting a slower speed than your service can process to reduce the risk of exceeding the limit.
3.3. Headers.
Set the necessary headers for your service. "Authorization" and "Content-Type" are the most commonly used.
If a header is labeled as private, the system will hide its value for users without access to integrations during the setup of your integration’s webhooks.
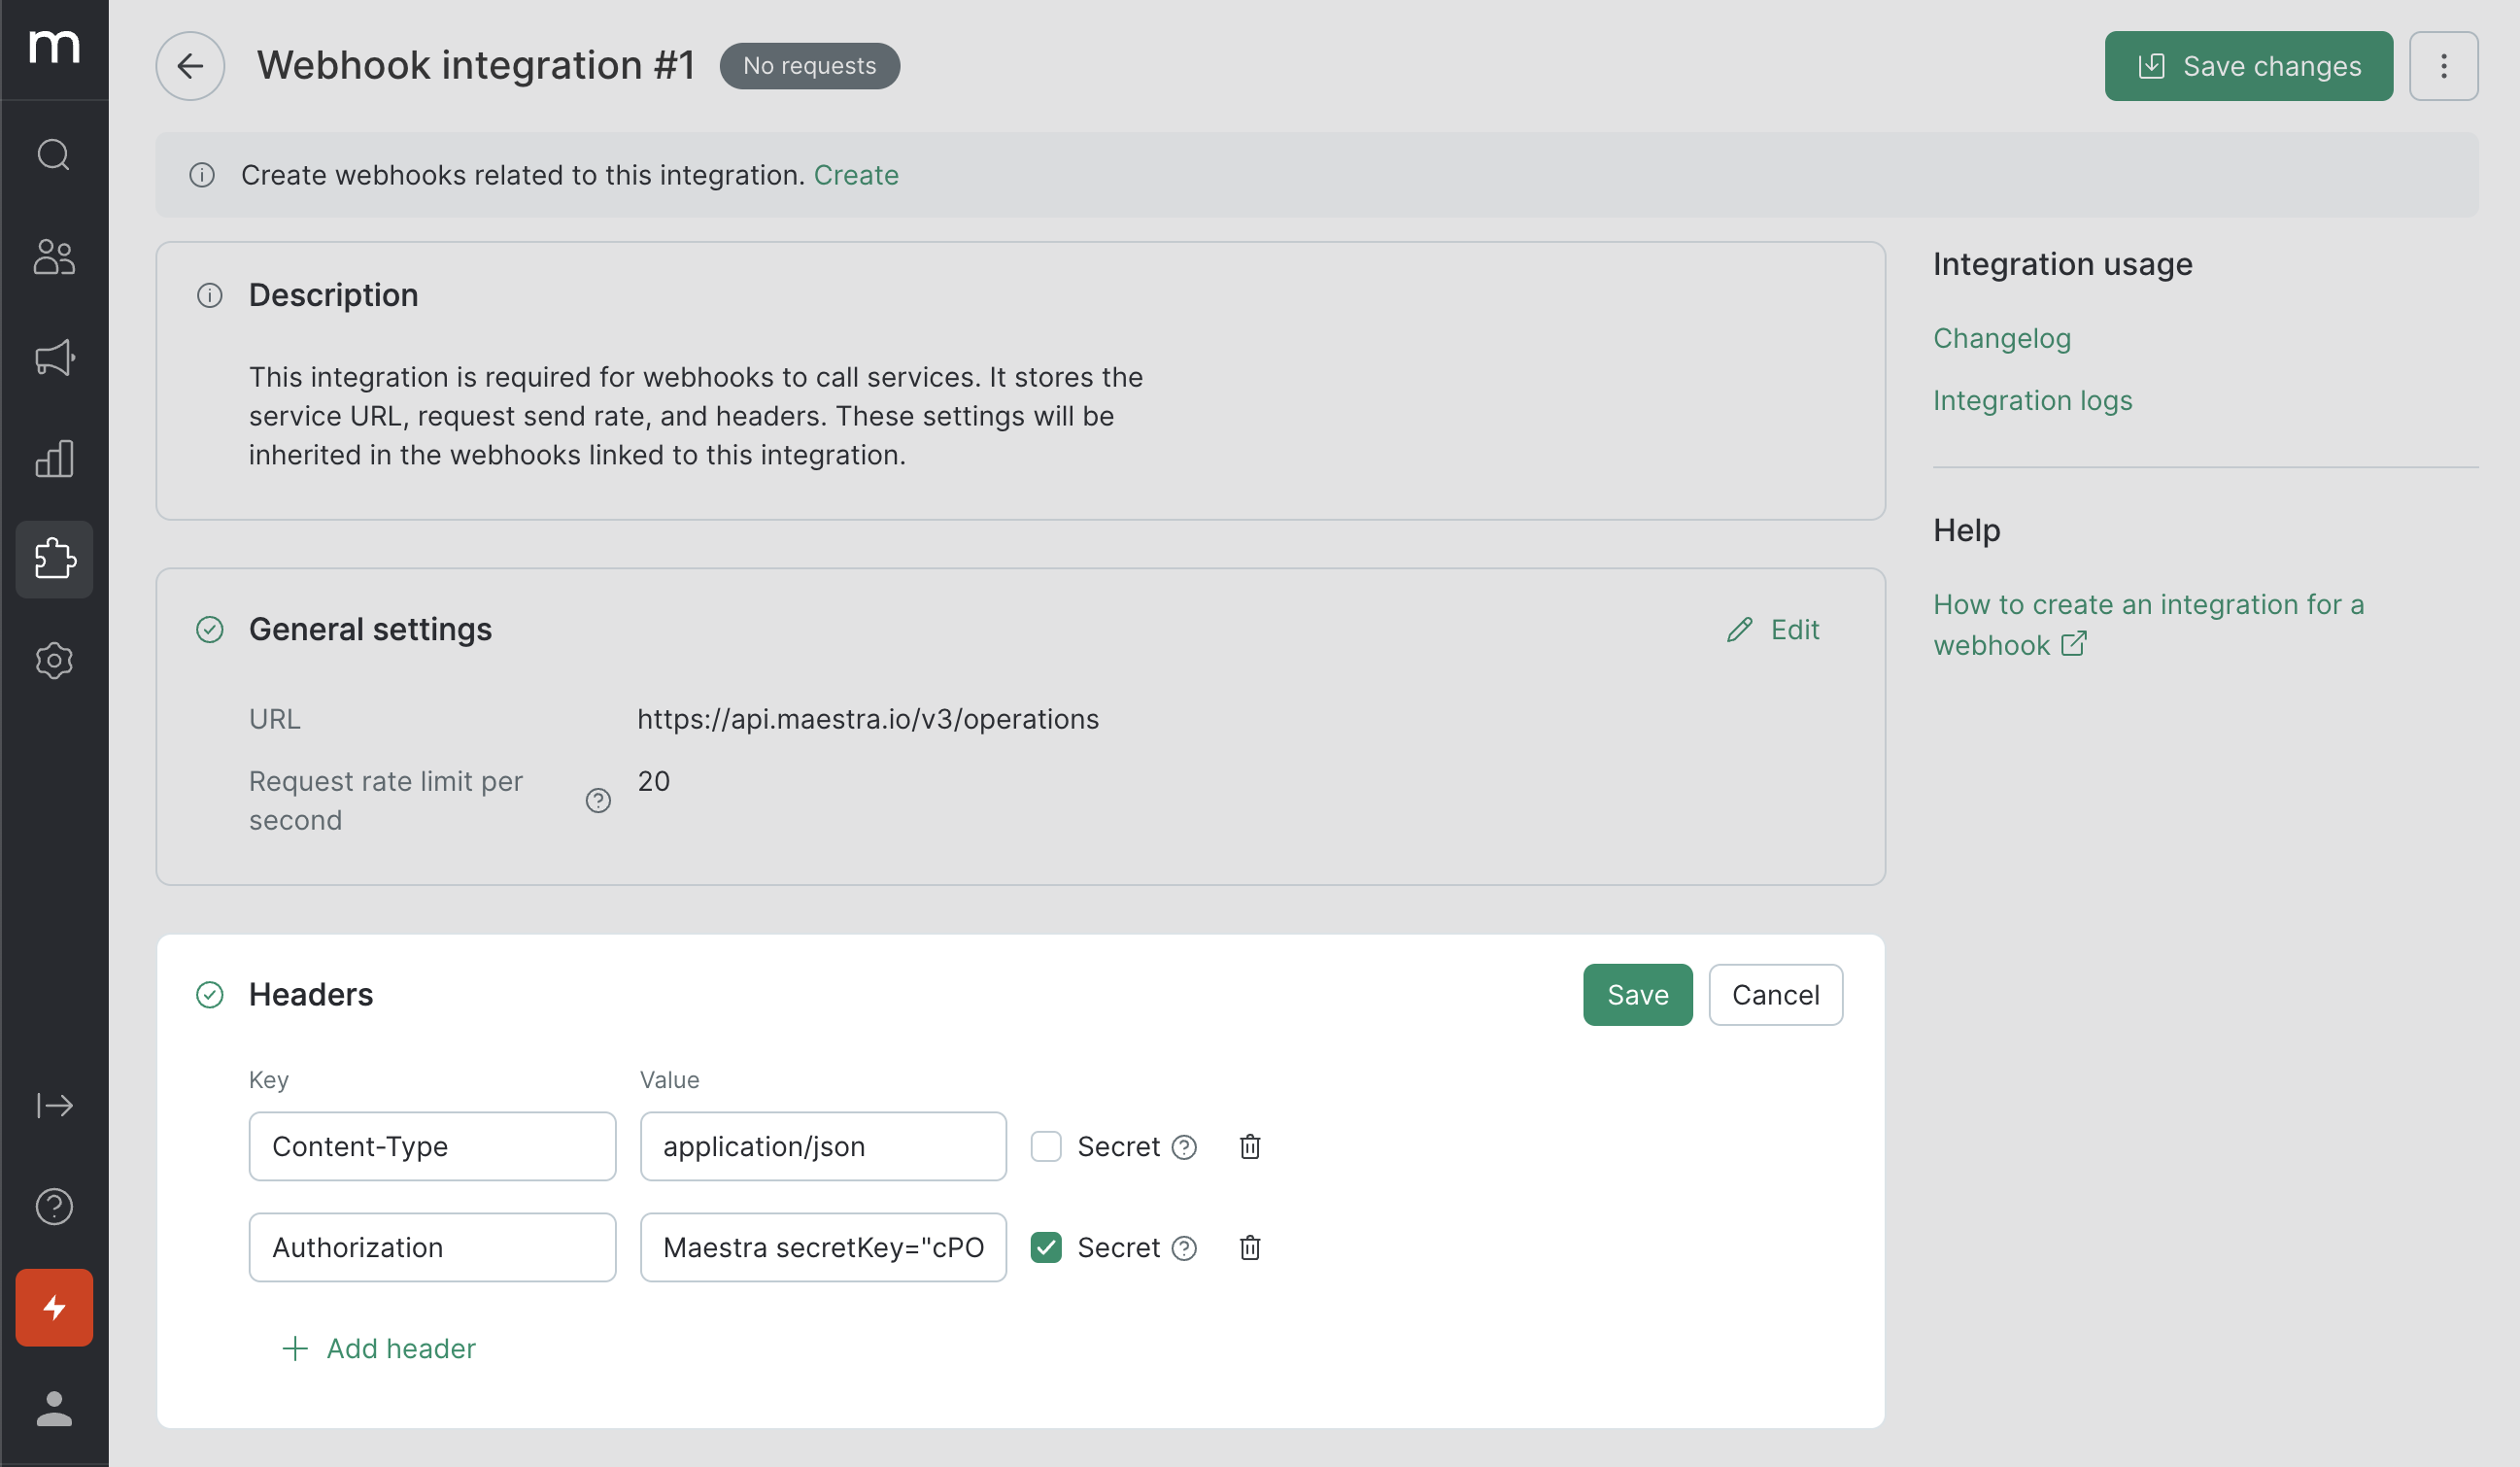
- Click "Save".
You can now create webhooks for your integrations.

Creating a webhook
- Add your webhook from the integration page or go to Integrations → Webhooks:
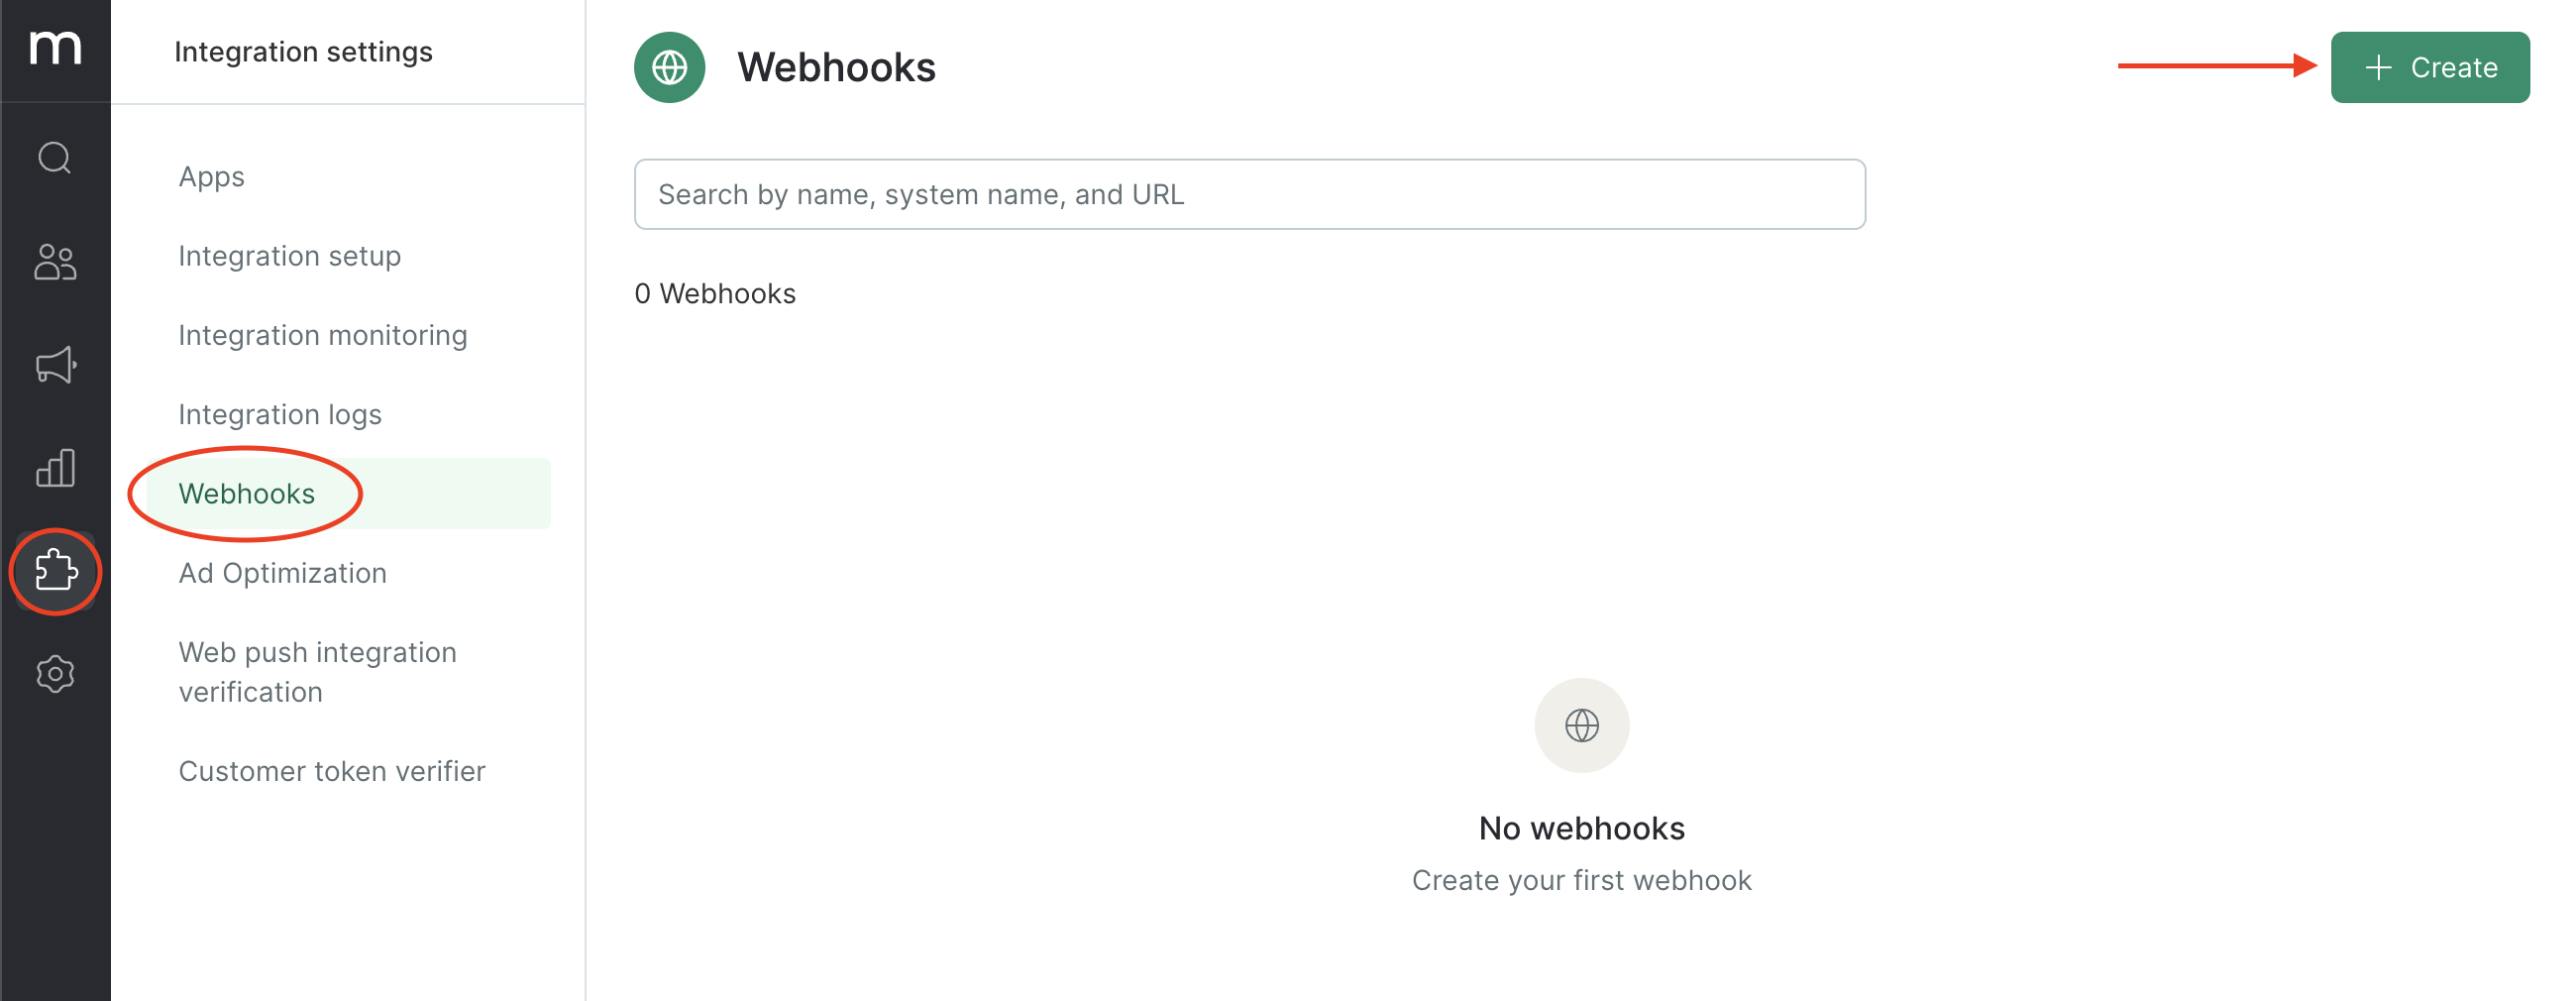
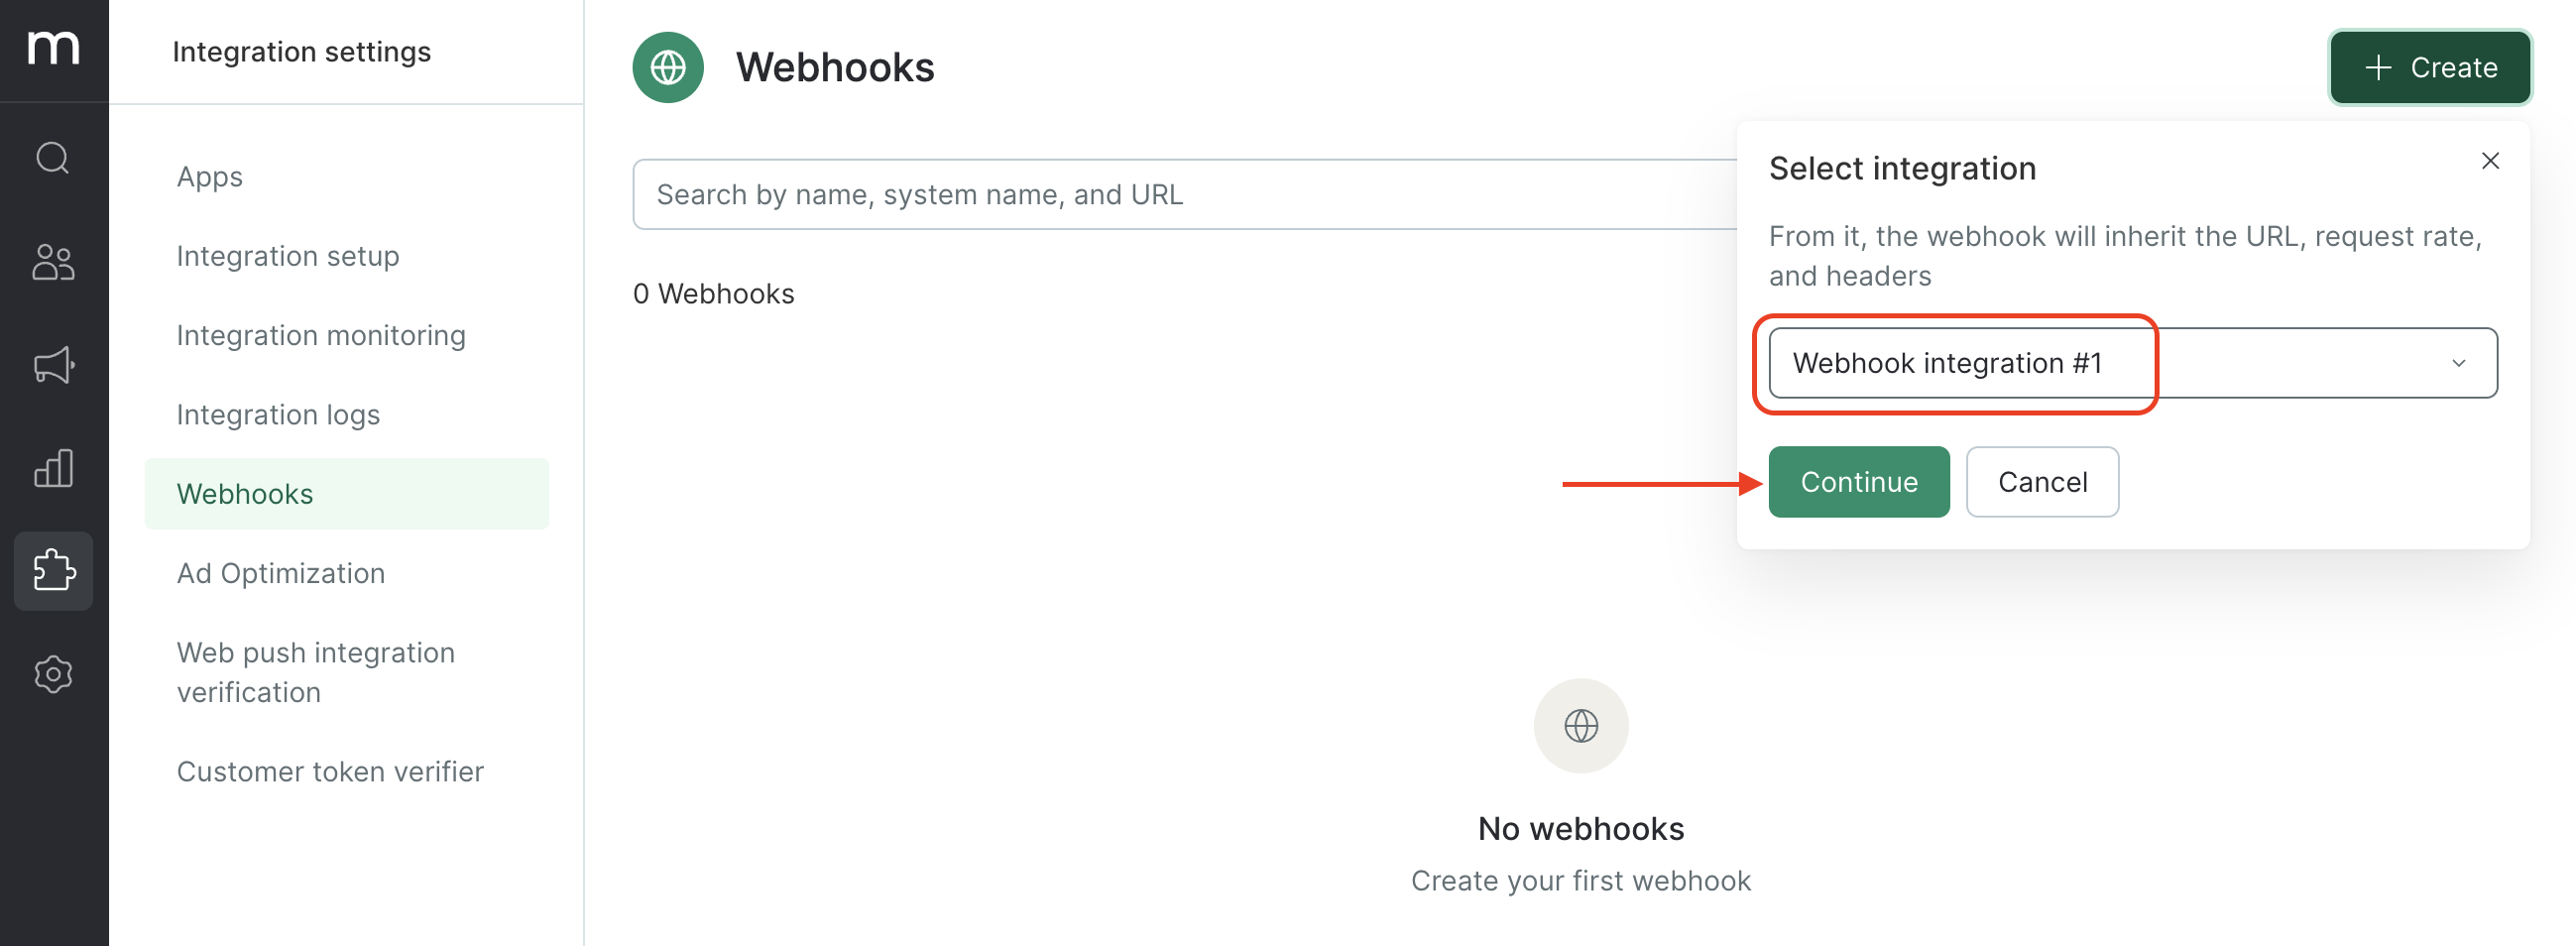
- Set up your webhook.
2.1. Choose the name that will be displayed for your webhook in the campaigns list and in flow steps.
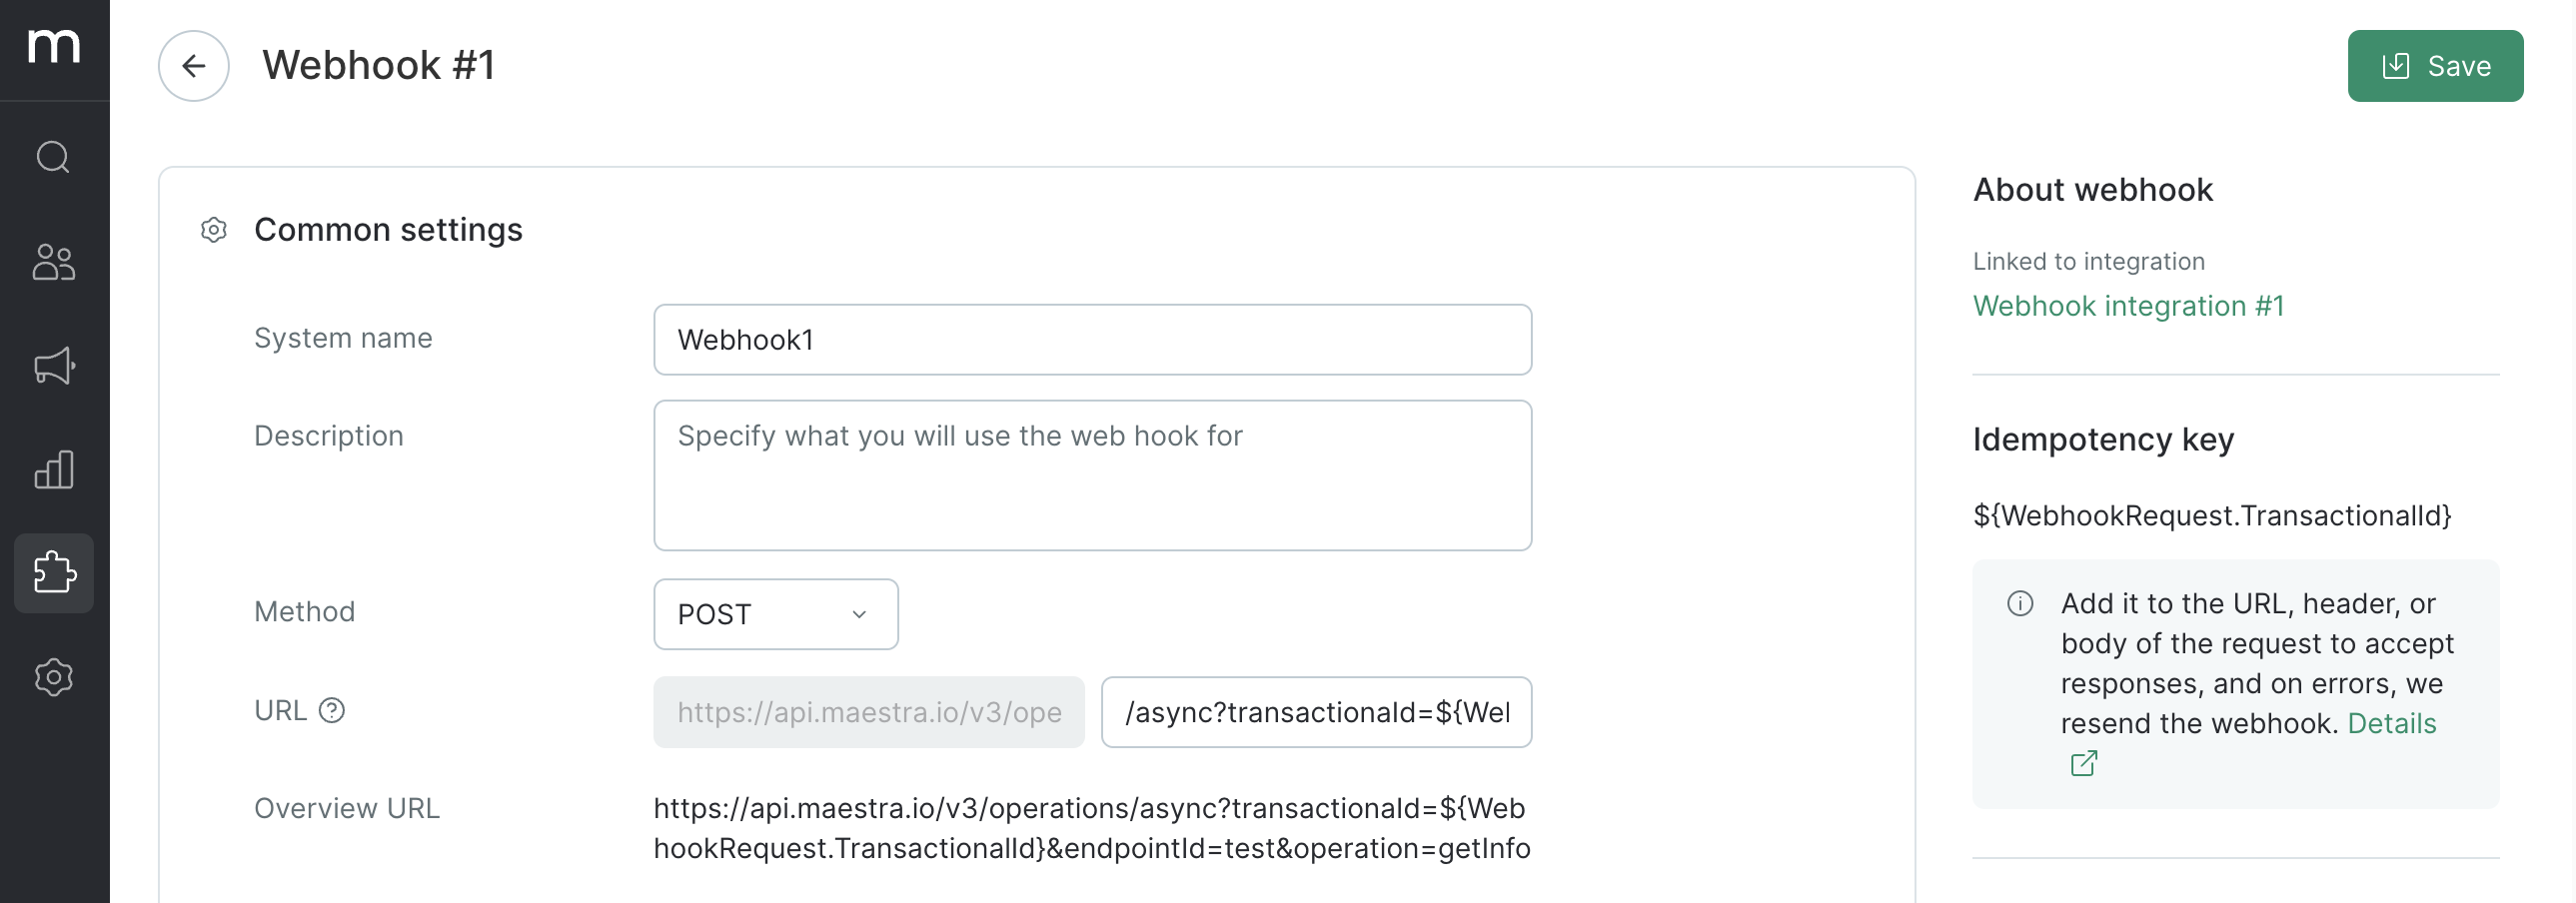
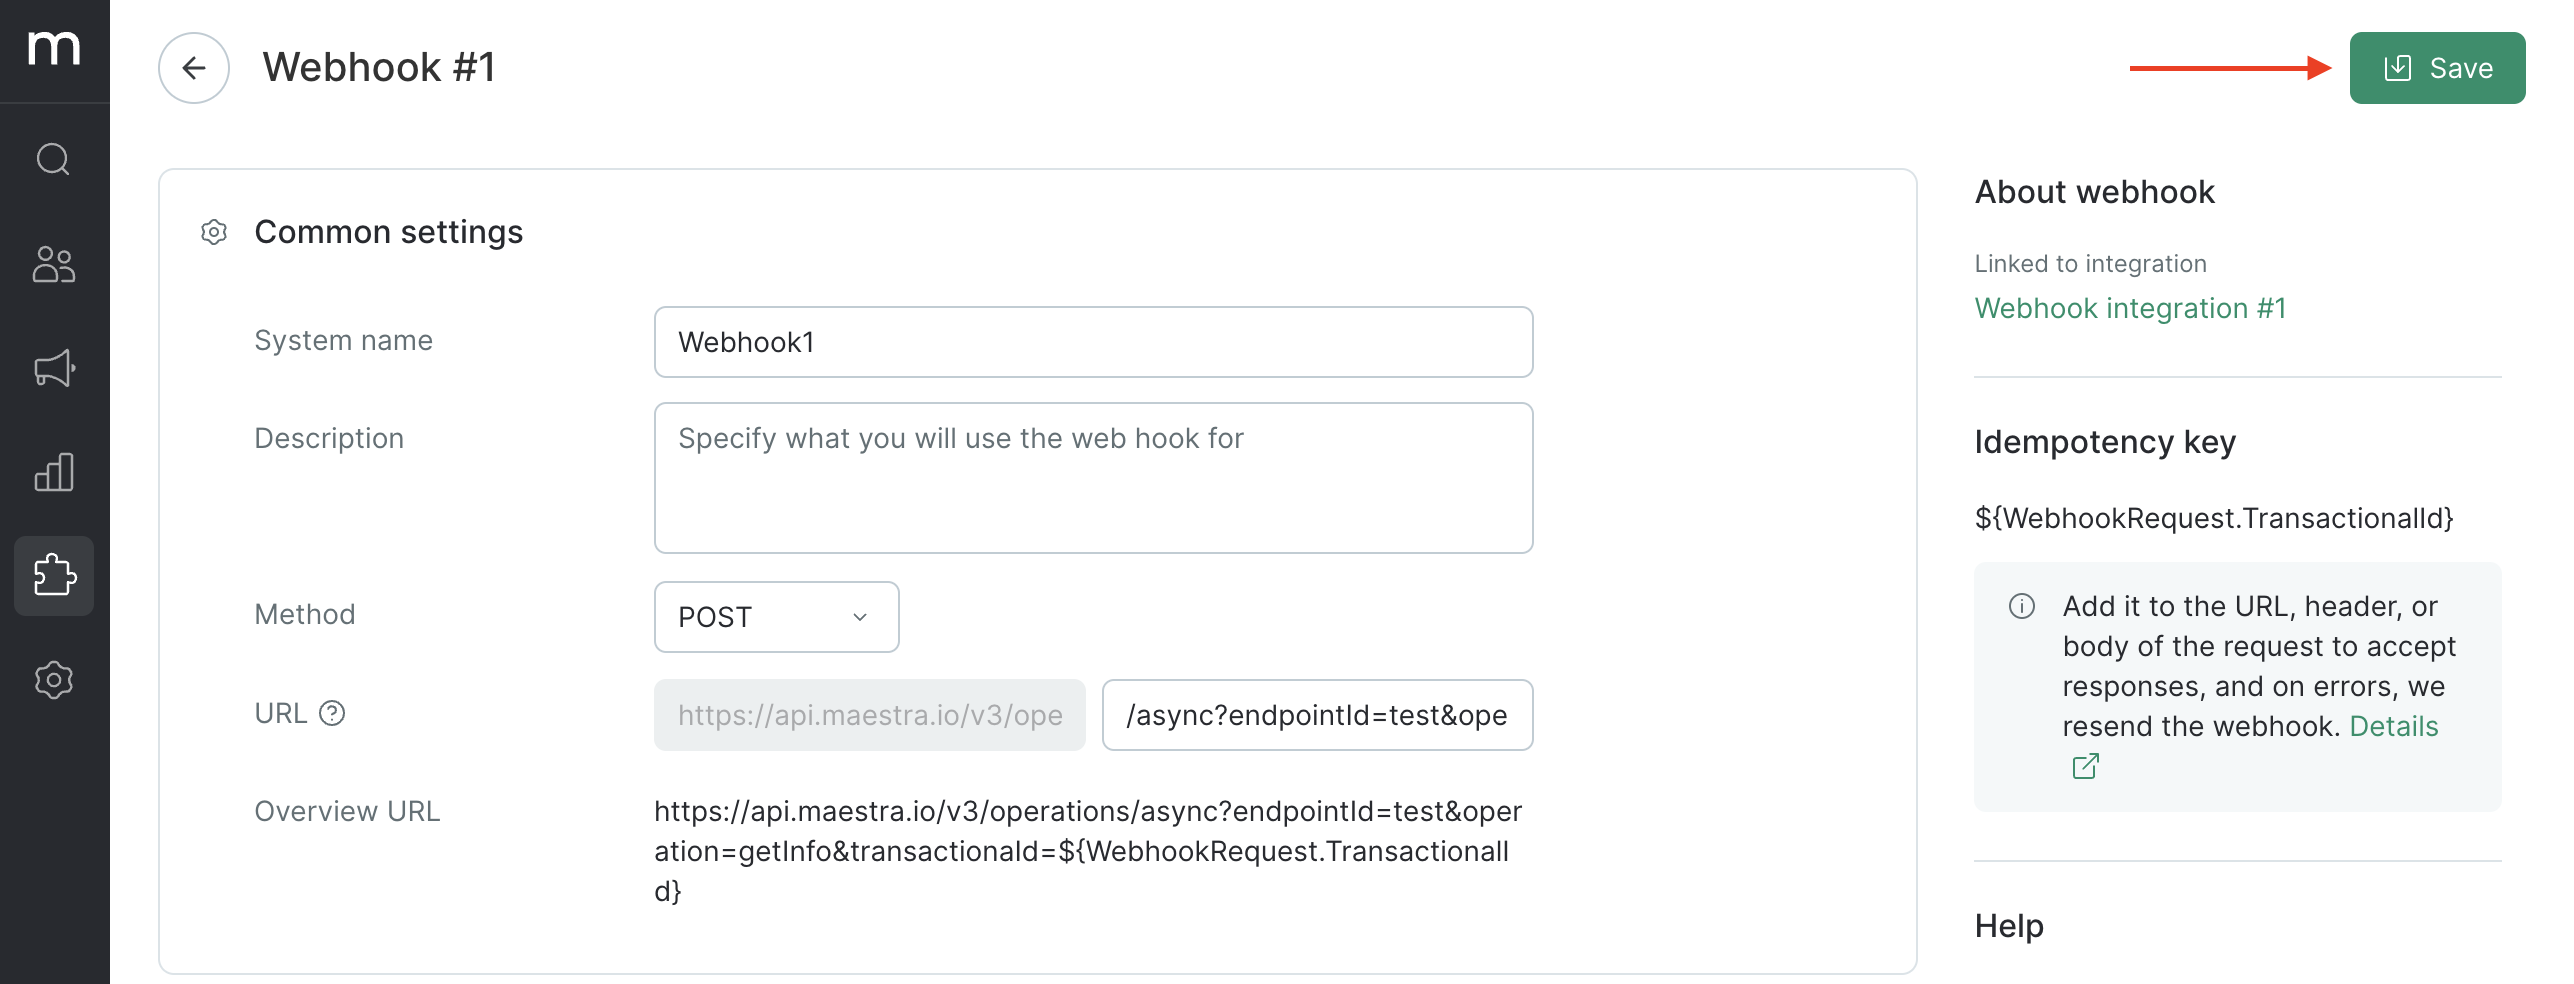
2.2. Fill out the general settings.
- System name should be unique to process your webhook response.
- The Description is an optional field that can contain any useful info about the webhook’s function.
- Method is determined by the task — GET, POST, PUT, PATCH, DELETE.
- The URL is an optional part to the root URL specified in the integration and can be left blank if the full URL is already included in the integration.
- The URL view displays the full URL request for visualization purposes only and does not require editing.
If you add the ${WebhookRequest.TransactionalId} parameter to your request, the webhook will be called back three times within six minutes if the response contains errors 5xx and 429, as long as the response does not include other codes or an absent transactionID.
This parameter is optional.
How to add a transactionID
You can enter the idempotency key in a URL, a header, or a request body.
Please check the documents of your service whether it accepts the transactionId parameter and how it is best sent in webhooks, as data format requirements may vary among services.
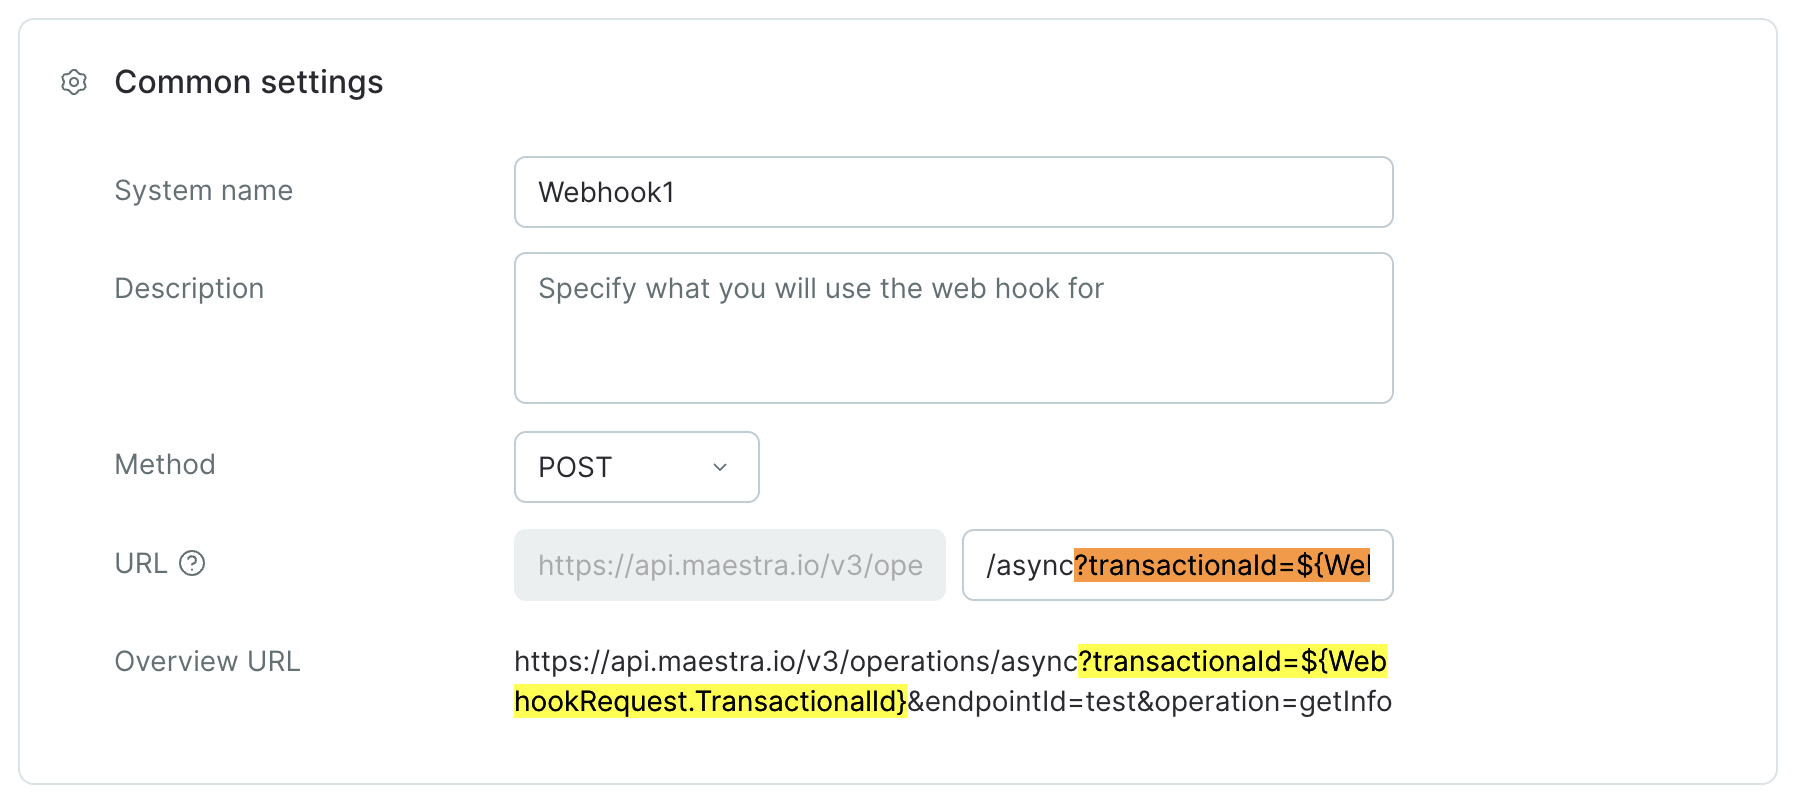
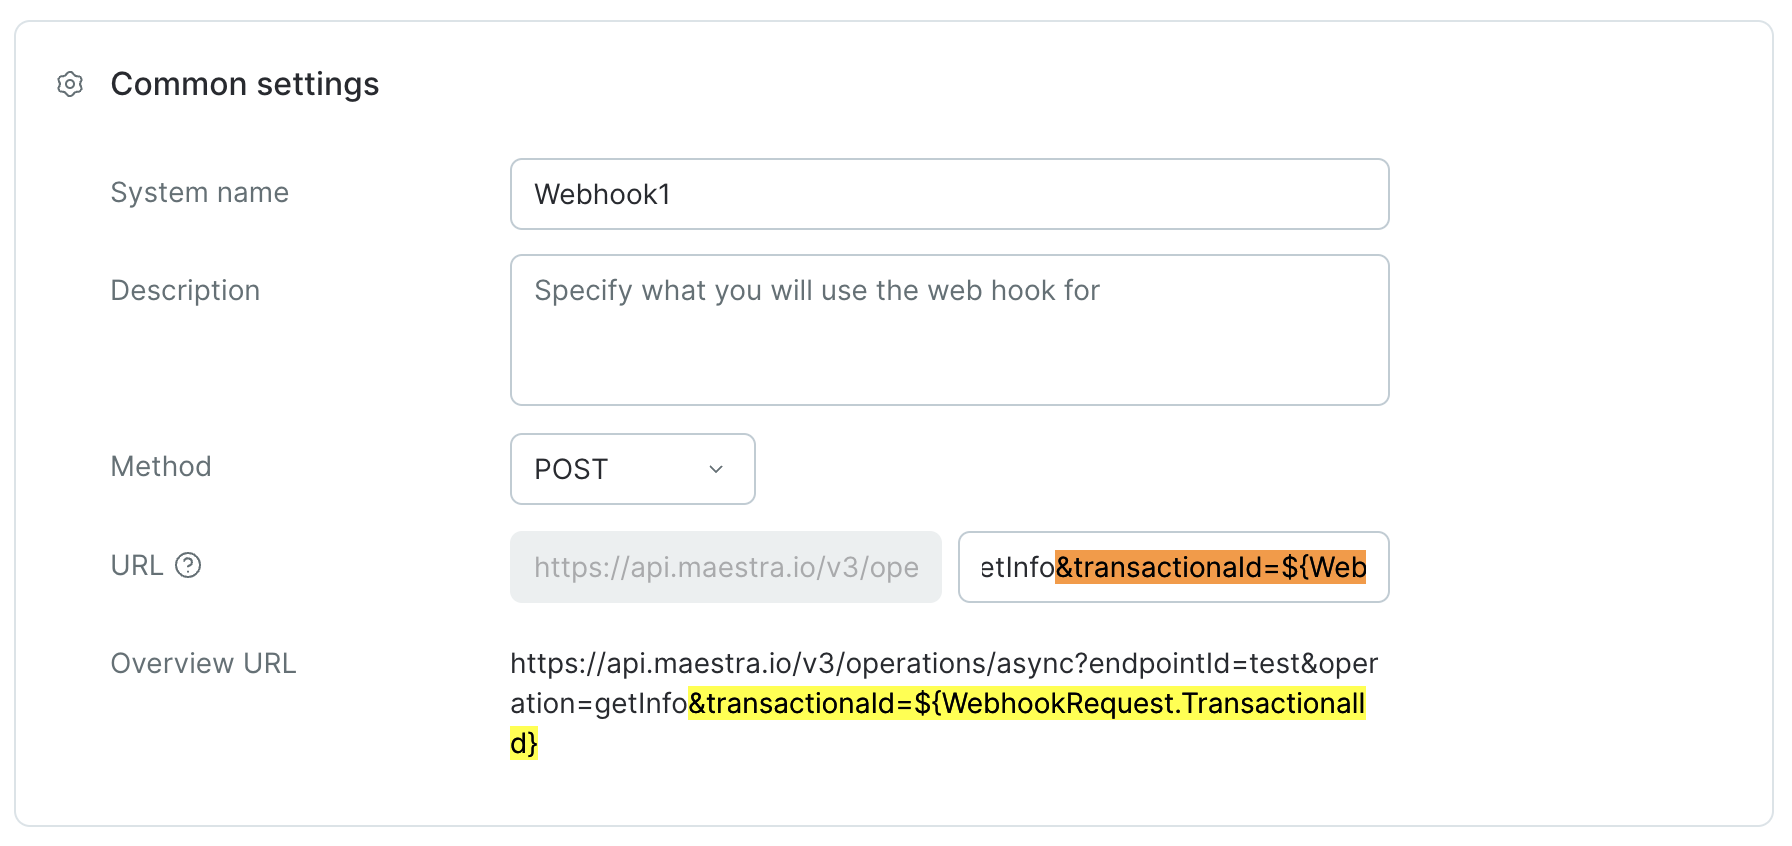
Now, let’s have a look at the examples of how the transactionID is added to the webhook’s URL.
The transactionId=${WebhookRequest.TransactionalId} is added after the question mark ?:
Multiple parameters are separated with the ampersand &:
2.3. Headers.
- The integration inherits specific headers which can be modified by deselecting the "Use" option.
- Additional headers are those included for a specific webhook.
Both inherited and additional headers are used when calling a webhook.
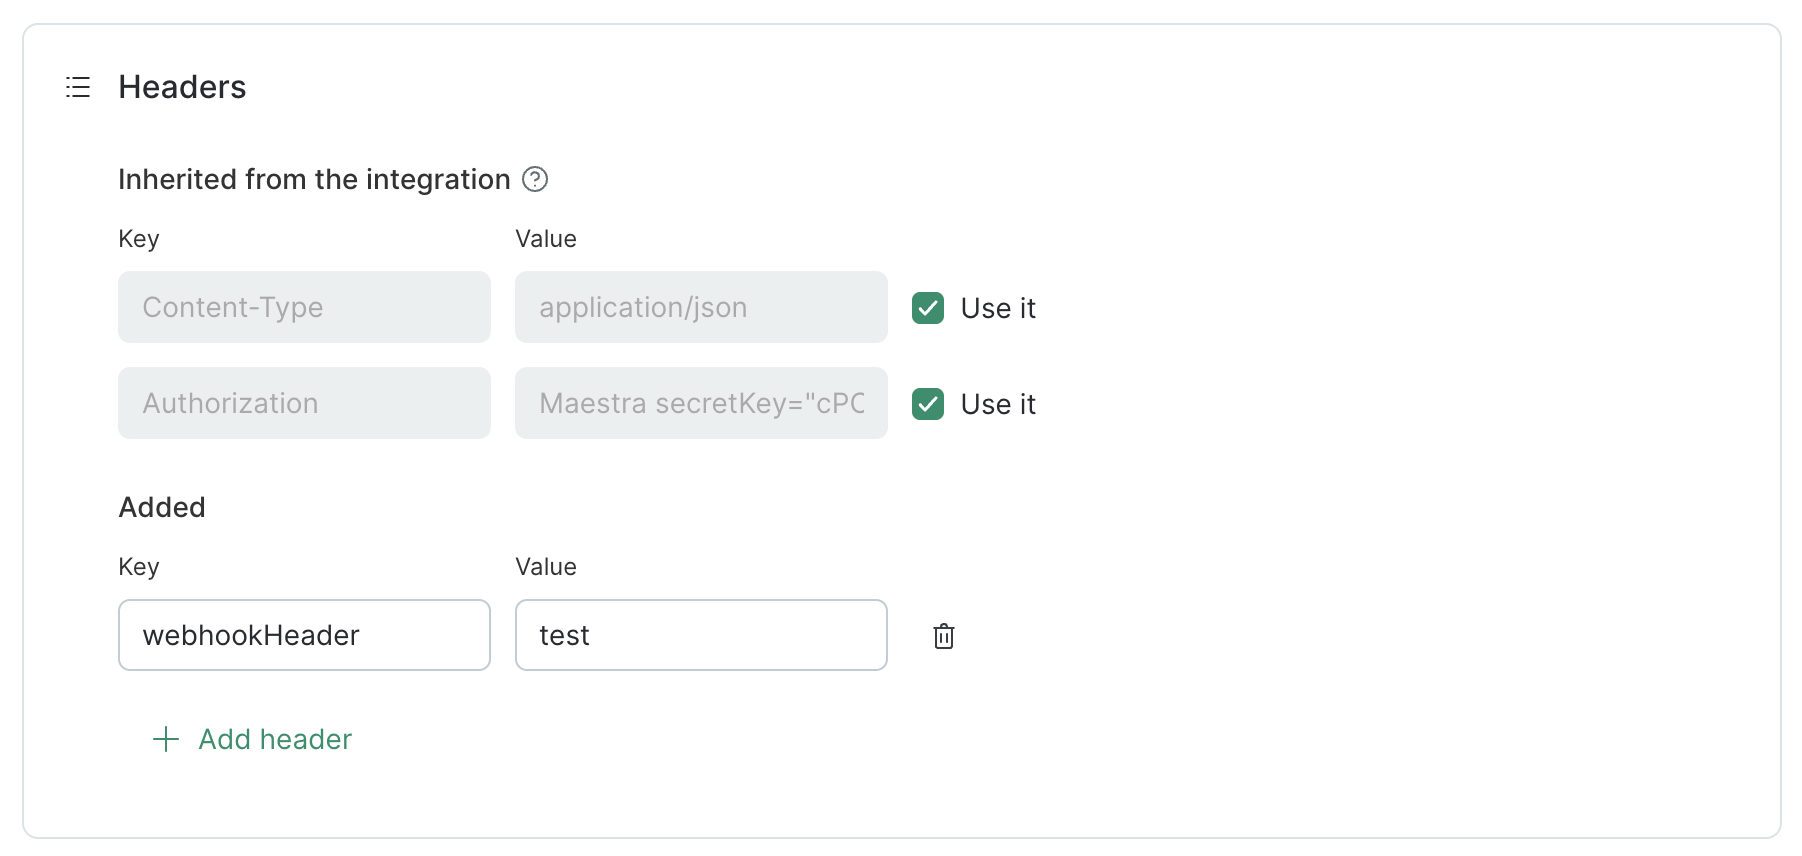
Here is the final set of headers for this example:
Content-Type: application/jsonwebhookHeader: test
2.4. Request body.
You can use Dynamic parameters in the request body, including [if-else-if-end] blocks(/v1/docs/adding-a-condition-ifelse-ifend-if){target="_blank"}, as well as for-end for cycles, passed using a JSON code.
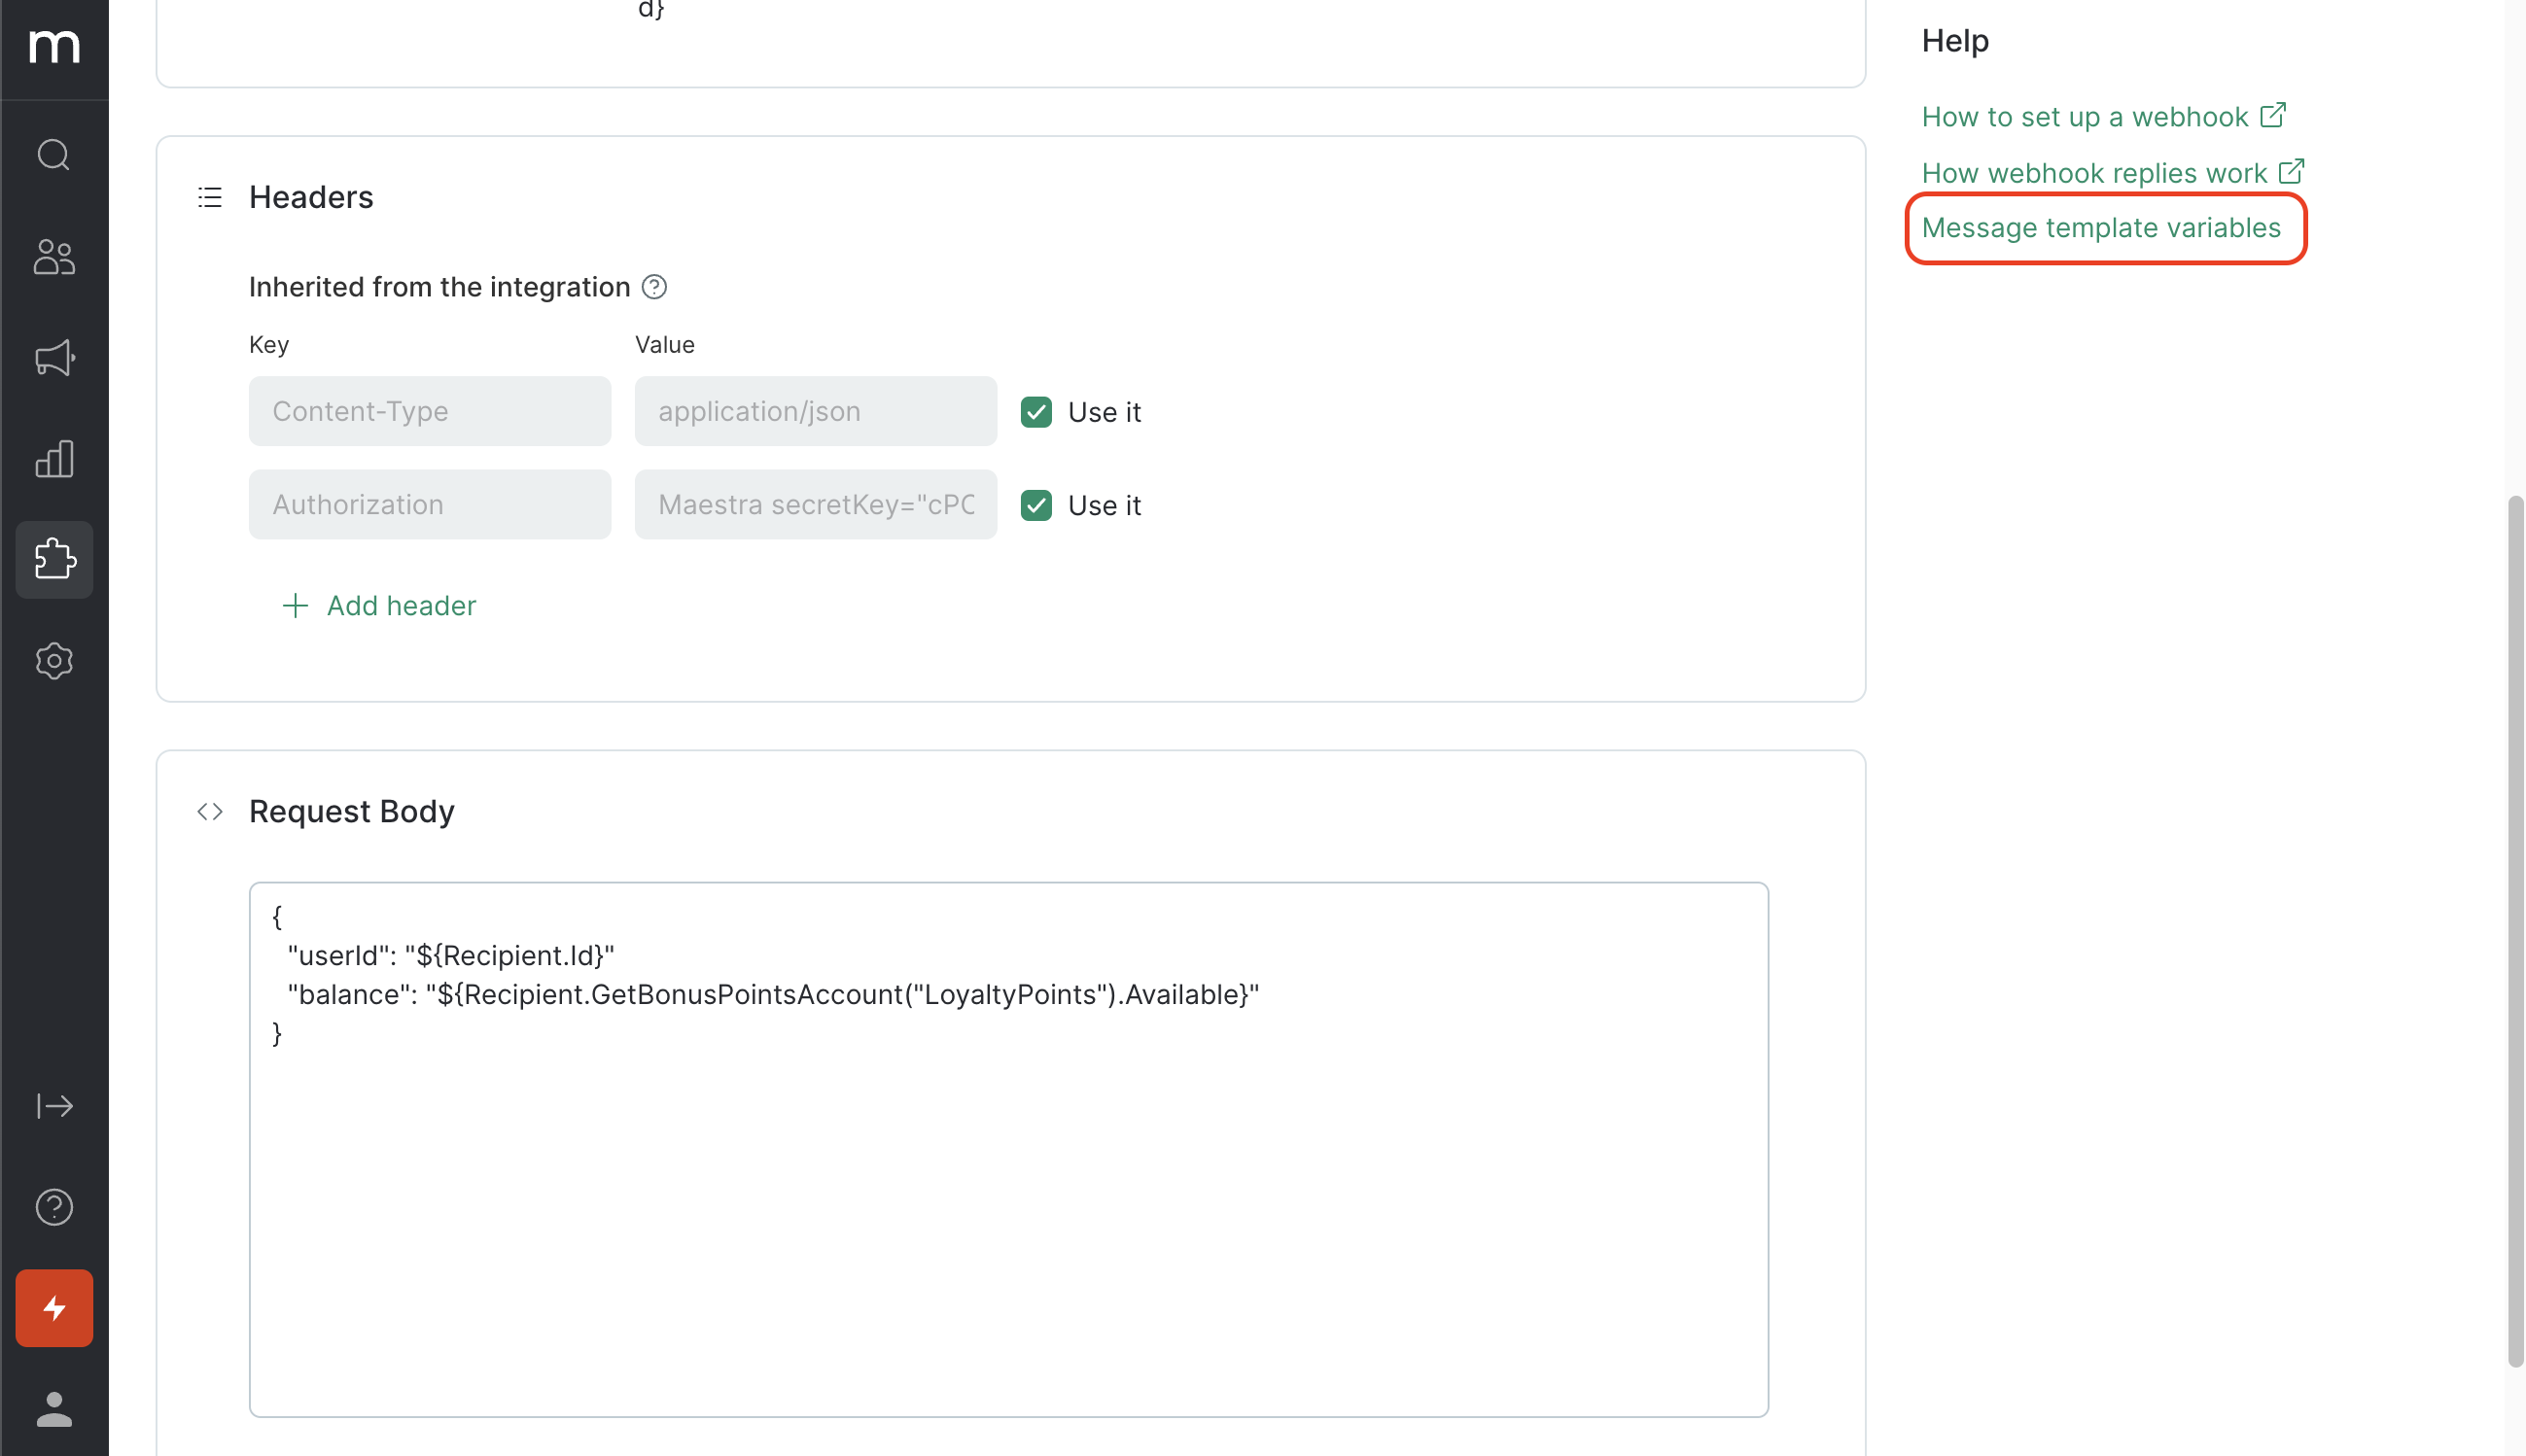
You can access Dynamic content message variables page located in the right sidebar.
2.5. Webhook response.
If you are using a webhook response, include it in your flow.
You can use both the webhook successful delivery status and specific values from the webhook response.
Example of how to add a variable:
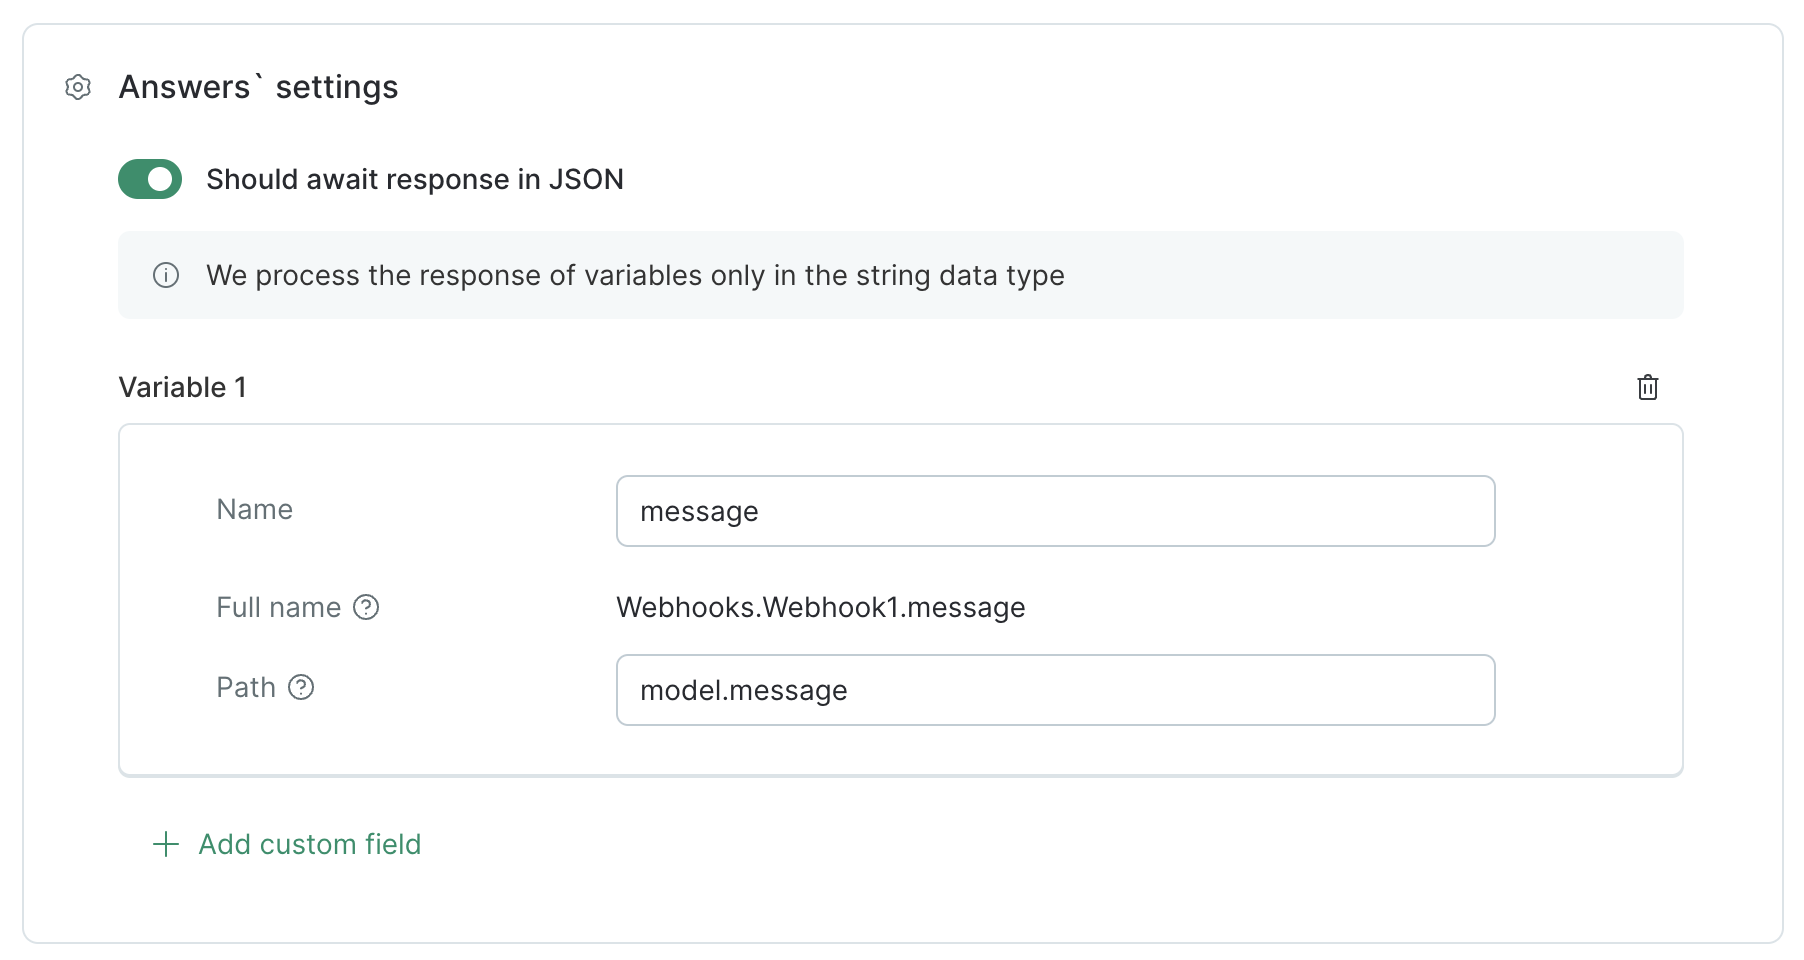
Please refer to this article to learn more about using webhook responses.
- Click "Save":
Helpful articles:
- Webhooks for Developers
- Exporting Webhook Logs
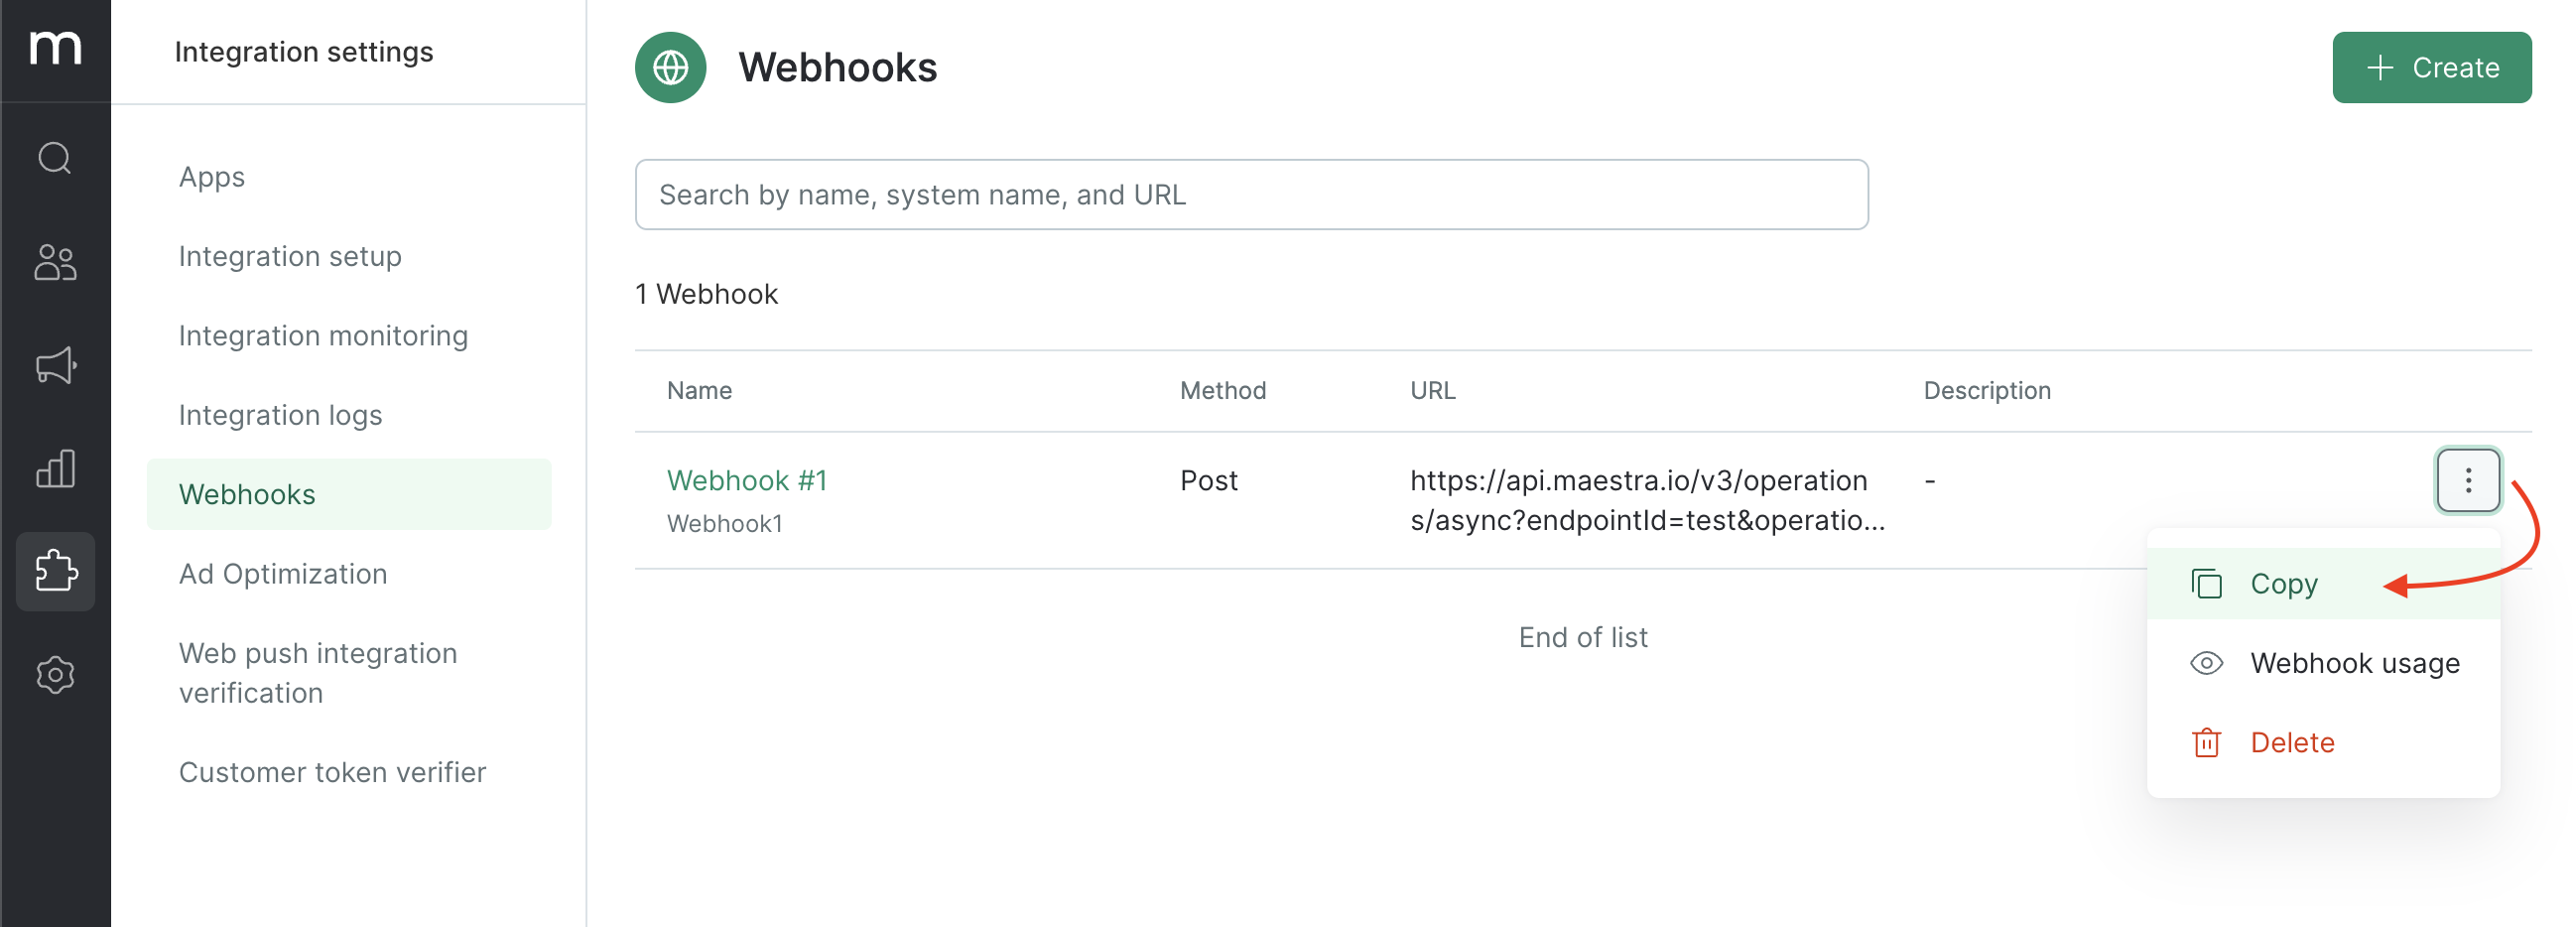
To duplicate a webhook, open the relevant webhook’s menu and click "Copy":
