1. Prepare your file for import
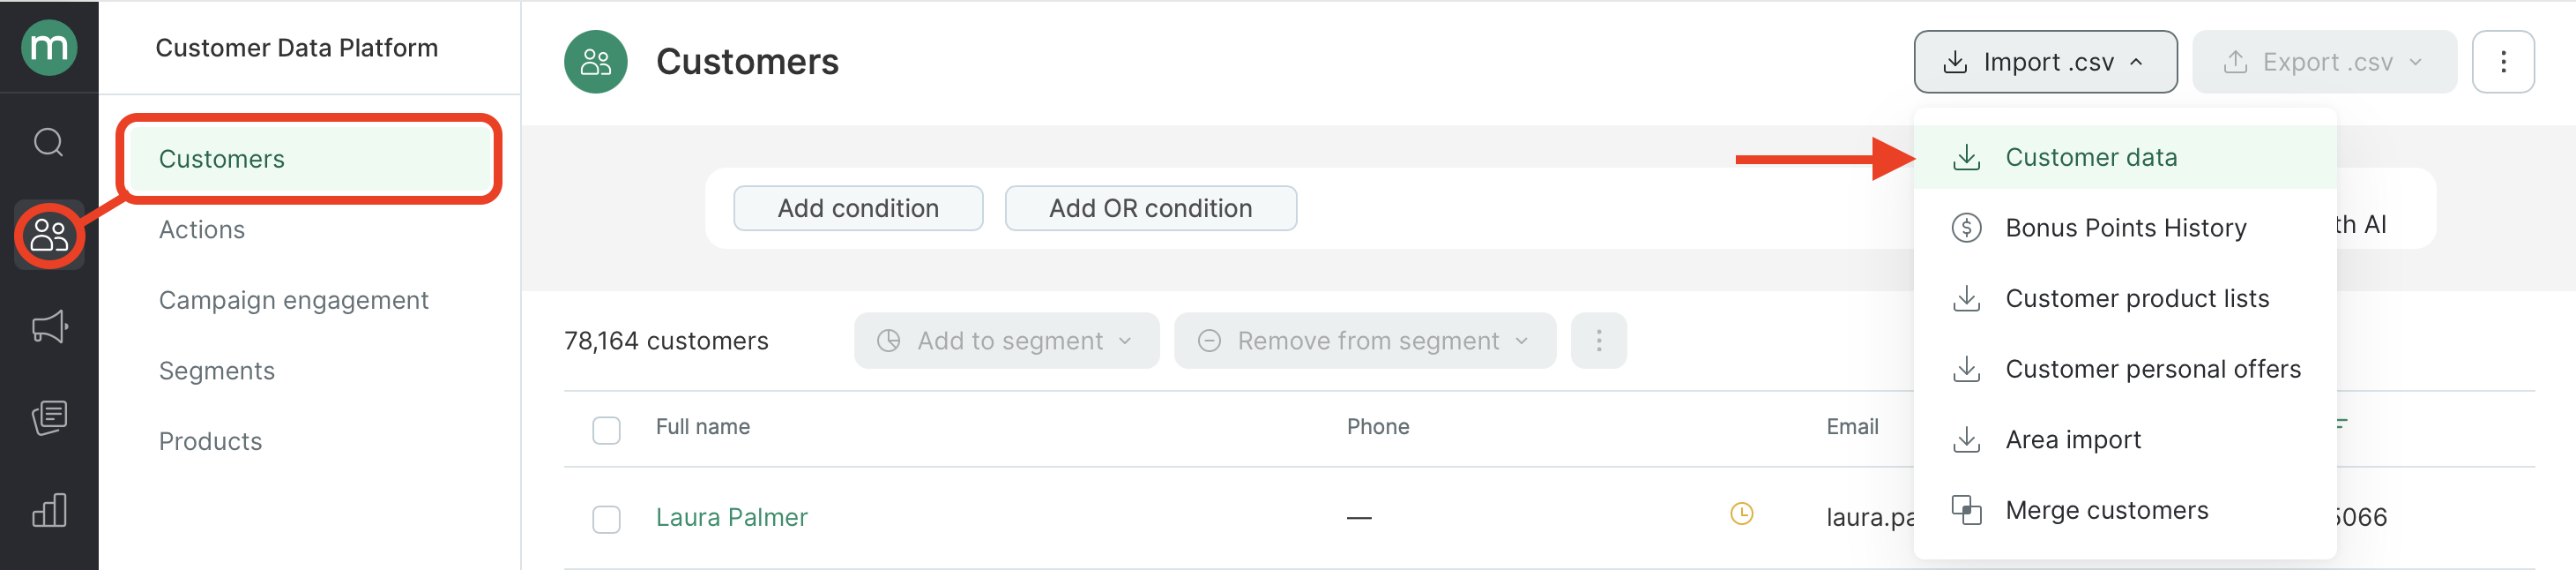
Go to Customer Data Platform → Customers → Import .csv → Customer data:
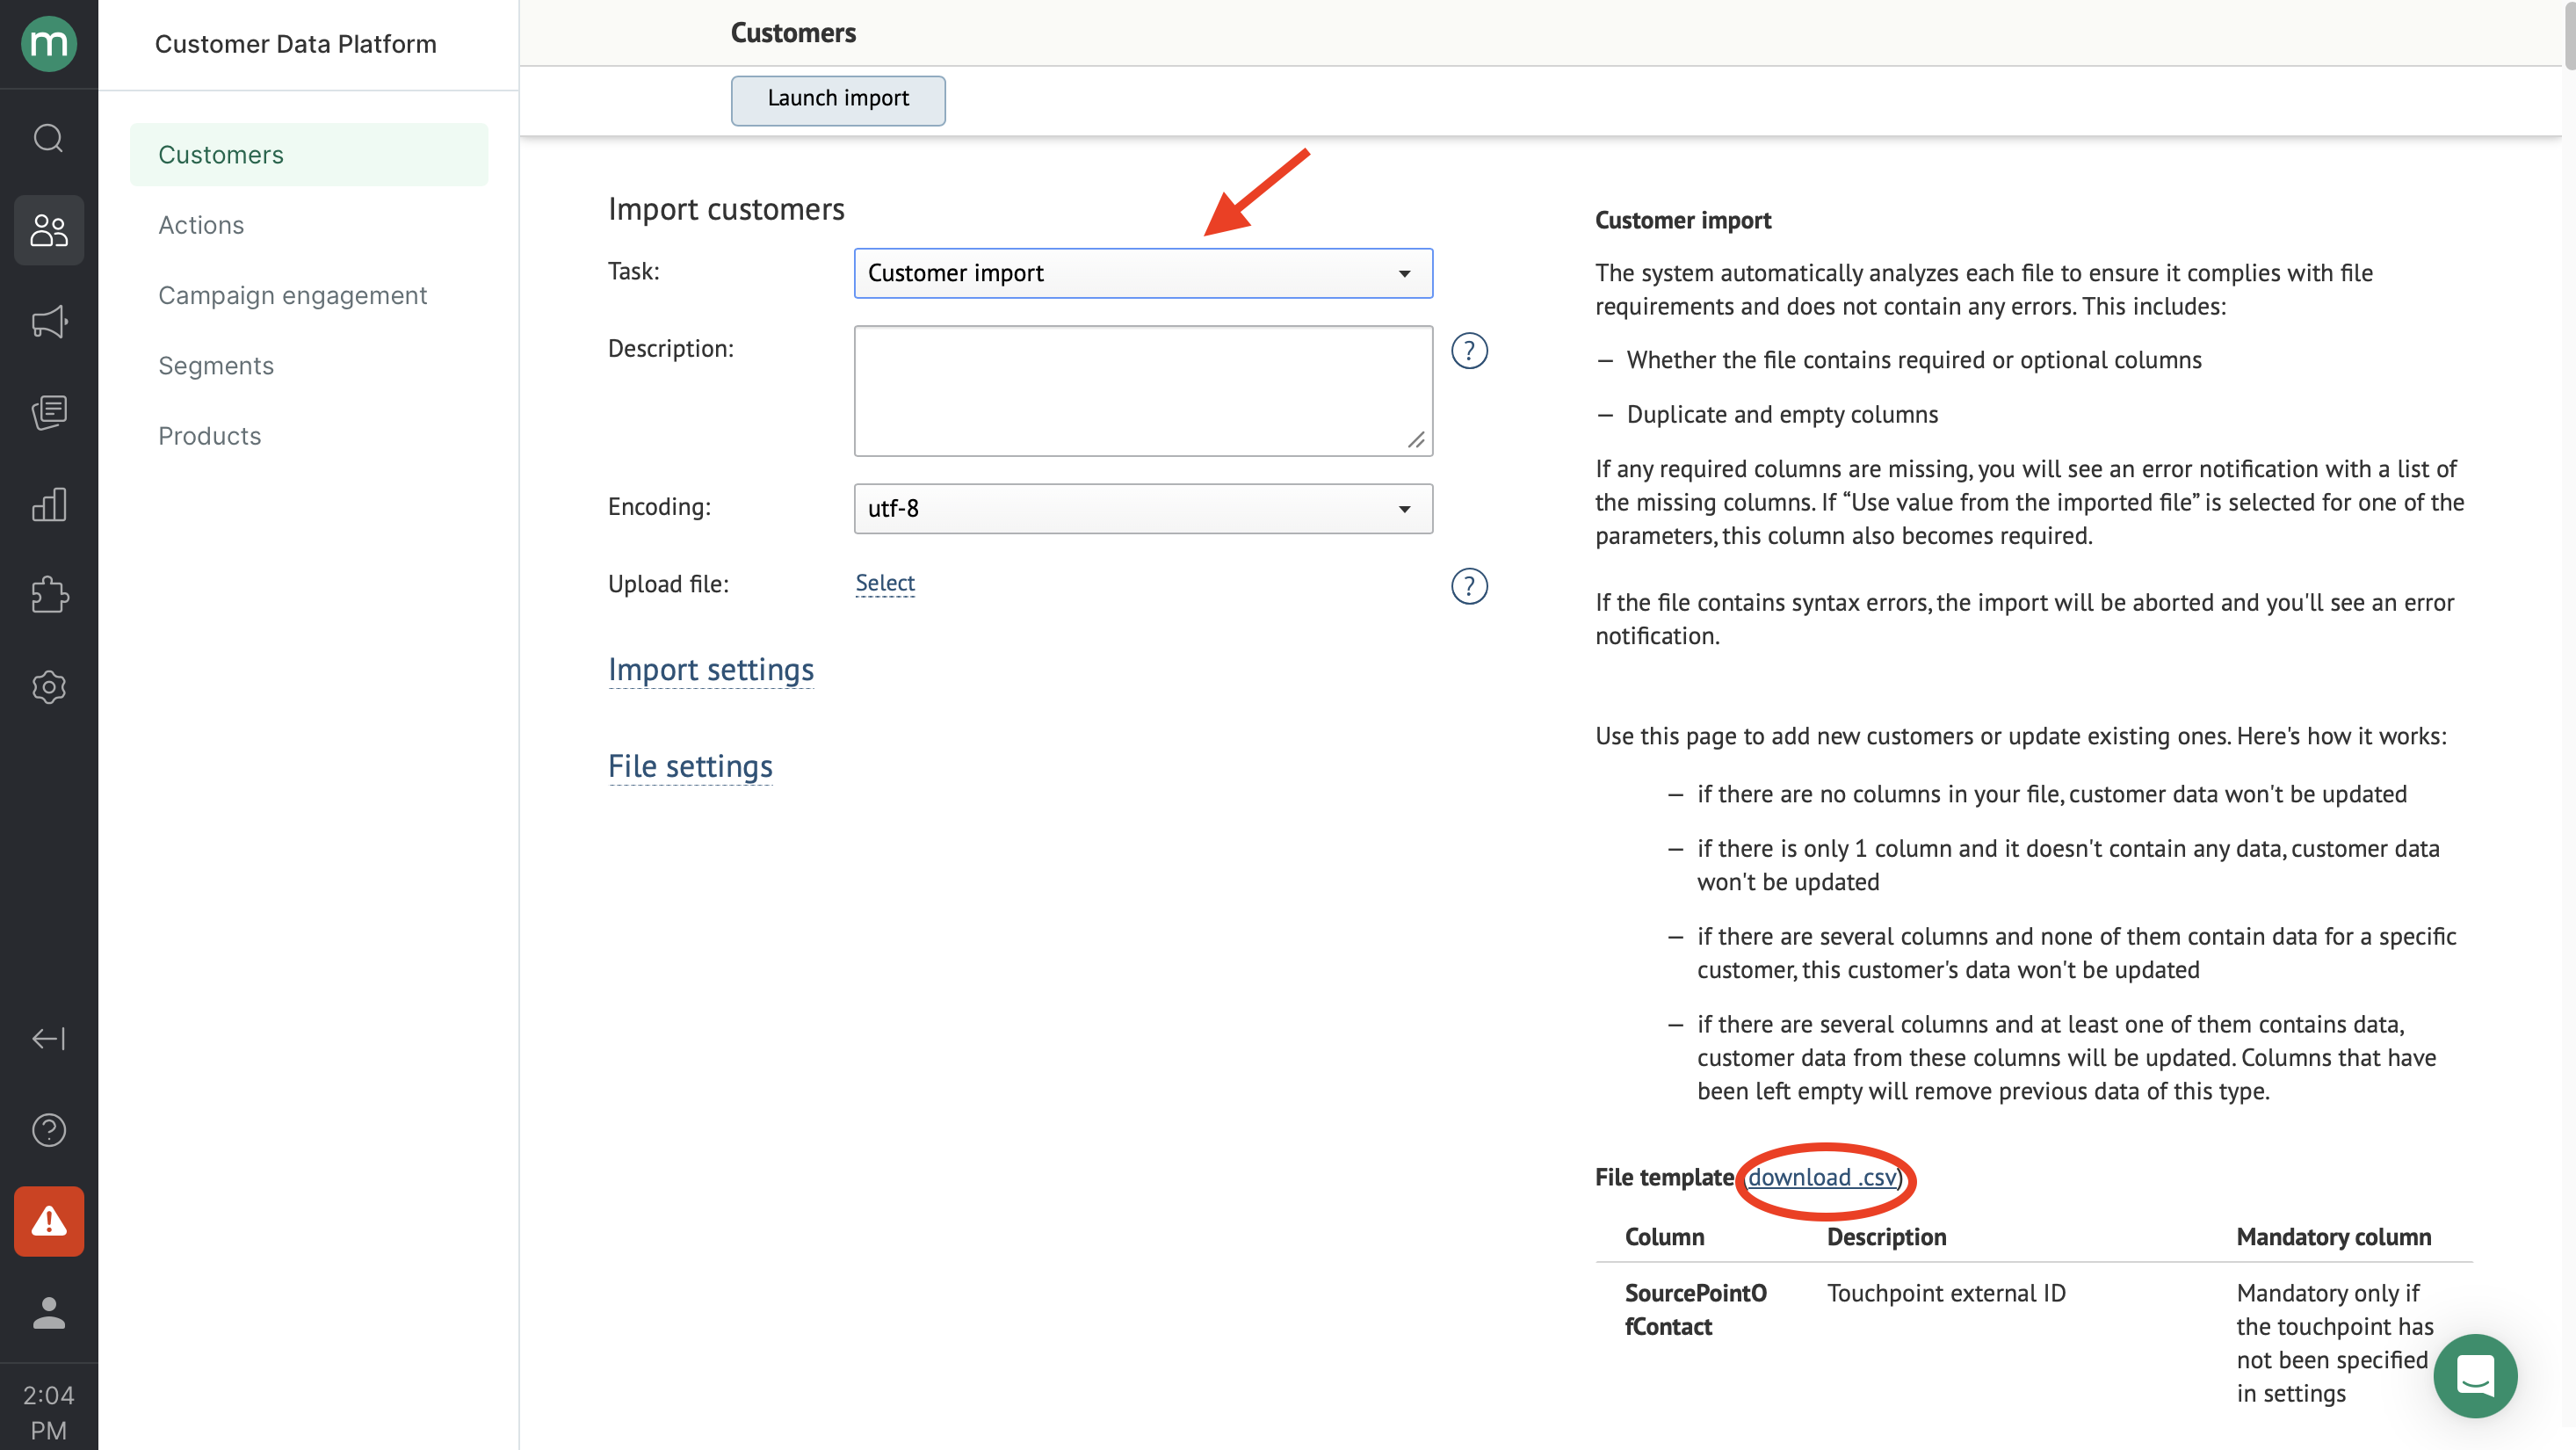
Select Customer import from the Task drop-down menu:
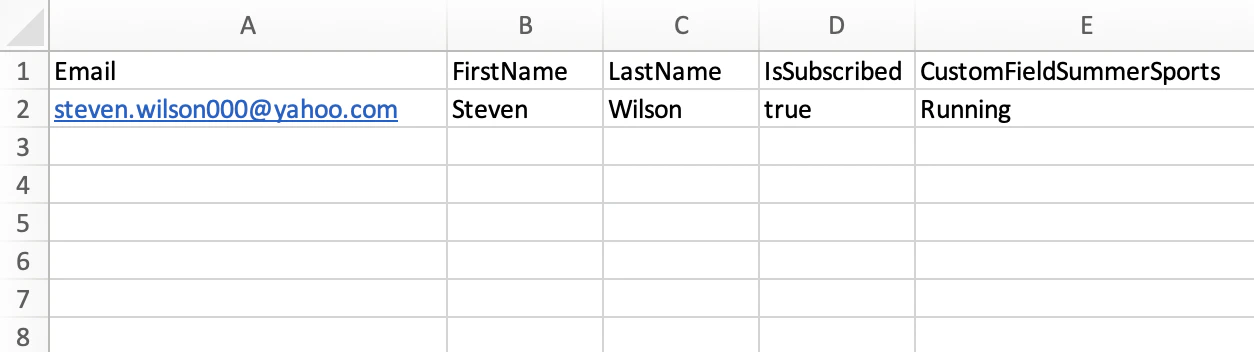
Now you’ll need to prepare a file for import.
The supported file format for uploads is CSV.
Important
- Make sure your file includes at least one identifier (email, phone number, or external ID) — otherwise the import will fail.
- Your file should not contain any irrelevant columns or empty columns (columns with a header but no data).
2. Import customers
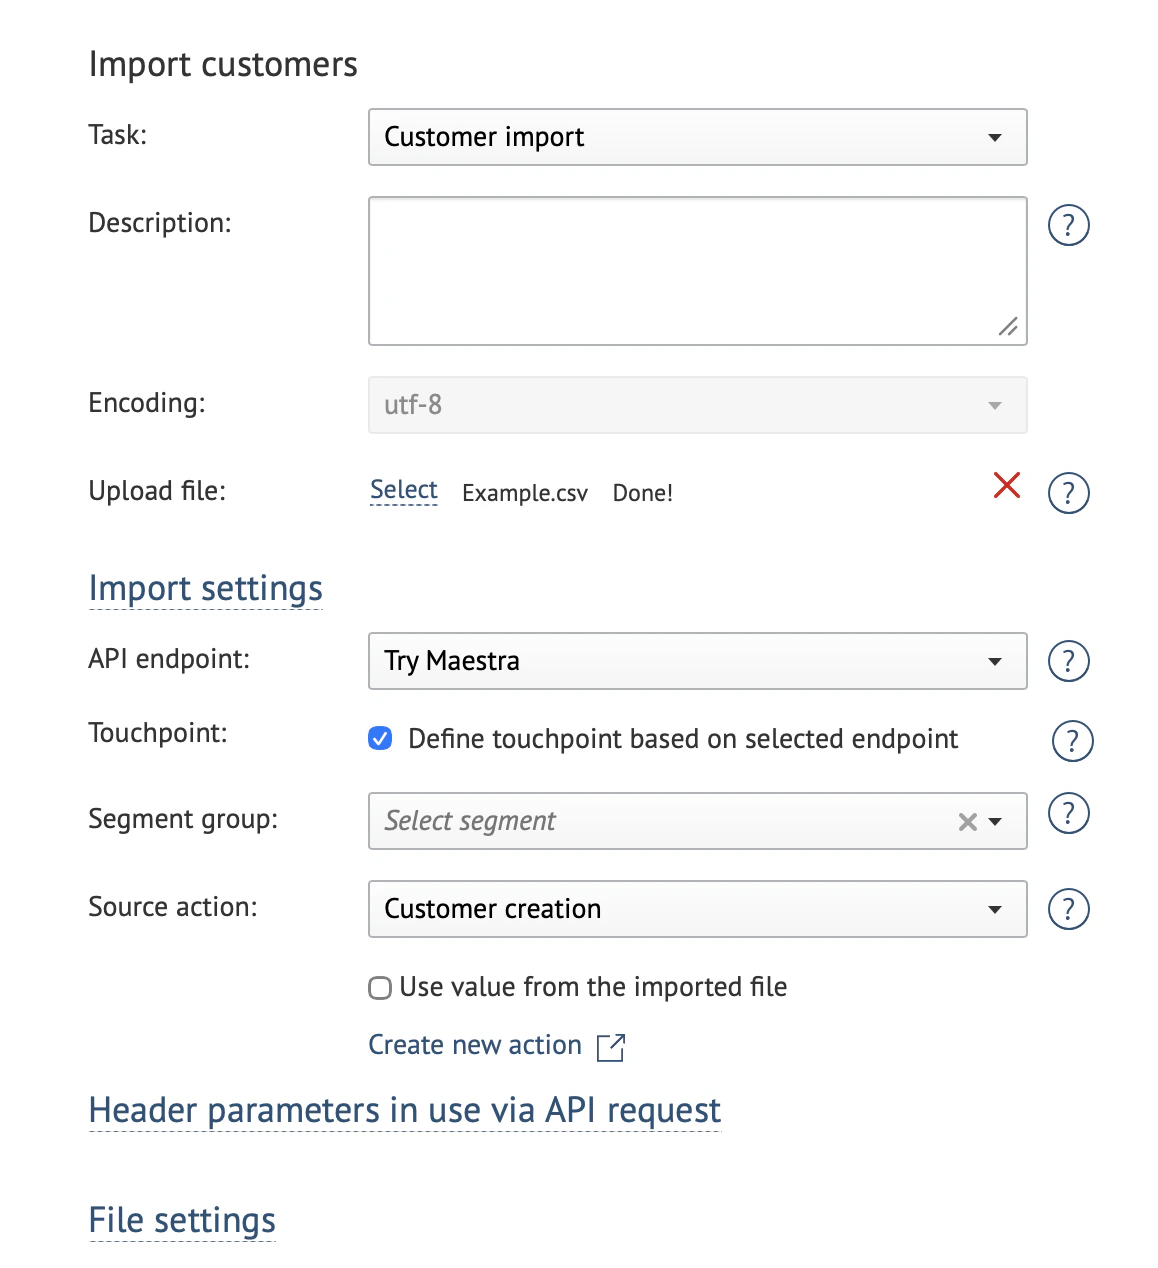
2.1. Fill in the settings:
Task: Customer import.
Description: fill in if applicable. This description can help you find your import task in the tasks list.
Encoding: the default encoding is UTF-8.
Uploaded file: follow Step 1 to upload the import file.
Import settings:
- API endpoint: indicates where the data originated. This affects customer action attribution. The default is “Maestra touchpoint”.
- Touchpoint: determines which channel or integration the customer is linked to. By default, this is detected automatically based on the API endpoint. If you need to explicitly associate customers with a specific website or store, select the touchpoint manually.
- Segment group: you can add customers from the file to a static segment. Select an existing segment or create a new one.
- Source action: the action associated with the customer when they’re added to the database (e.g., “Create customer”). This affects segmentation and analytics.
Source action will be added to customers’ activity feeds. If you create an action template, make sure the action name is easy for you to find – for example “Filled in May “22 survey” or “Registered on xyz.com”.
Each parameter can be set either in the import settings (applied to all customers in the file) or in the file itself (individually per row).
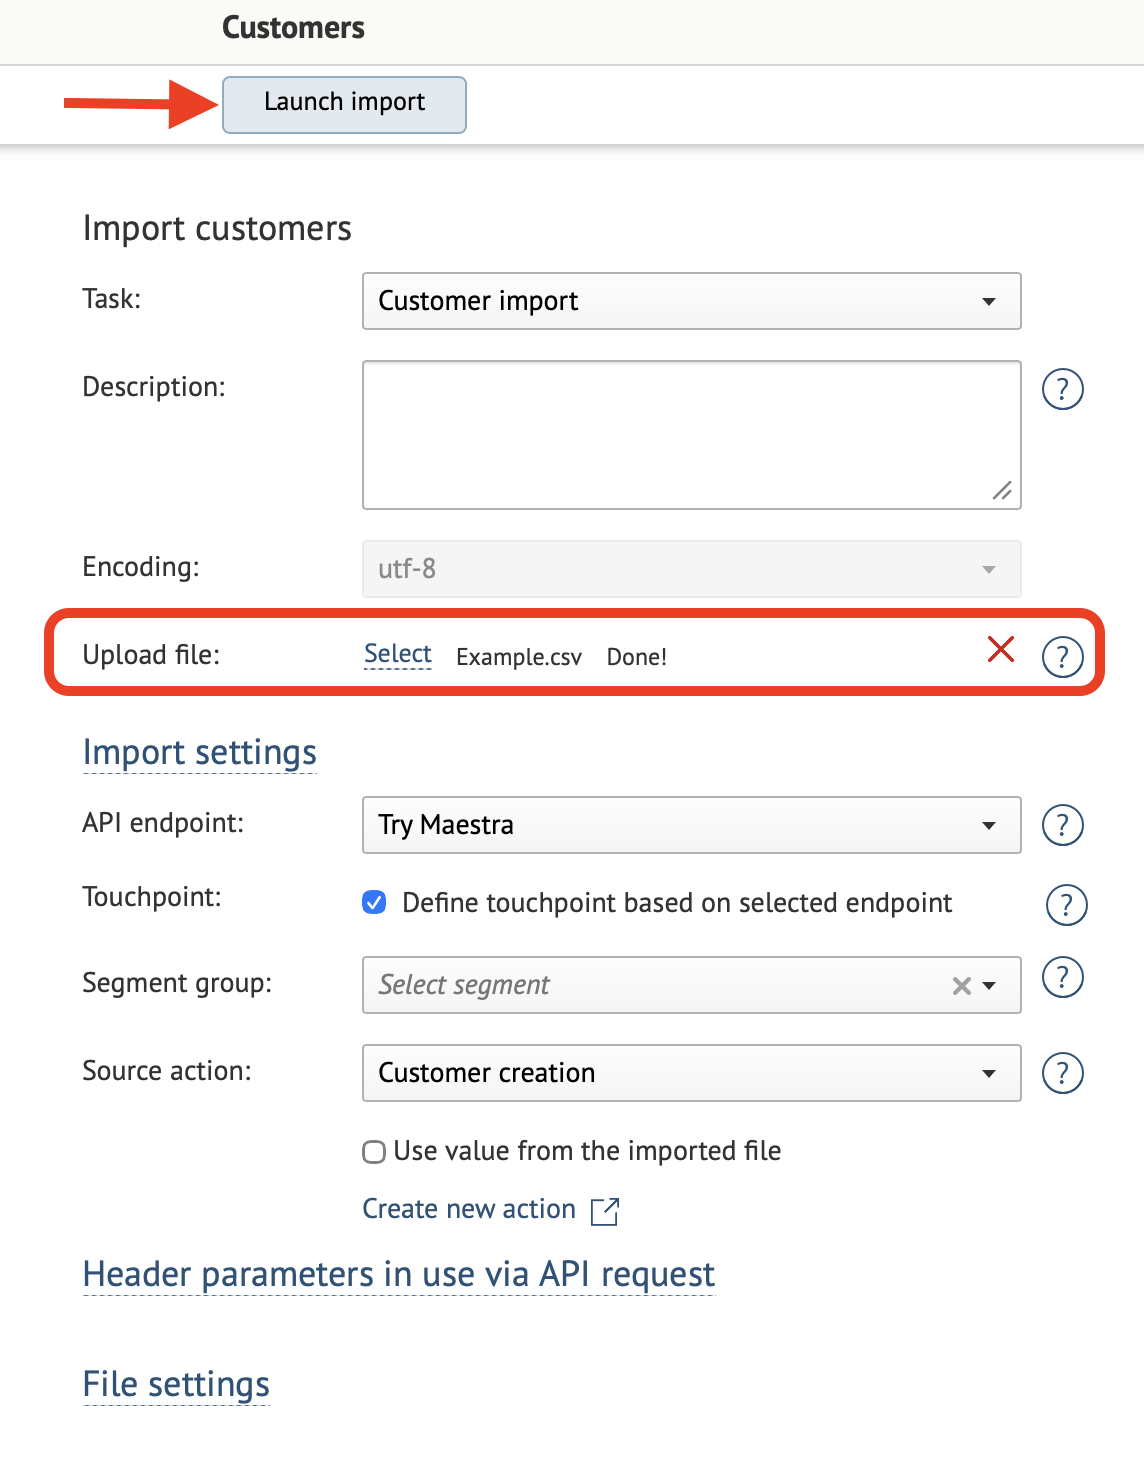
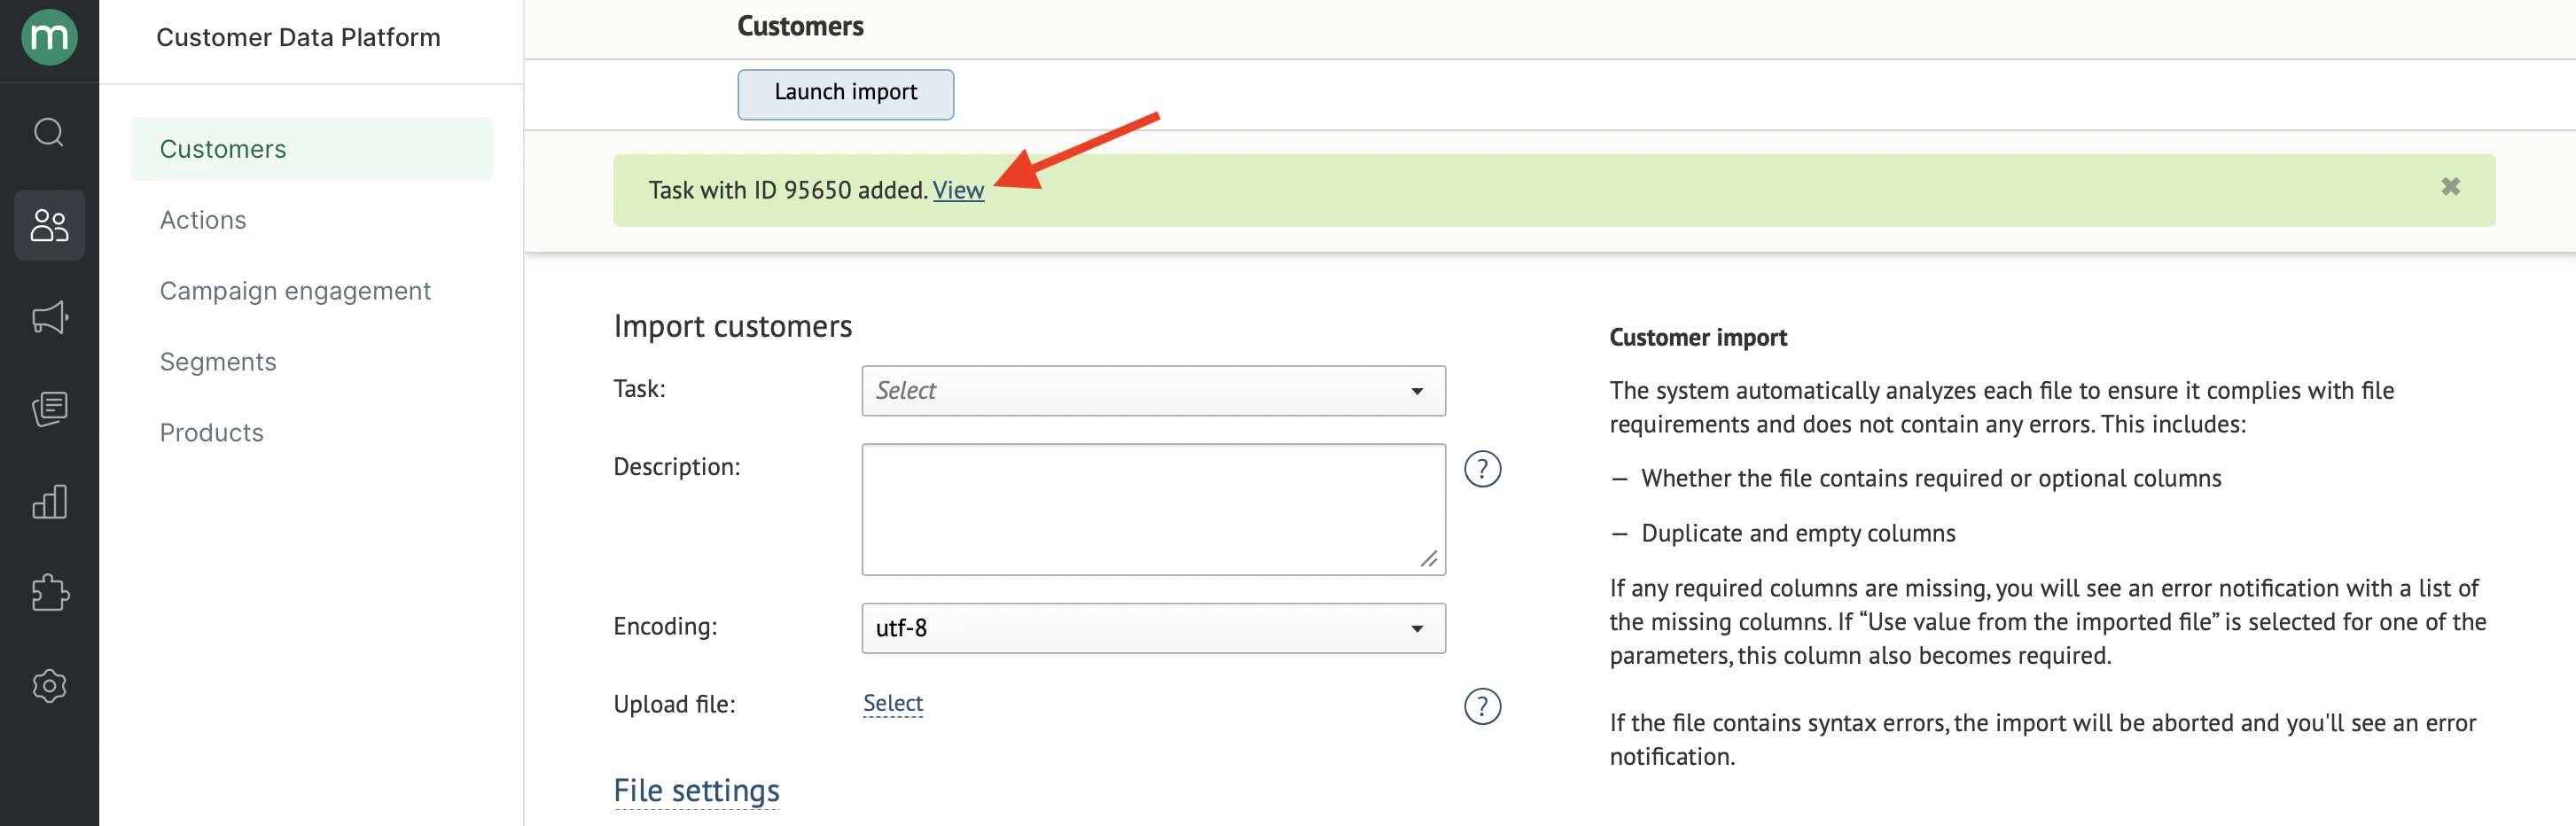
2.2. Click Launch import to add your task:\
Now you can see a URL leading to this task:
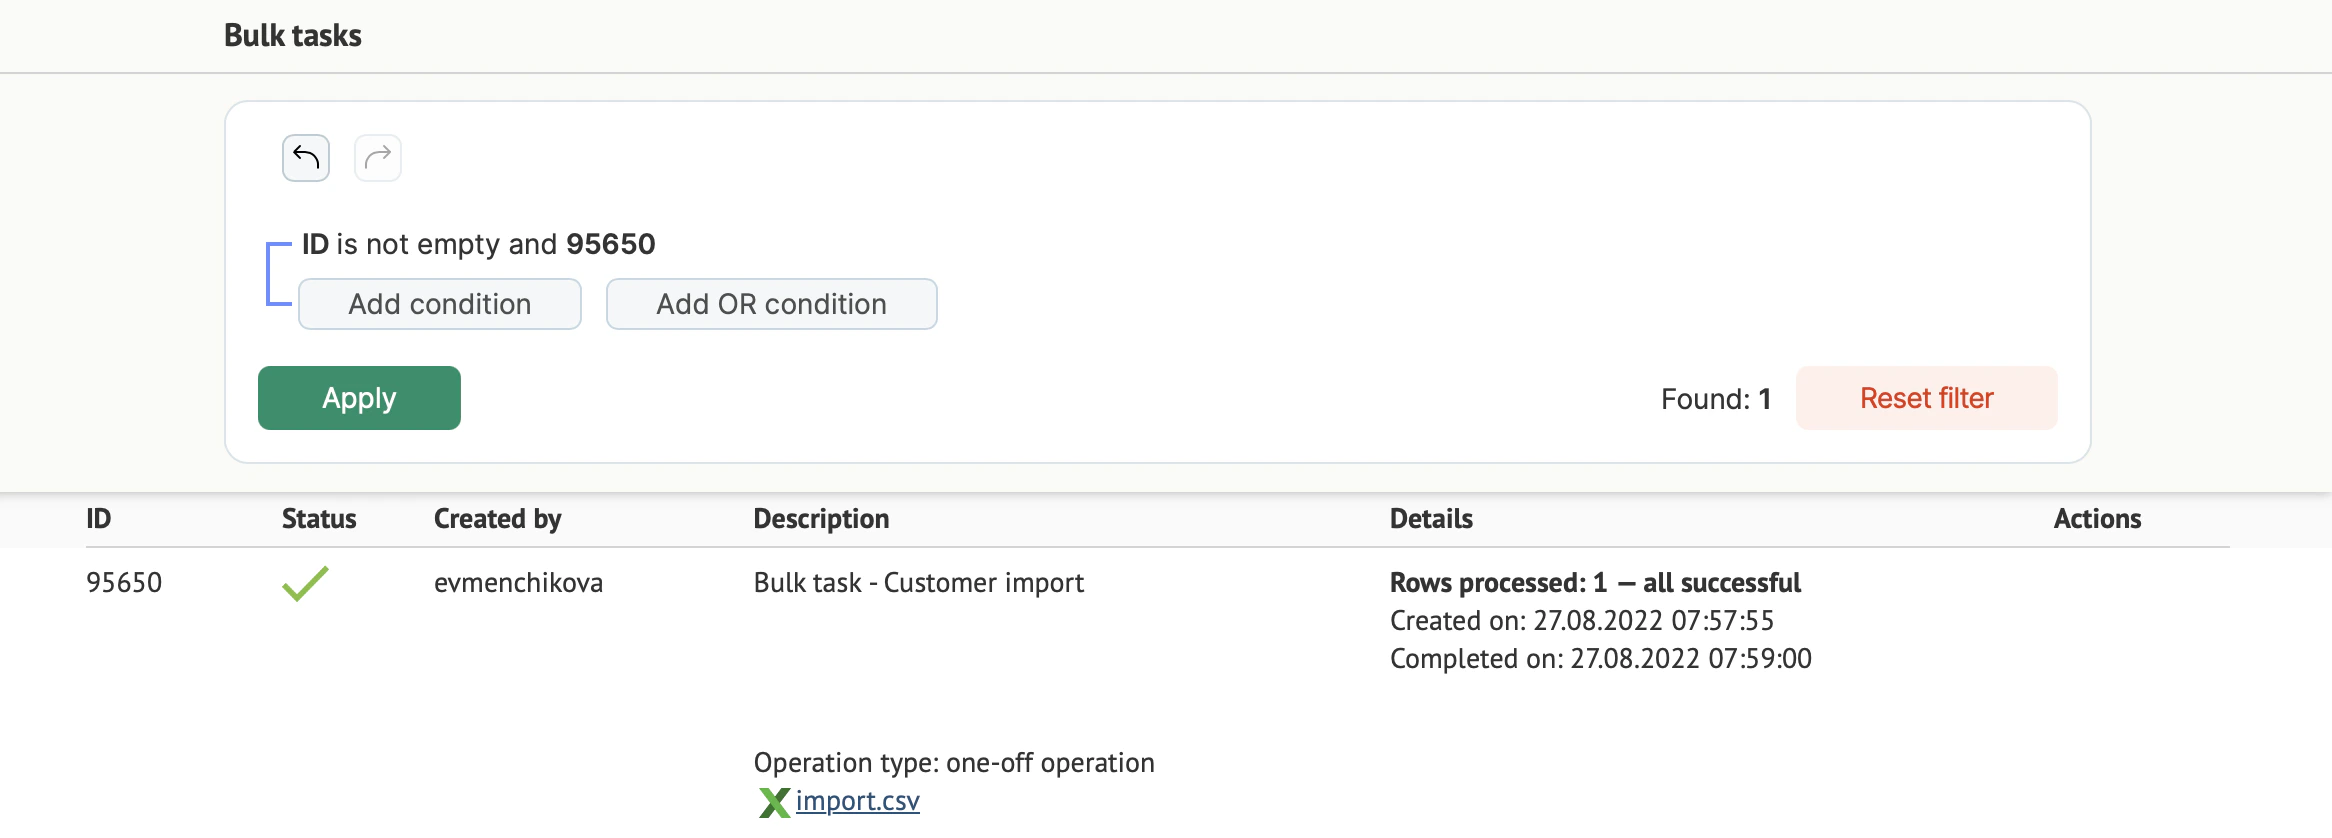
Wait for the import to be completed:
The customer will emerge in the database: