Create a segment from a filter
1
Open the customer list
Go to Customer Data Platform → Customers.
2
Build your filter
Add conditions to narrow the list to the customers you want in the segment, then click Apply.
3
Click Create segment
With the filter applied, click Create segment in the top right to open the segment panel.
Configure the segment
The segment panel opens with everything on one screen. Set the fields below, then click Save and update at the bottom to create the segment and run the first calculation.\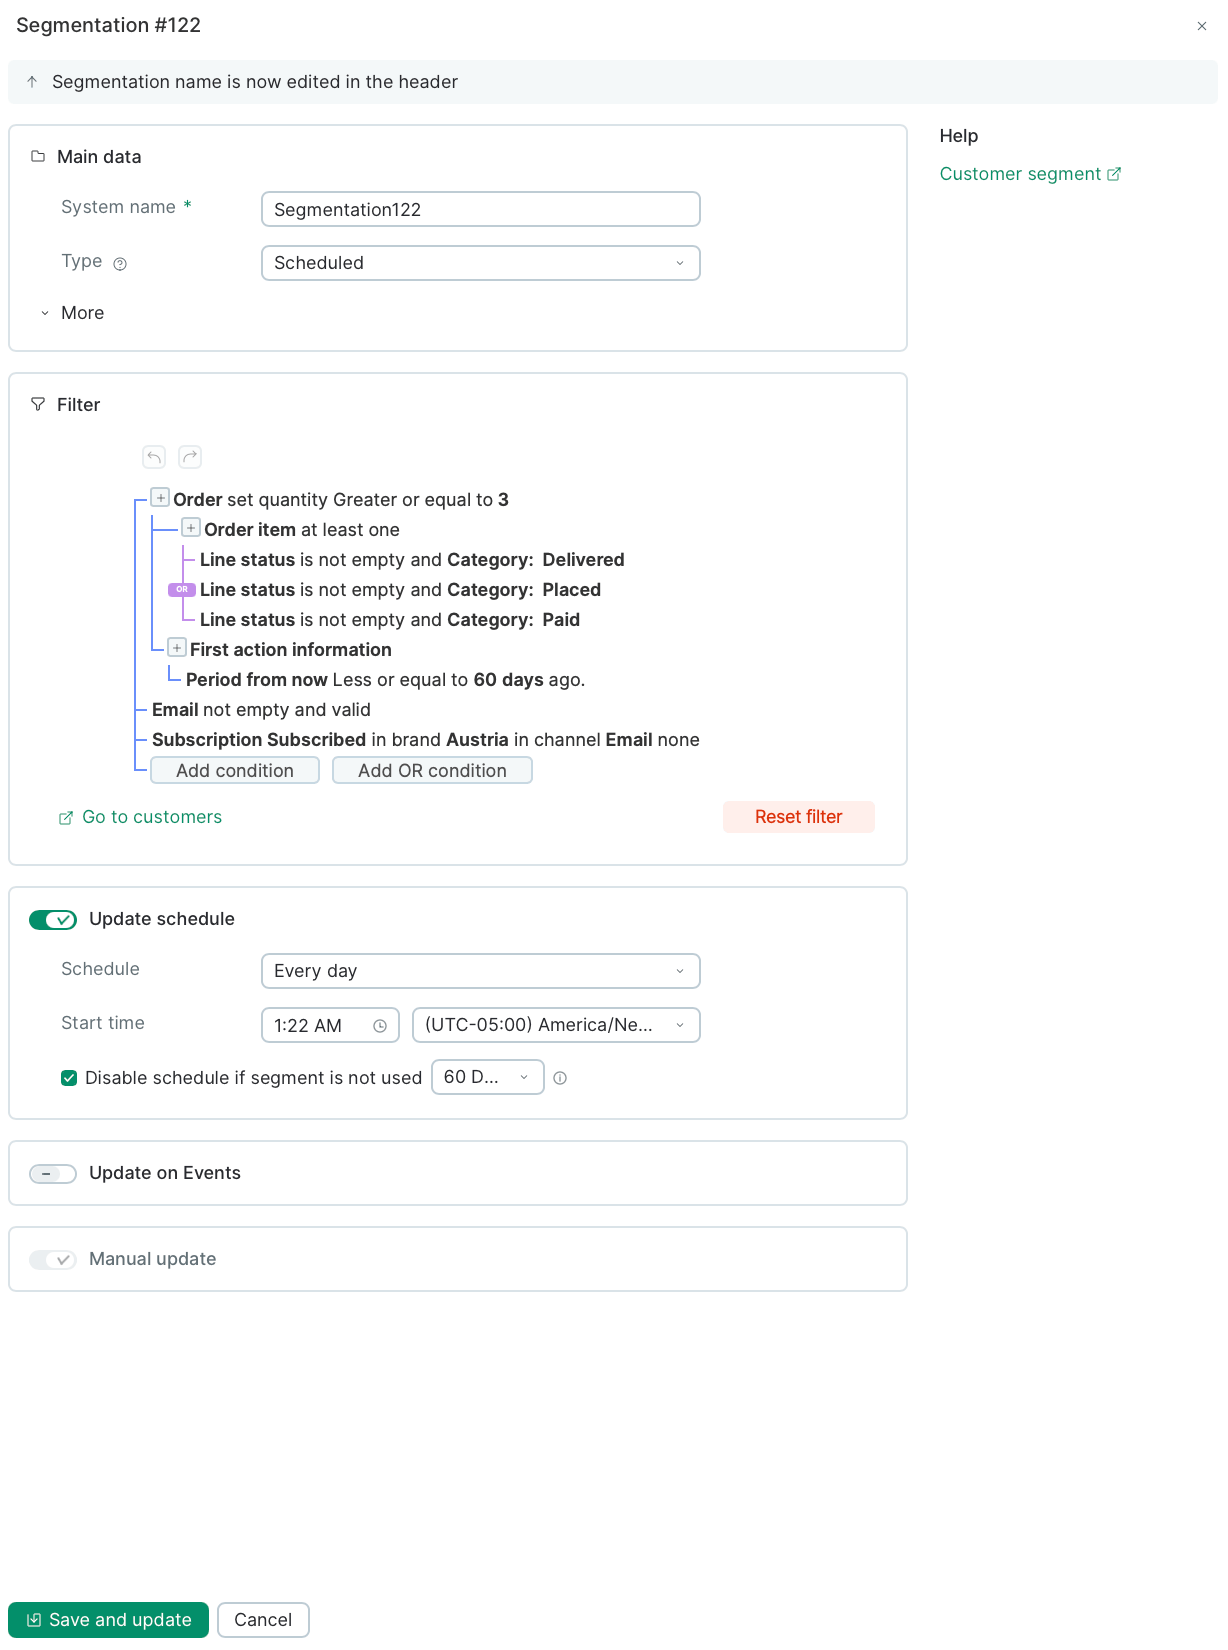
Name and system name
Type the segment name in the header at the top of the panel.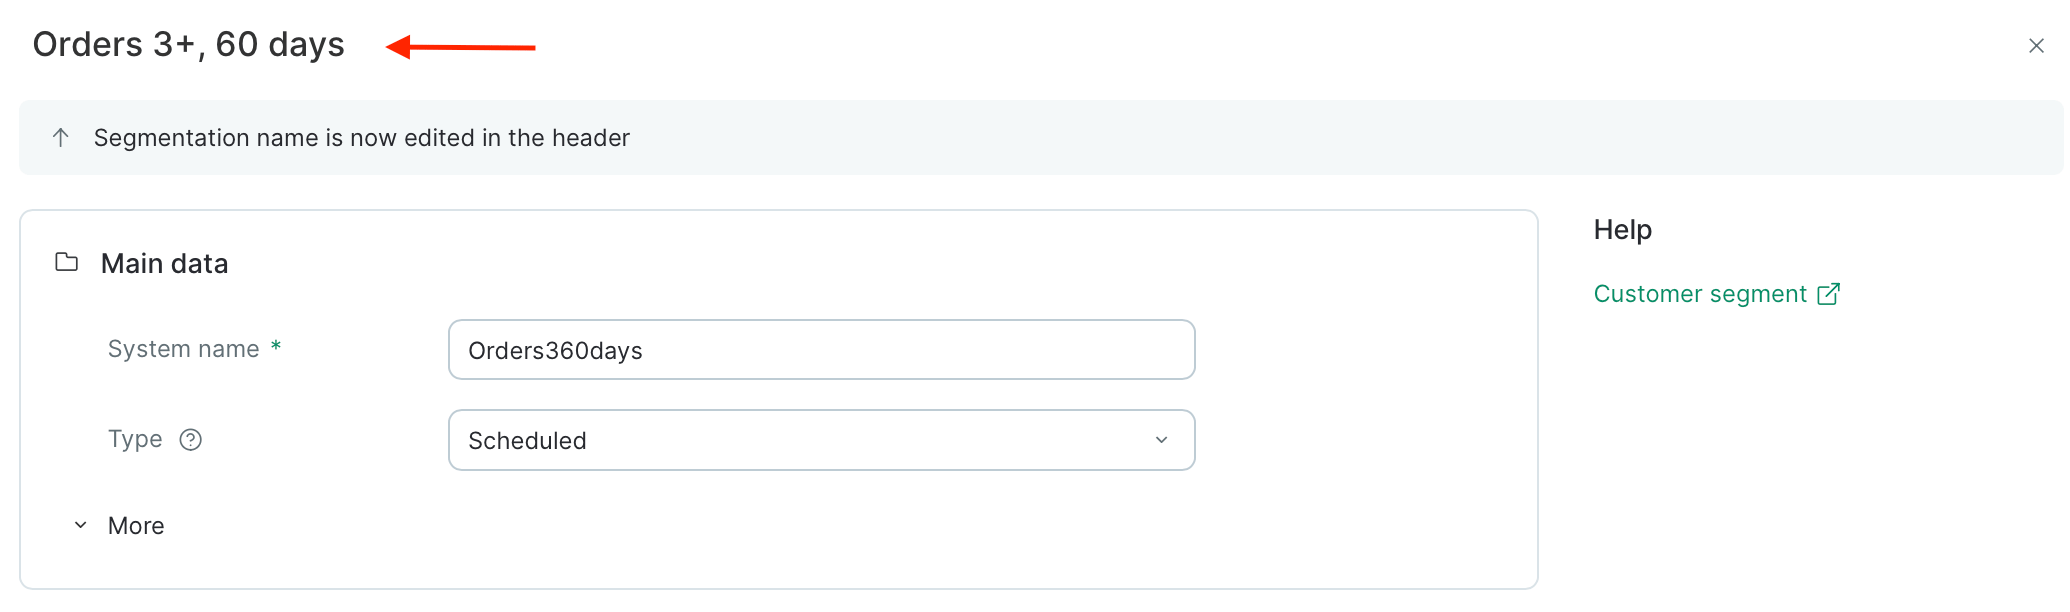
Type
Choose how the segment is built and refreshed.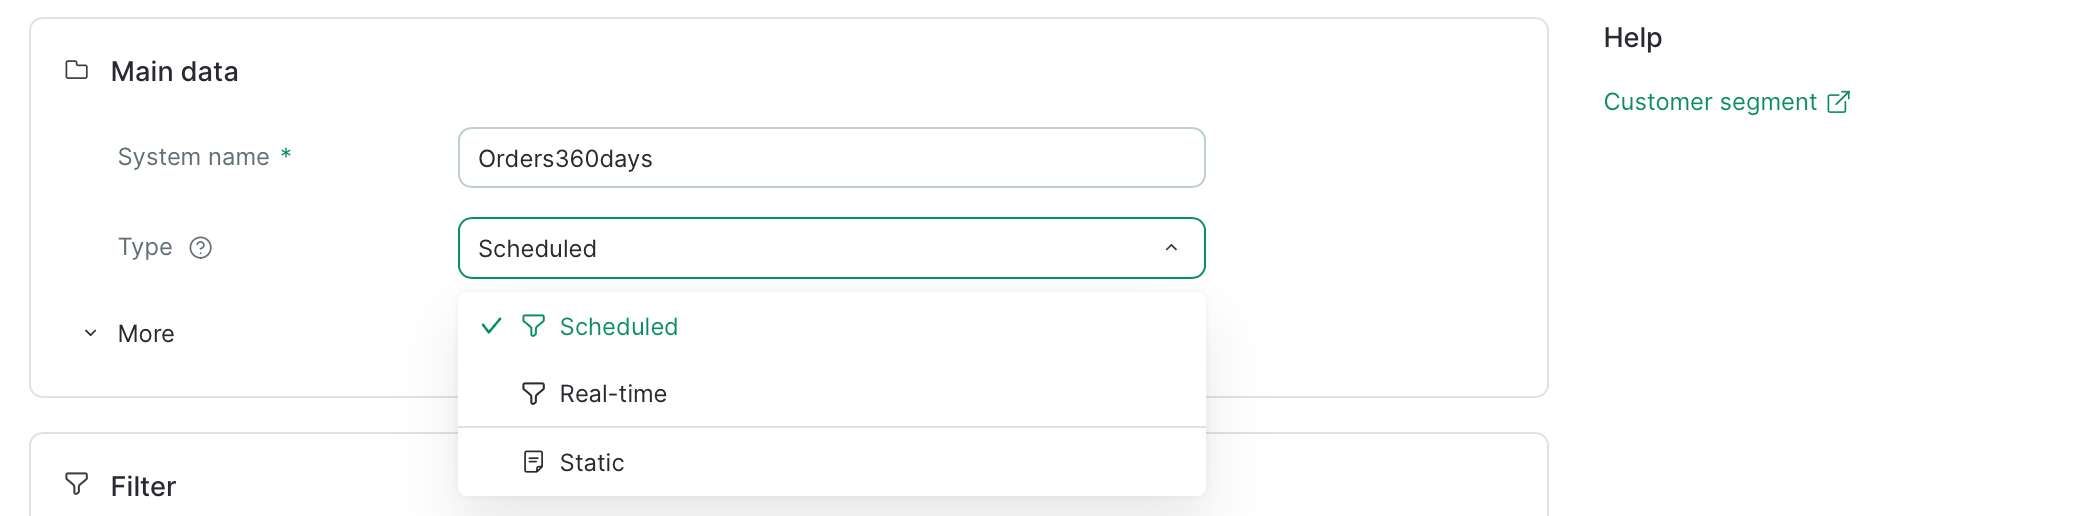
Not sure which to pick? See Types of customer segments for a deeper comparison.
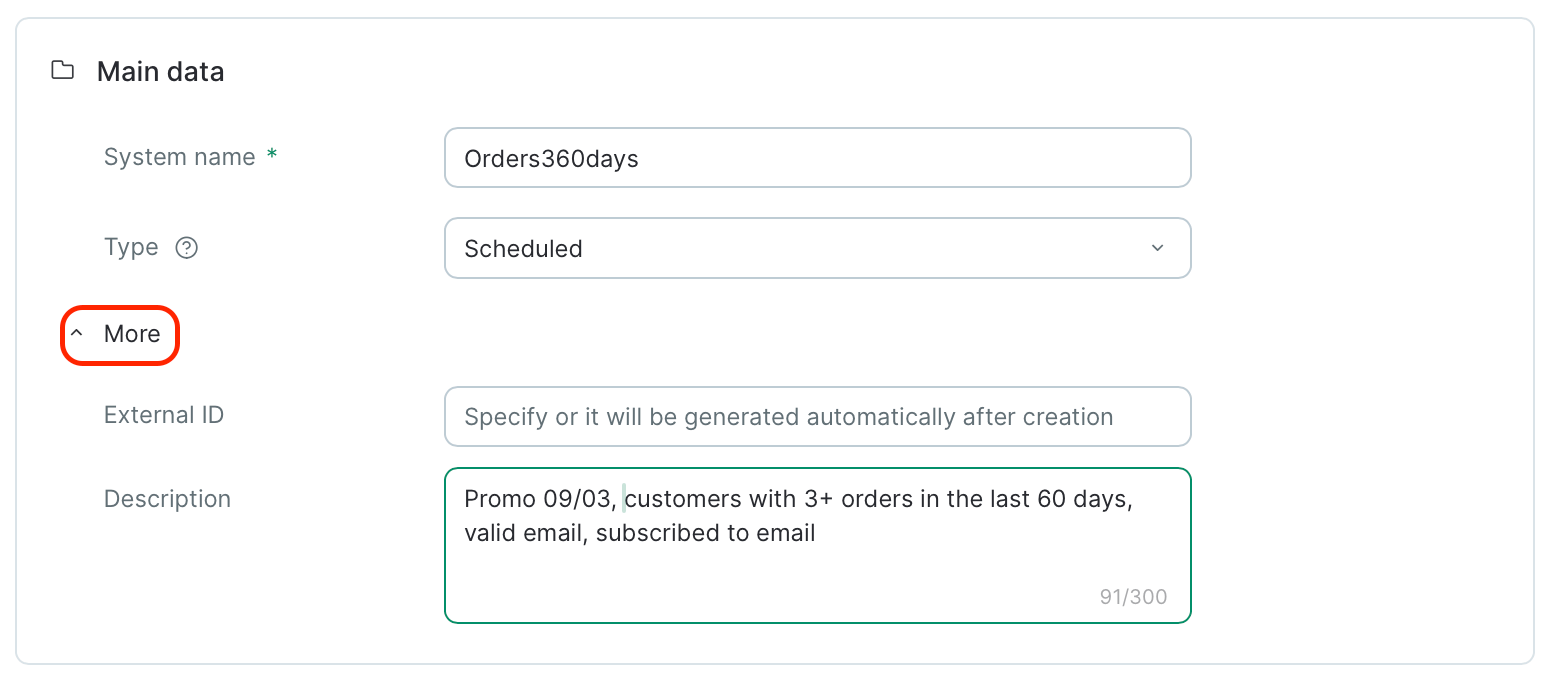
More (External ID and Description)
Expand More under Main data to set two optional fields:- External ID — your own identifier for the segment, useful when referencing it from an API or external system. Leave it blank and Maestra Platform will generate one after creation.
- Description — a short note (up to 300 characters) explaining who’s in the segment and what it’s for. Helpful for teammates picking the segment from a list later.
Filter
Review the conditions you brought in from the customer list. You can keep editing them here — your changes are saved with the segment once you click Save and update.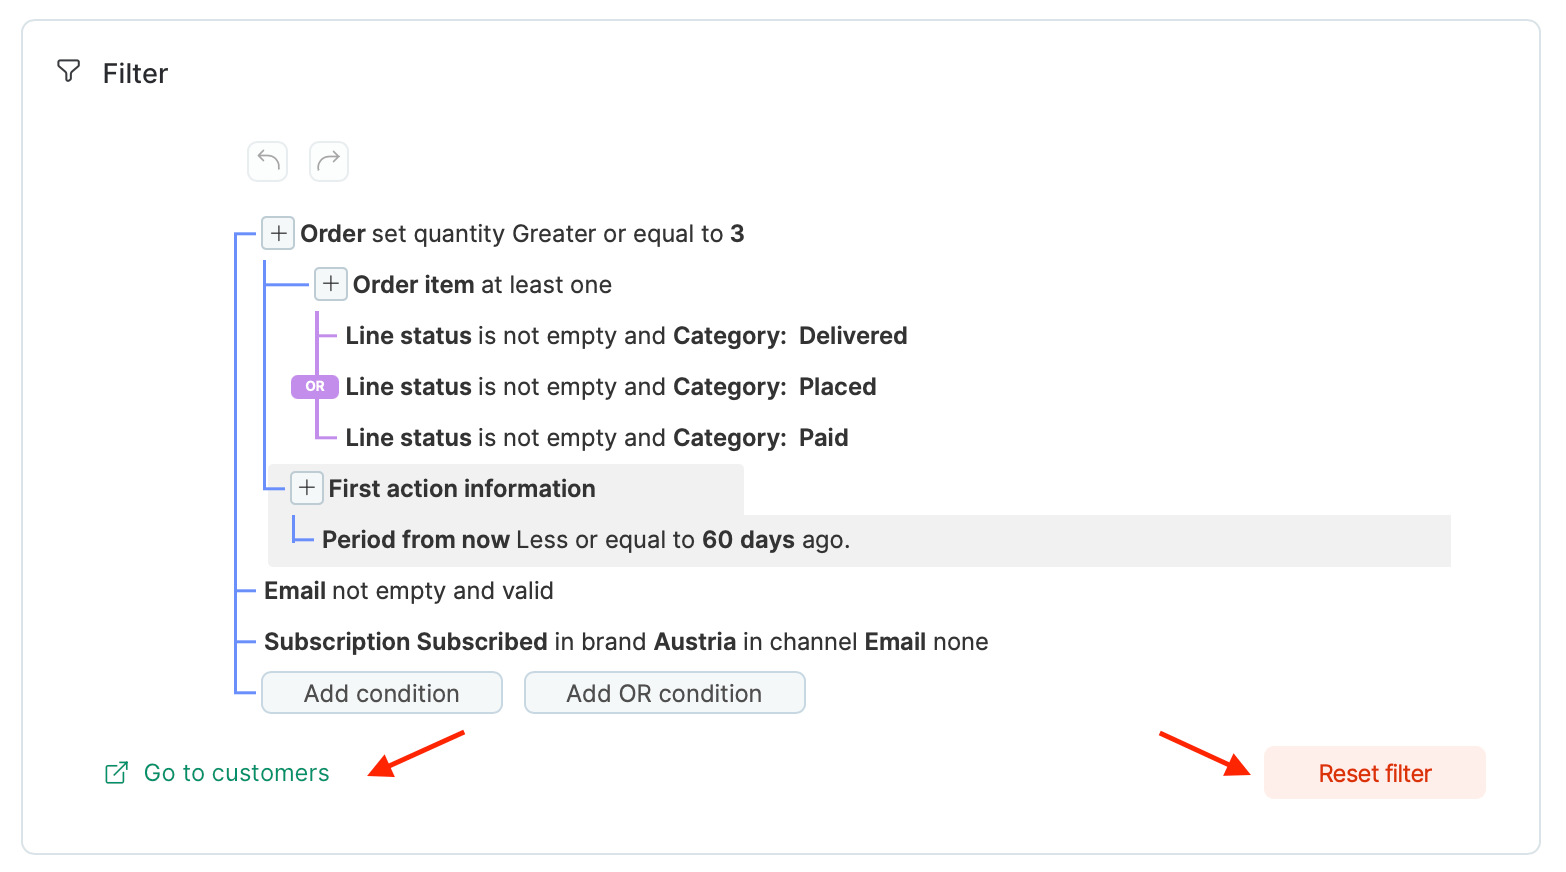
- Go to customers — opens the customer list with this filter applied to preview who currently matches.
- Reset filter — clears all conditions so you can start over.
Update schedule (Scheduled segments only)
If you picked Scheduled, configure how and when the segment refreshes.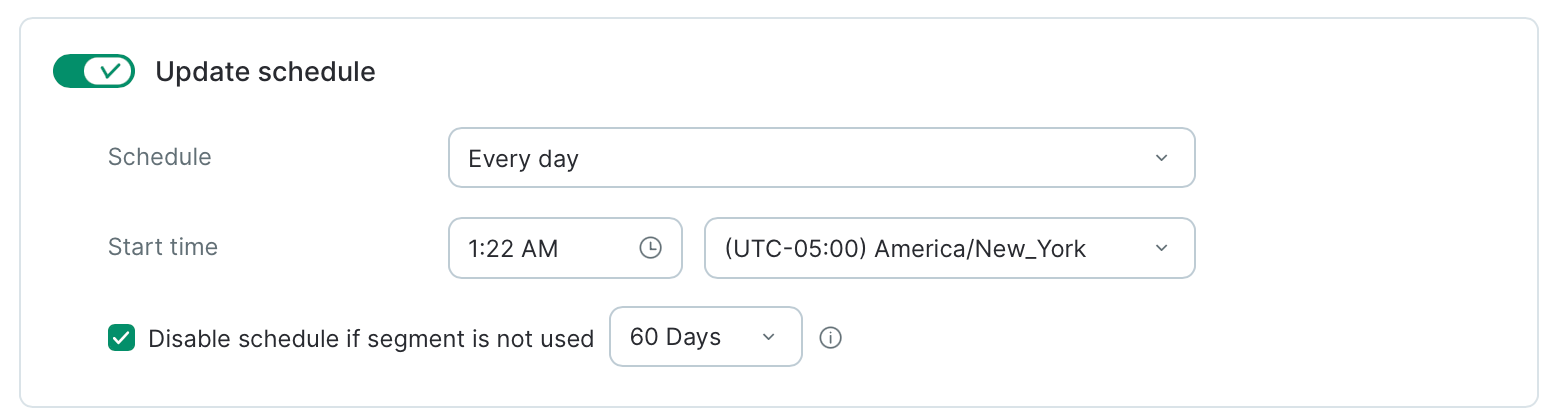
- Every day — once a day at the time you choose.
- By days of week — one or more weekdays at the hour you choose.
- By days of month — a specific day of the month at the hour you choose.
Update on Events (Scheduled segments only)
Turn on Update on Events to recalculate the segment whenever specific customer events occur — on top of the scheduled refresh. Useful when you need the segment to react to key actions (a purchase, a subscription change, a custom event) without waiting for the next scheduled run.
- Toggle Update on Events on. An empty Event 1 card appears.
- Open the Event dropdown and pick the event that should trigger a refresh.
- Click + Add event to add more triggers. Each one is listed as its own card.
- To remove a trigger, click the trash icon on the event card.
Manual update (Scheduled segments only)
Always available for scheduled segments.Save
Click Save and update.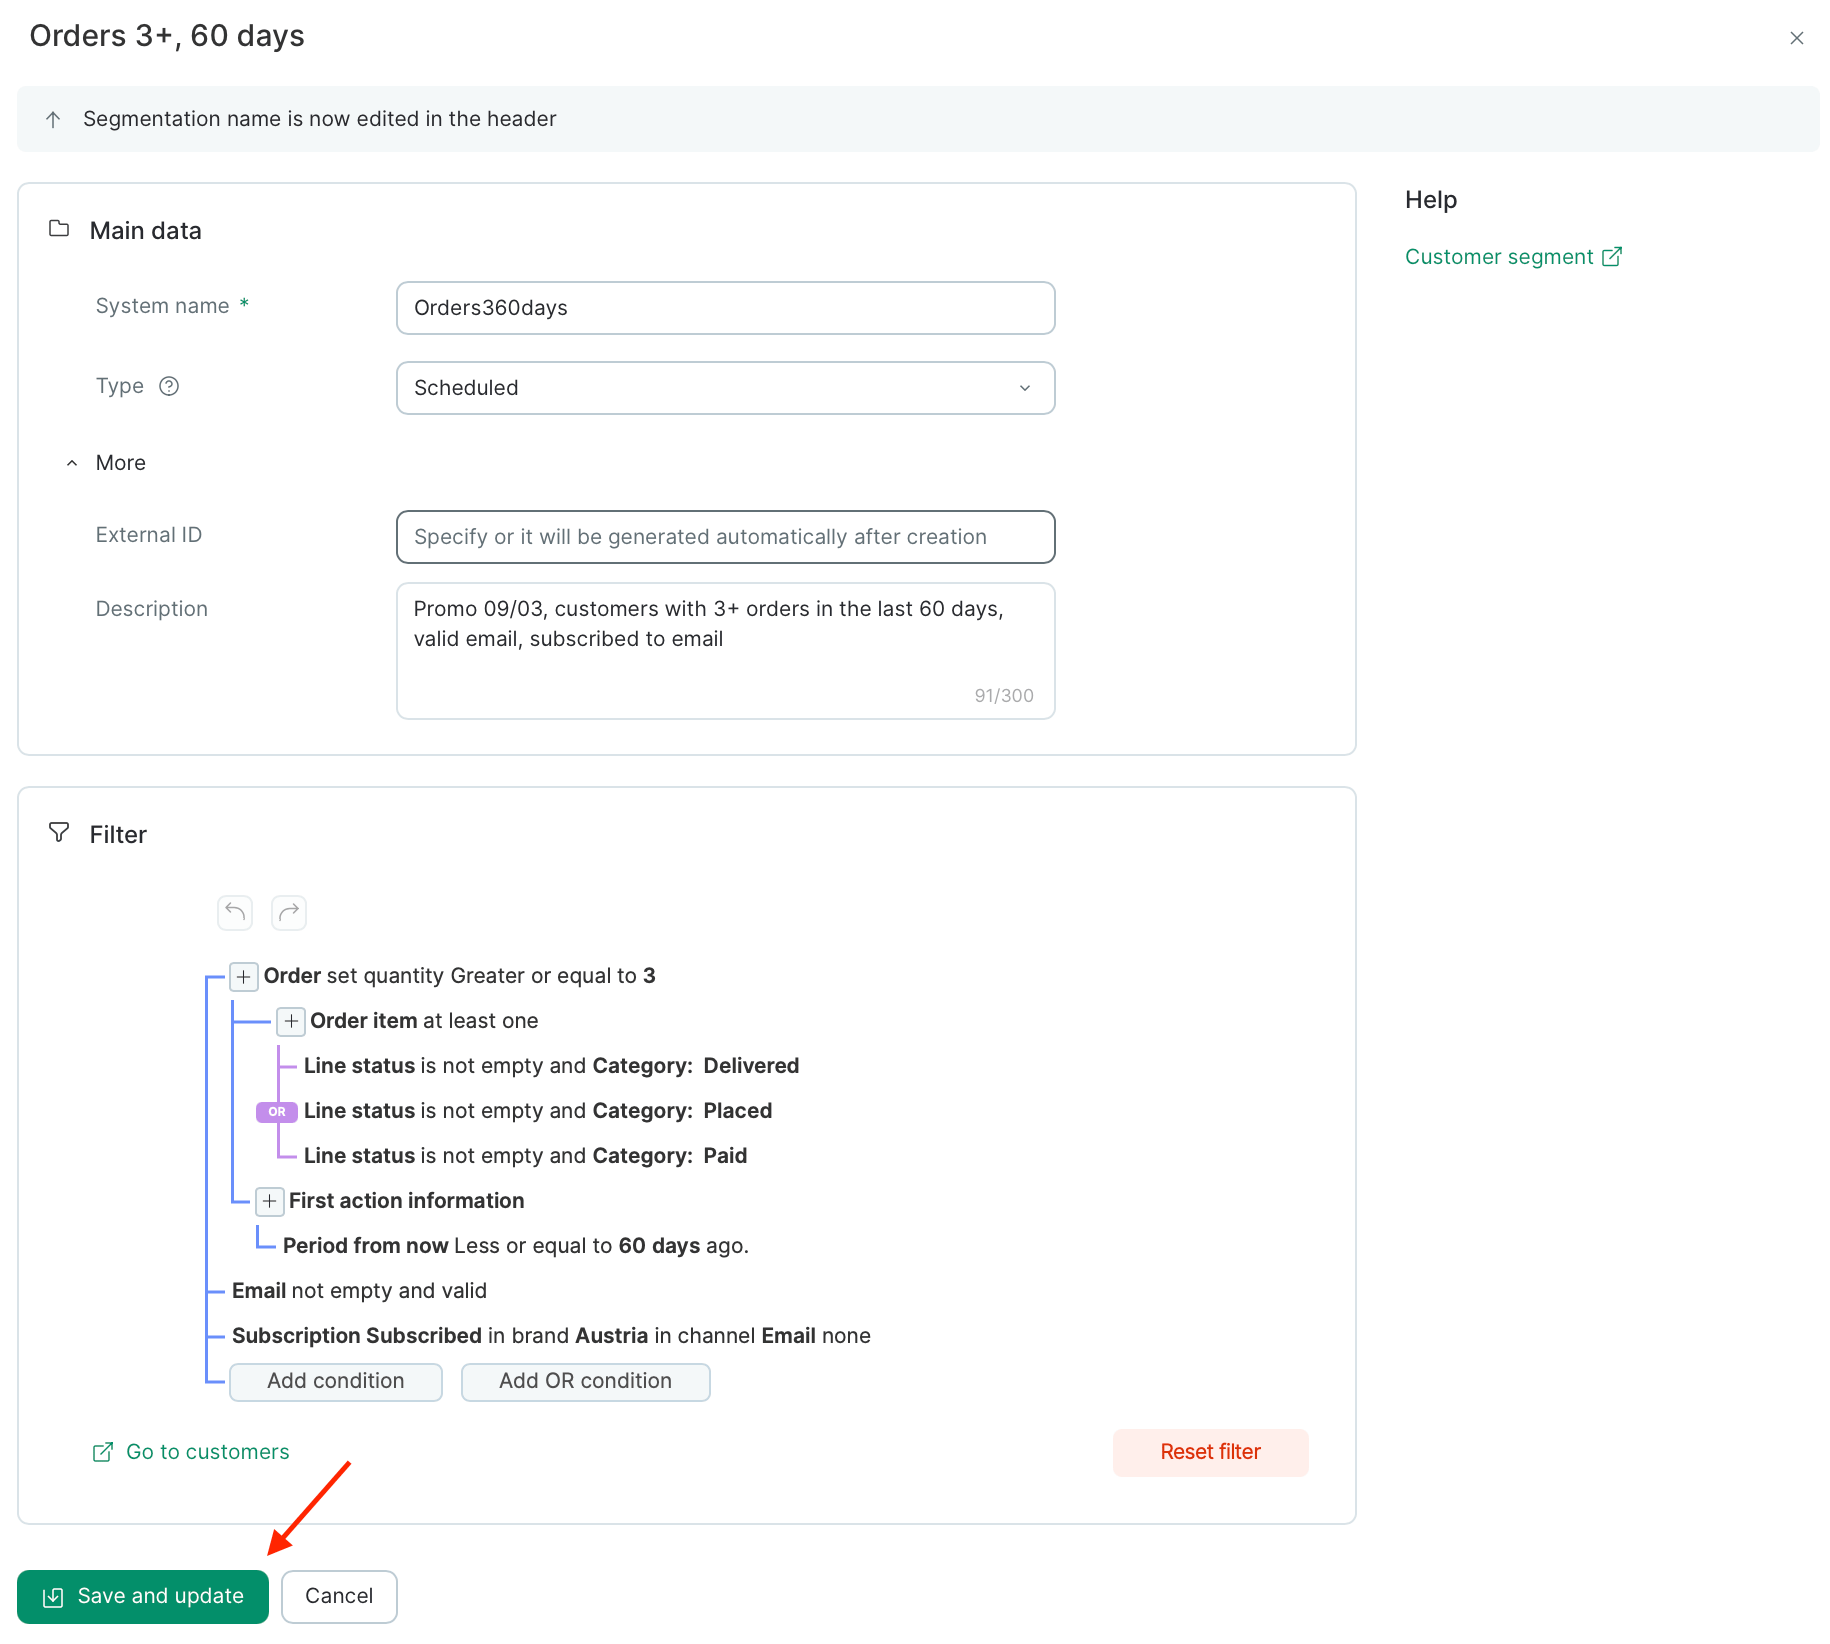

Real-time segments are ready to target right away. Scheduled segments need to finish their first recalculation first — you can watch the status on the segment page.