What are flows?
Flows help set up automated communications with customers across all channels (email, mobile and web push notifications, SMS, webhooks, and more), assign promo codes, award bonus points, edit customer data, and transmit this data between segments. Flows are highly flexible, and combined with Maestra’s segmentation capabilities, they allow you to create an ultra-personalized sequence of interactions with each customer.How to create a flow
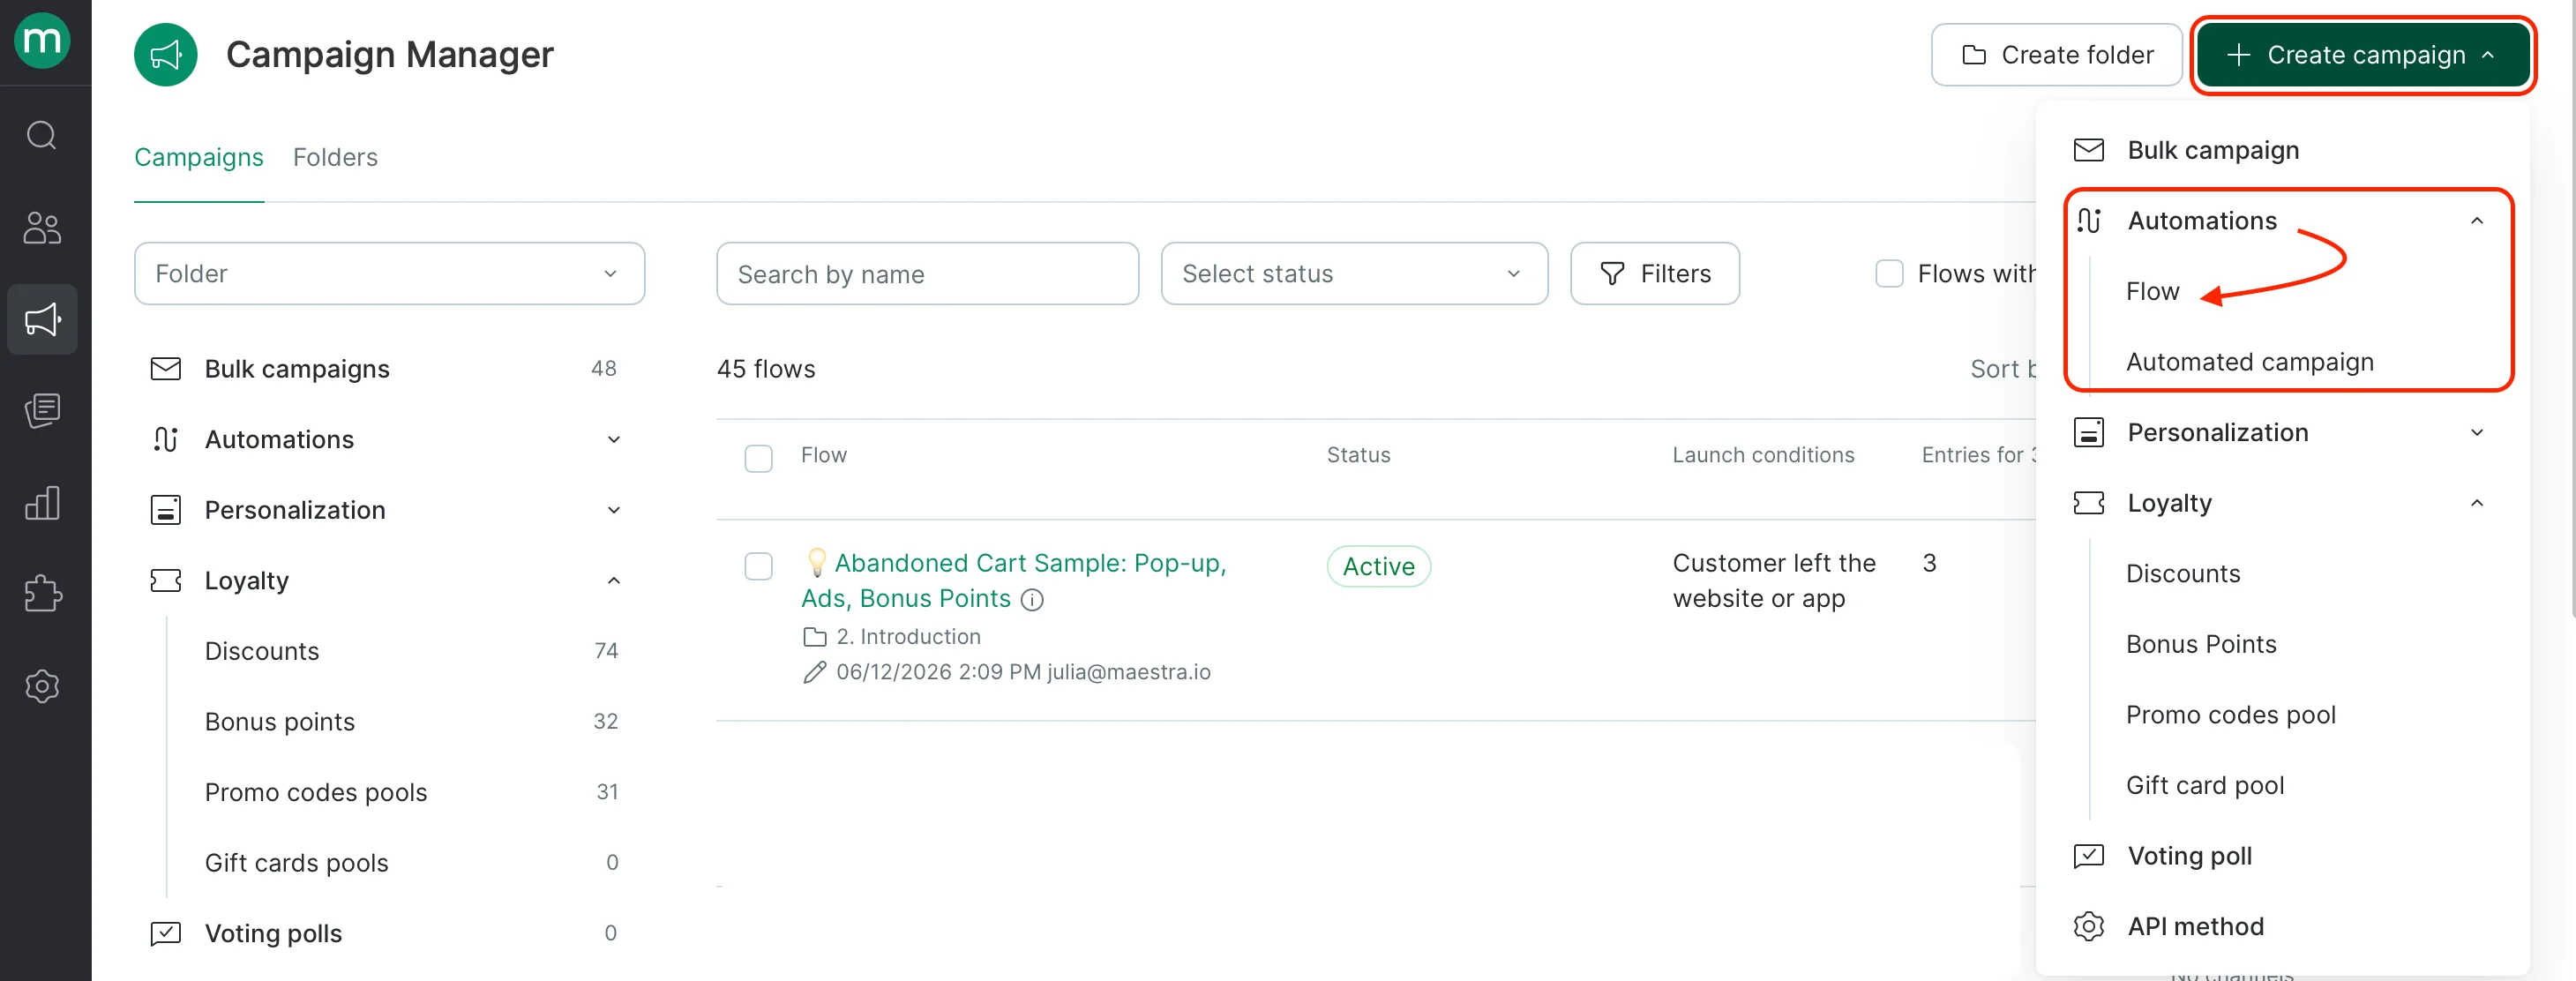
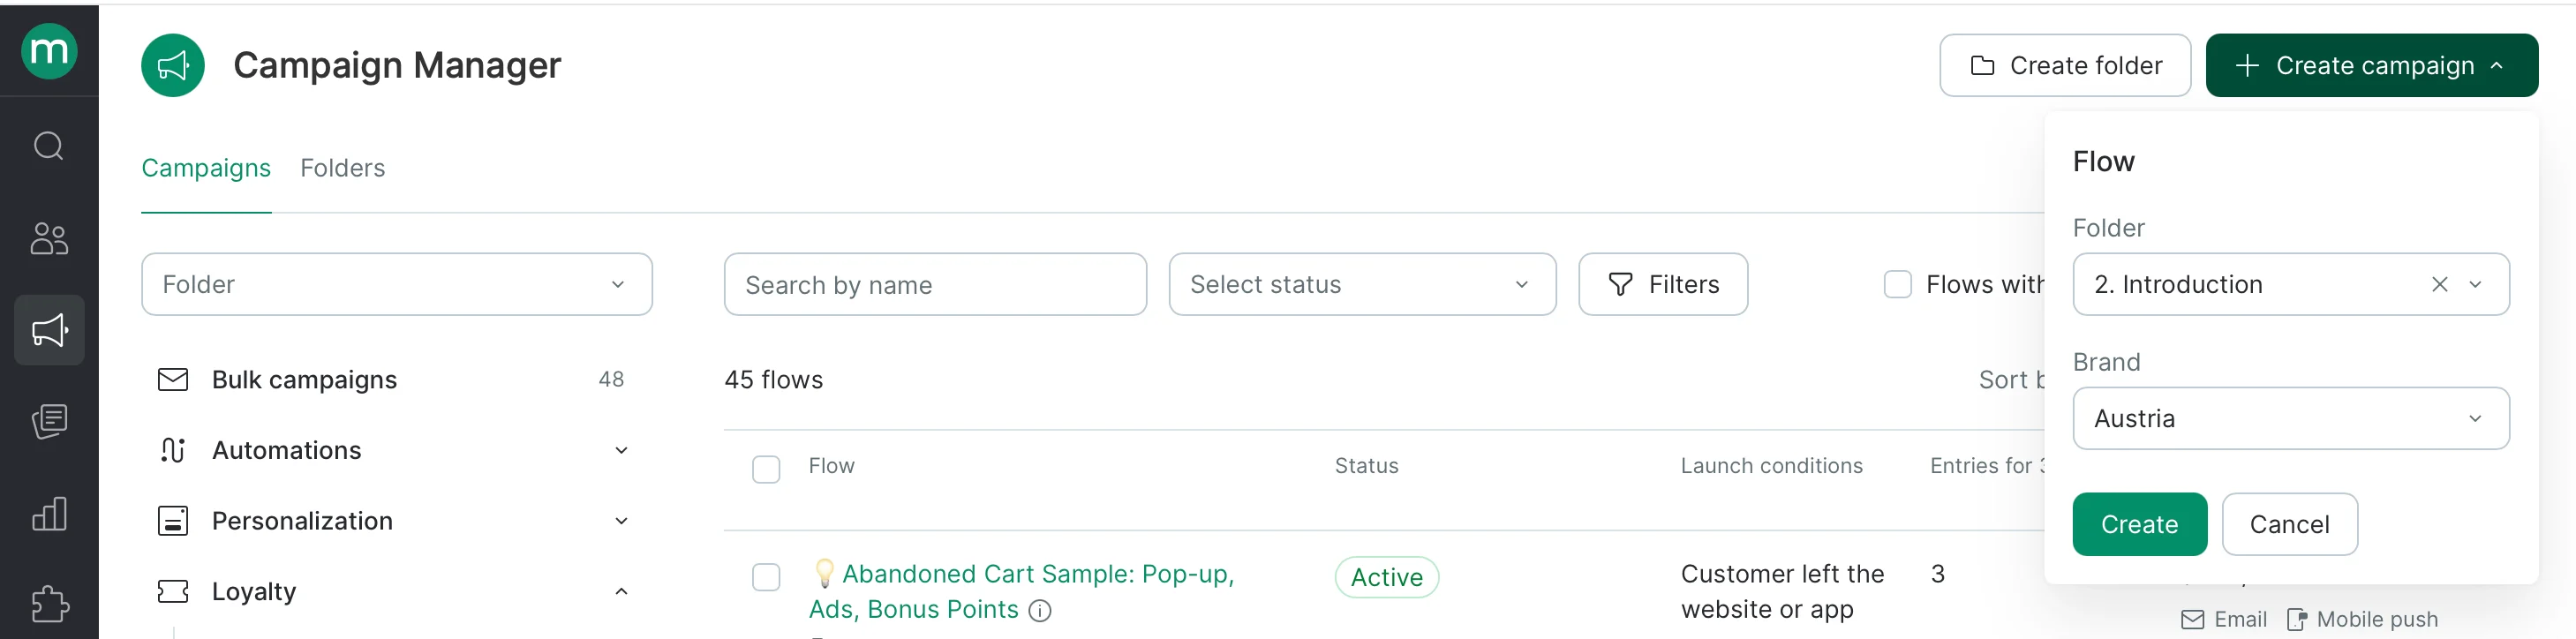
Go to Campaign manager: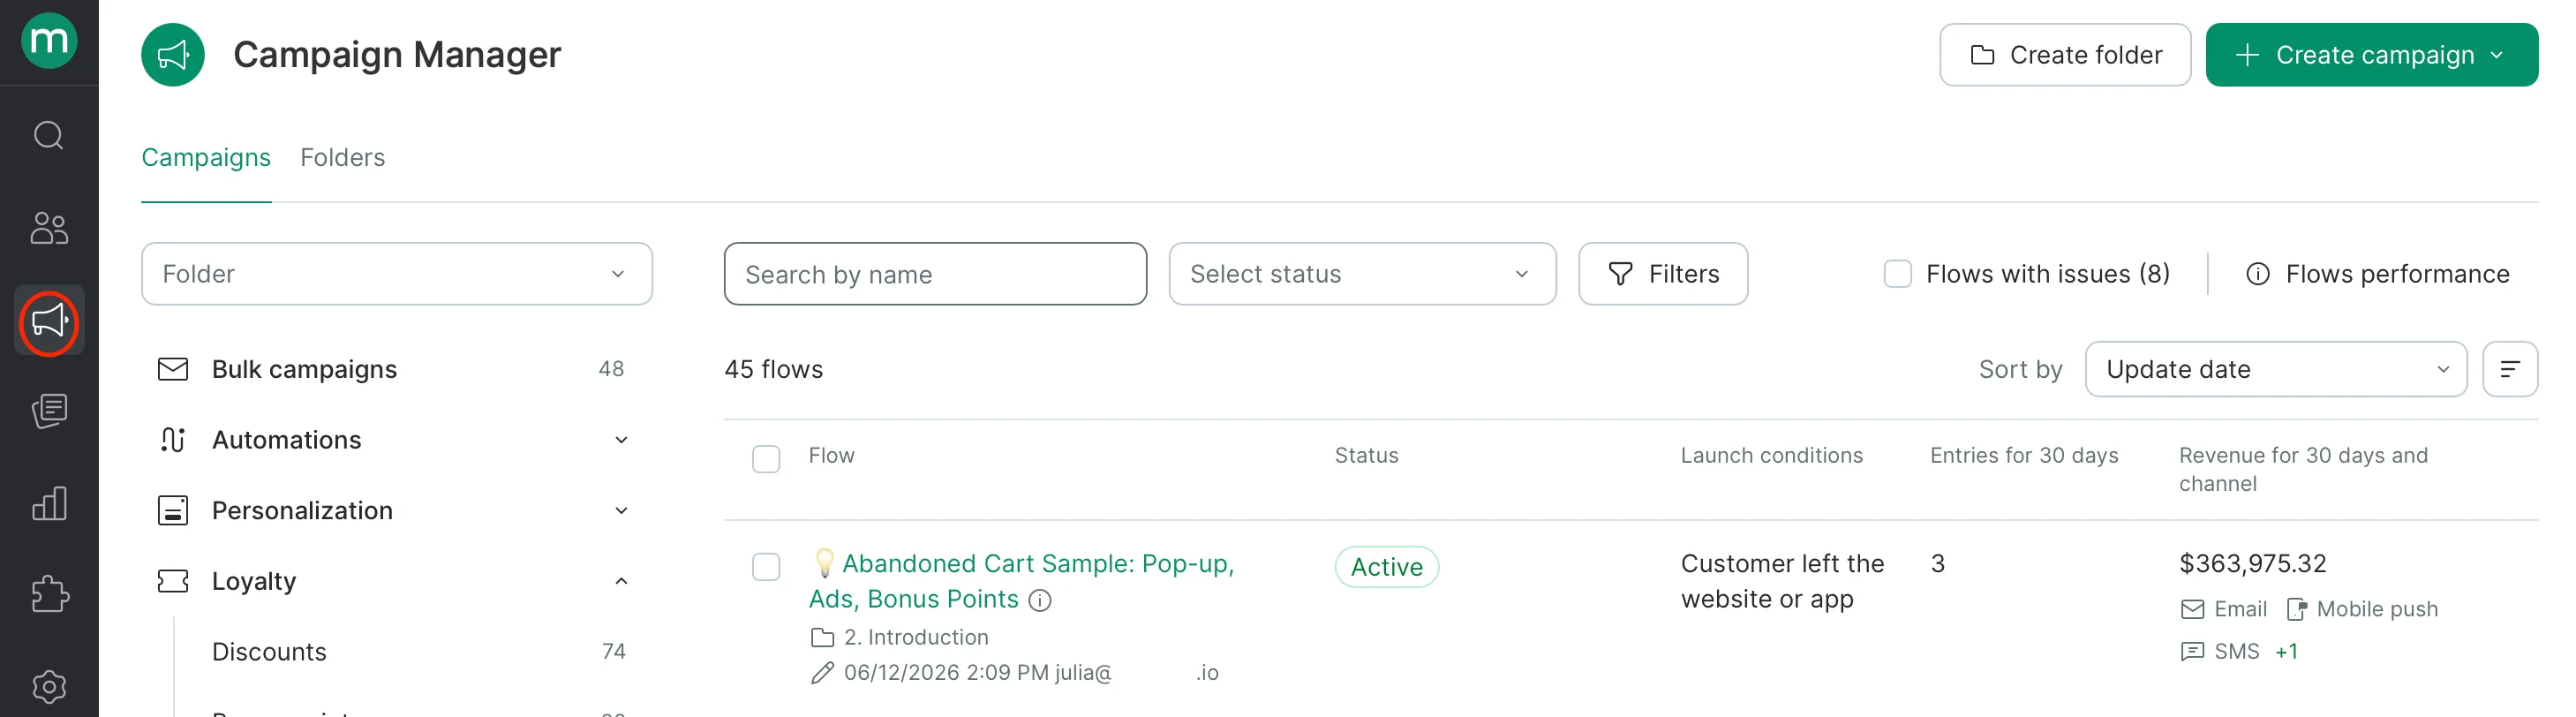
How to set up a flow
Settings
Flow statuses
- Draft: some nodes are still empty;
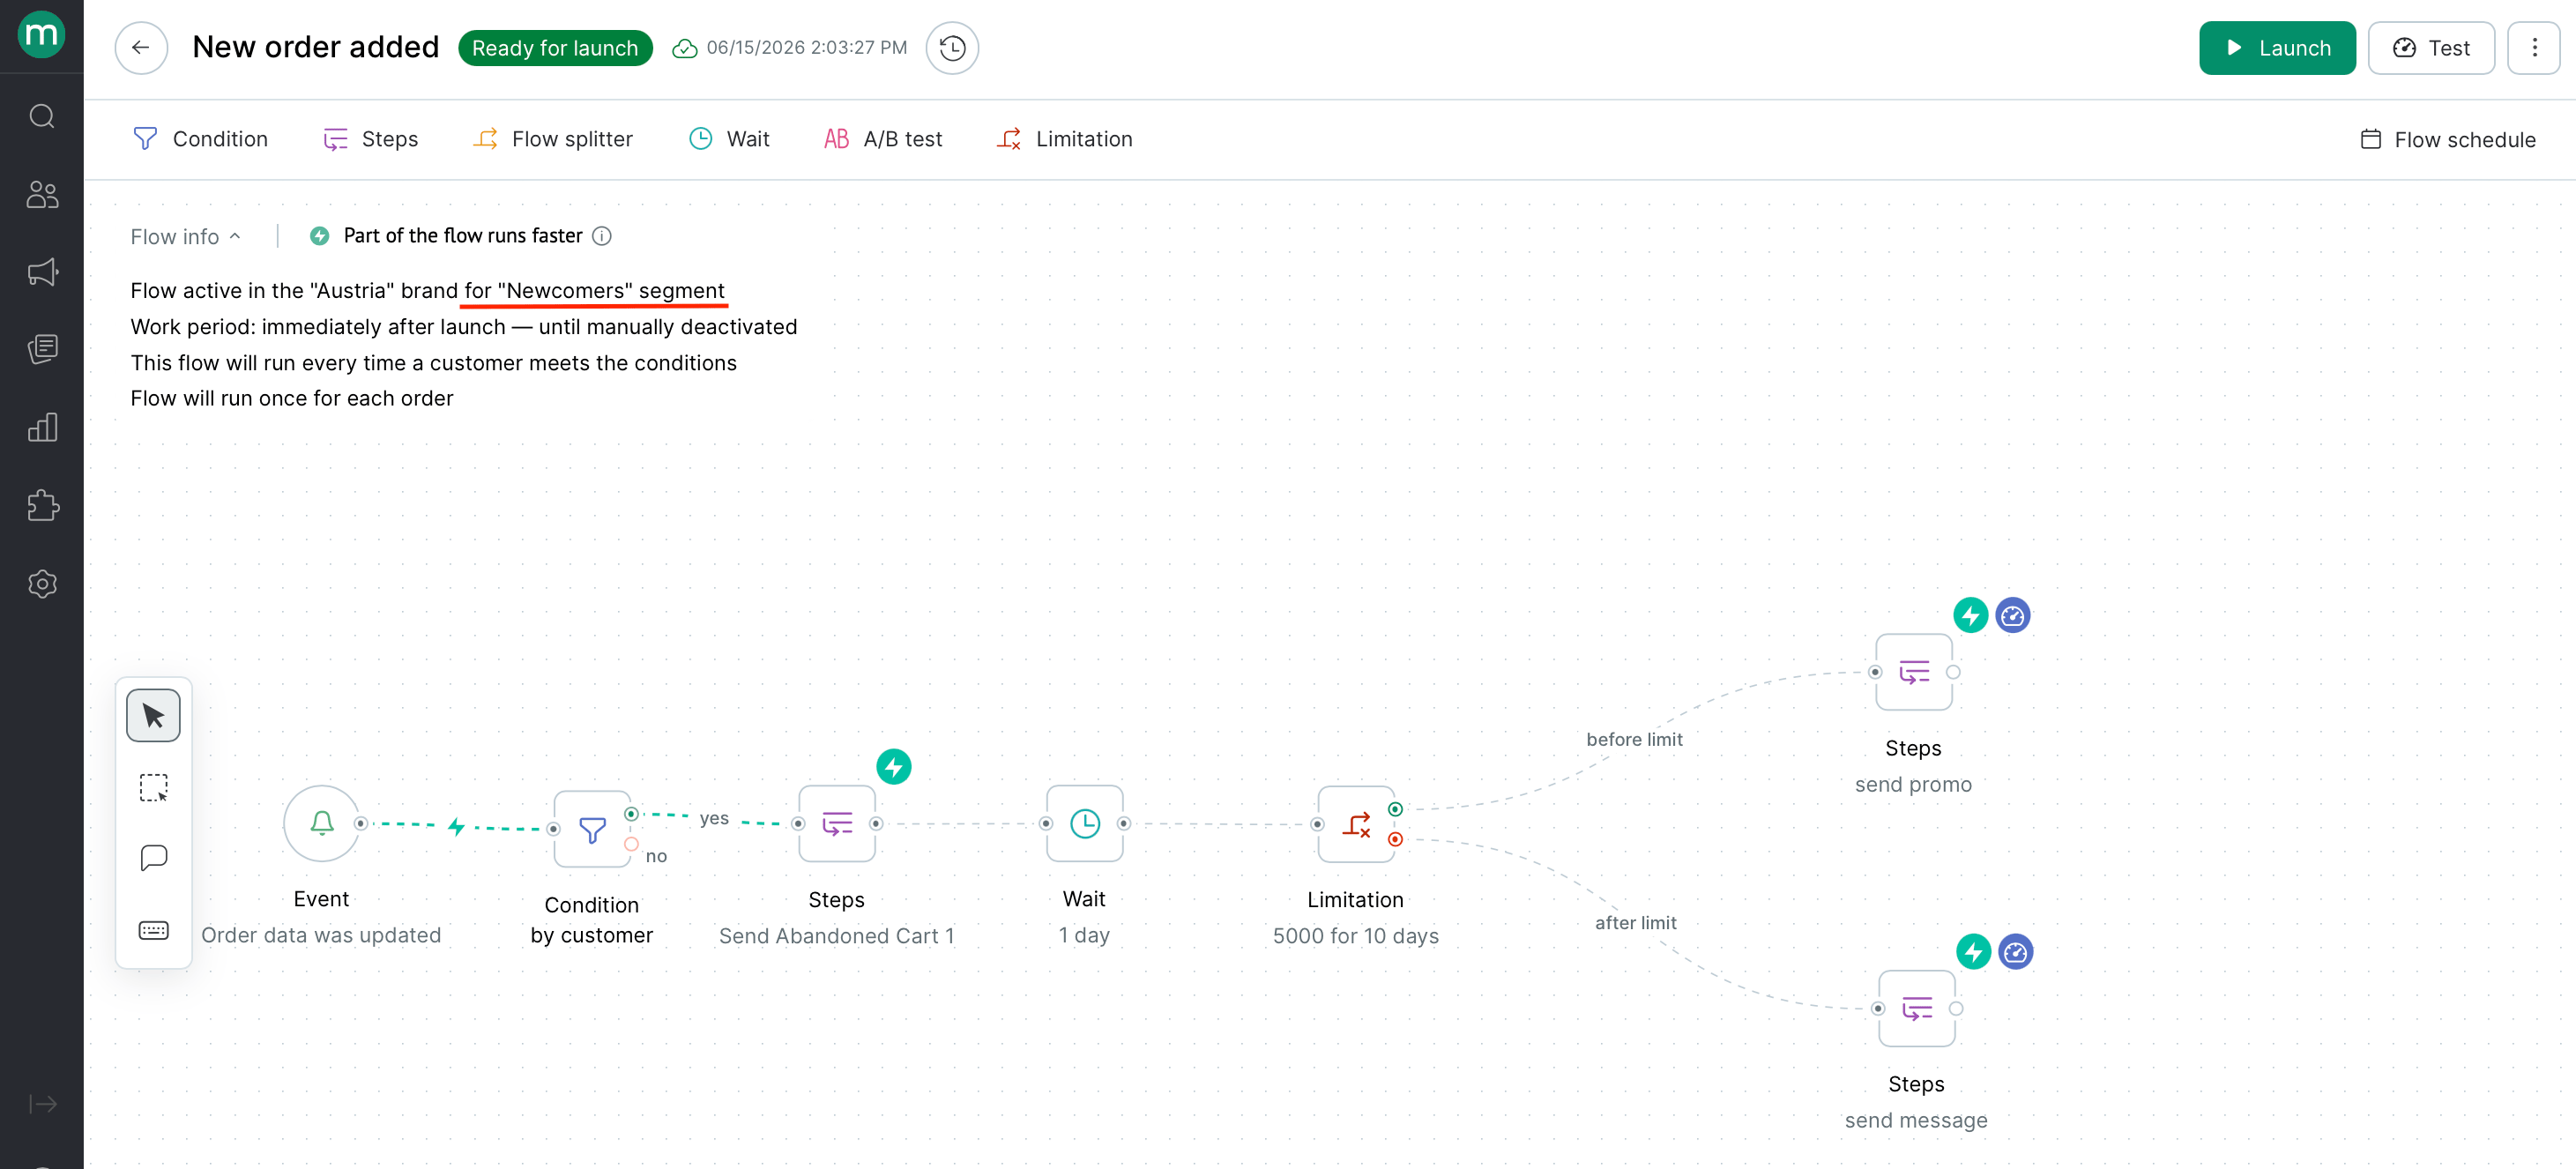
- Ready for launch: all the blocks are filled in and the flow (or the draft) can be launched;
- Launching: this status is displayed for a couple of seconds after clicking the Launch button;
- Active: the flow is running;
- Paused: the flow has been paused;
- Creating draft: the status is displayed for a couple of seconds after clicking the Edit or Copy flow buttons.
Nodes
A flow consists of different nodes: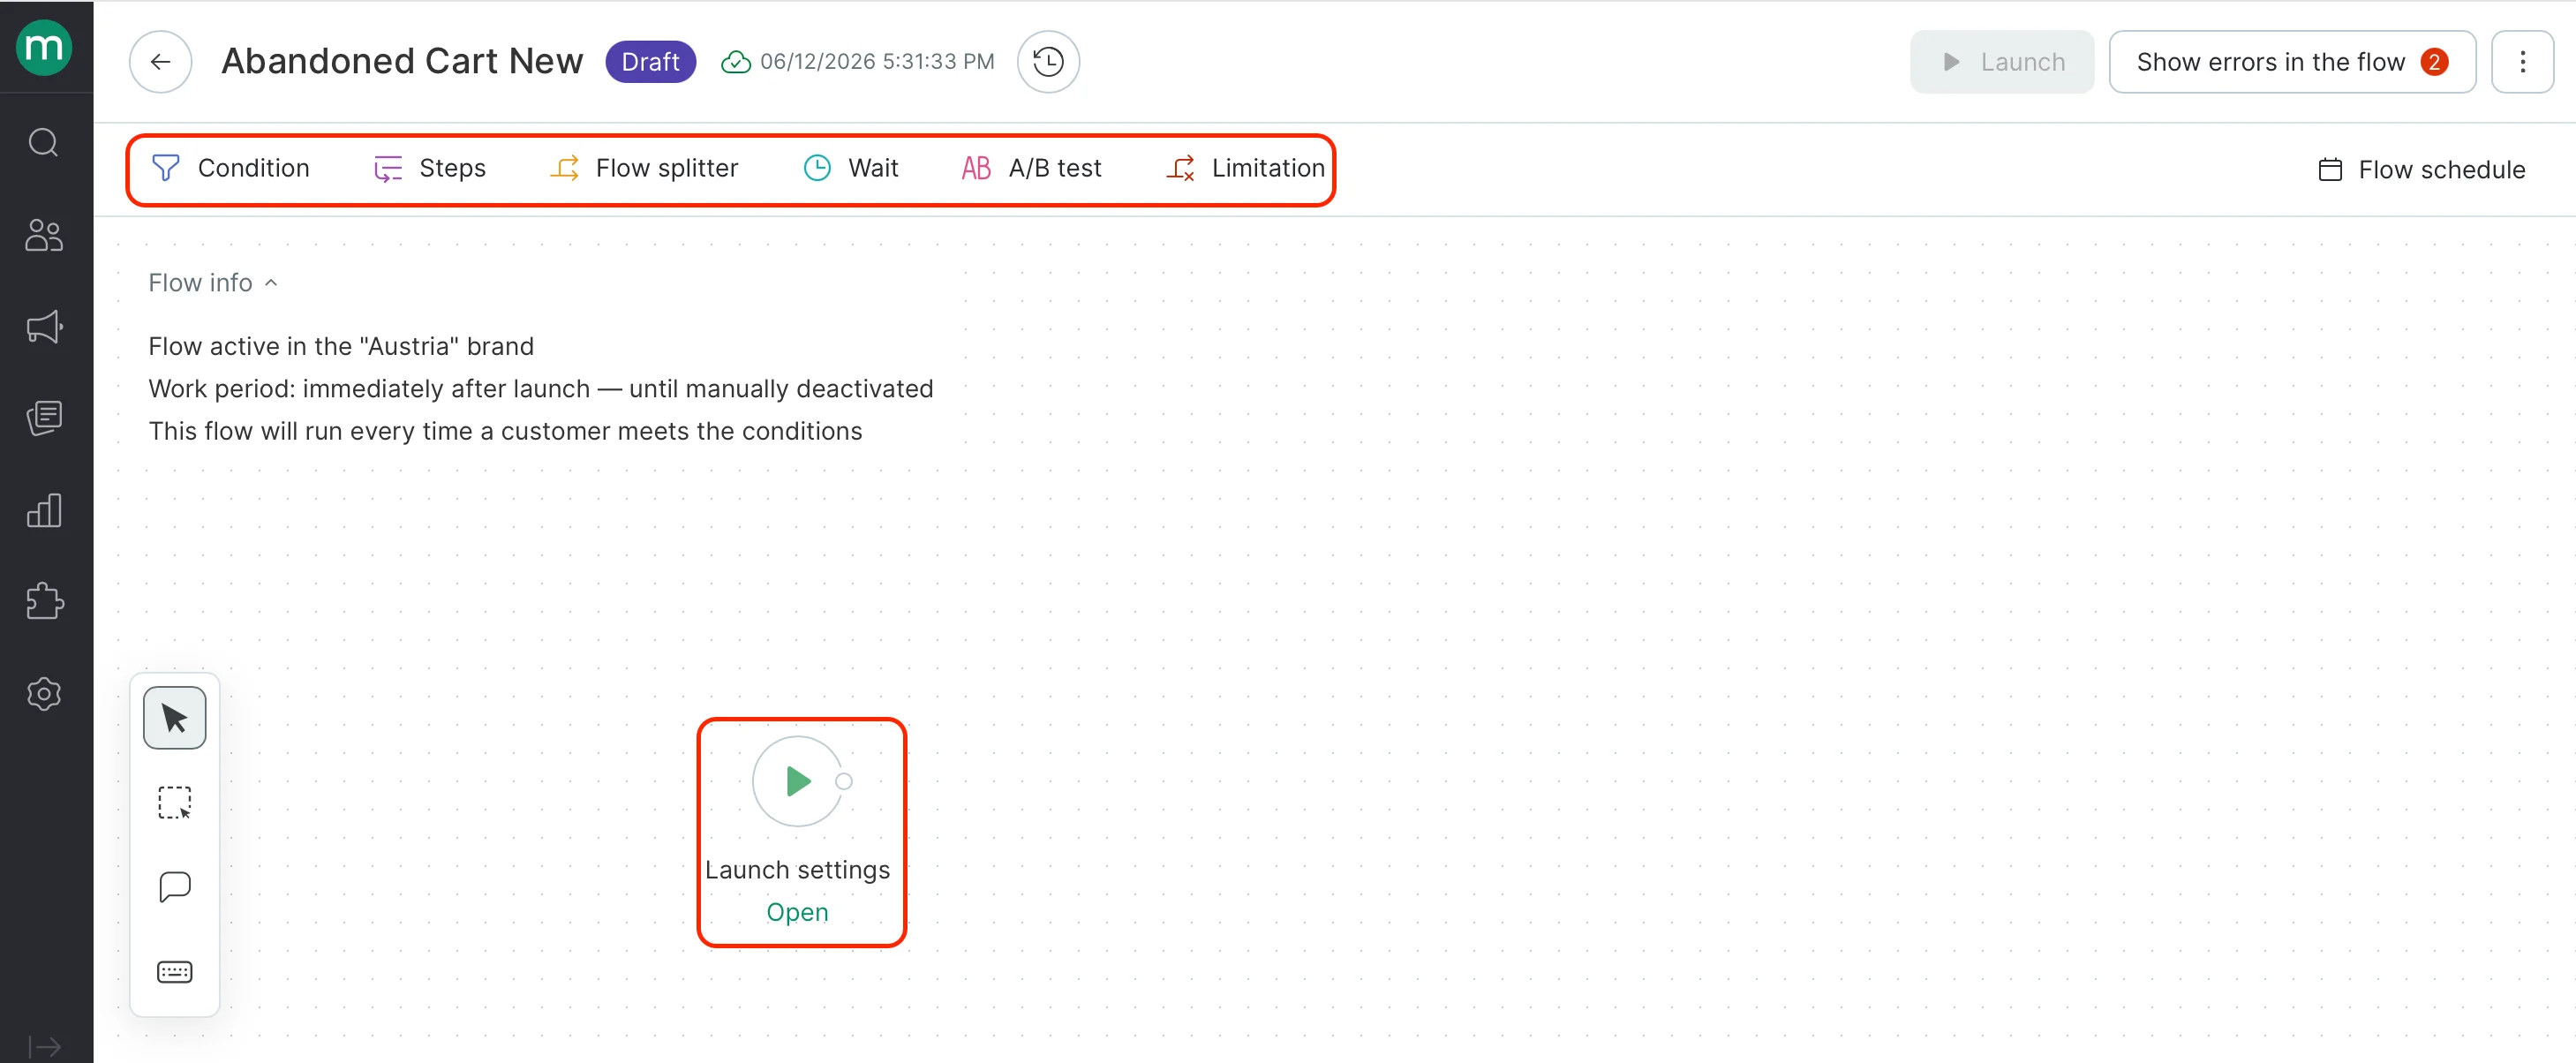
We support the stable flow interface up to 150 added nodes.
- Launch Settings
- Event-based — the flow starts when a specific action or change occurs, such as a customer joining your list, a browsing session ending, or an order status update.
- On a Schedule — the flow runs on a recurring schedule rather than in response to an event: daily, on specific days of the week, or on set dates each month.

- Condition

- Steps

- Flow splitter
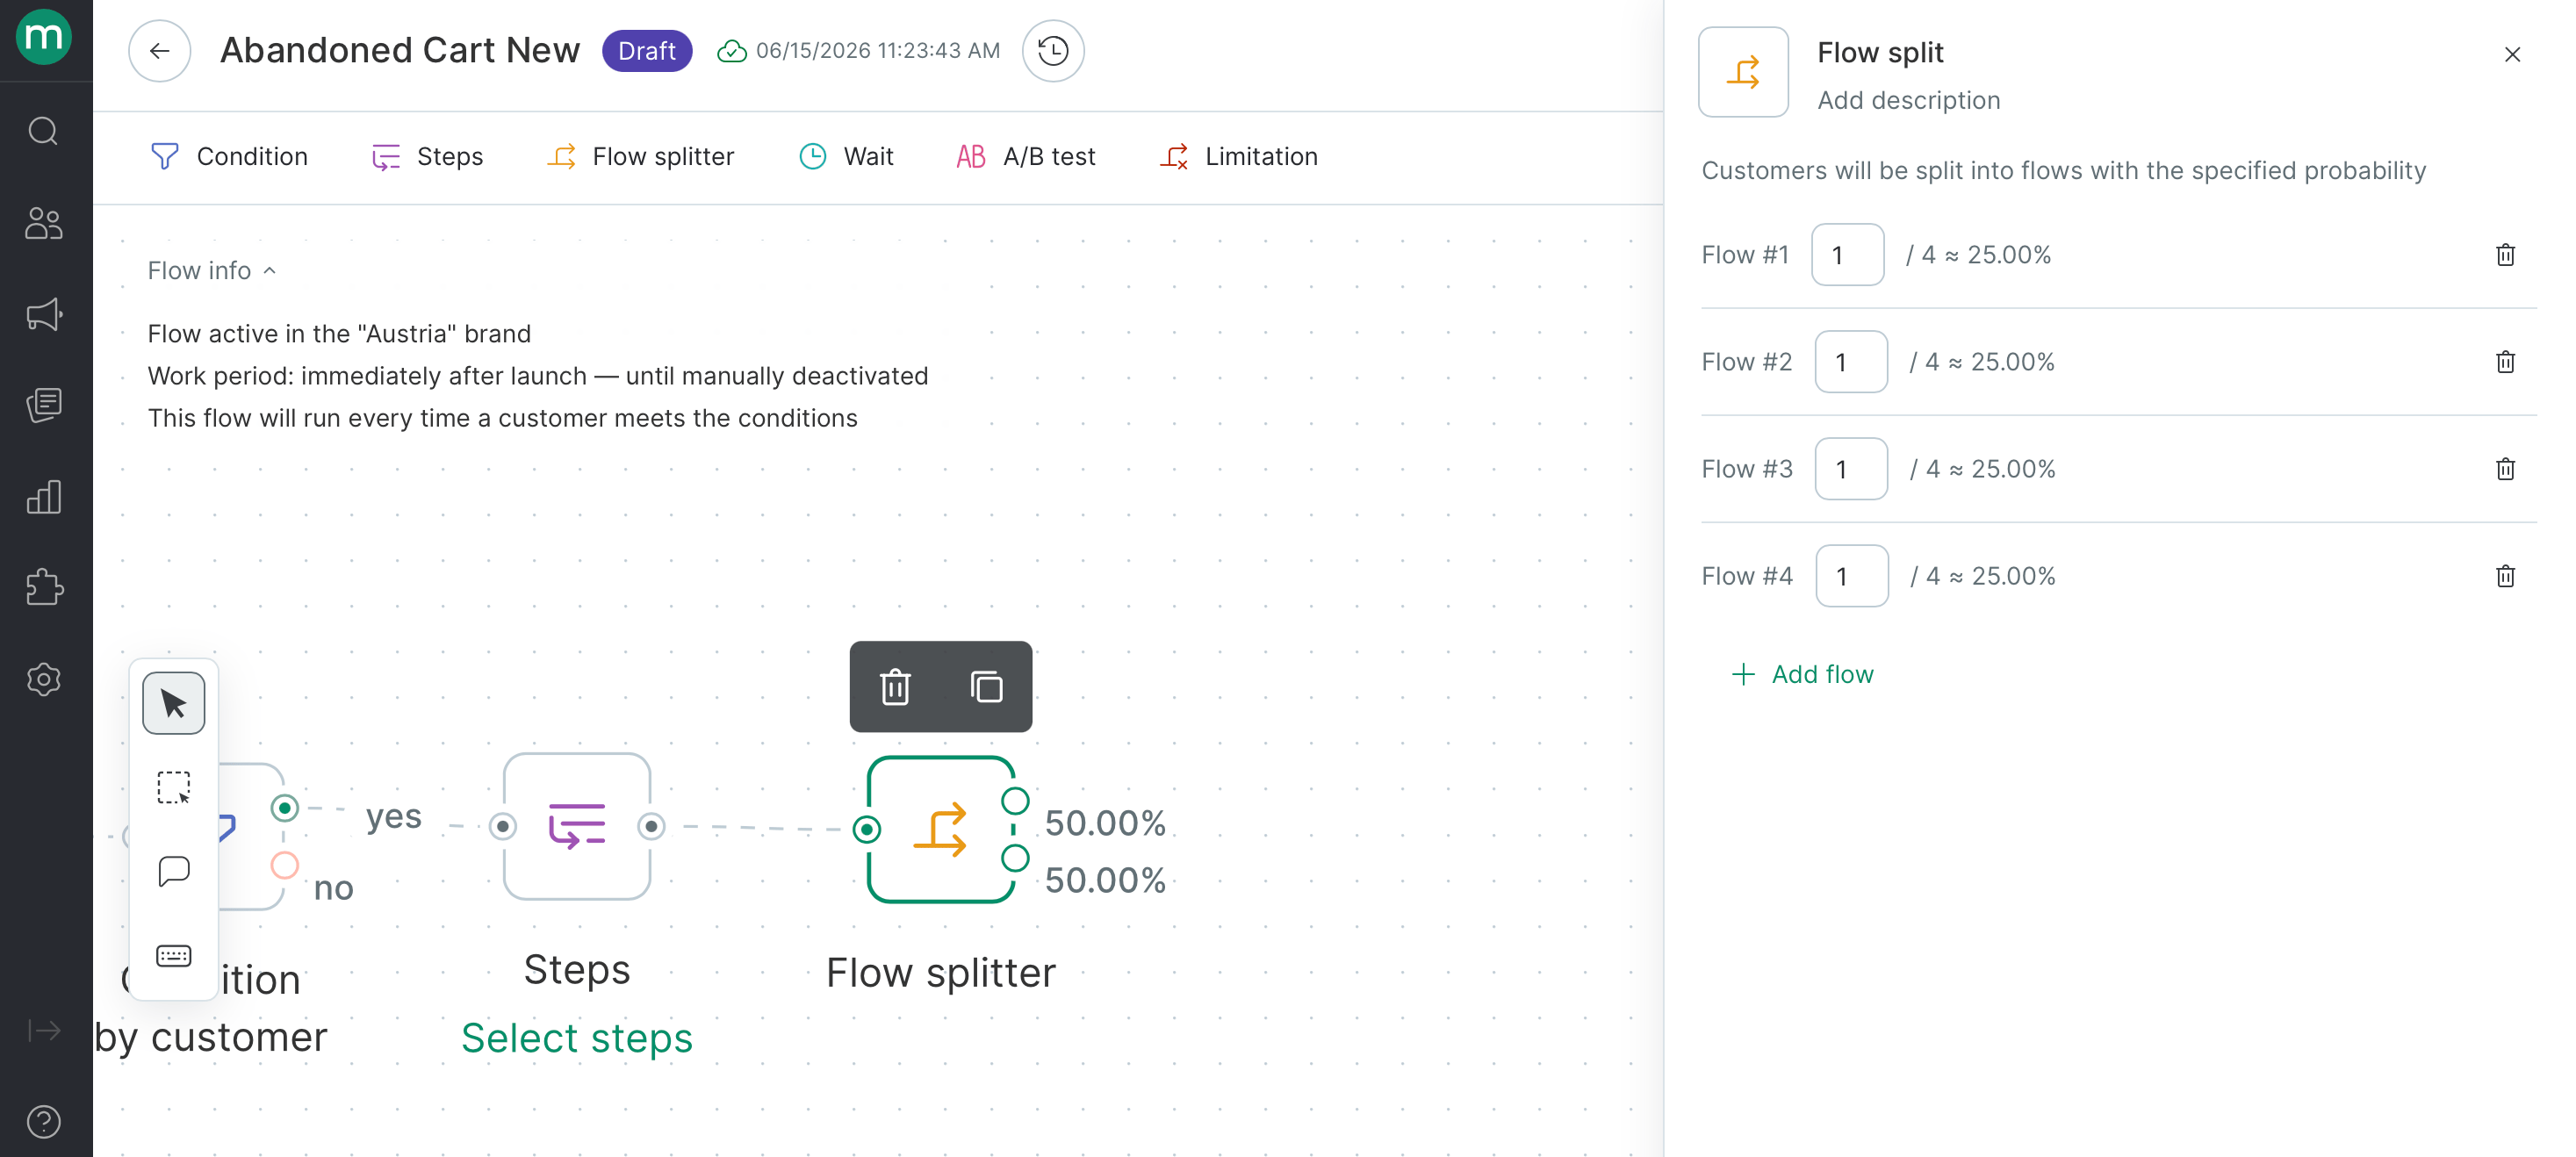
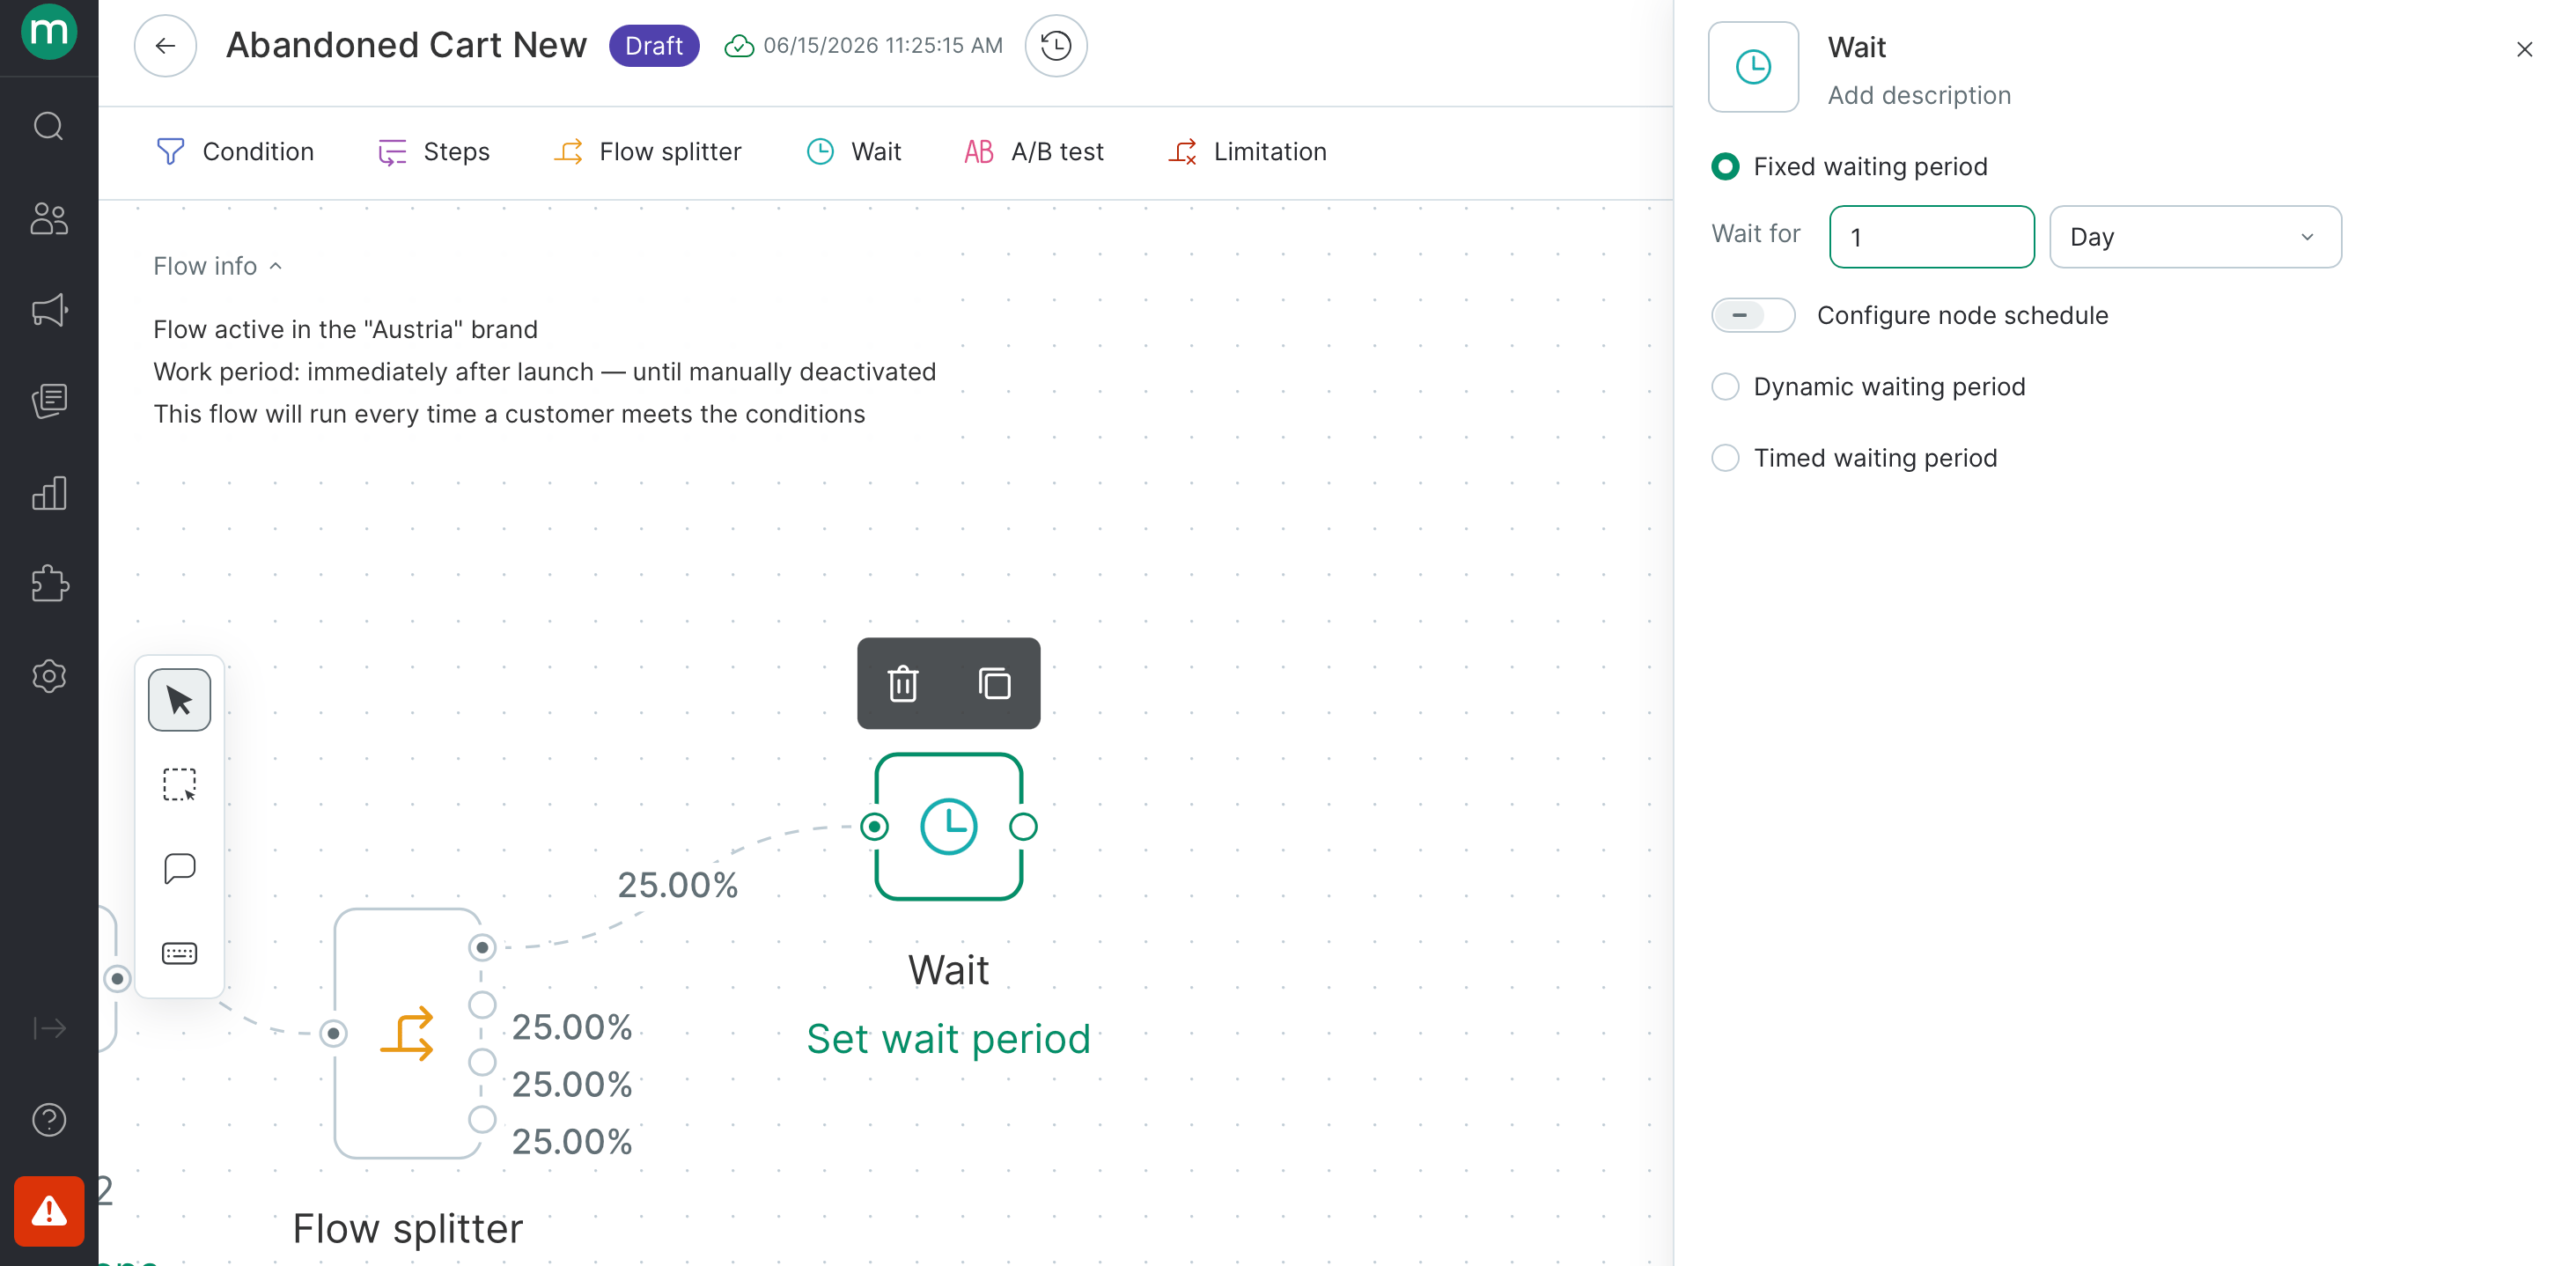
- Wait
- Fixed — holds the contact for a set number of minutes, hours, or days.
- Dynamic — waits until a date stored in a customer, order, product, or action field, with the option to trigger before, on, or after that date.
- Timed waiting period— doesn’t add a delay, but controls when the contact exits the block by restricting it to specific hours or days of the week.
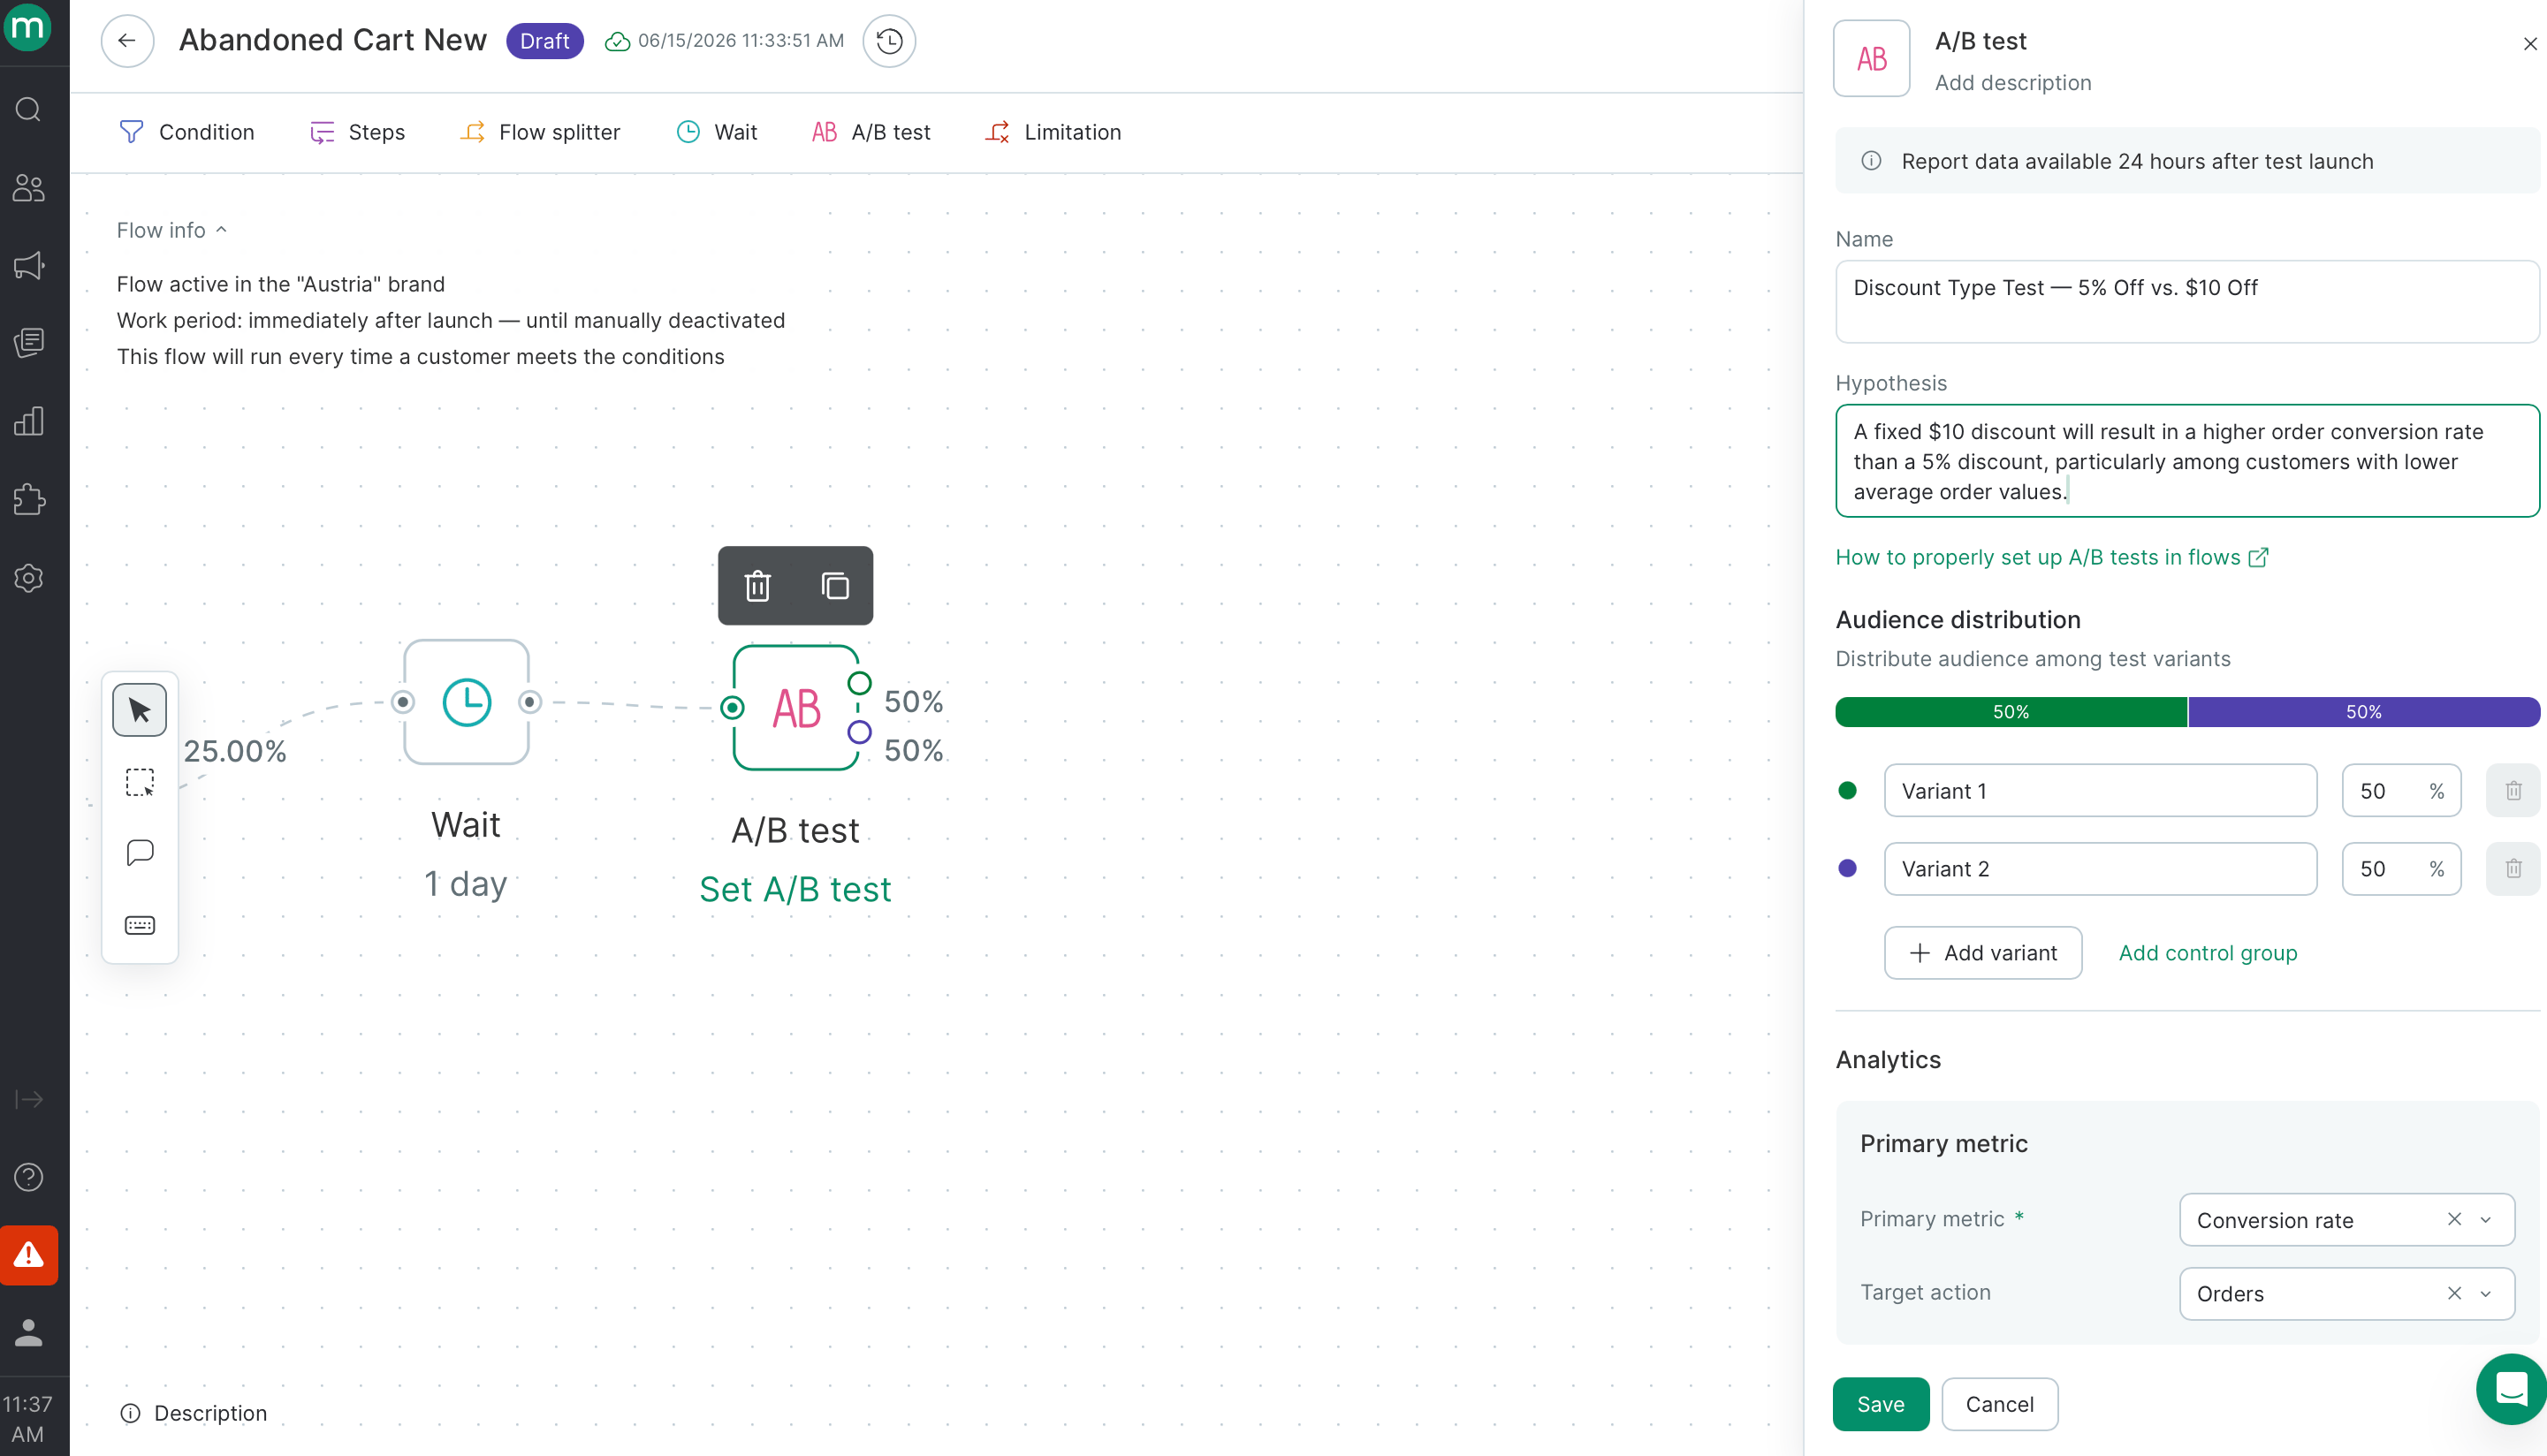
- A/B test
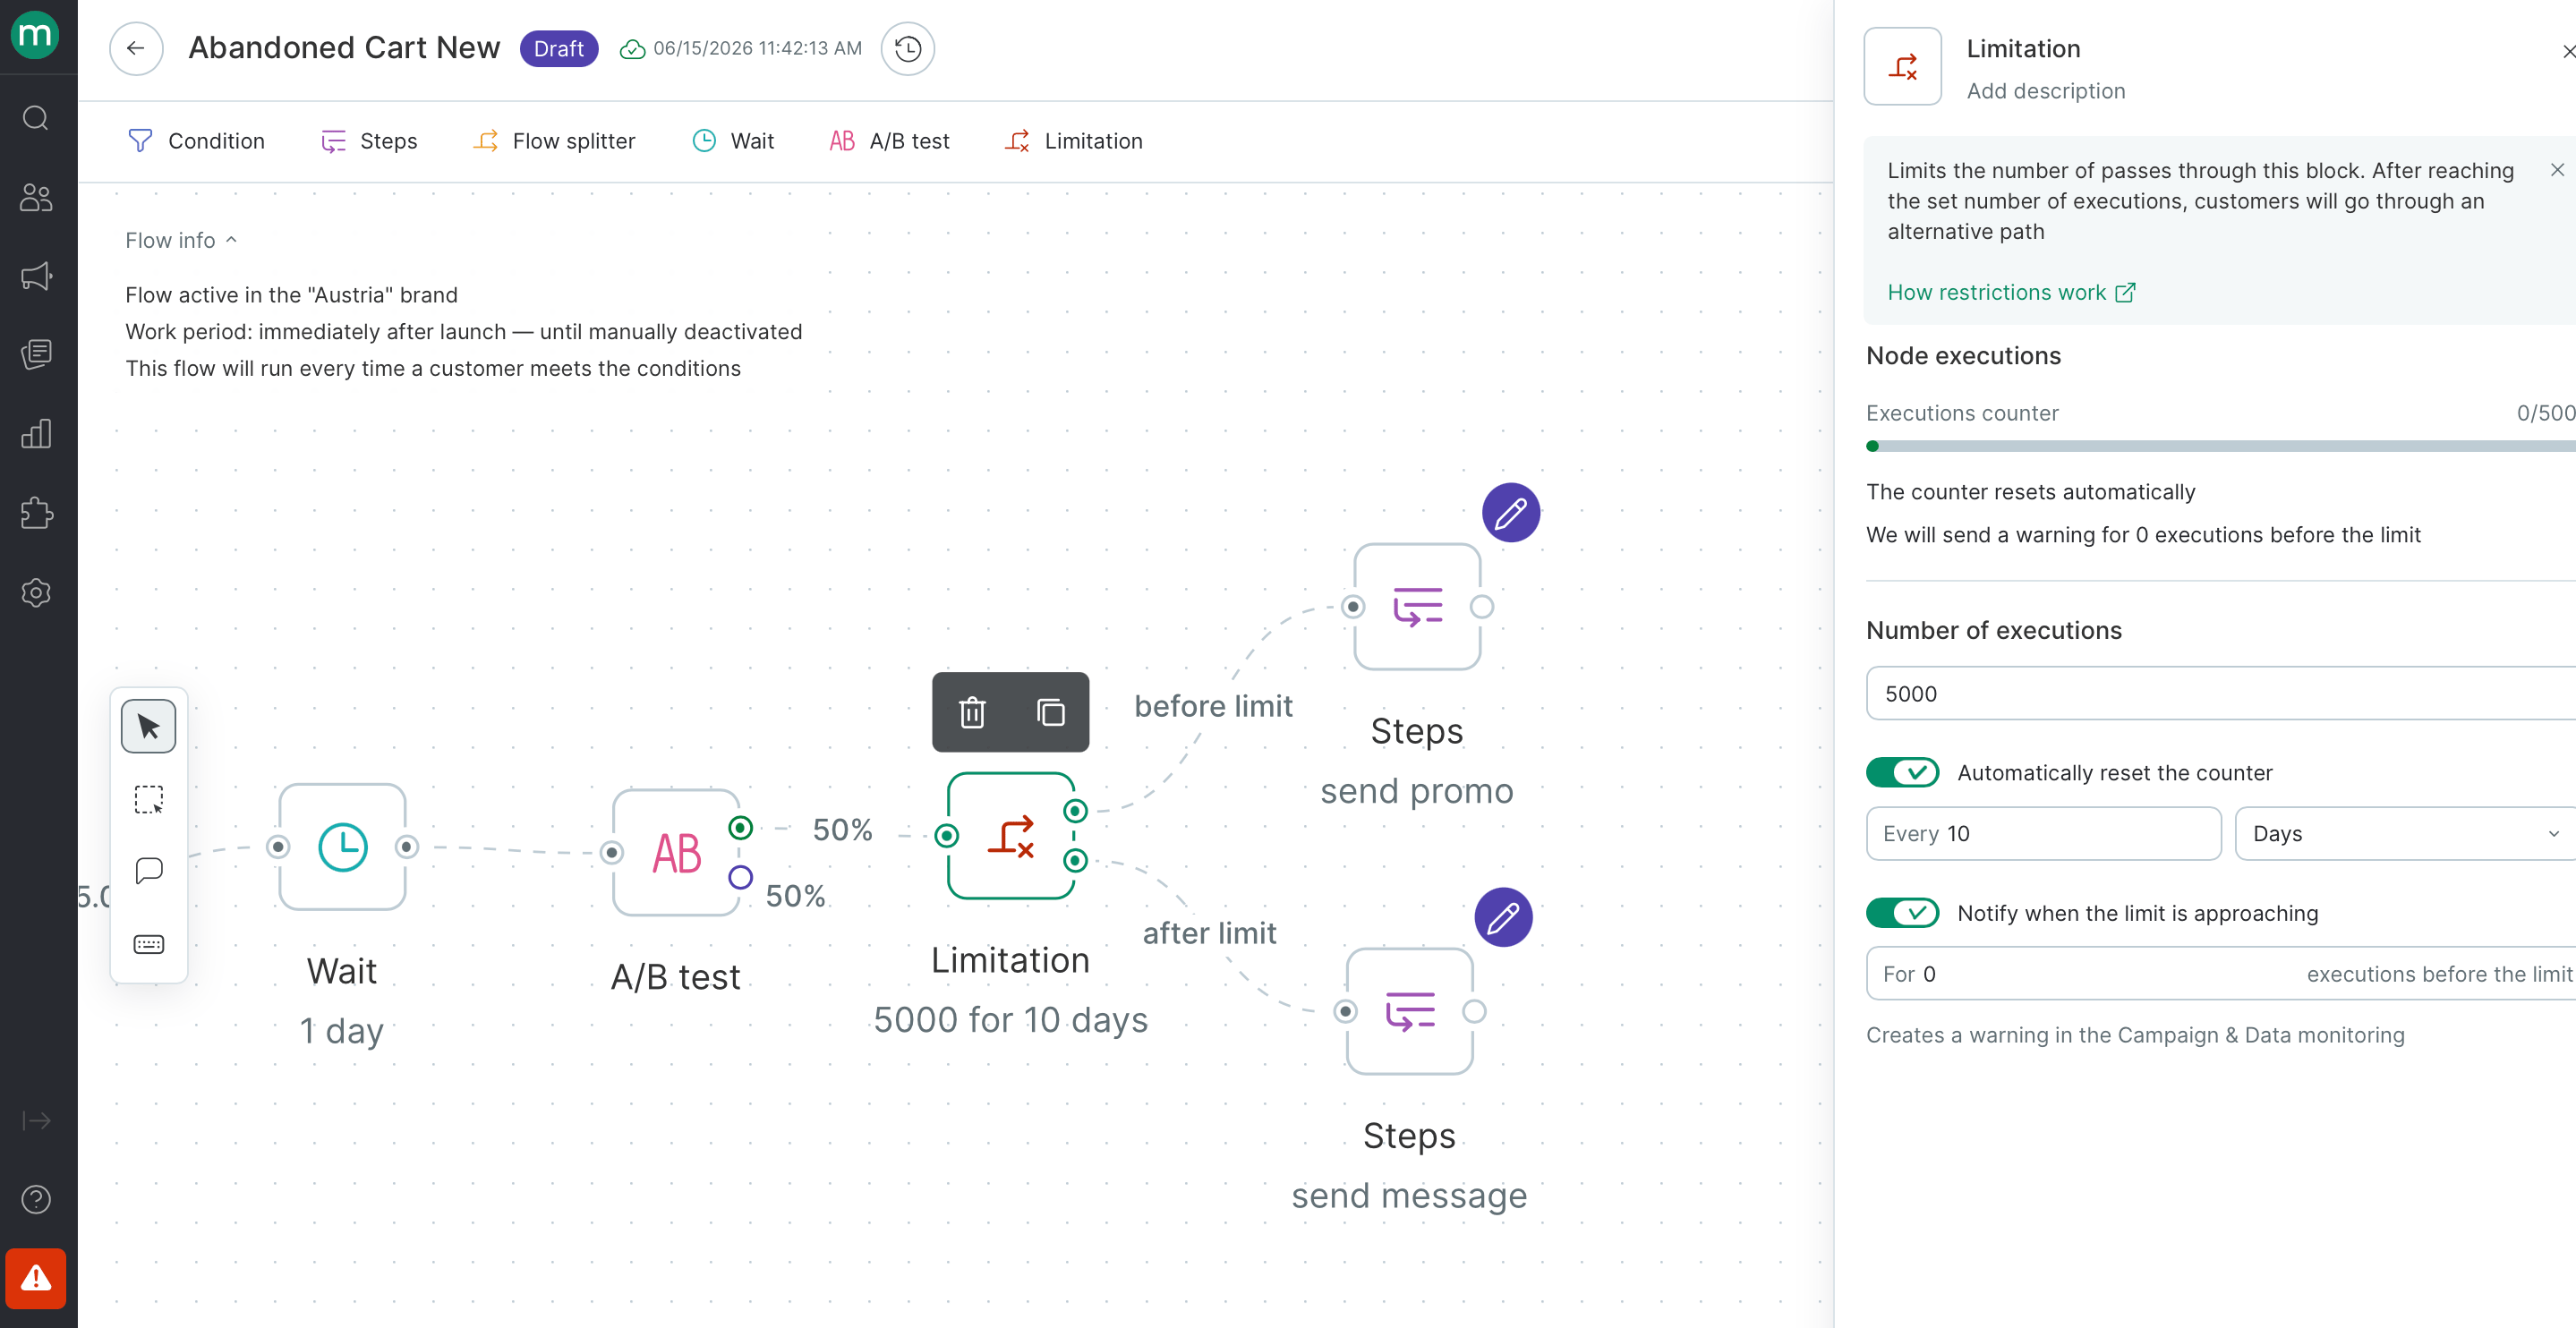
- Limitation
Connections between nodes
Use connection lines to join nodes into a sequence
Bulk copying and deleting blocks
To copy or delete multiple blocks at once:1
Switch to multi-select mode using the left toolbar.
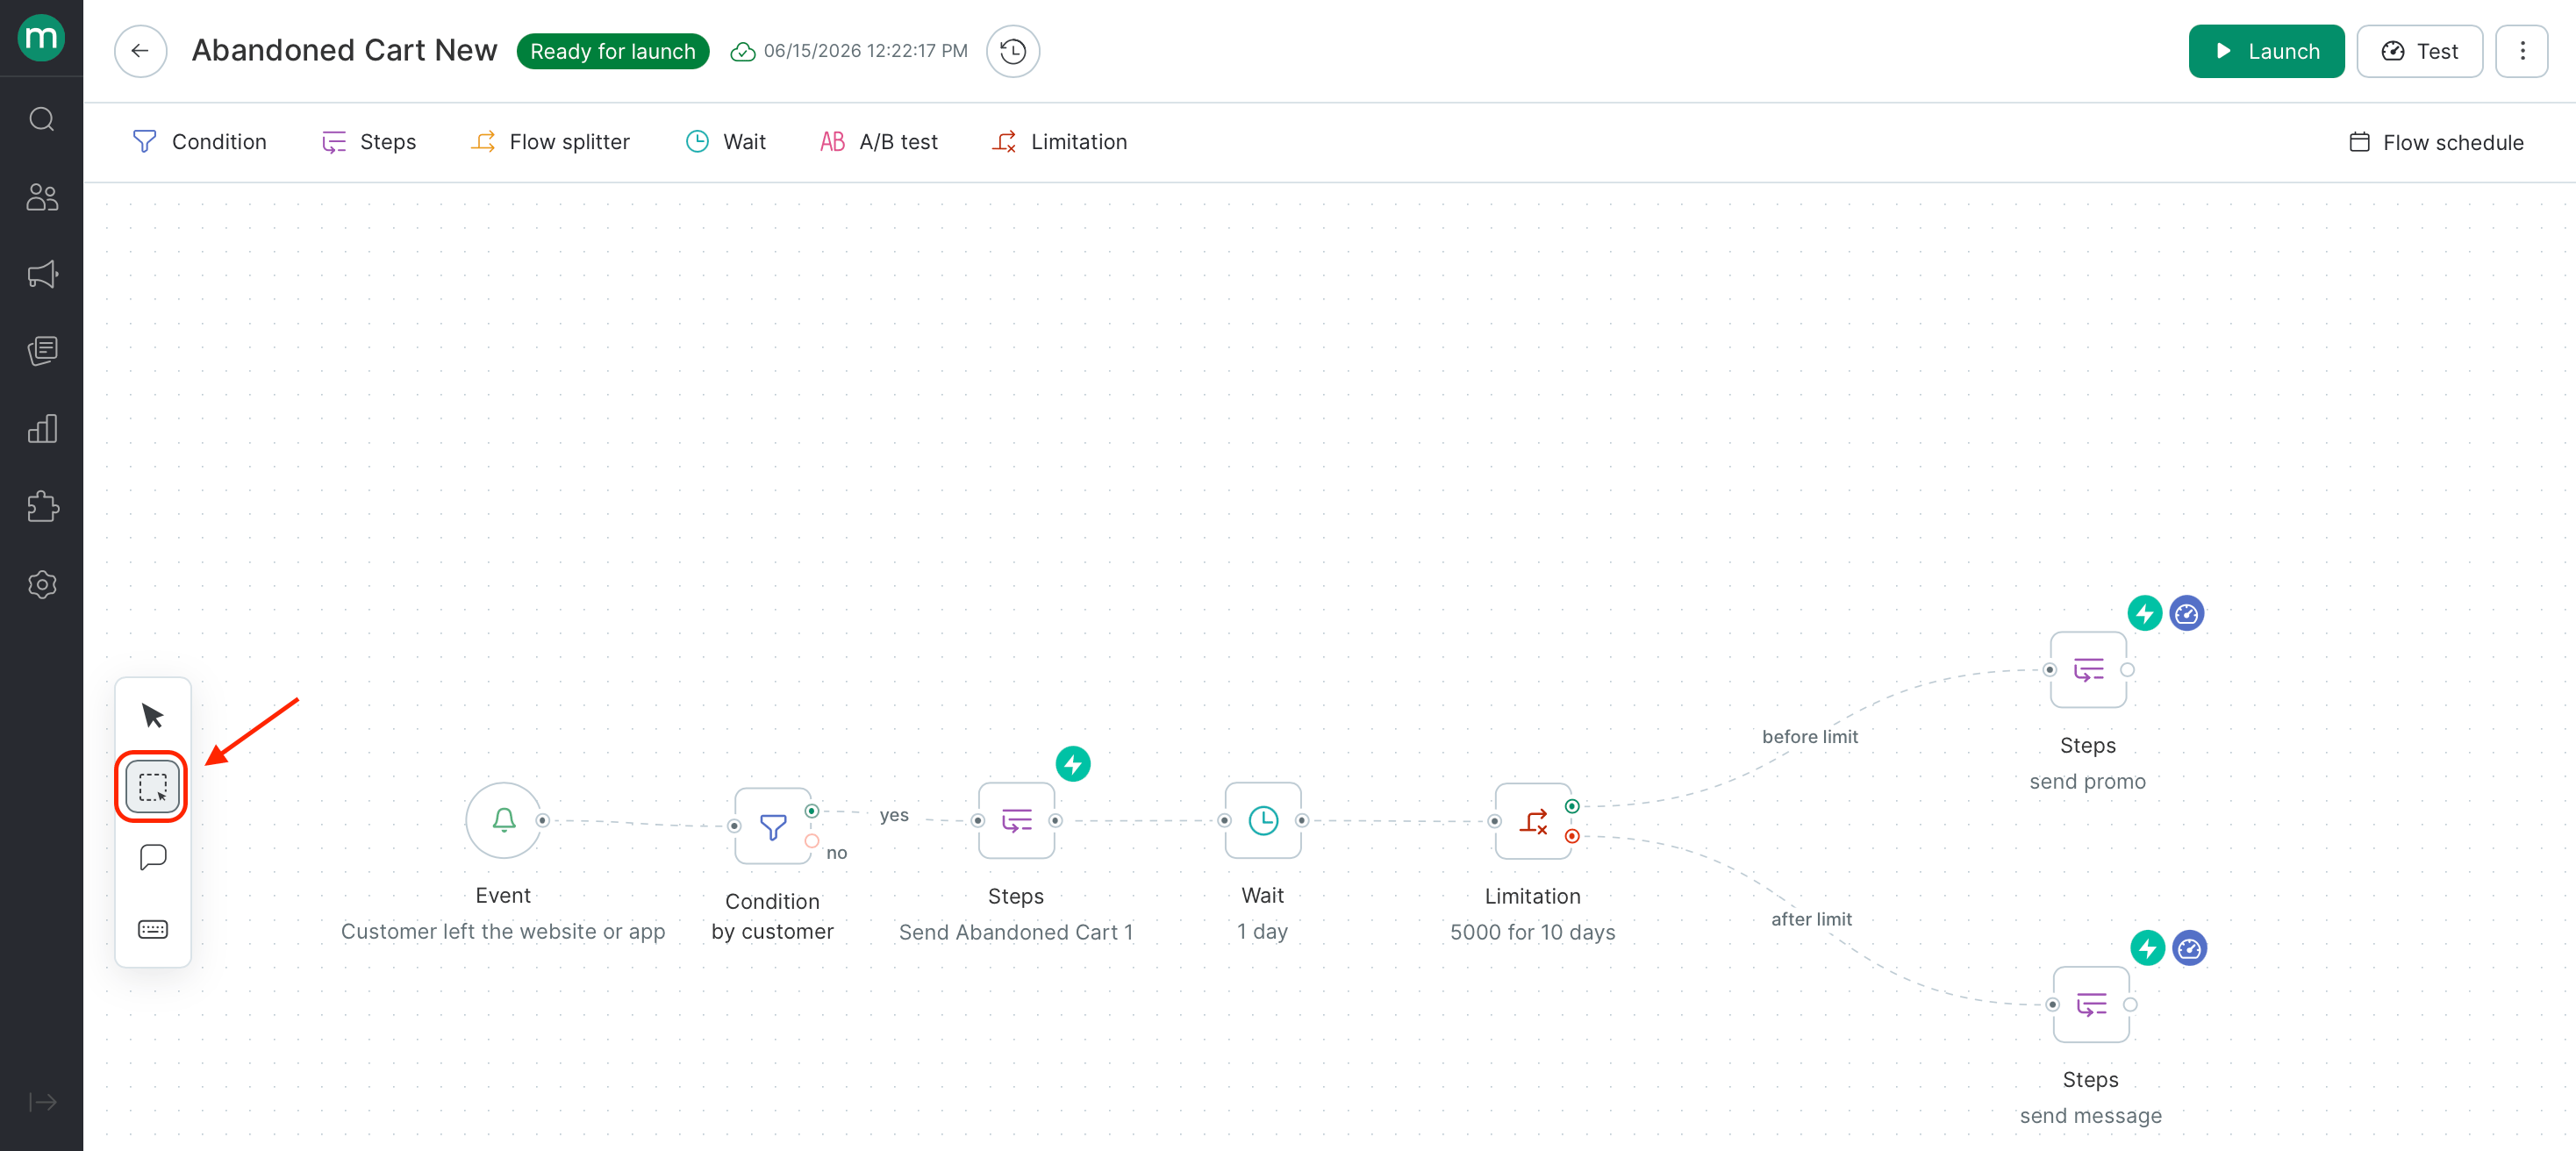
2
Highlight the blocks
Drag to highlight the blocks you want.
3
Copy or delete
Use the buttons in the upper-right corner of the selection to copy or delete them.\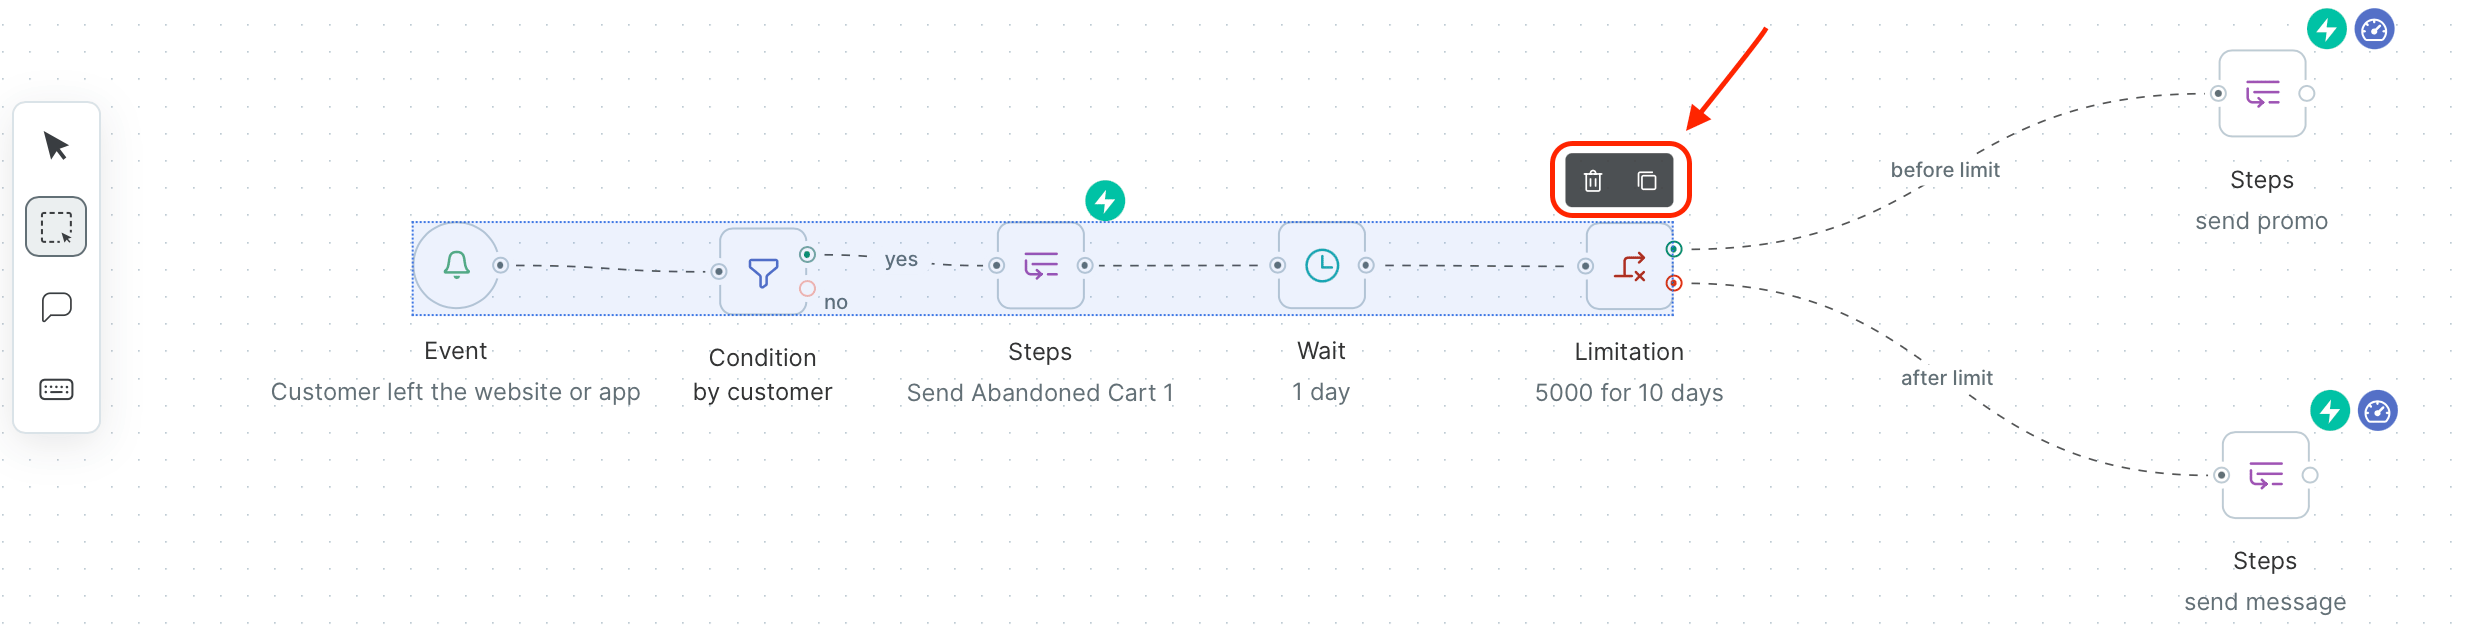
Flow frequency per customer or order
You can set a limit on how often a flow fires for a given customer or order — once ever, on a recurring schedule, or every time the flow fires.
Flow schedule
There are three ways to schedule a flow:- Launch it immediately when you’re ready.
- Schedule it to start automatically on a future date.
- Set an end date so it stops automatically at a specific time.
1
Open flow schedule
Open the flow schedule in the upper-right corner.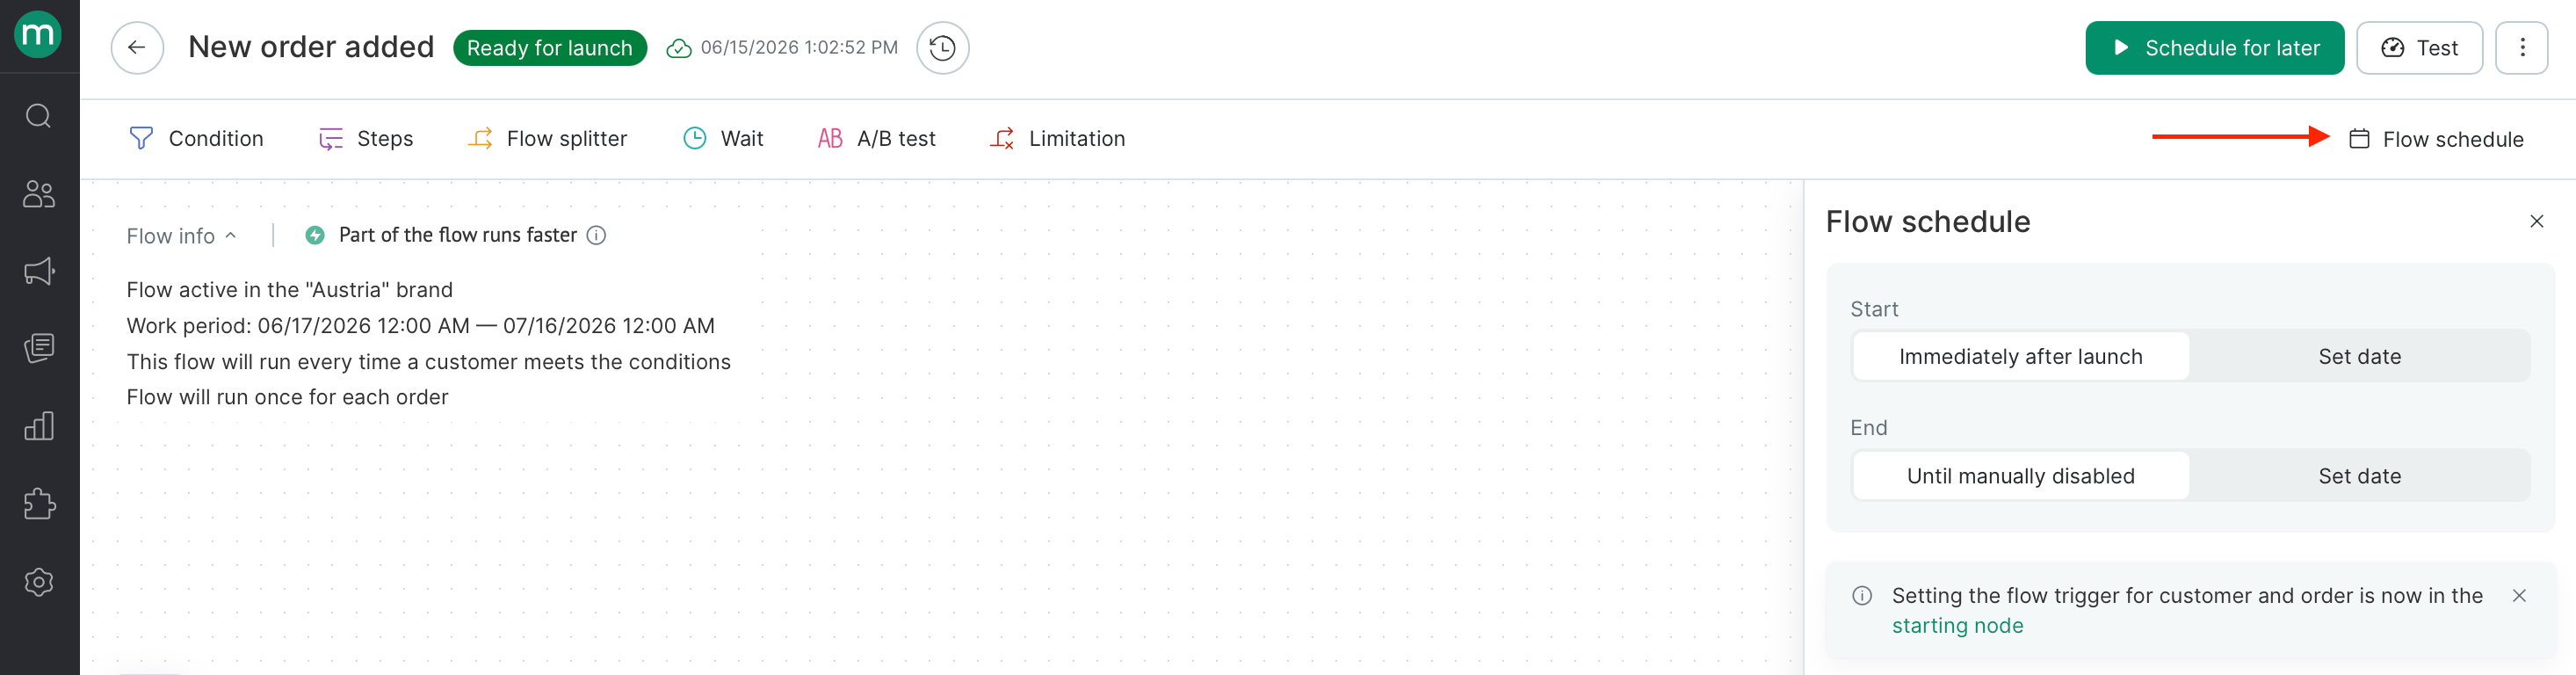
2
Enter dates and click Save
Enter the start and/or end date and time.\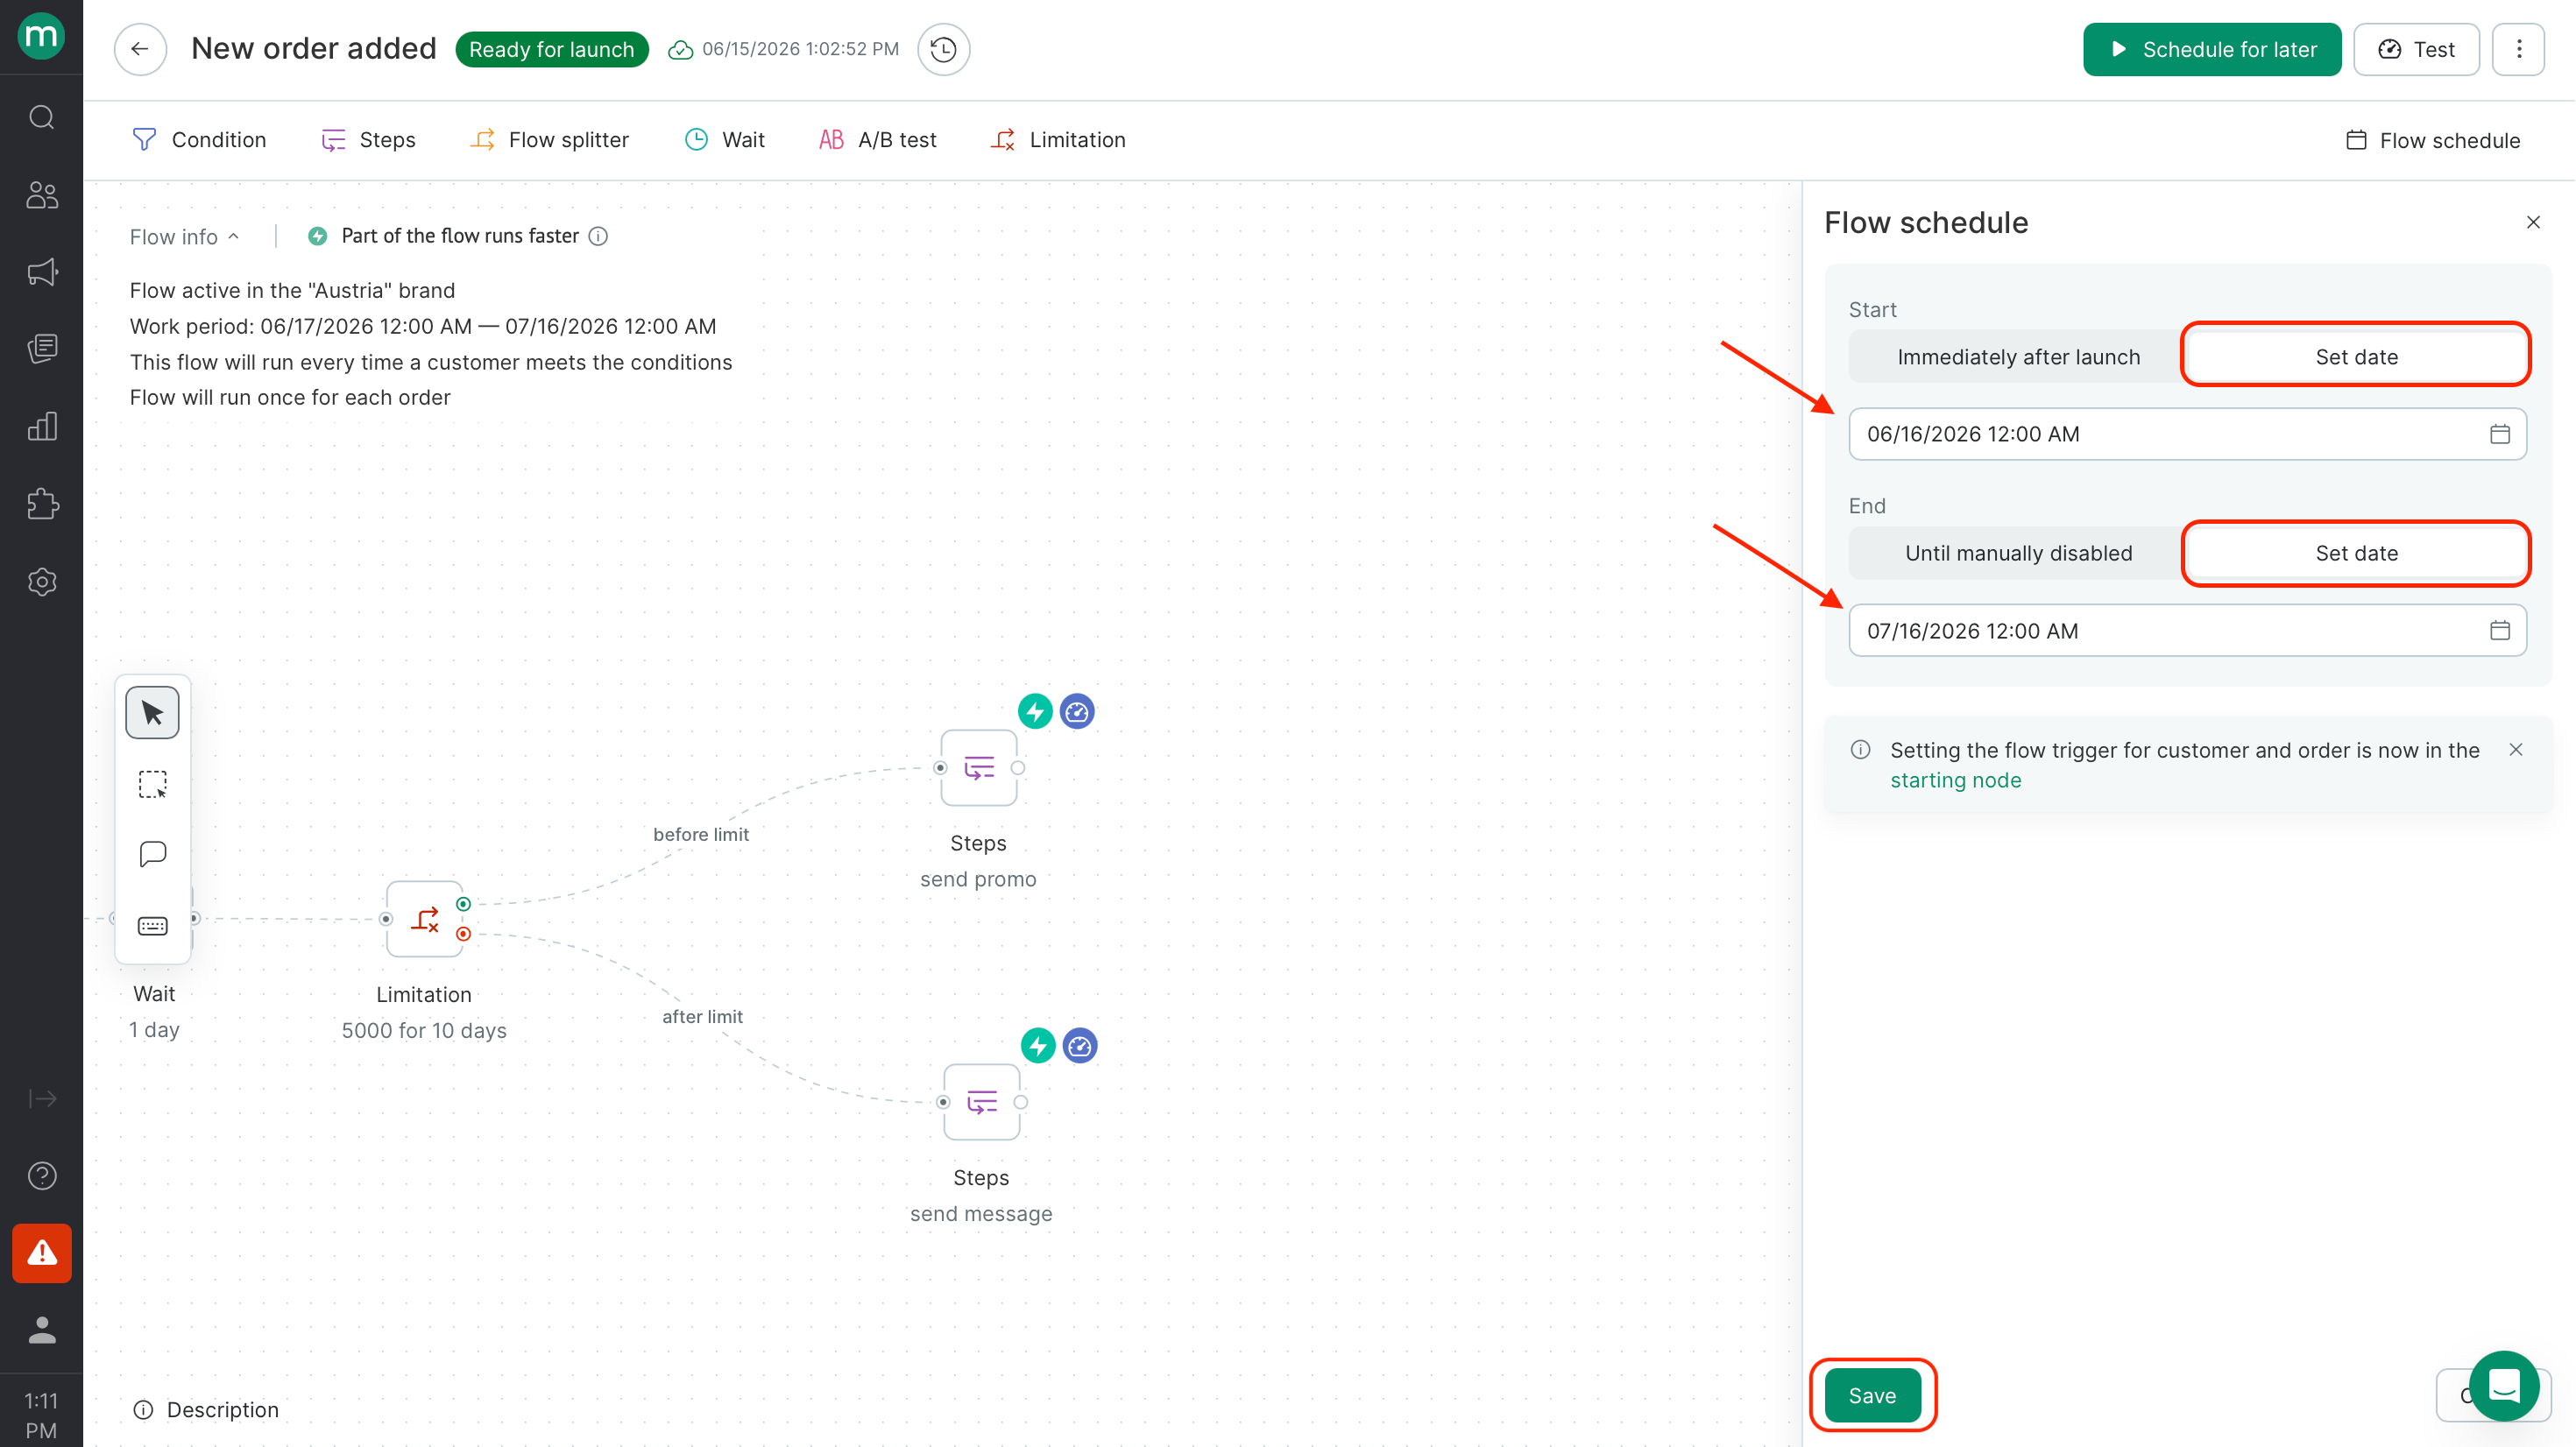
3
Schedule for later
If setting a start date, click Schedule for later — otherwise the flow won’t launch automatically.
Once the schedule is set, here’s how each option affects the flow:Start date — the flow only processes events that occur after this date.End date — works like a manual stop: contacts already in a Wait block will remain there, and no further steps will execute. If you push the end date back while contacts are waiting, they’ll continue through the flow.
Segment restriction
If the folder containing your flow is restricted to a segment, the flow will only fire for contacts who belong to that segment — both at the time of the trigger event and at the time each step executes. If a contact leaves the segment at any point, their run stops.
Autosave and validation
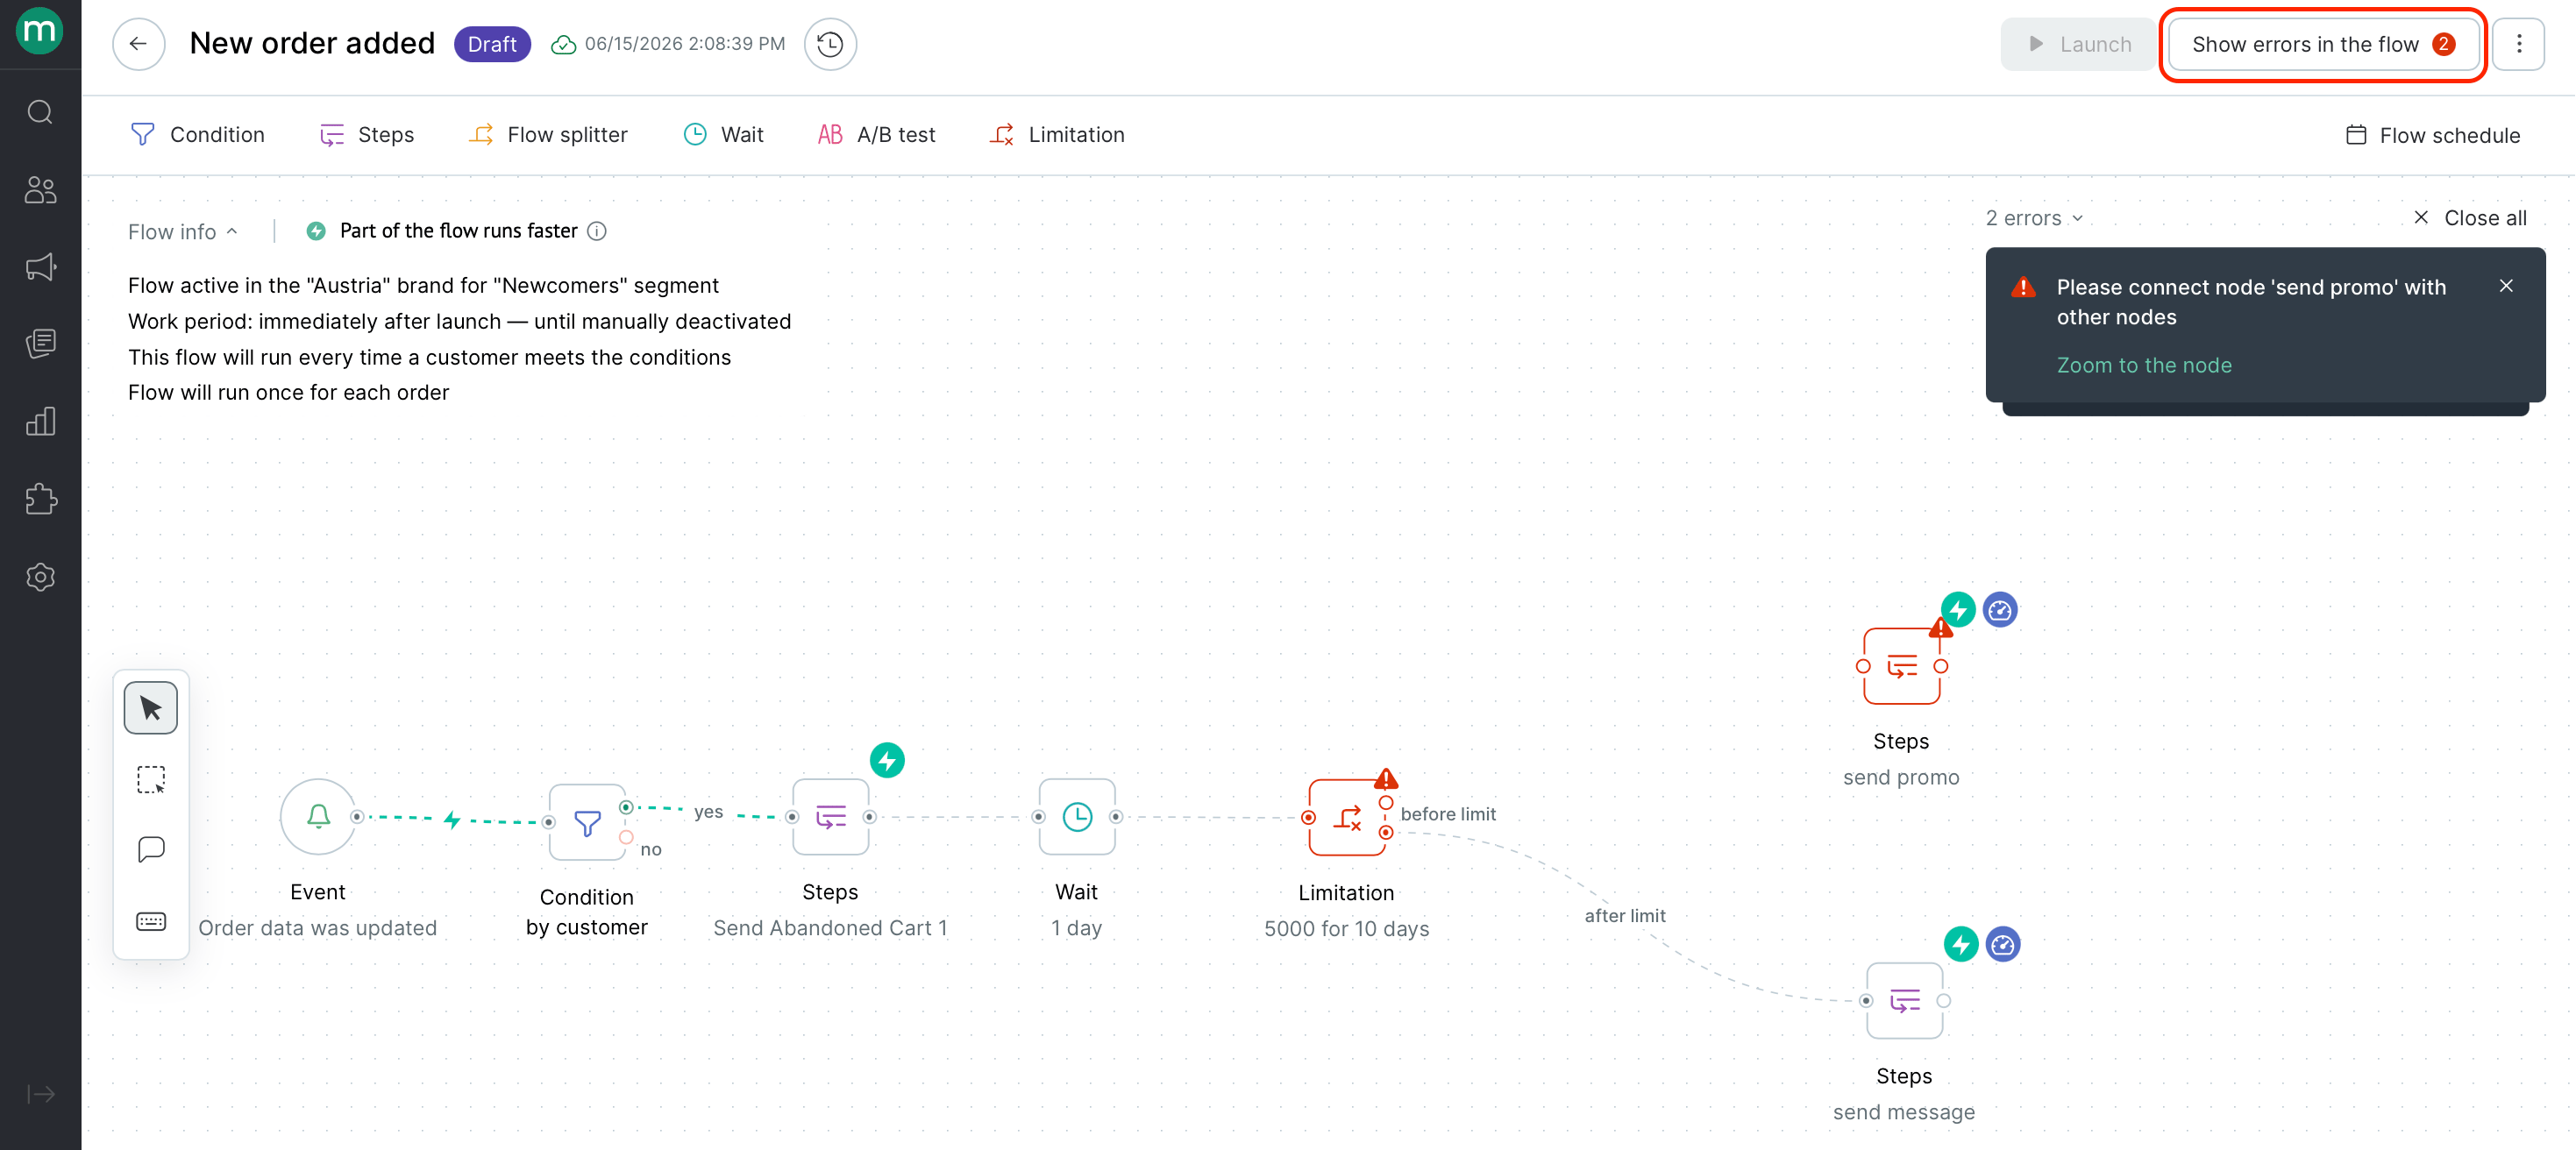
Every change is saved automatically.If you can’t launch your draft, click Show errors in the flow in the top right corner to see what’s blocking it. You can jump straight to the problem by clicking the link in the popup.
Launching a flow
Test mode
Use test mode to verify your flow logic before going live. You can preview how contacts are routed through each branch and generate test messages — step groups won’t execute and wait blocks are skipped.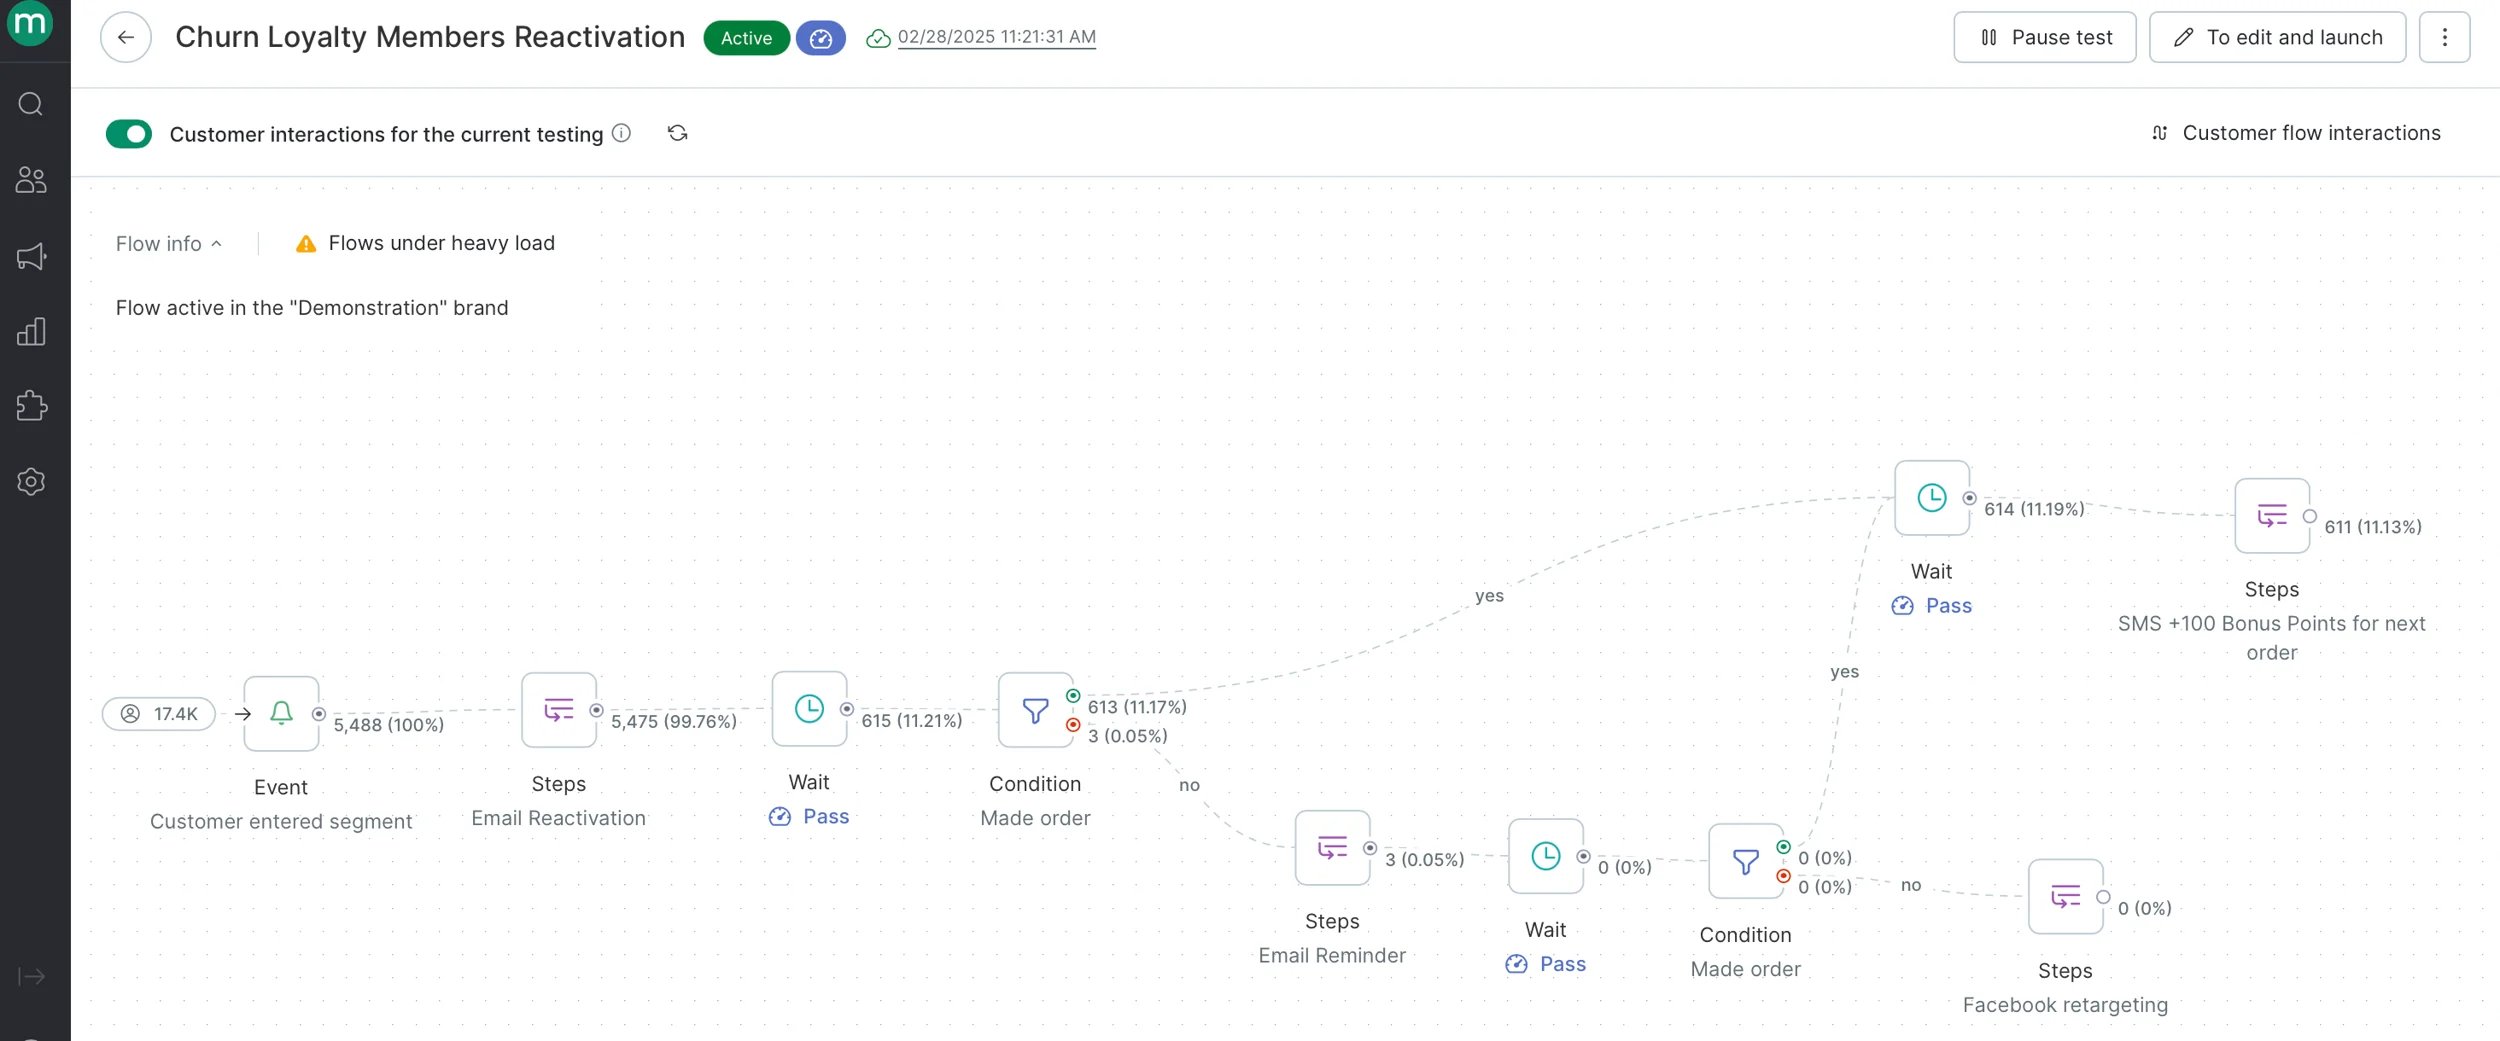
Editing a live flow
1
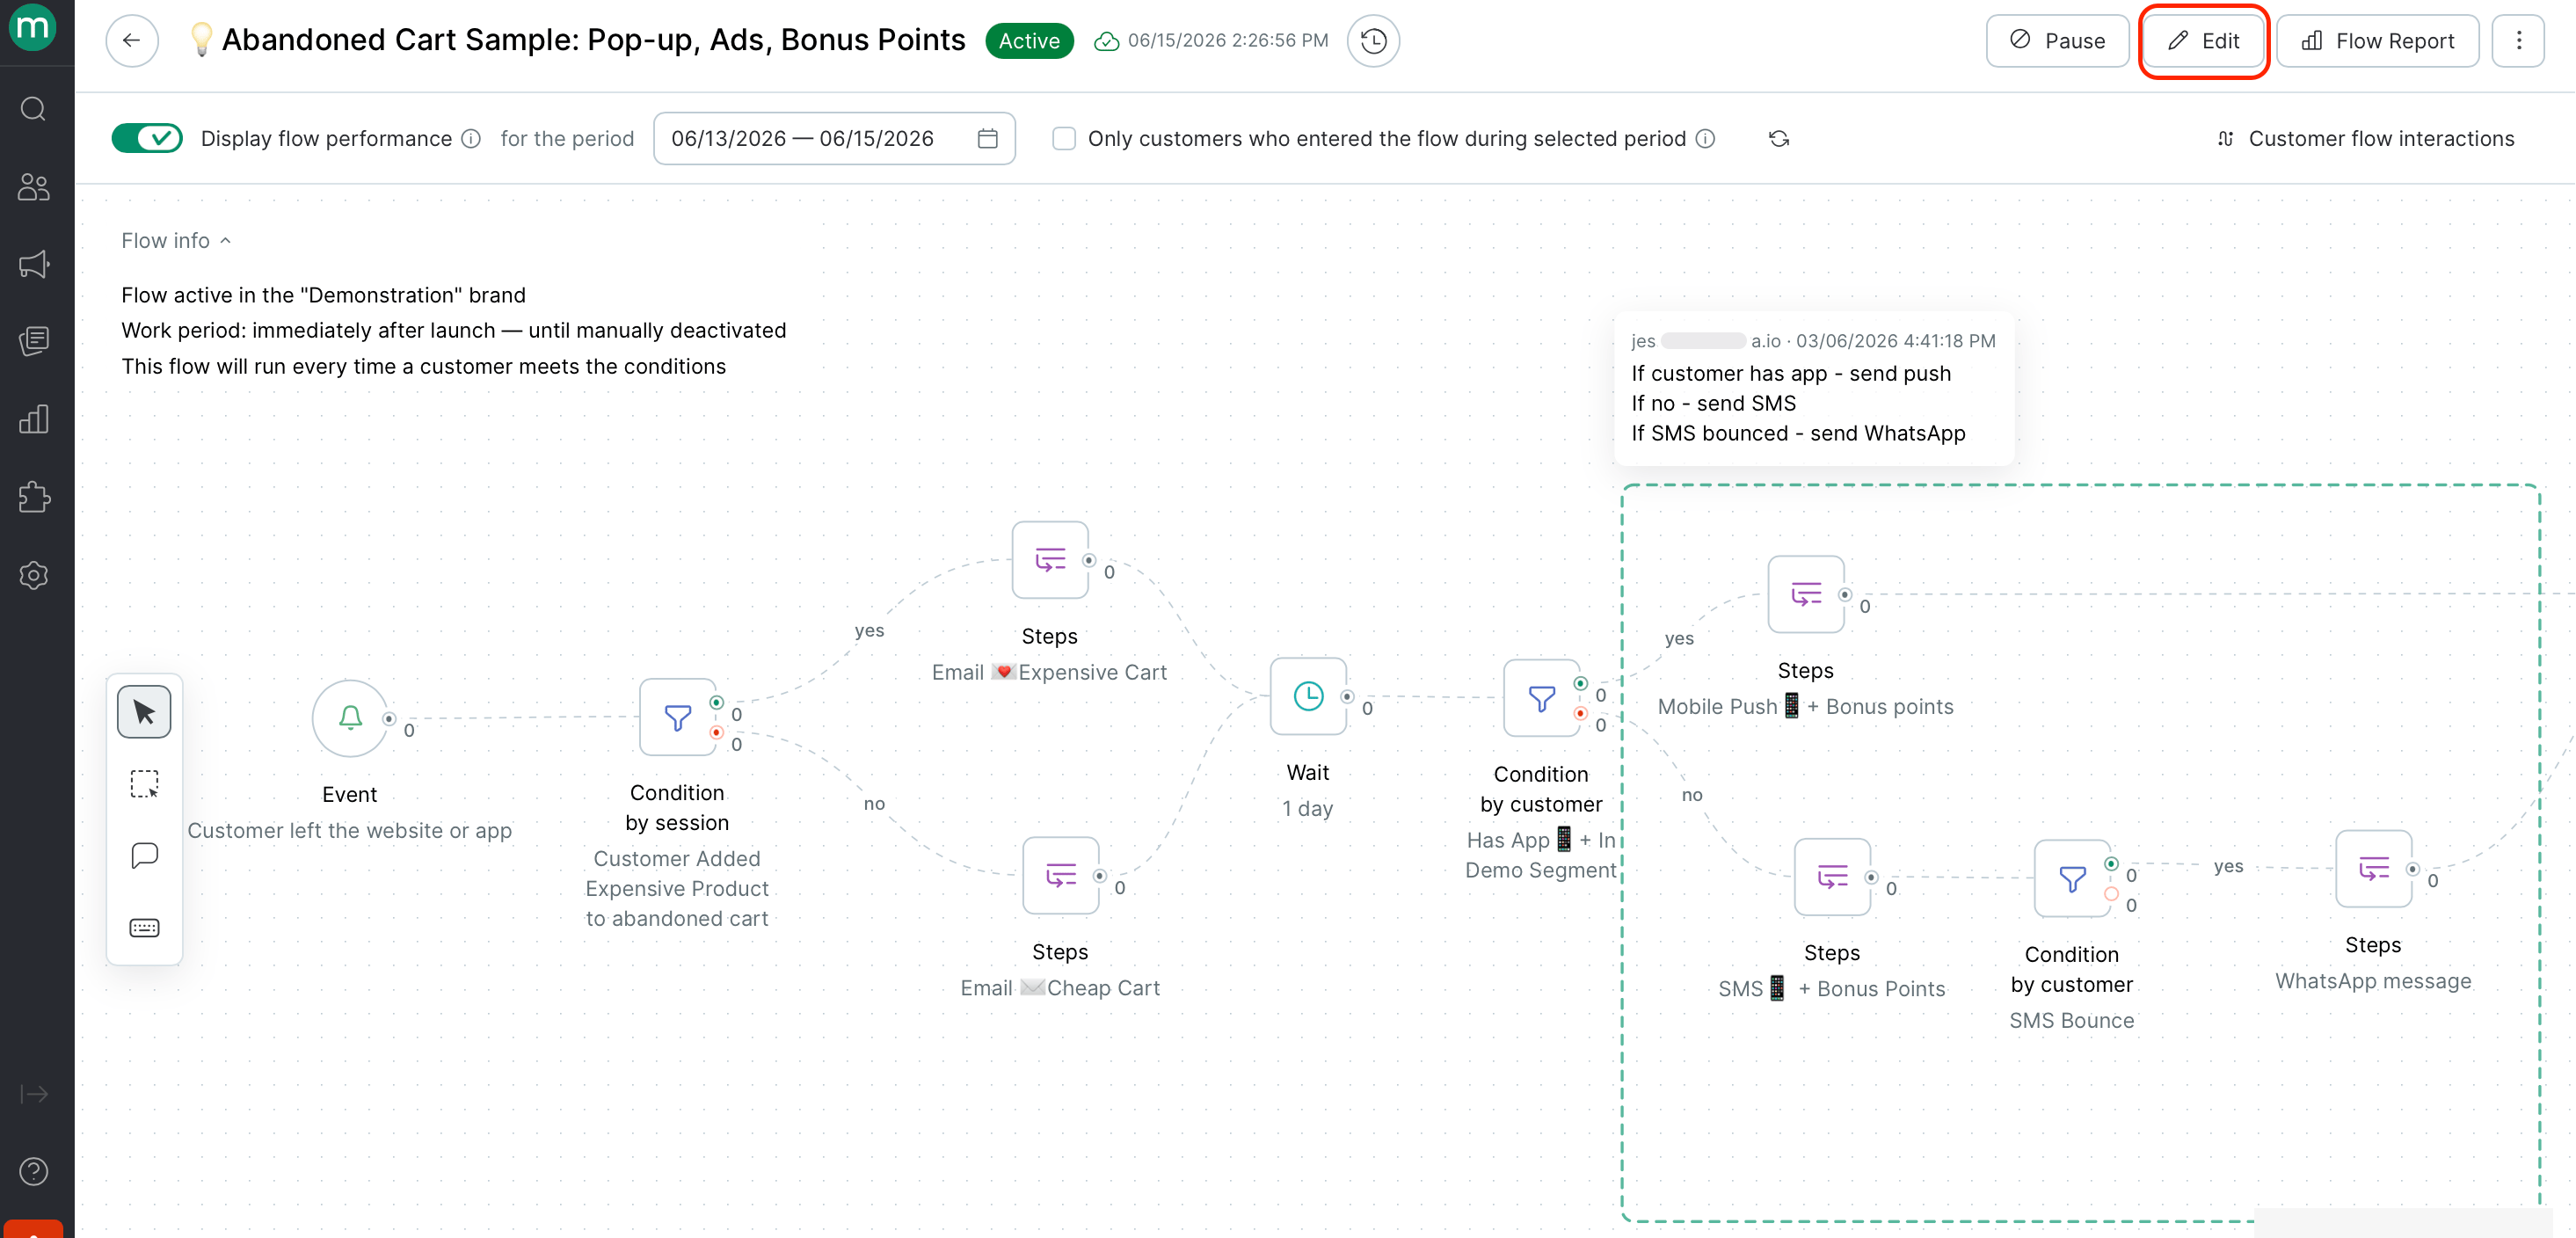
Click Edit
2
Make your changes
Edit the draft as needed.
3
Click Launch
The draft goes live and the previous version stops.
To discard your changes, select Delete draft from the menu.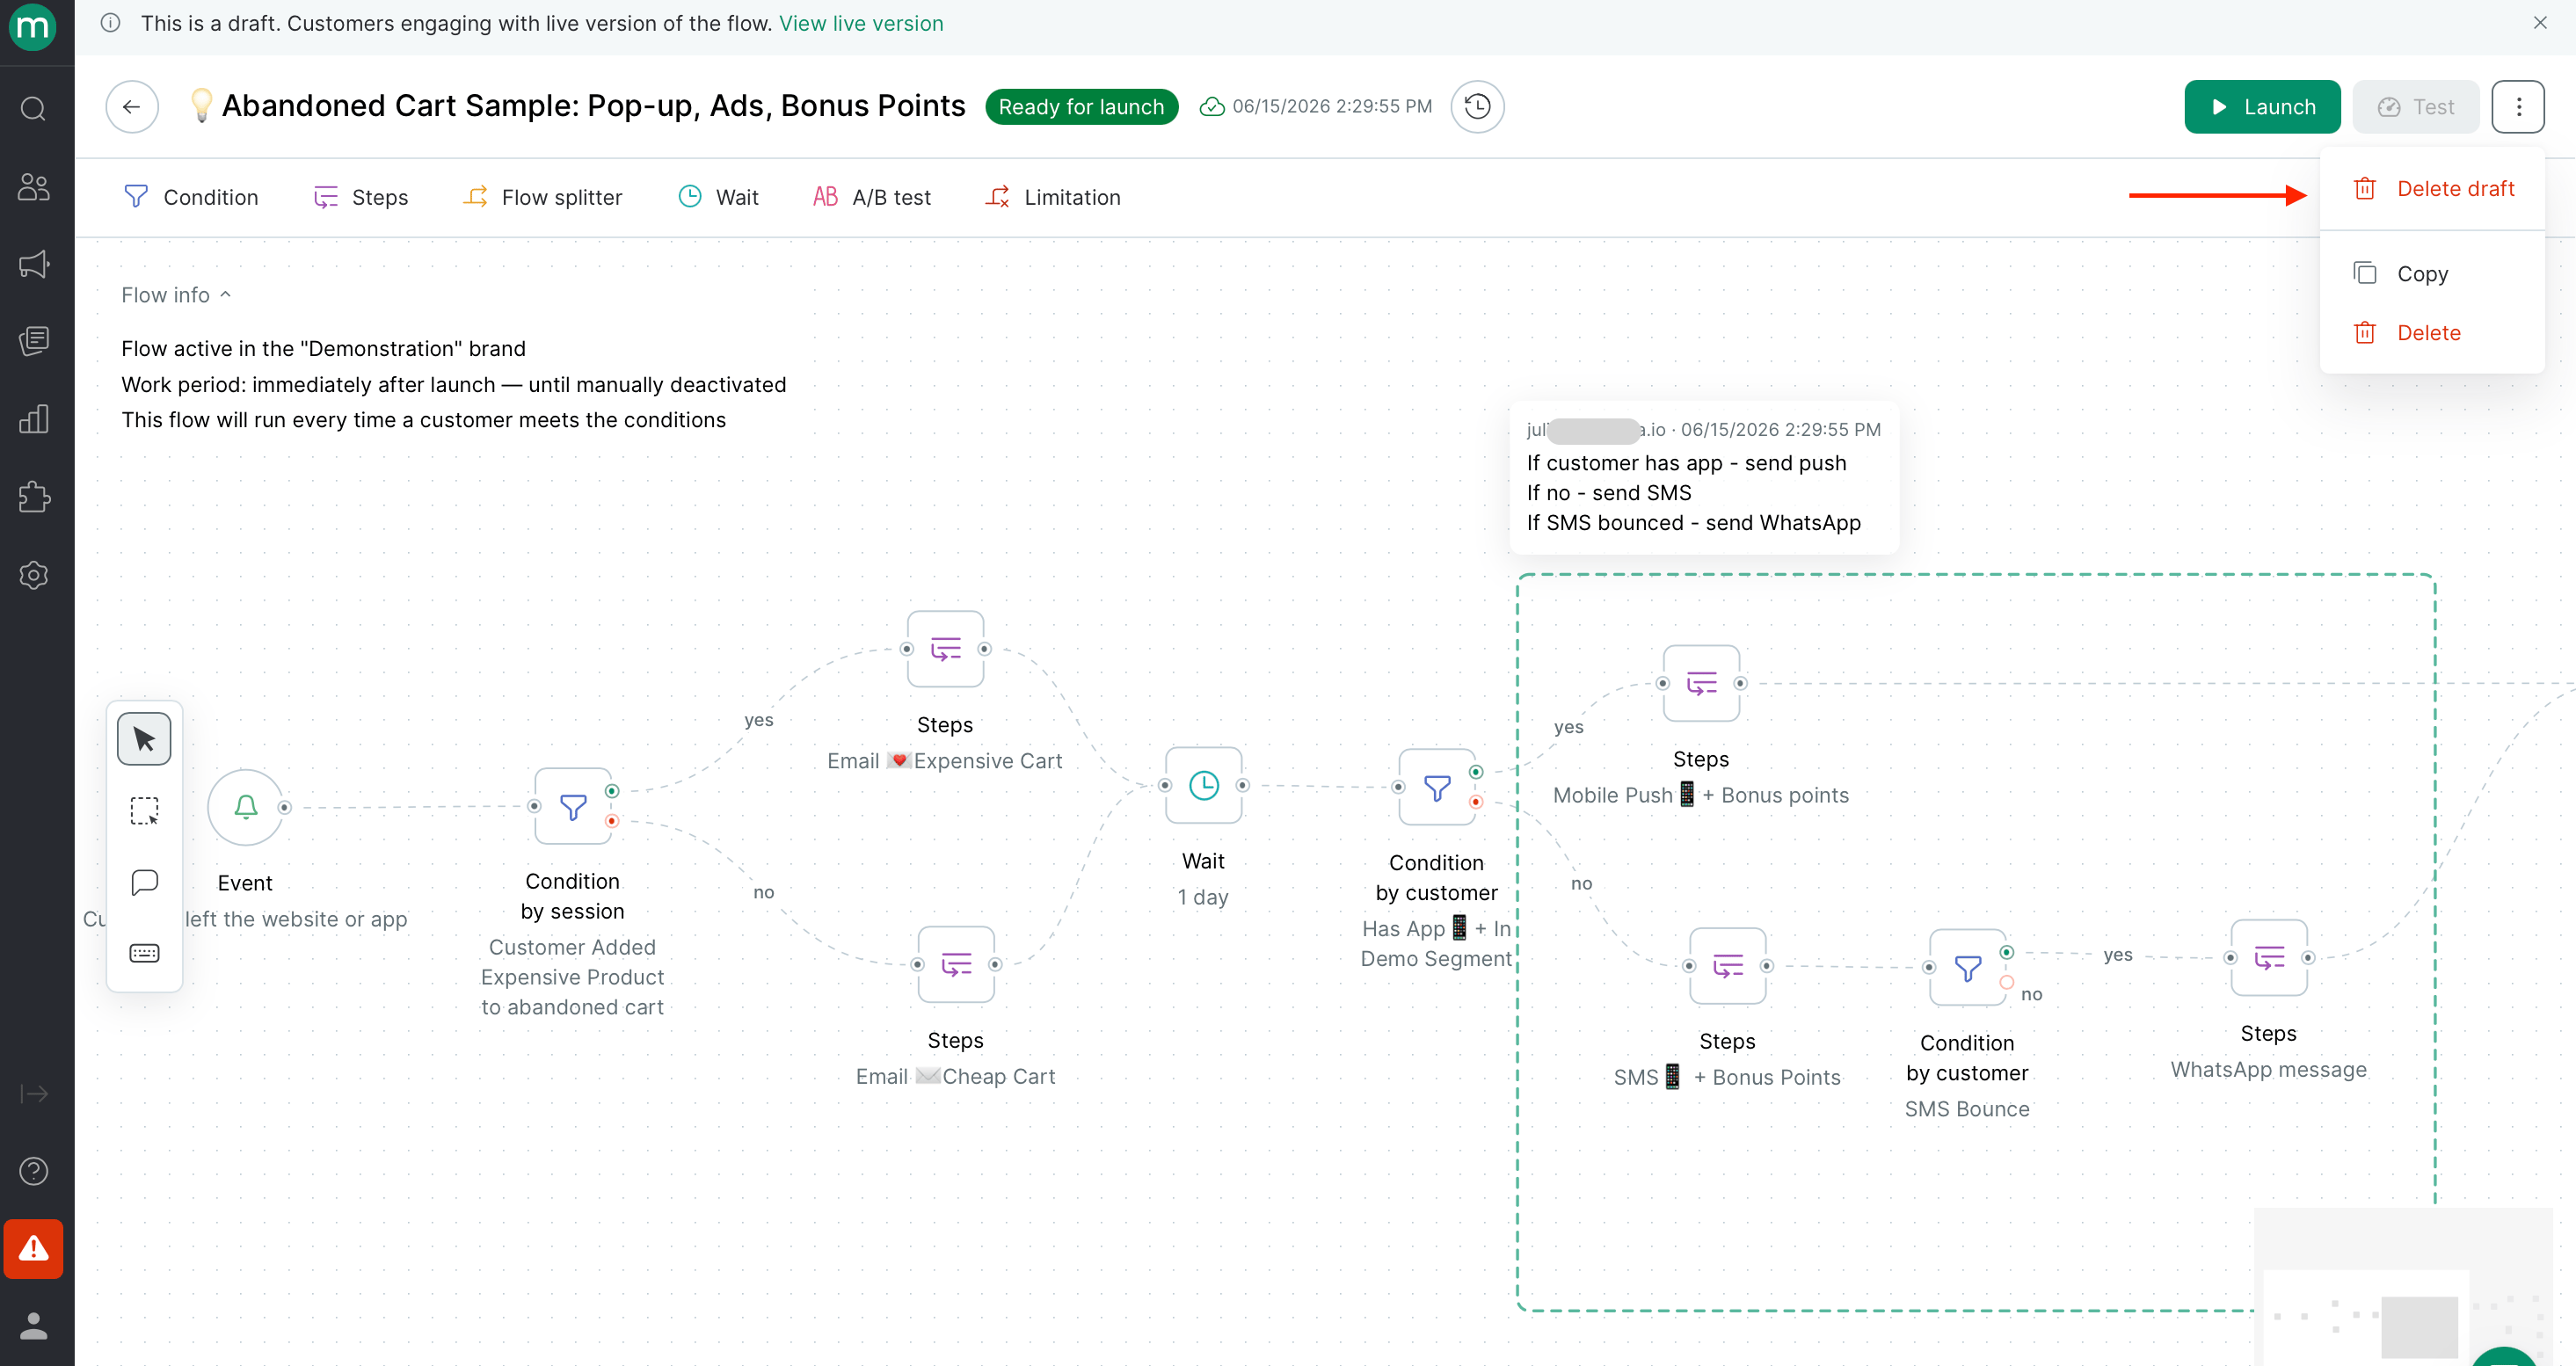
Version history
Click the clock icon next to the flow name to open version history. Each entry shows when that version was launched and stopped. Click any version to view its configuration at that point in time.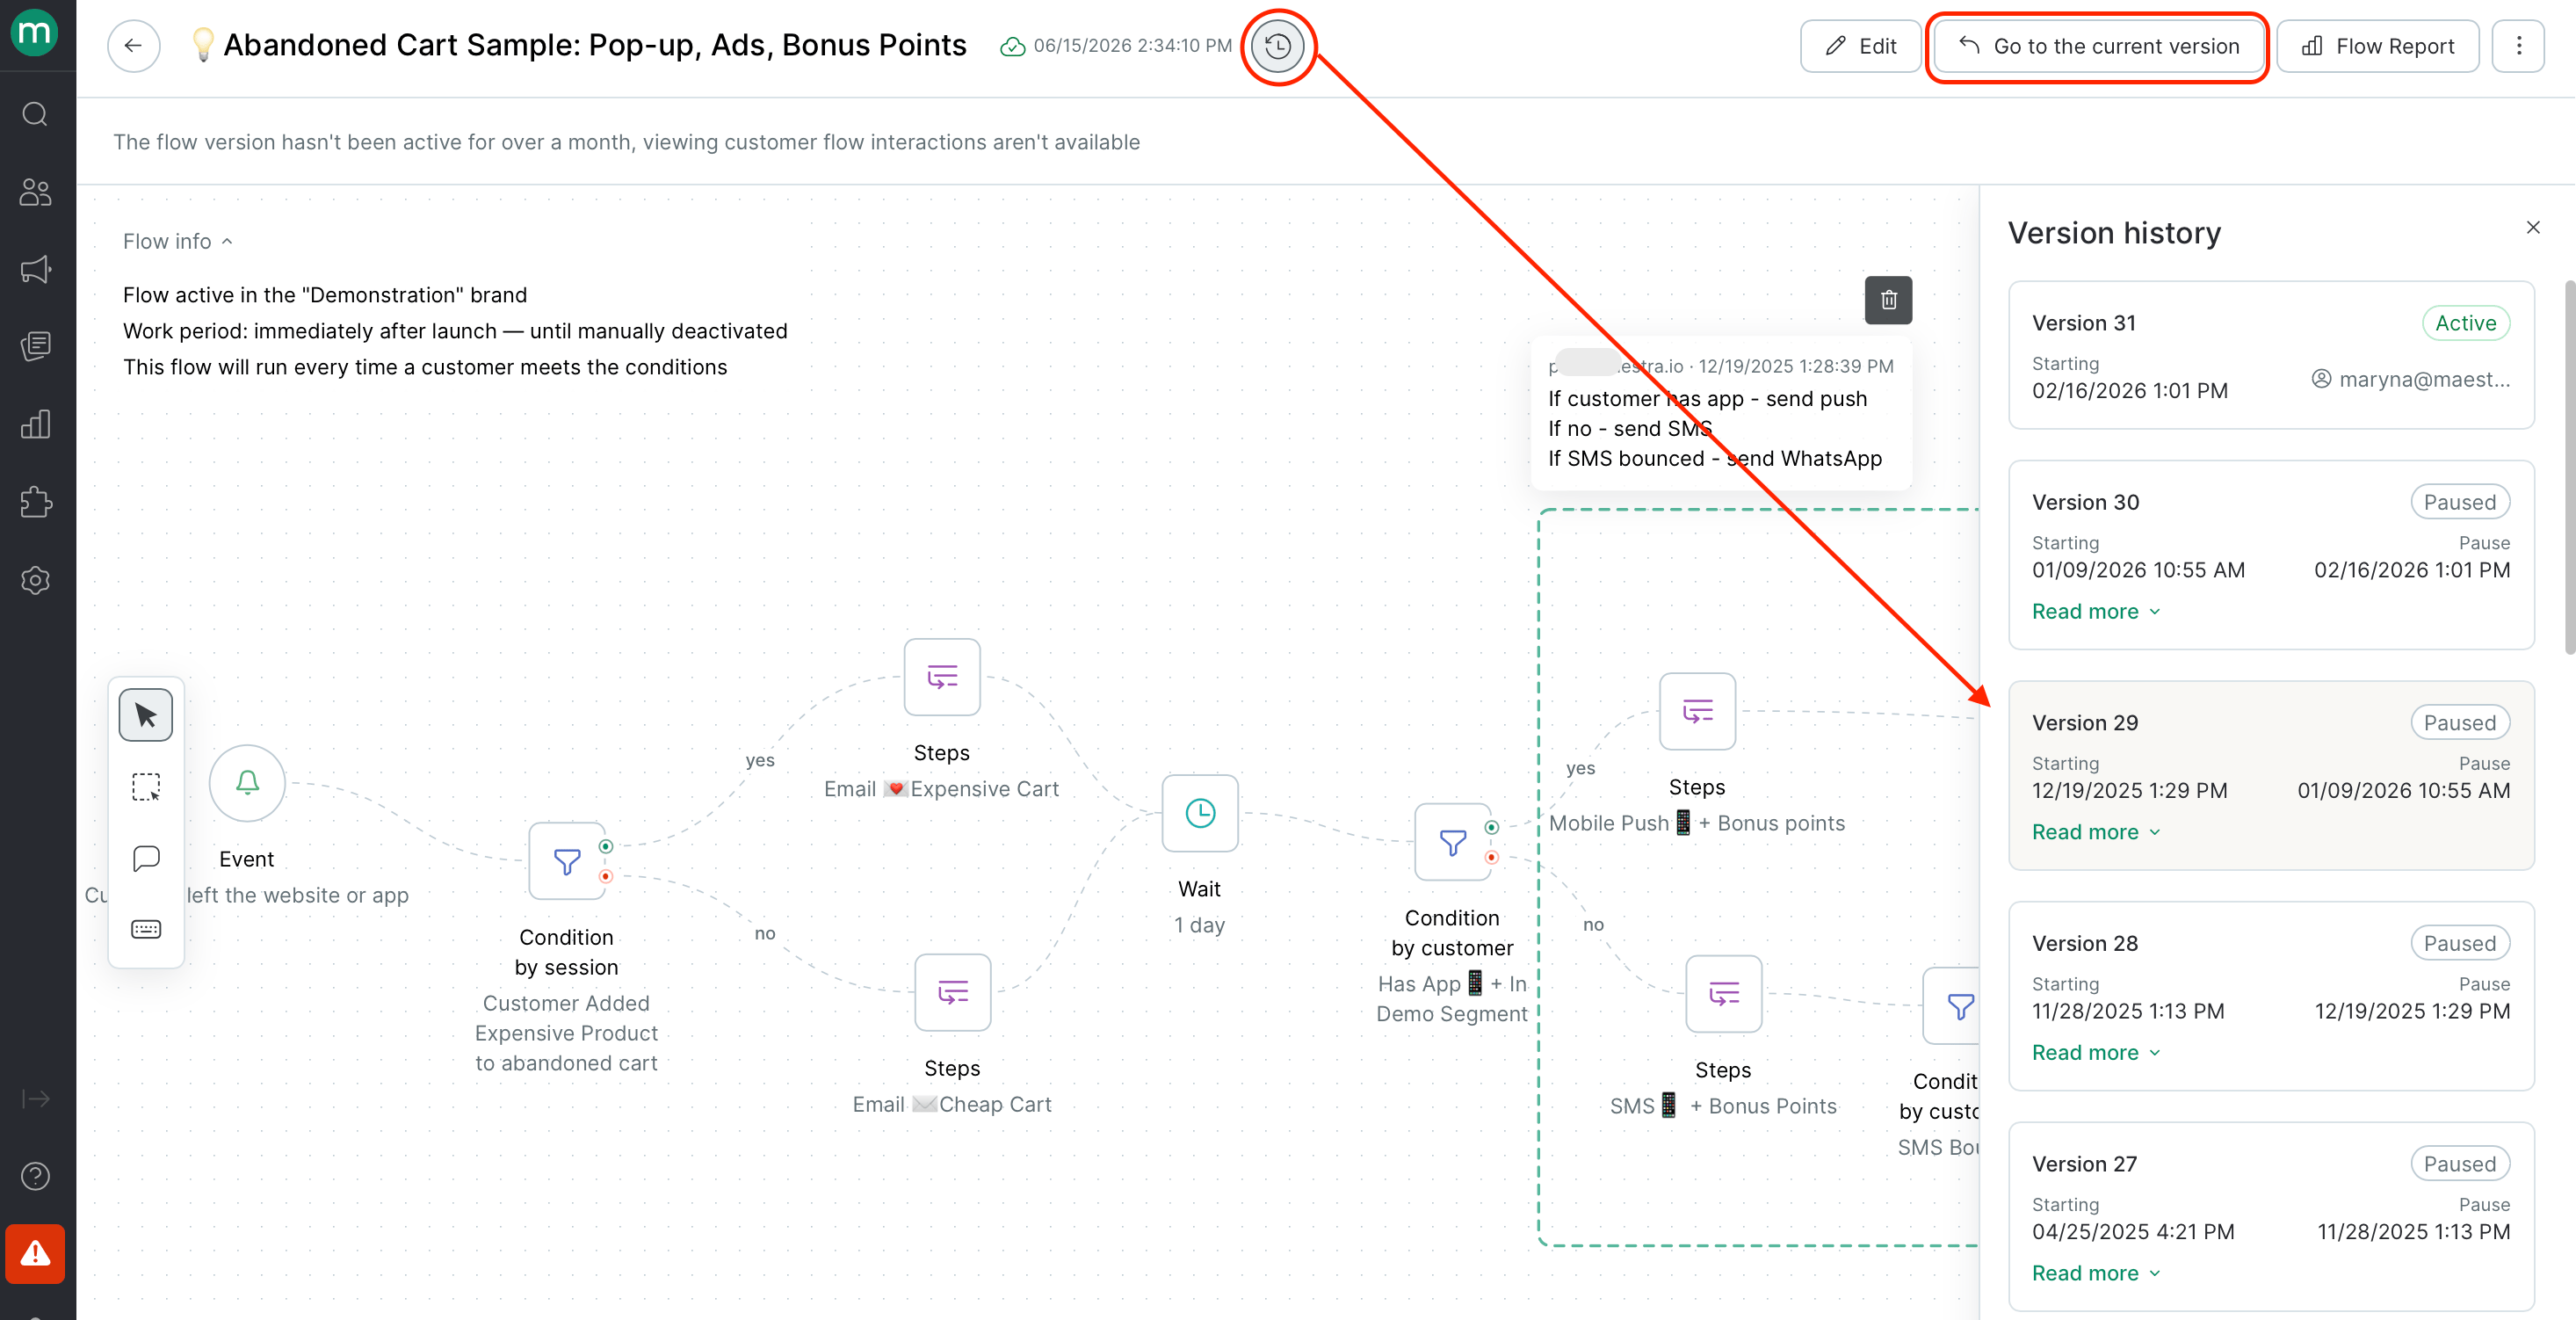
Copying a flow
Select Copy from the flow menu
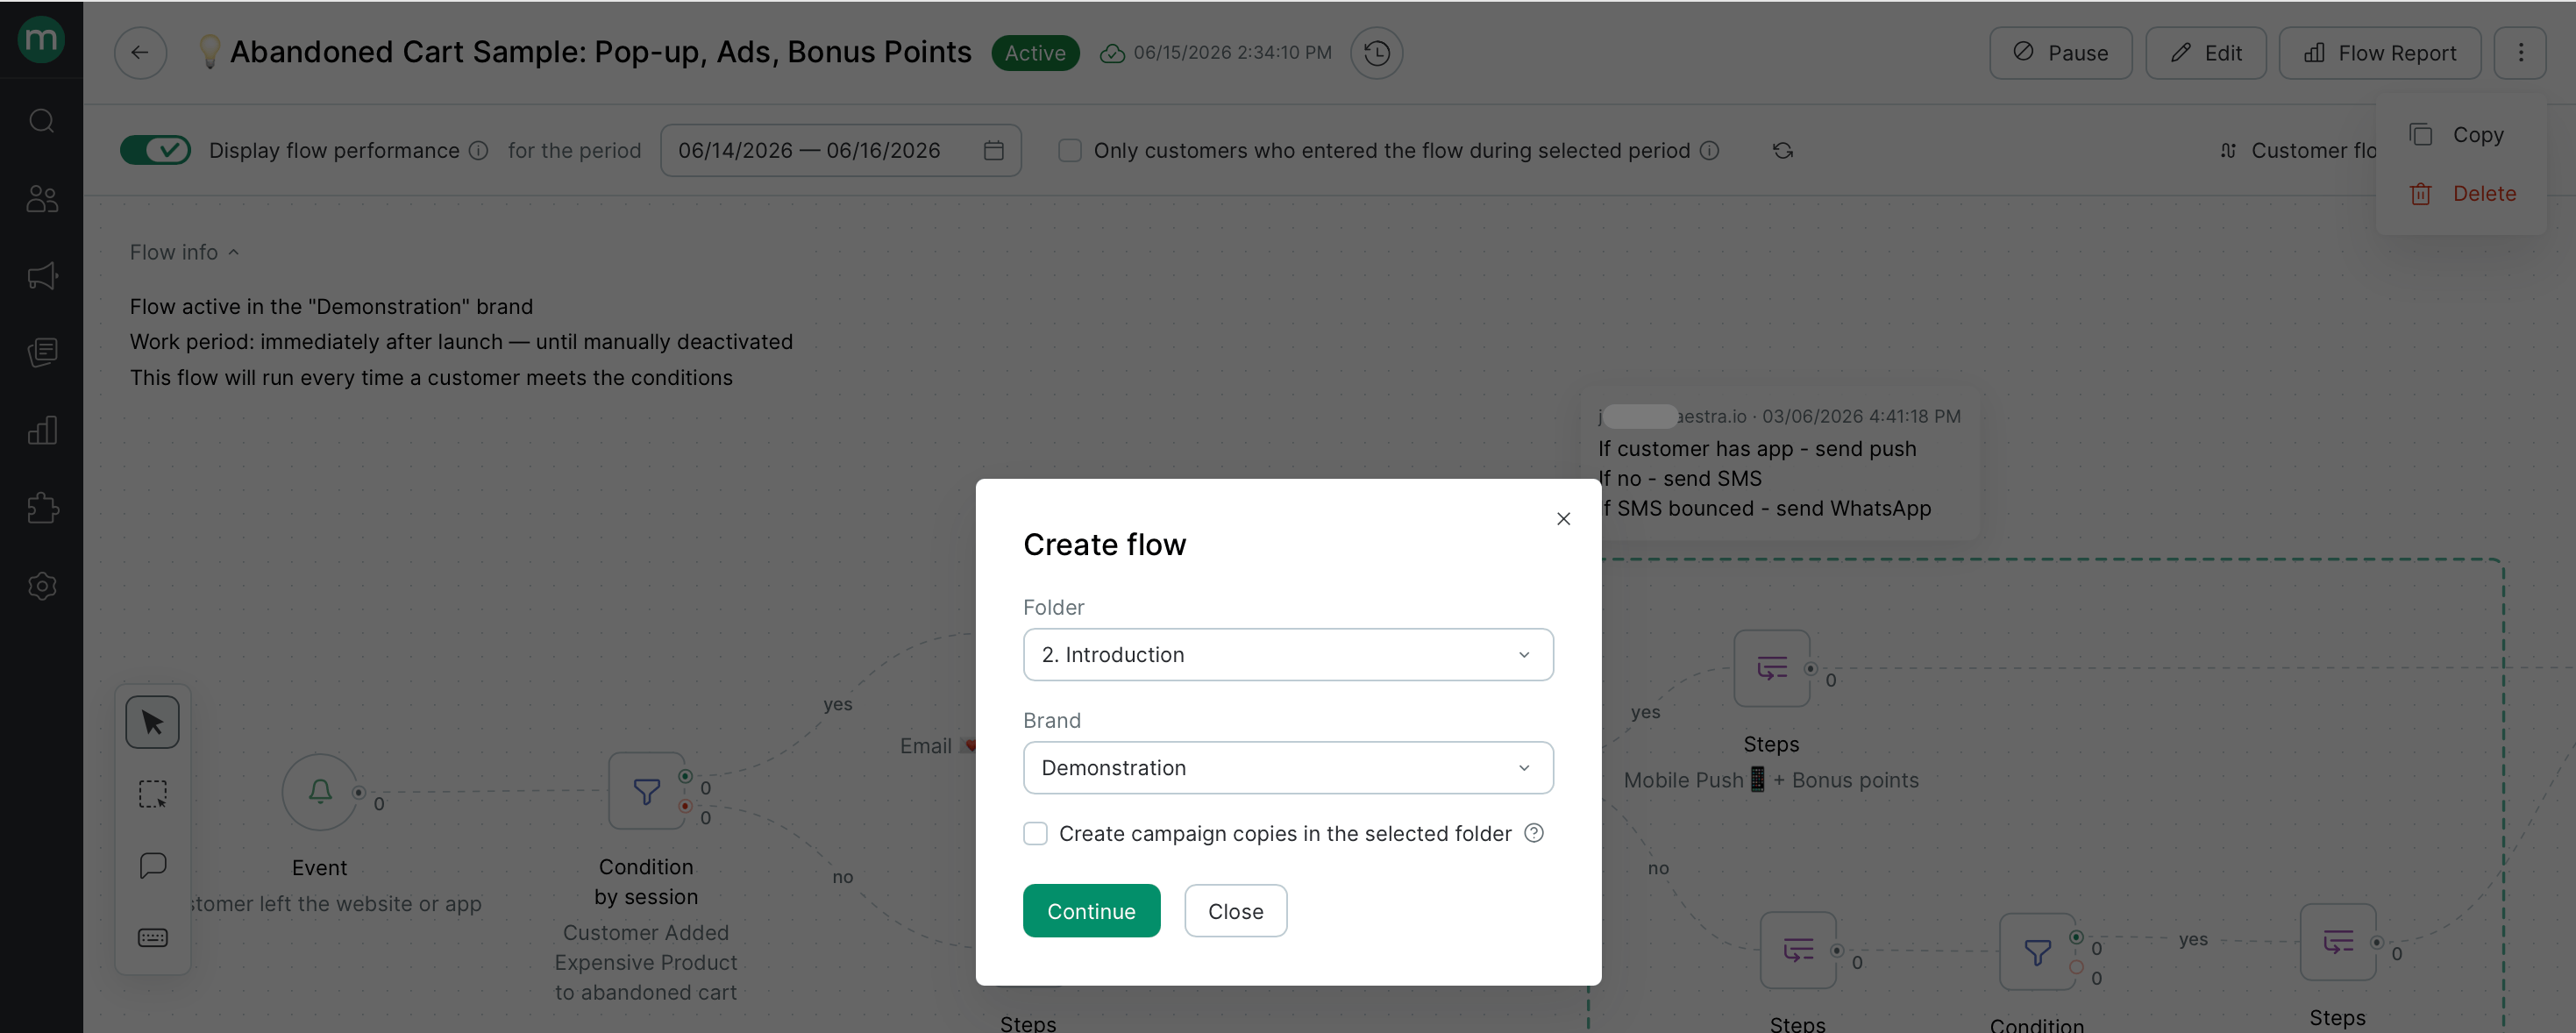
- If the flow sends campaigns, check Create campaign copies in the selected folder to automatically duplicate them in the new folder.
- If the flow issues an action, the step group will be copied without that step — you’ll need to create a new action template and add it to the copied flow manually.
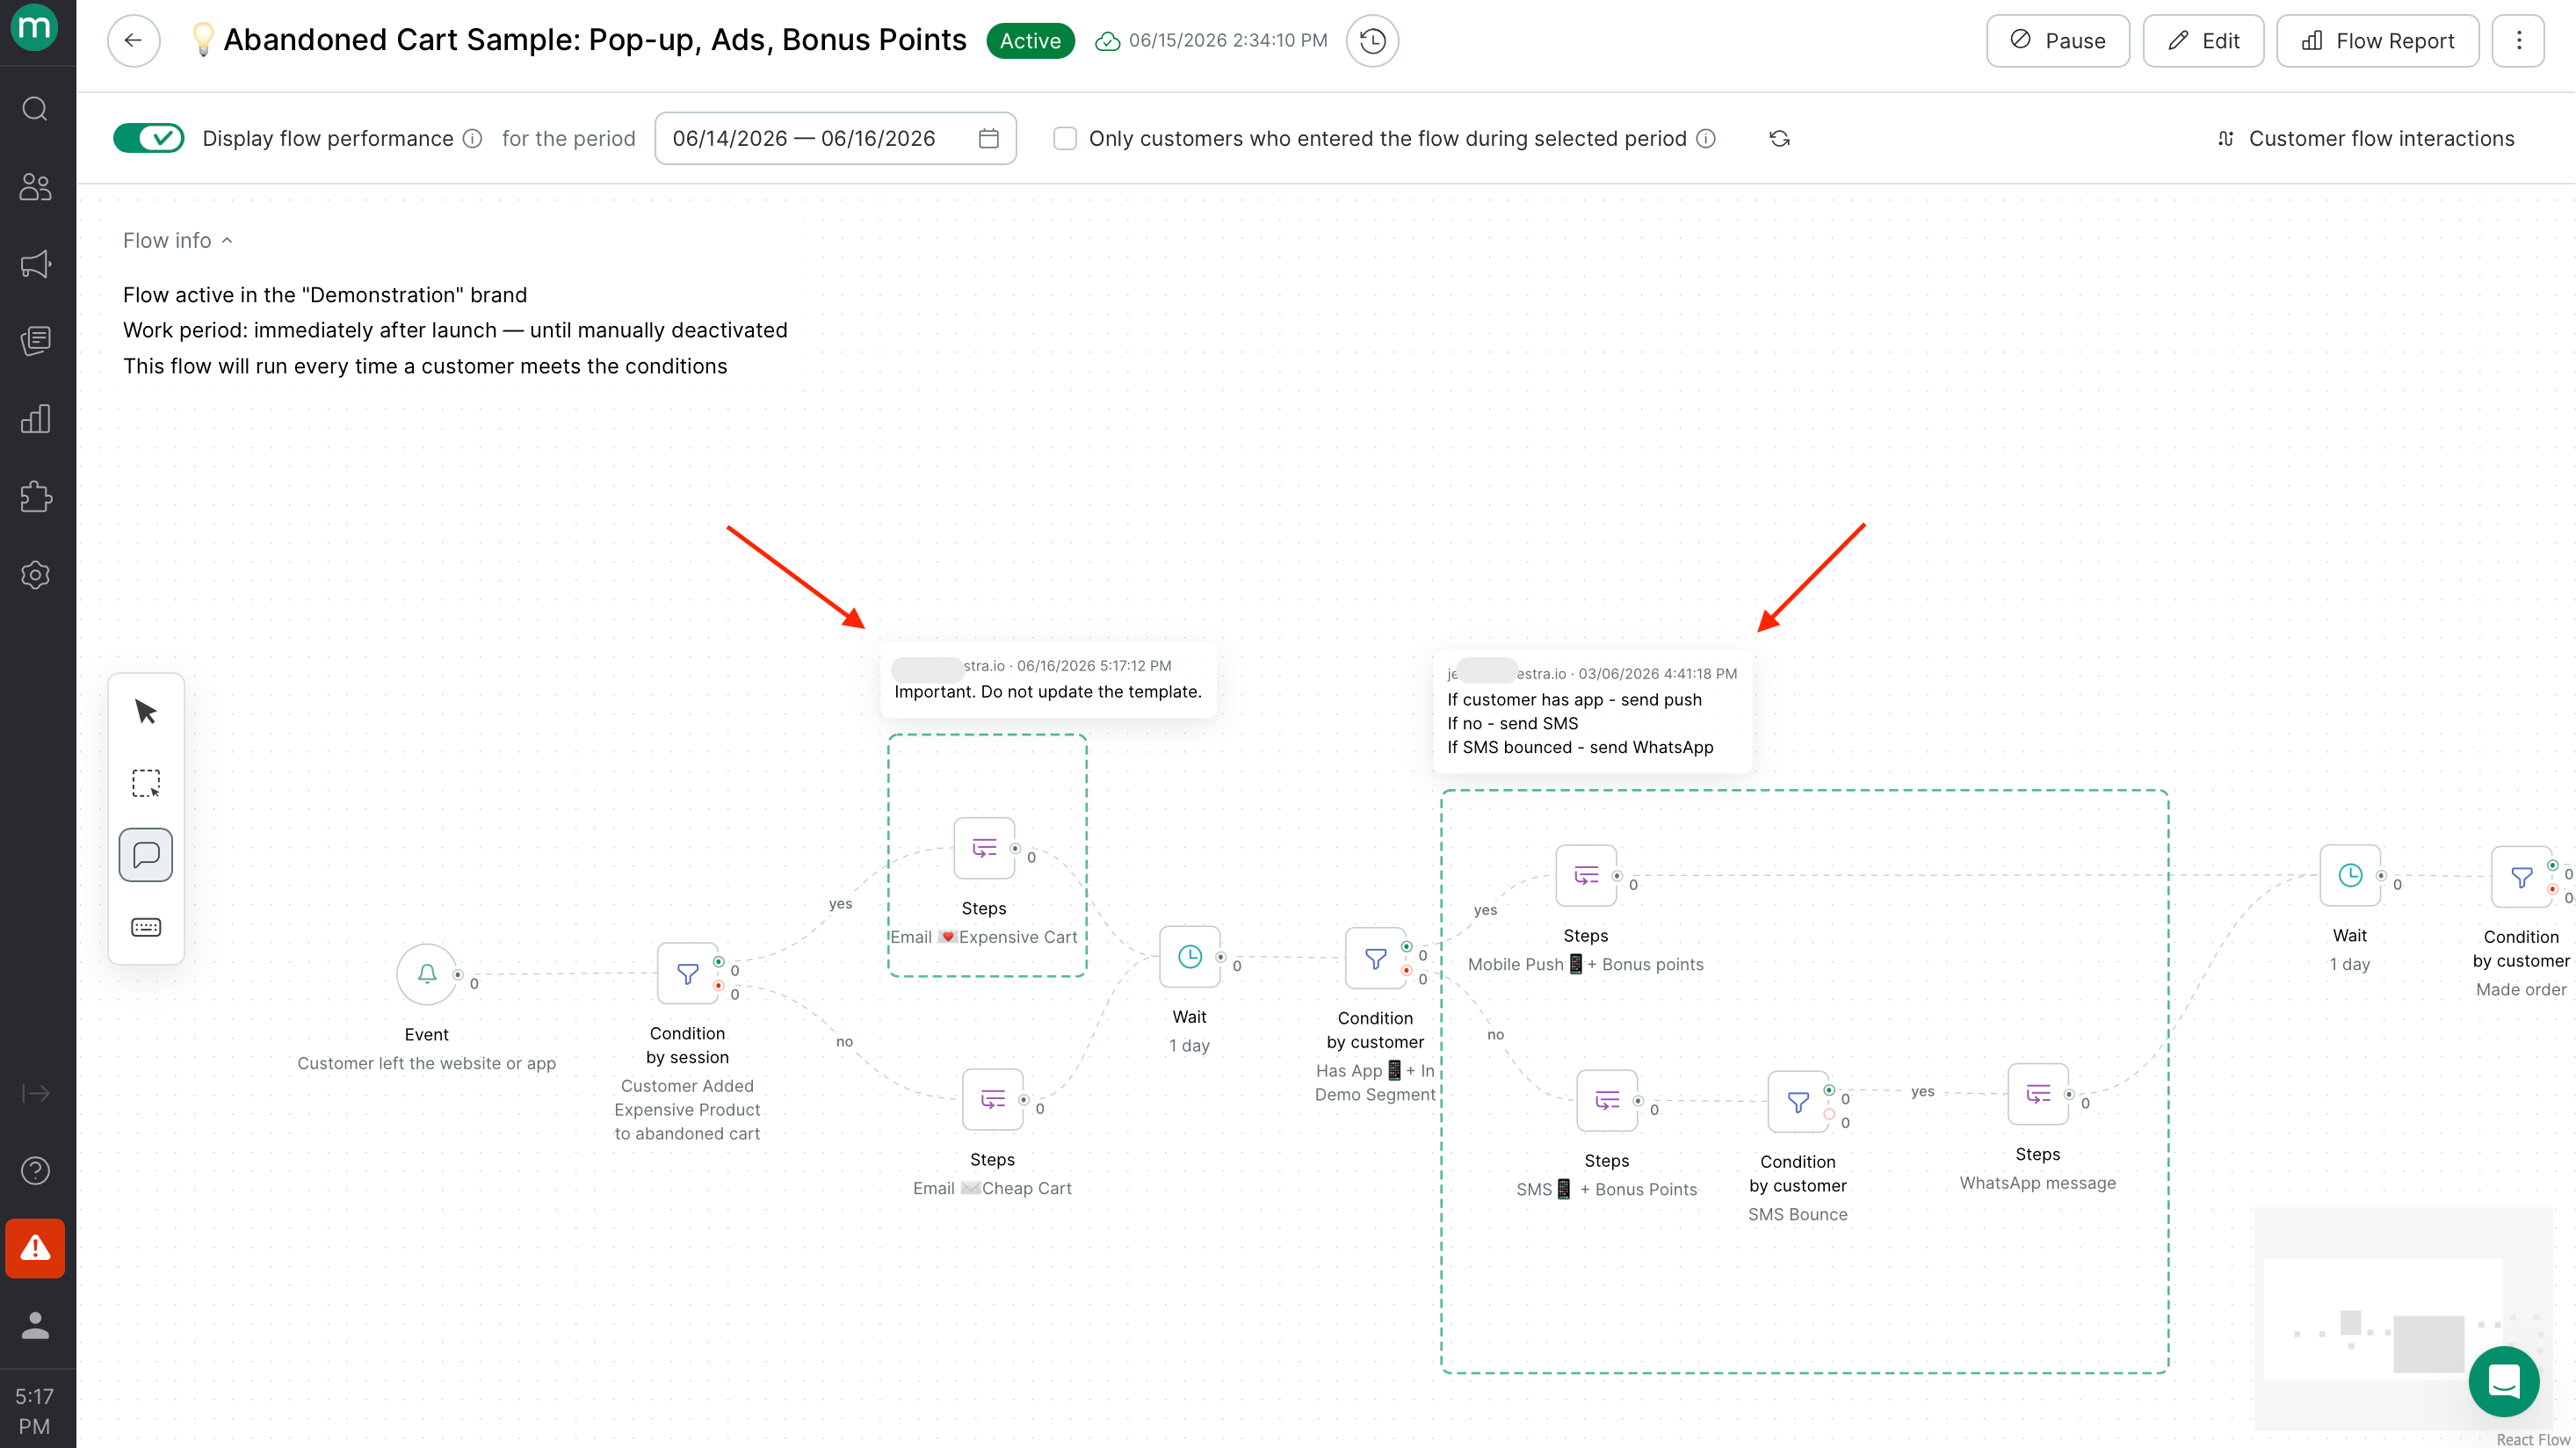
Comments
Comments let you leave notes directly on the flow canvas — useful for documenting logic or leaving context for teammates. To add a comment:1
Switch "Add a comment mode" using the left toolbar.

2
Click anywhere on the canvas, type (up to 500 characters) and save
Flow analytics
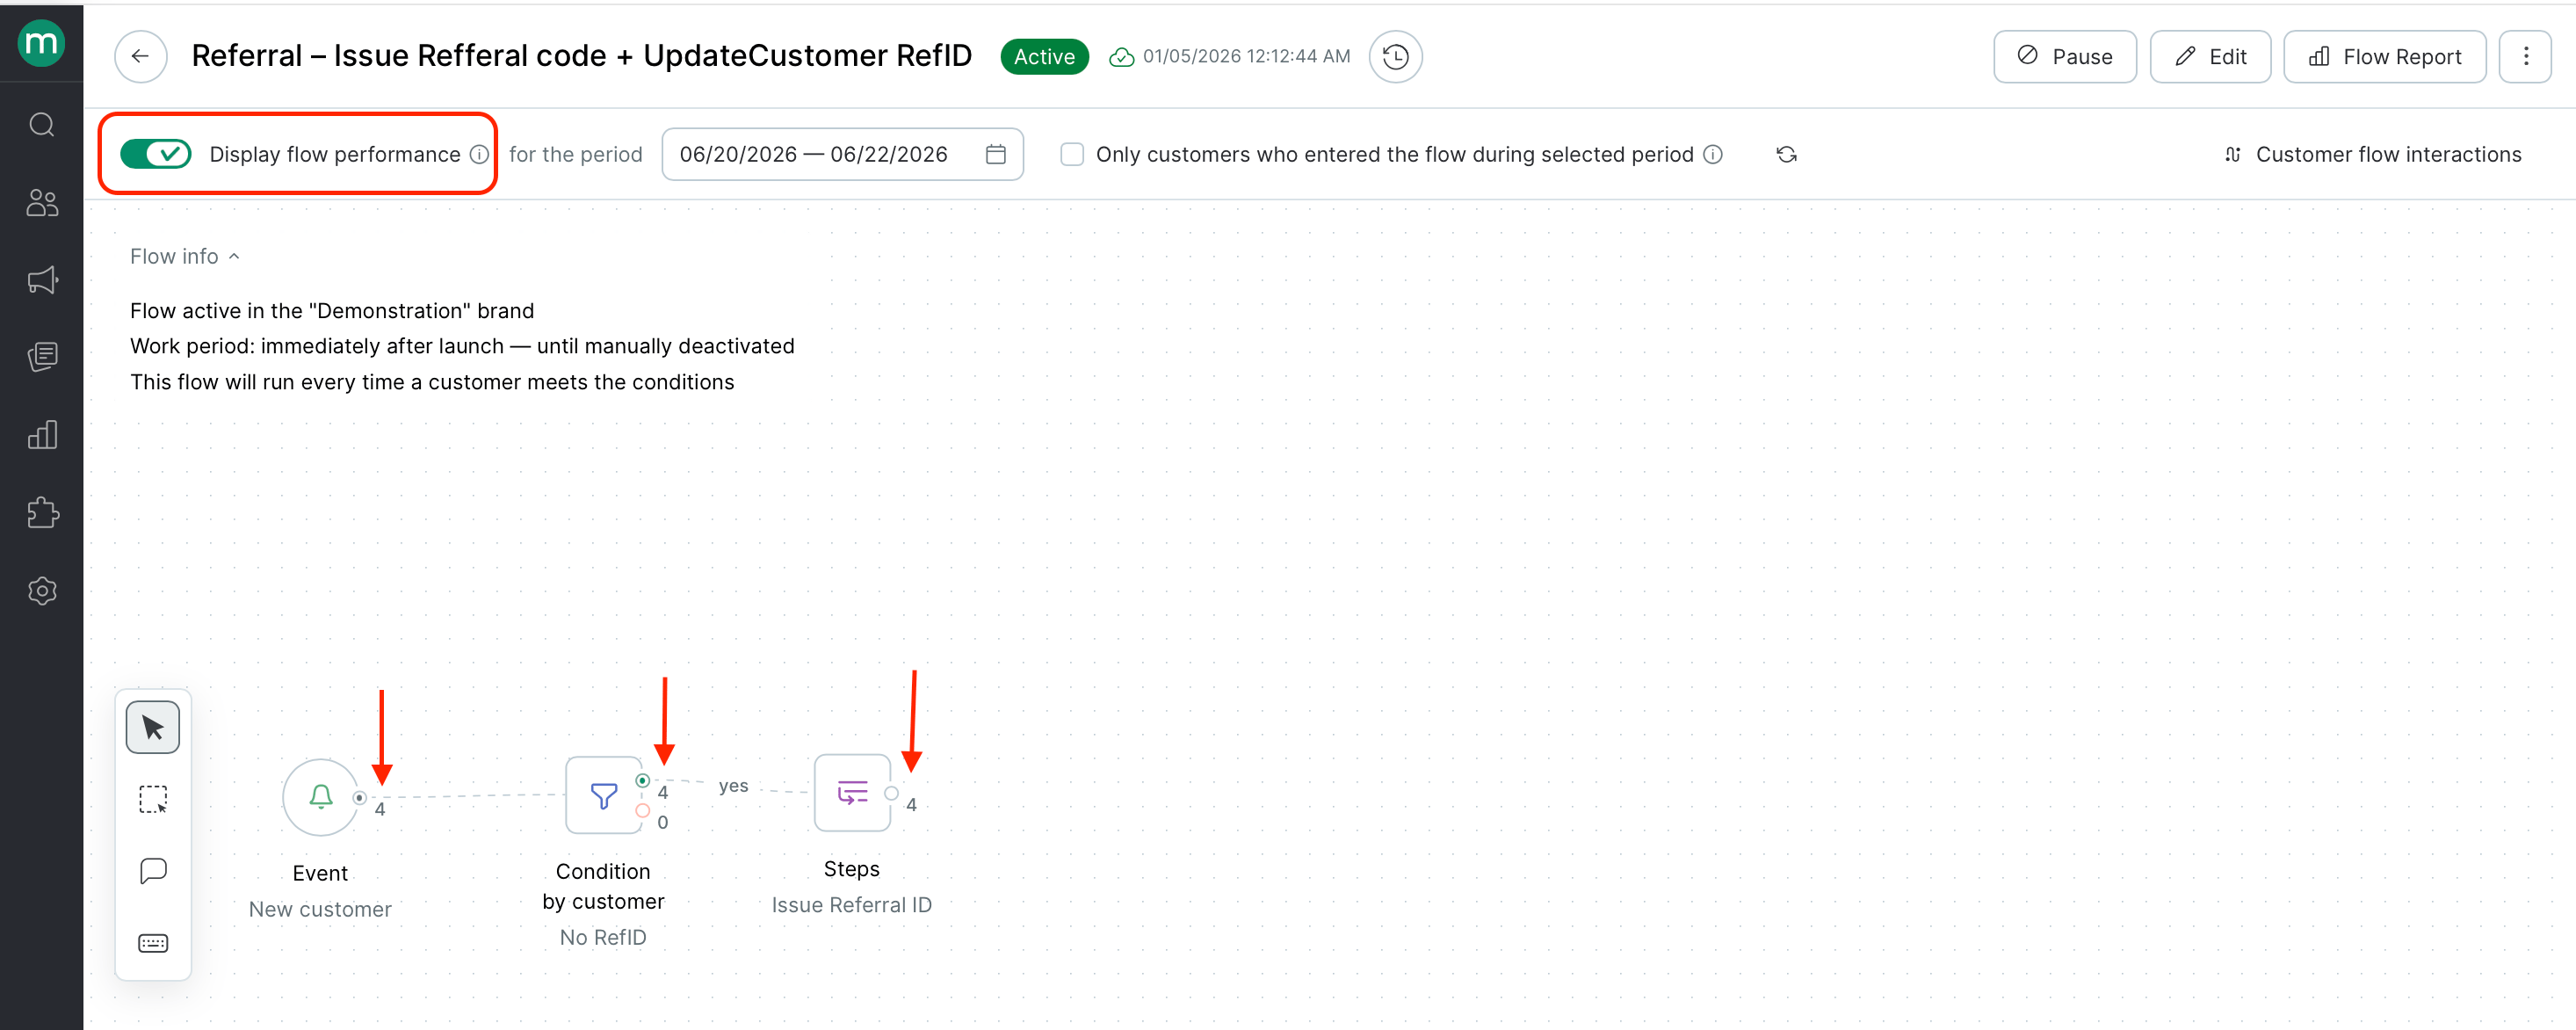
Run statistics
Once your flow is live, run statistics appear directly on each step. Use them to see:- How many contacts entered the flow
- How they moved through each branch and where they dropped off
- The most common step execution errors
- Send metrics for any messages in the flow
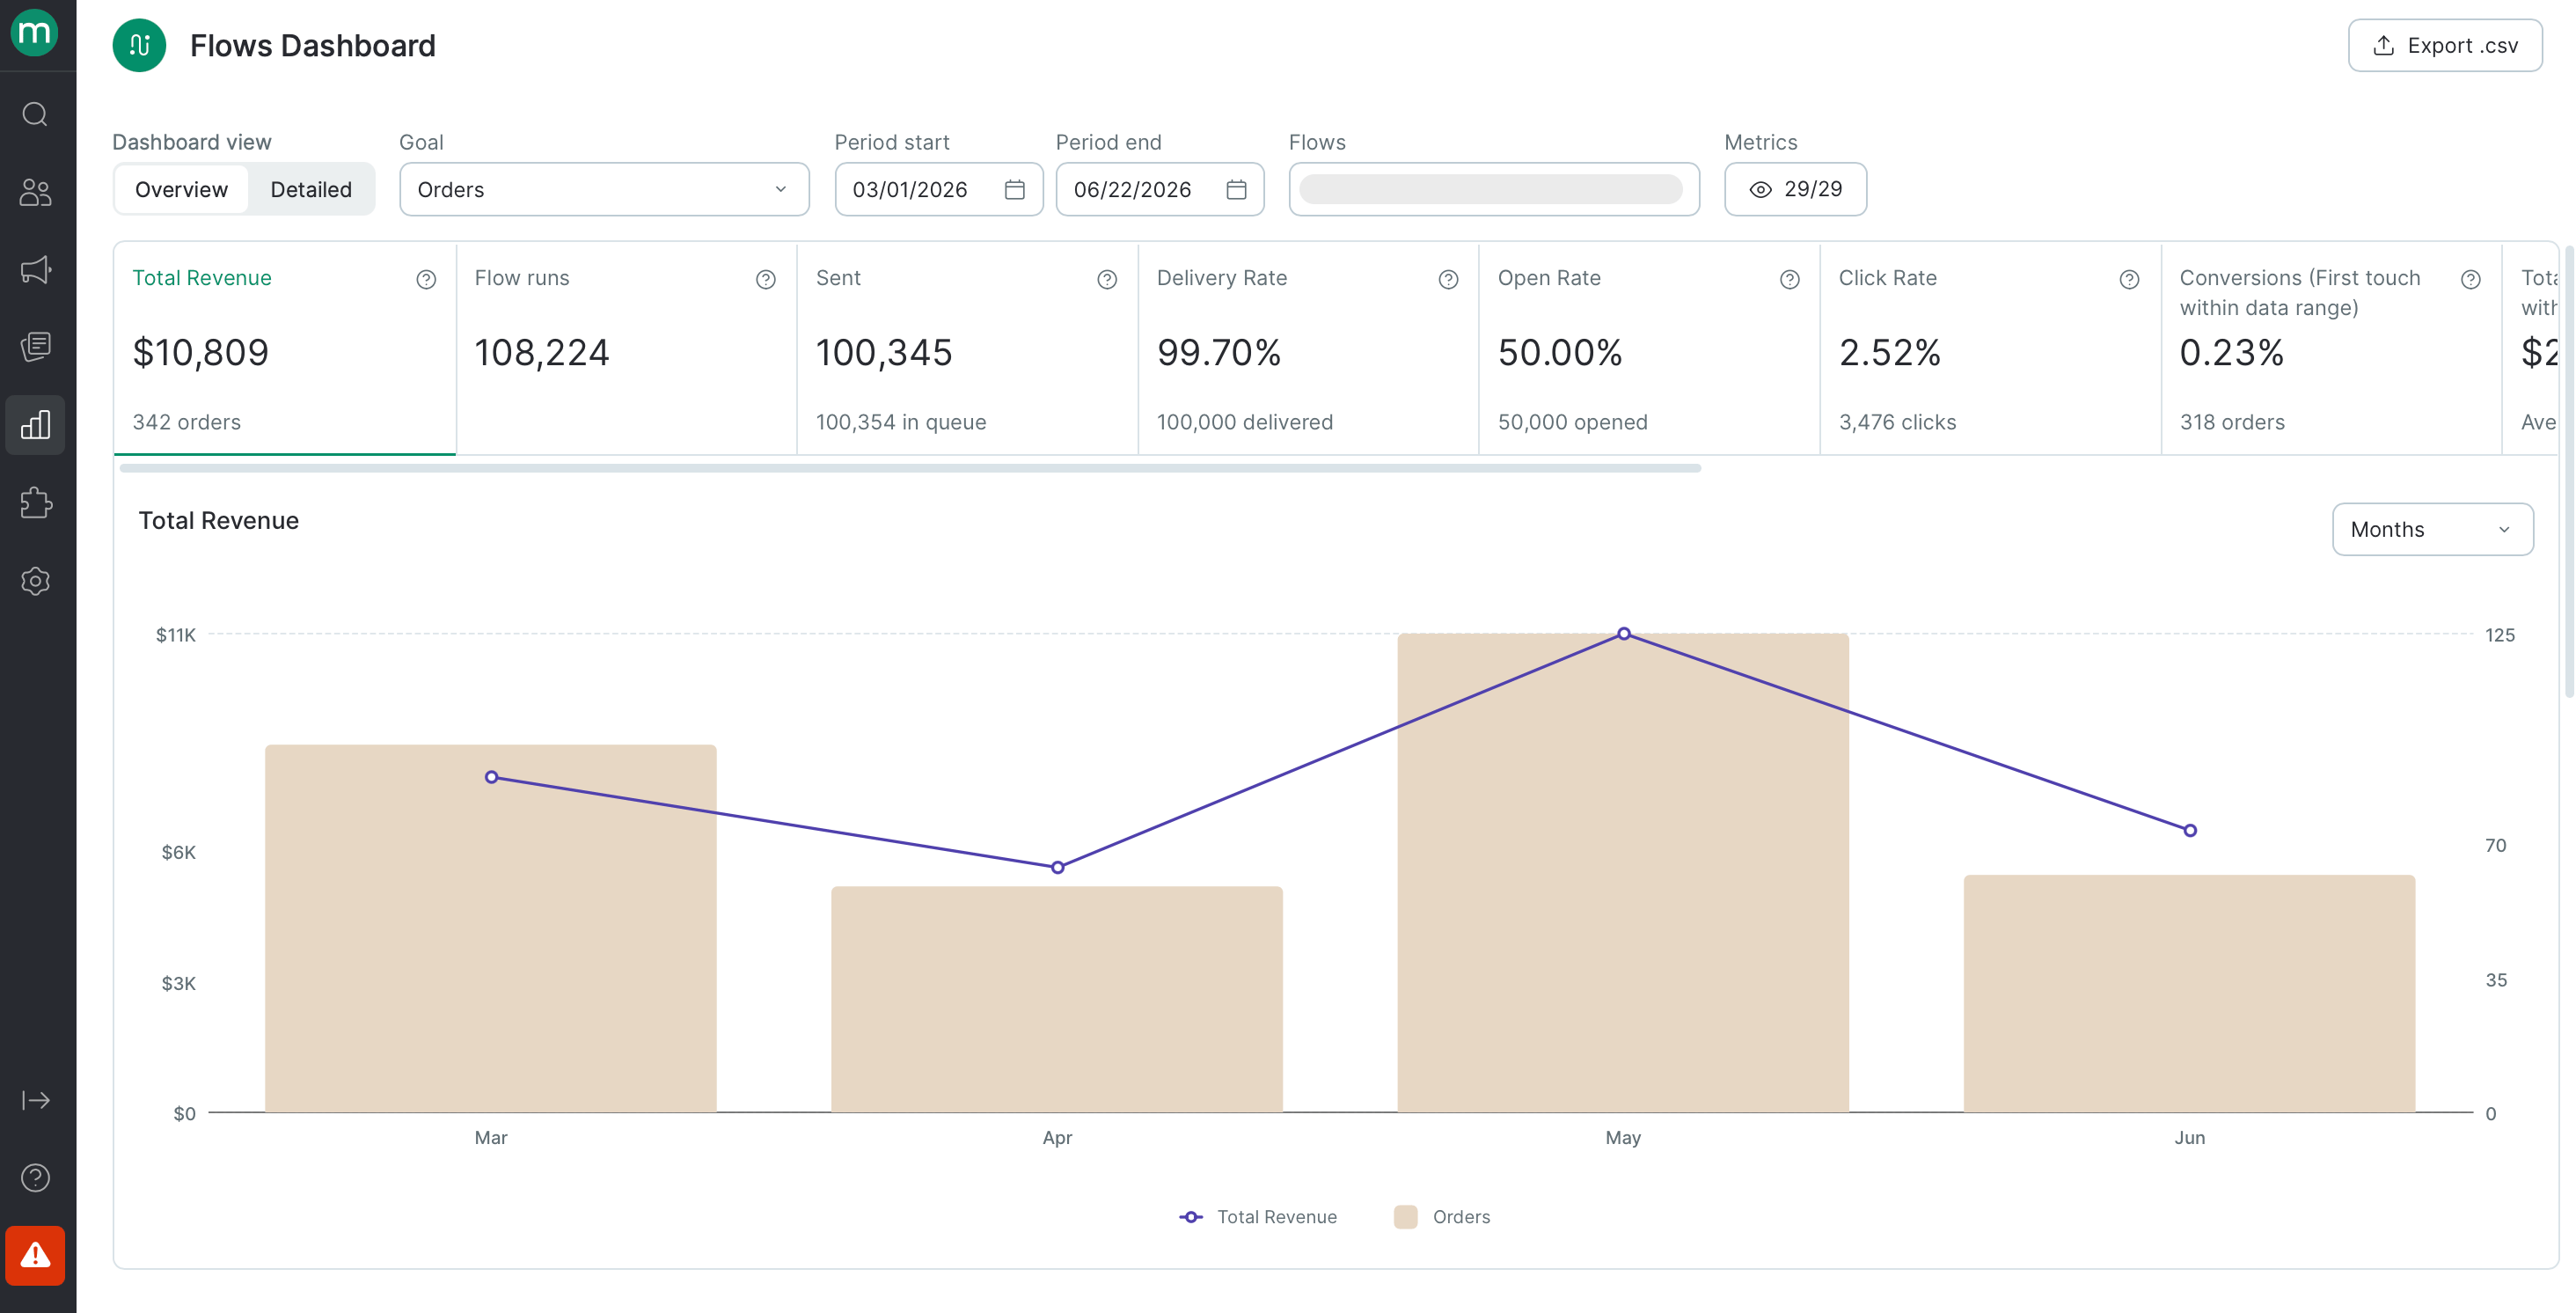
Reporting
Hover over Flow Report on the flow page for a summary of metrics since the first launch. \
Click to open the full Flows Dashboard for this flow.
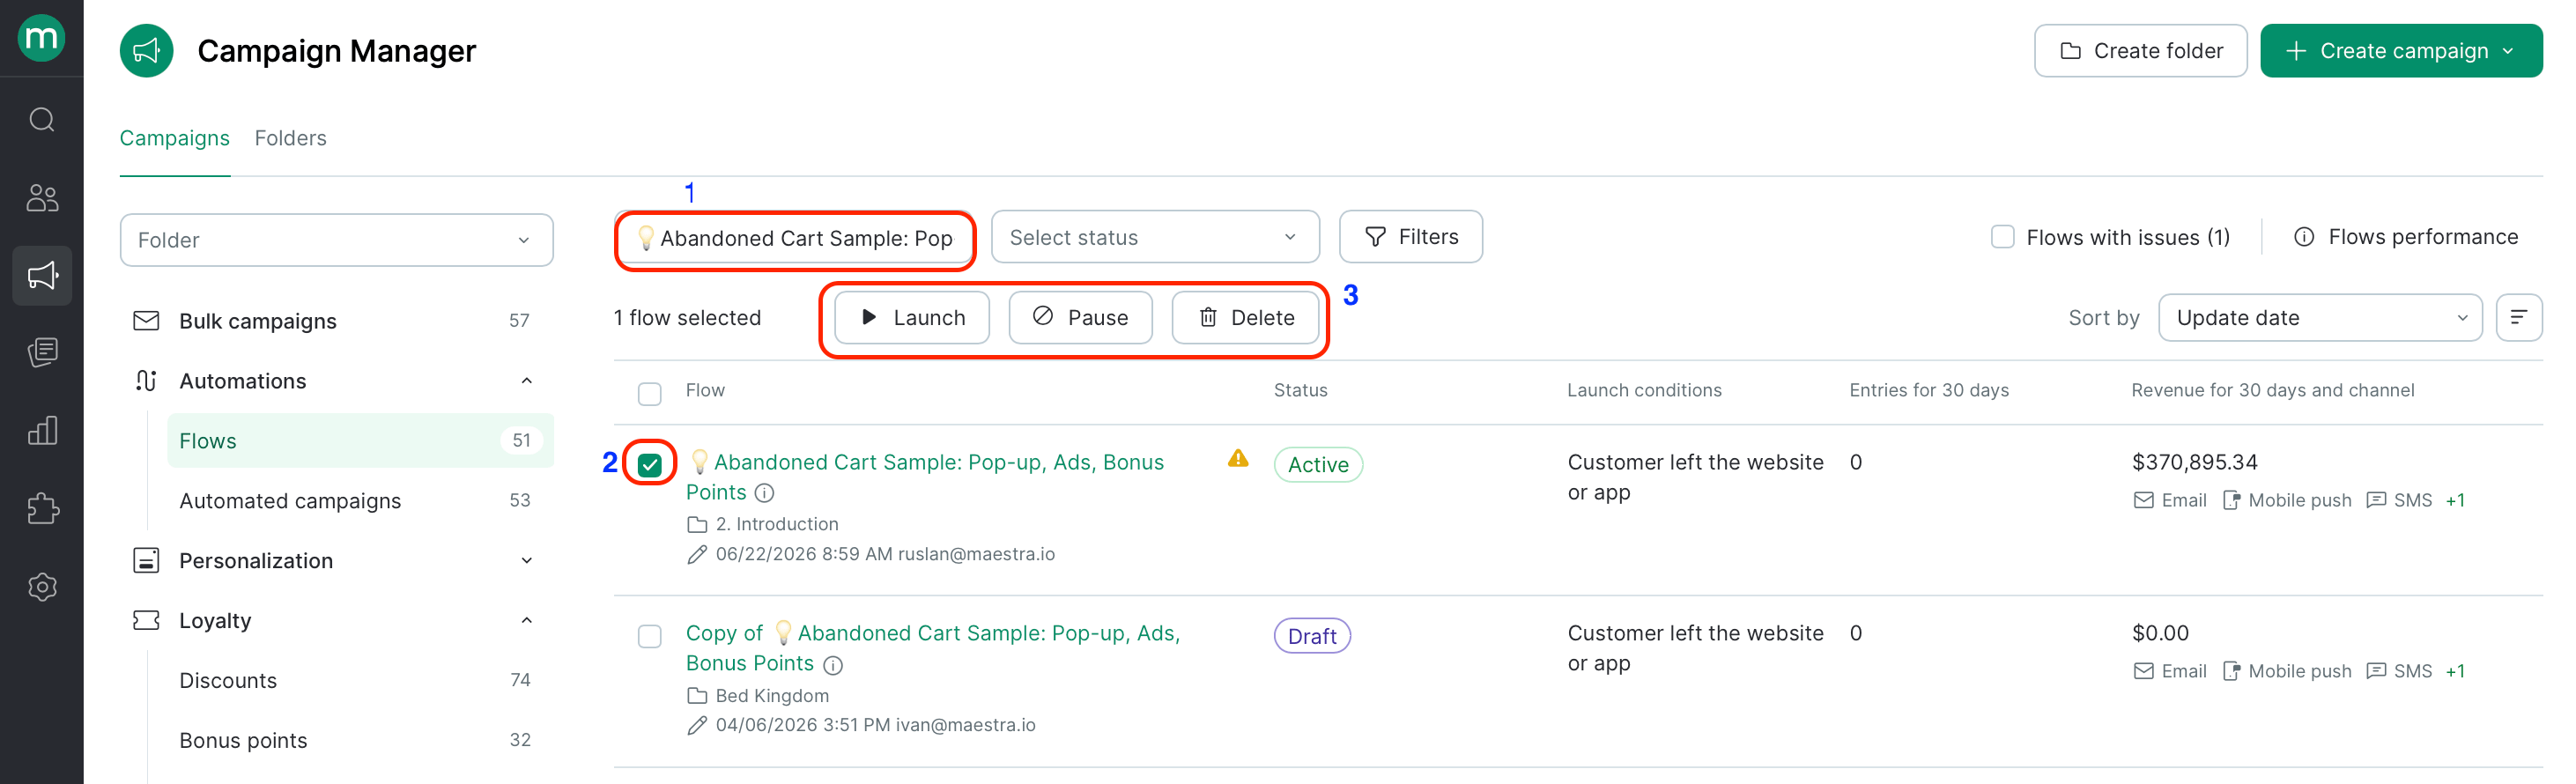
Bulk flow management
From the campaigns list, you can launch, pause, or delete multiple flows at once:- Filter the list to find the flows you need.
- Use the checkboxes to select them.
- Choose an action — launch, stop, or delete.
- Confirm when prompted.
- Launching a multi-flow automation all at once
- Pausing flows with errors while you fix them
- Cleaning up old test flows in bulk