

How to Create a Bulk Email Campaign
- Go to Campaigns → Campaign Manager
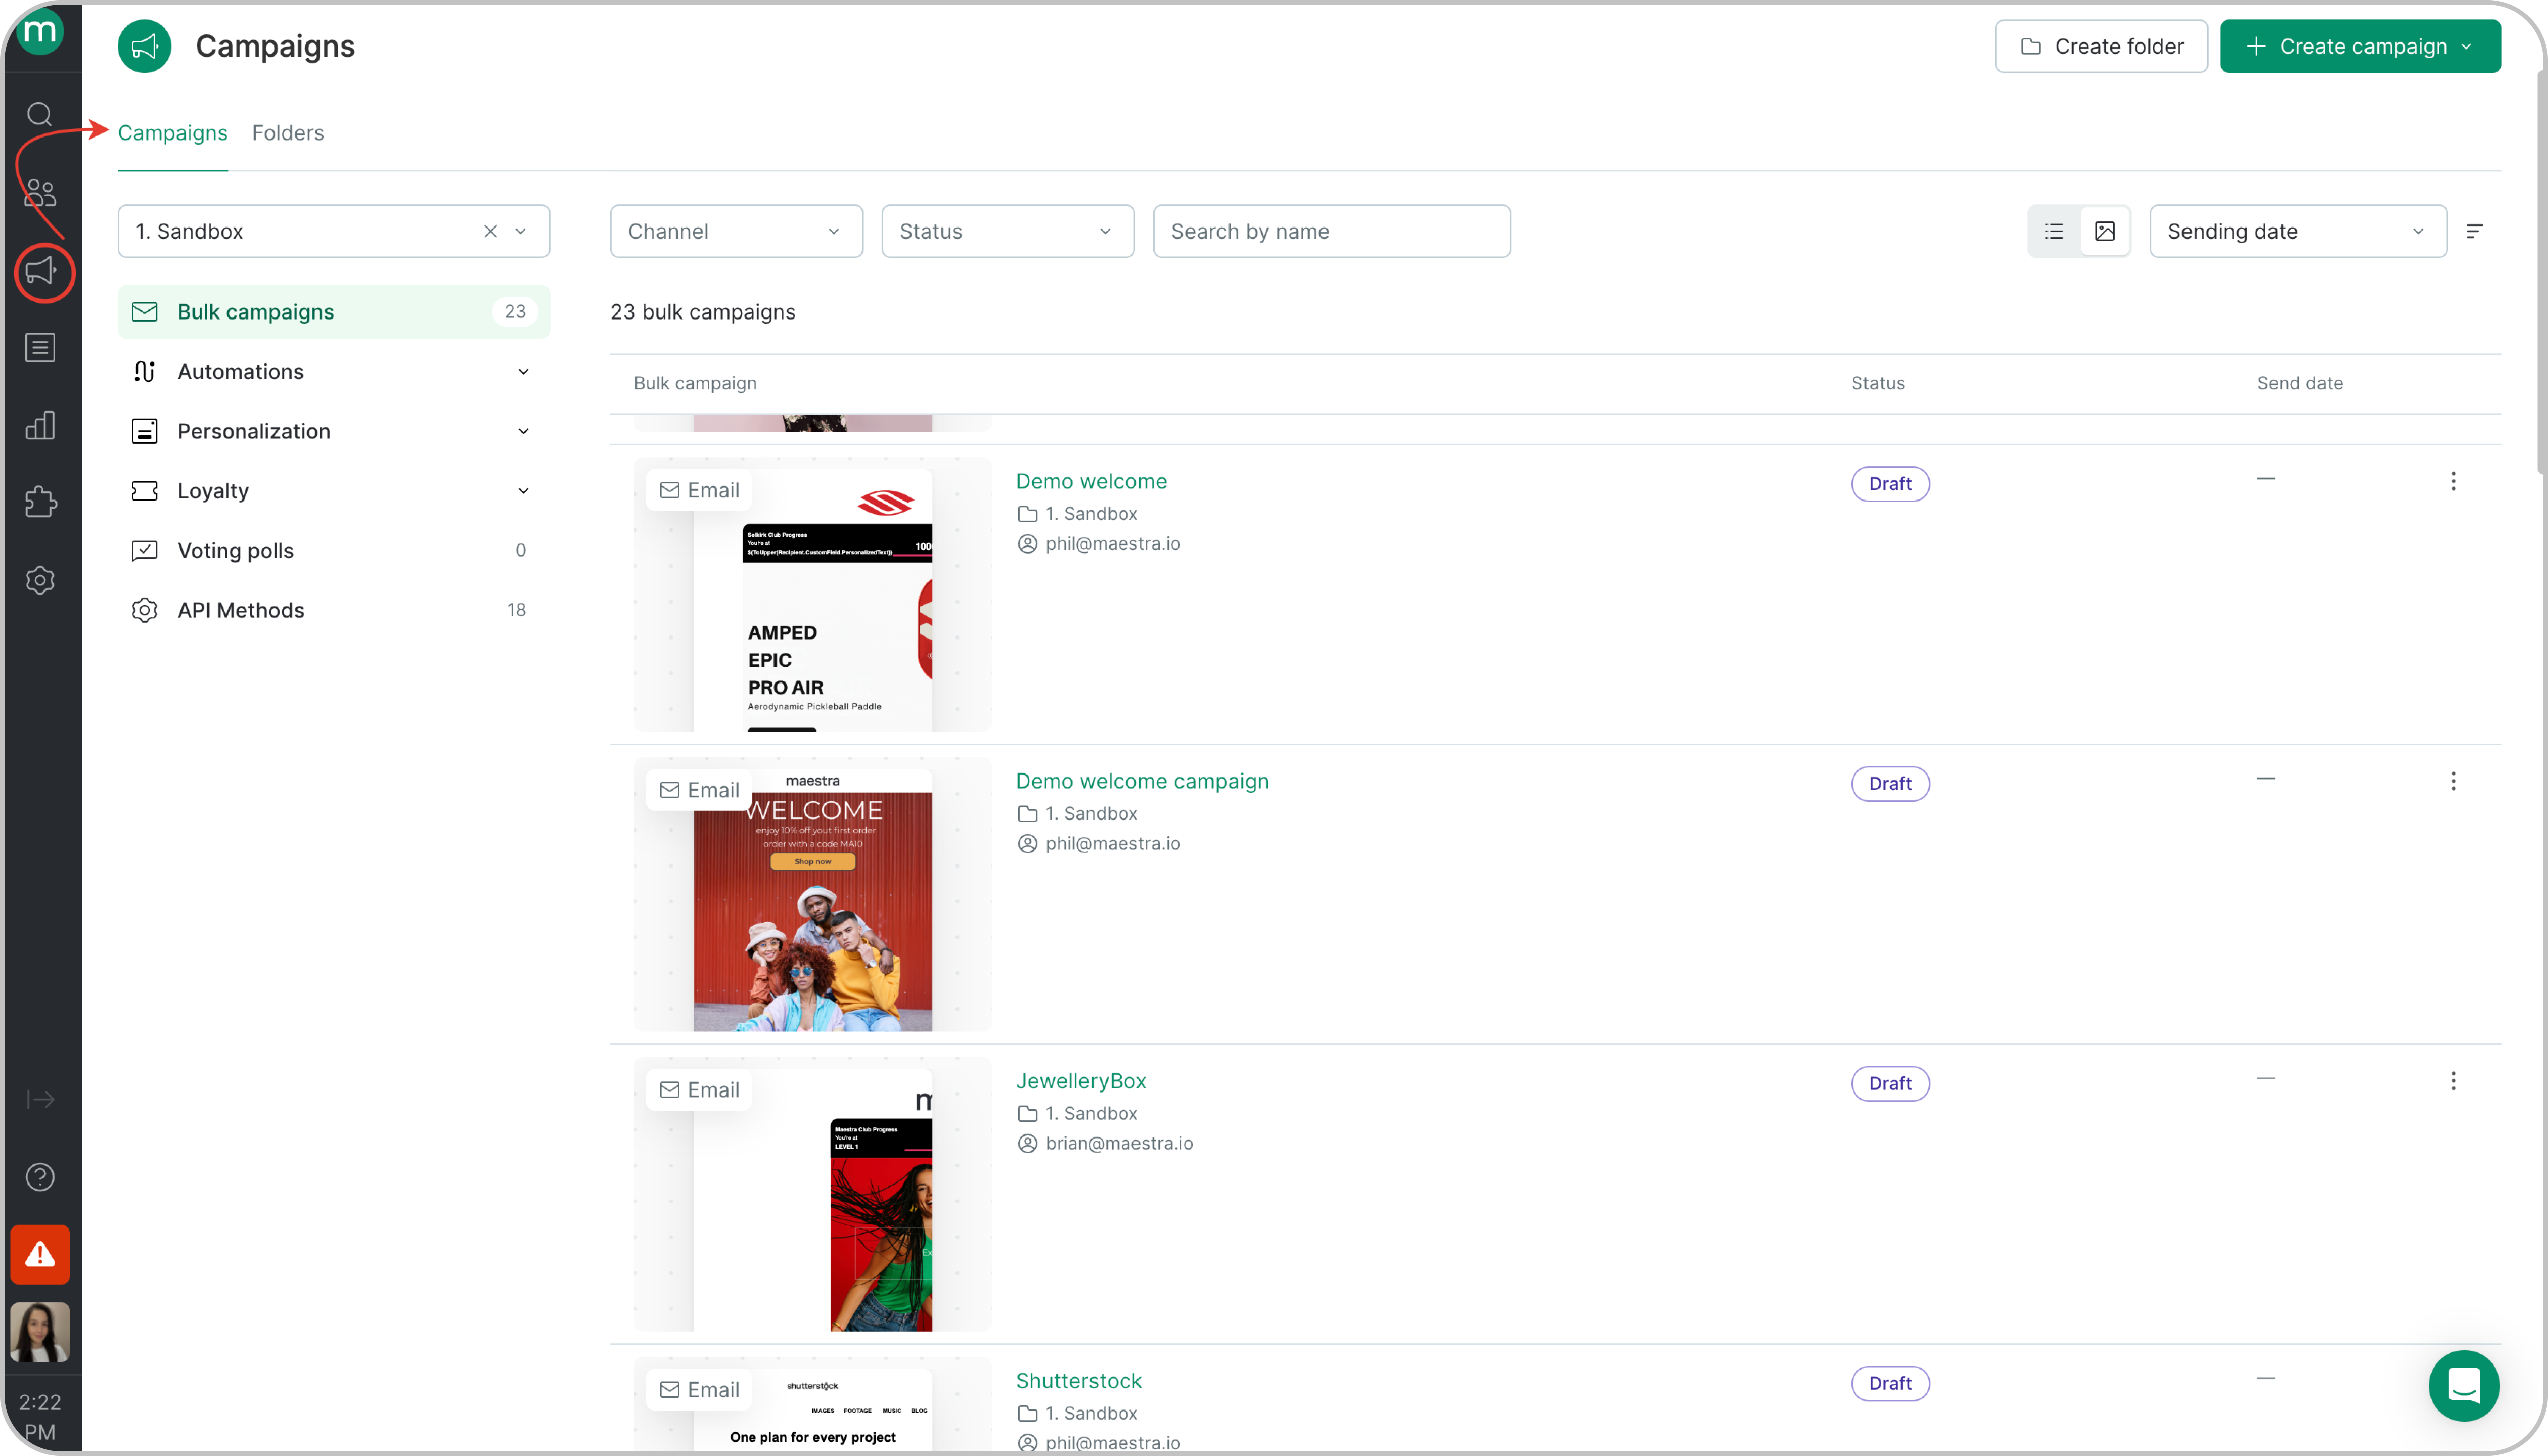
- Click Create Campaign → Bulk Campaign.
.png?fit=max&auto=format&n=PP-BodS5bFF14NYd&q=85&s=dfd2f1e5a0d8a7c7eb25d999d46e7880)
- Choose the channel, assign a folder, and click Create.
.png?fit=max&auto=format&n=PP-BodS5bFF14NYd&q=85&s=4222d2bd01b70b786185e669bd71c898)
Campaign Settings
Campaign Name
.png?fit=max&auto=format&n=PP-BodS5bFF14NYd&q=85&s=30e899aade4c2747afef80bfc01415f0)
- Campaign Name is used to help you locate the campaign among others and manage it in reports, filters, or exports.
- If you use a utm-tag with the ${Message.MailingUtmName} variable, the campaign name will be included in the tag automatically.
Campaign
.png?fit=max&auto=format&n=PP-BodS5bFF14NYd&q=85&s=35499edb866504e81ebb049f20ff9645)
- Subject Line. Supports variables and emojis.
- Preview text* Body text – the email client will show the first line of the content;* Custom – you can enter a custom preview text (supports variables/emojis);* Blank – the area after the subject will be blank in inbox previews.
- Sender - set the name and email address that appear in the recipient’s inbox, indicating who the message is from.
Choose how to create an email
.png?fit=max&auto=format&n=PP-BodS5bFF14NYd&q=85&s=8862987197e0576211d80c6219c4b815)
- Maestra Editor – modern drag-and-drop editor;
- HTML Editor – custom HTML code, including manual insertion of variables;
- Legacy editor – earlier version of visual email editor;
- URL – fetch template from a hosted link;
- ZIP – upload a ZIP archive of your template.
- Add an AMP version for interactive elements (e.g. quizzes, surveys).
.png?fit=max&auto=format&n=PP-BodS5bFF14NYd&q=85&s=06f59fe8a51aed86714750127e4dfdbb)
- Review and edit all links in the message and update their type if needed (e.g., when using custom subscription confirmation or unsubscribe links).
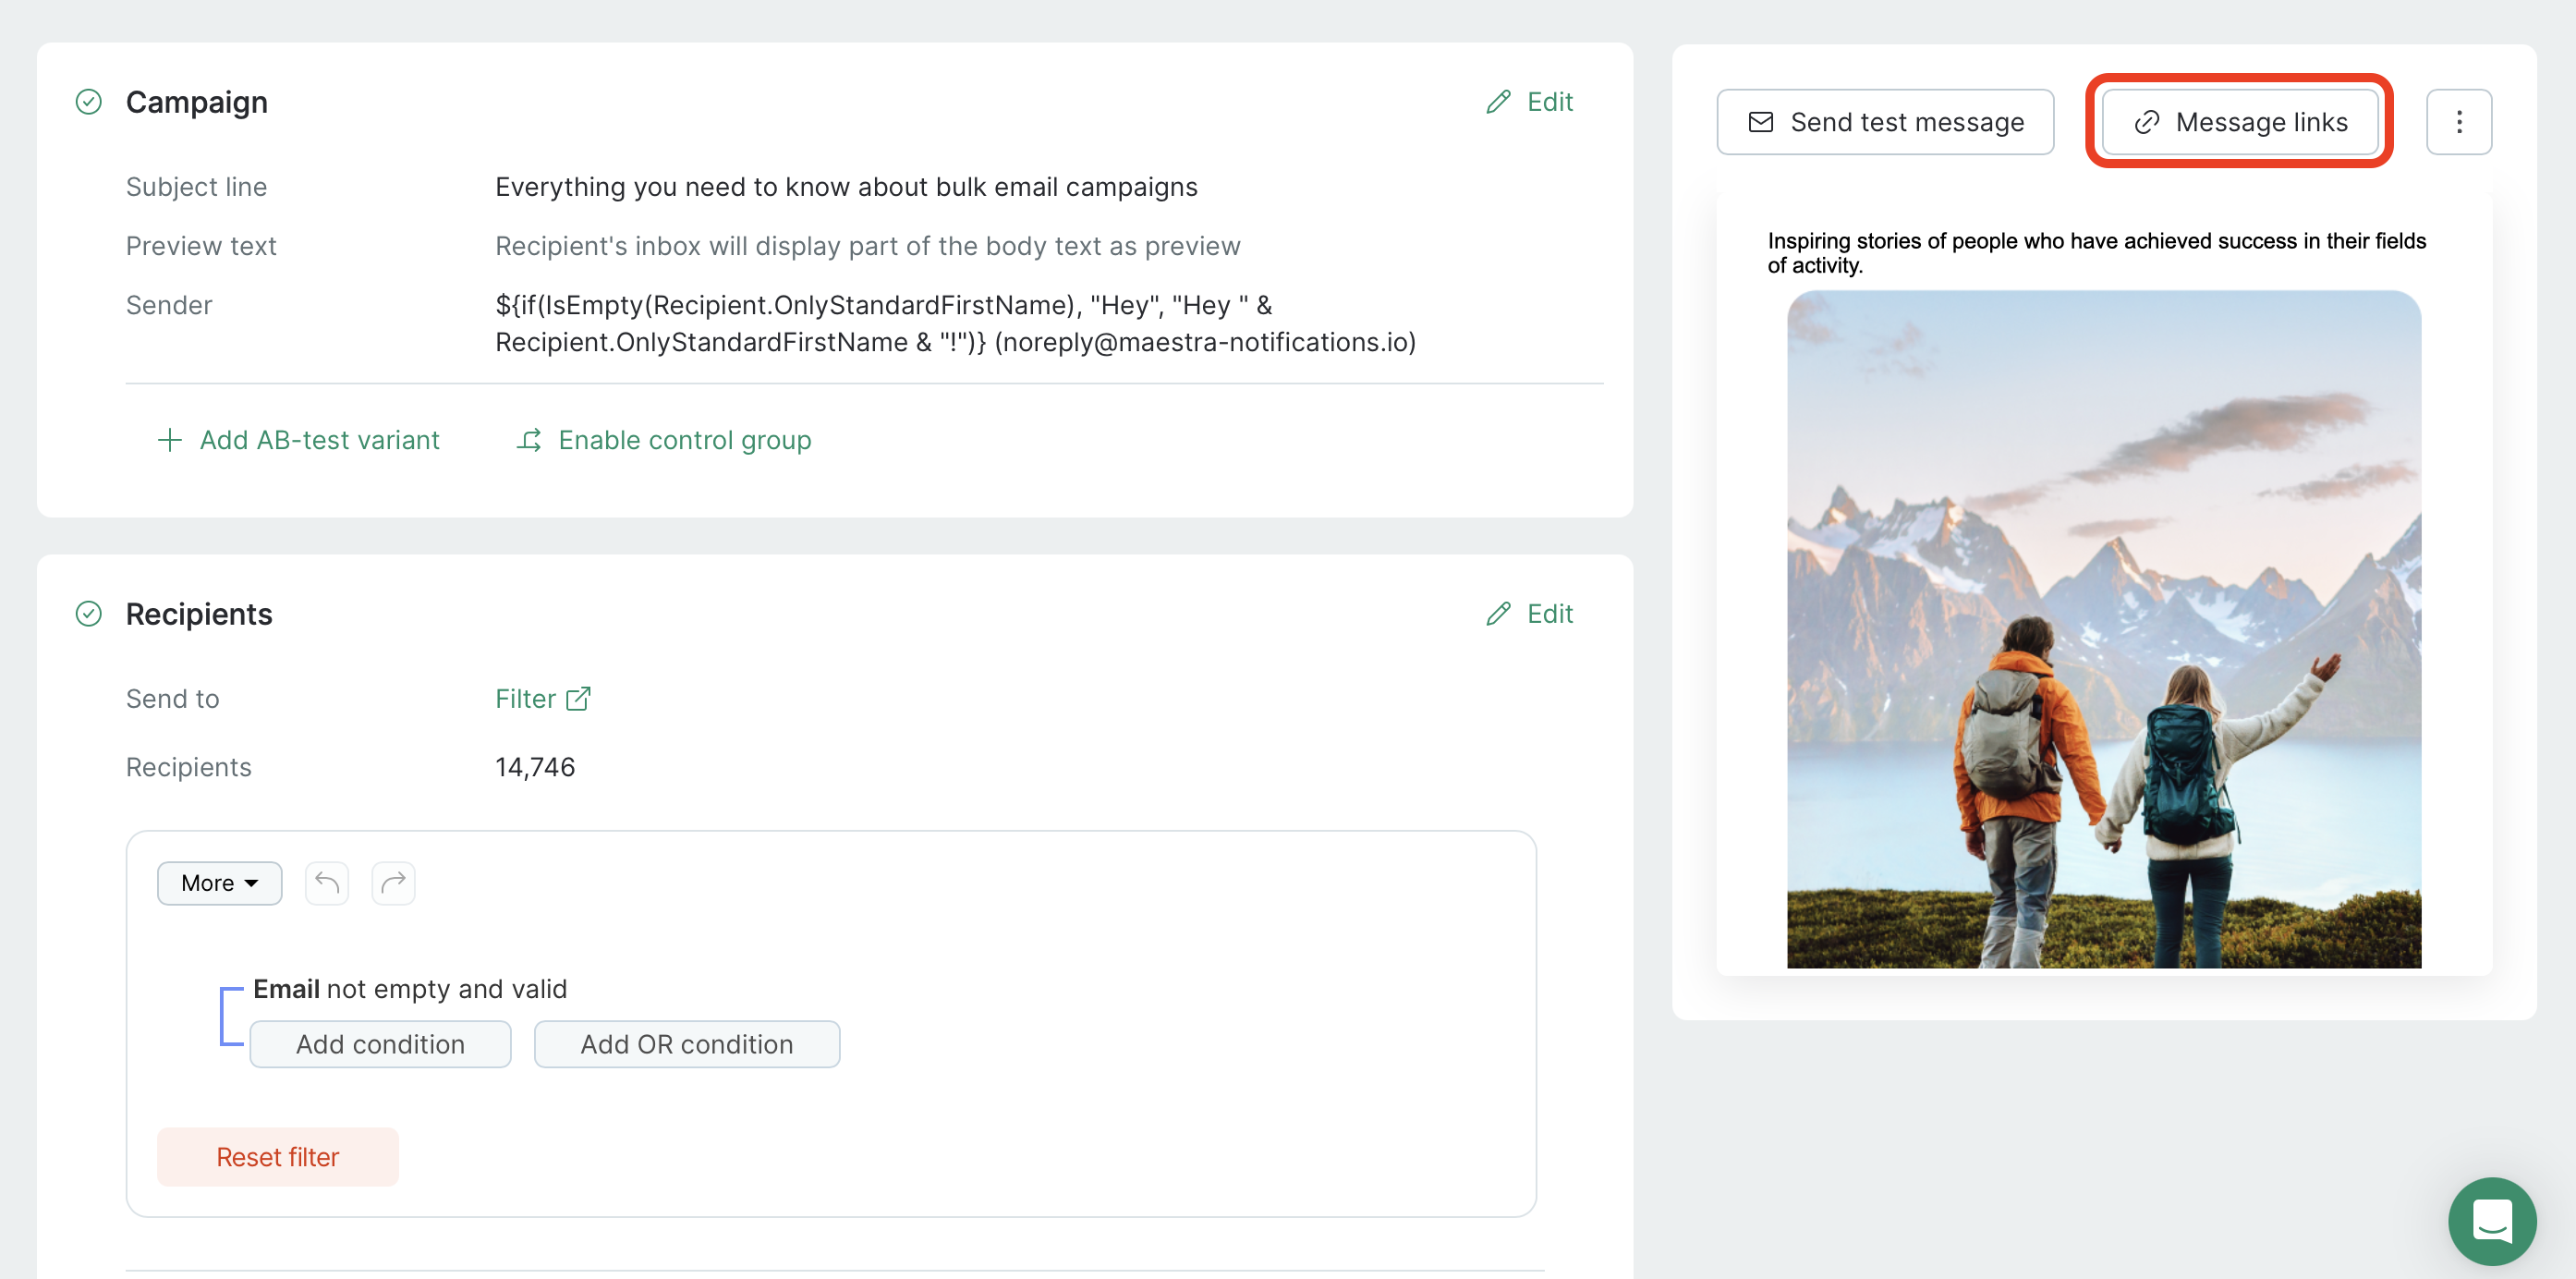
.png?fit=max&auto=format&n=PP-BodS5bFF14NYd&q=85&s=eeece71f9d78ca2066c69fdb257726d1)
Send Test Message
Once your campaign is ready, you can preview it. To send a live test, click “Send Test Message”. You can select recipients from the existing list (previously added for testing) or add additional ones using the “Add Recipient” button. Then, click “Send to Selected.”.png?fit=max&auto=format&n=PP-BodS5bFF14NYd&q=85&s=da72fb2b8093256e6982f4de3990fd54)
.png?fit=max&auto=format&n=PP-BodS5bFF14NYd&q=85&s=8b41c0fff89498cdf0ab63abcd0a16ef)
Click Preview to view your message without sending it. .png?fit=max&auto=format&n=PP-BodS5bFF14NYd&q=85&s=856bae28db0f2943beb879ee1916be4a)
General Settings
- Brand – relevant for multibrand projects.
- Topic – allows recipients to flexibly manage their subscriptions and receive communications only on topics they’re interested in.
- Tags – use tags to group campaigns by an additional attribute when channel, topic, and folder filters are not sufficient. Filtering campaigns by tags is easy, including within reports.Campaign profile – defines who can receive the message and under what rules. Available Profiles:
- Default – for marketing messages. Basic recipient checks are applied: * Valid email adress * Active email subscription (Subscribed to email channel or selected topic) * Not part of the global control group (if enabled). Note: this is not the same as the campaign control group. * Daily communications for the recipient stay within the allowed limit (if Smart Sending limits are enabled).
- Opt-In – for confirming pending subscriptions. Applies checks for: * Valid email * Pending opt-in status for the email channel (or for the selected topic, if the campaign includes one) * Daily communications for the recipient stay within the allowed limit (if Smart Sending limits are enabled).
Recipients
Choose one of the following recipients selection methods:- Segment – pick from prebuilt customer segments
- Filter – build custom rules
- One-time File – import a list
.png?fit=max&auto=format&n=PP-BodS5bFF14NYd&q=85&s=a763988b2460218a89f842ca2f985f37)
UTM Tags
.png?fit=max&auto=format&n=PP-BodS5bFF14NYd&q=85&s=426ac88922b7702cceedfc05abca599a)
- Use saved default UTM parameters
- Customize UTMs per campaign
When Setup Is Complete
Campaign Readiness Check
Once all required fields are completed — indicated by a green check mark next to each section header — the system automatically changes the campaign status from “Draft” to “Ready to Send.”.png?fit=max&auto=format&n=PP-BodS5bFF14NYd&q=85&s=4326ebbfa79036f7e6a3deec65a58c1d)
Schedule or Send Now
.png?fit=max&auto=format&n=PP-BodS5bFF14NYd&q=85&s=619c0071f80de37b43410aed2429a833)
- Send Now – campaign will begin sending right away and its status will change to “Sending”.
- Schedule – set a specific future time and date. Until then, the campaign will have the status “Send scheduled”. You can edit it during this waiting period — including adjusting the launch time.
.png?fit=max&auto=format&n=PP-BodS5bFF14NYd&q=85&s=3be49200d12114708dbdc0ab7f675162)
- Sending Interval – limit sending to specific hours (by project or recipient timezone)
- Sending Speed – control the sending speed to manage traffic load on your website or call center. The system supports limits from 500 to 2,000,000 emails per hour. When throttling is enabled, you’ll see an estimated duration for the full send.
- How long to retry sending – limits how long Maestra keeps trying to deliver your emails. Two modes:
- Time interval (e.g. 3 hours) – counts for each email separately, from the moment that email is generated (not from campaign start). Note: the interval doesn’t limit the campaign’s total duration. With a sending speed limit, emails are generated gradually, each with its own interval – so sending can continue well beyond “campaign start + interval”. To set a hard stop, use a specific date instead.
- Specific date – a hard cut-off for the whole campaign. Nothing is sent after this date; emails that didn’t make it appear in the report as not sent. Use it when the content expires at a known moment – and make sure your audience fits before the cut-off if a speed limit is set.
A/B Testing and Control Groups
A/B testing lets you try different subject lines, templates, or sender names to see which version performs best — boosting opens, clicks, and revenue..png?fit=max&auto=format&n=PP-BodS5bFF14NYd&q=85&s=7312a848b180bcfe7ac3645d89082f62)
.png?fit=max&auto=format&n=PP-BodS5bFF14NYd&q=85&s=0894c74cfa80bcf5c84efc97a7b1e6e0)
- Open rate — the percentage of customers who opened the campaign during the testing period (does not work with control group).
- Click rate — the percentage of customers who clicked at least once during the testing period (available if click tracking is enabled, does not work with control group).
- Conversion to order — the percentage of customers who placed at least one order during the testing period. Returns and cancellations are not included.
- Average order value (AOV) — total revenue divided by the number of orders during the testing period. Returns and cancellations are not included.
- Average revenue per user (ARPU) — total revenue during the testing period divided by the number of participants in the test variant. Returns and cancellations are not included.
.png?fit=max&auto=format&n=PP-BodS5bFF14NYd&q=85&s=bc0427b81e0963a4b597ef888c922f9c)
.png?fit=max&auto=format&n=PP-BodS5bFF14NYd&q=85&s=55d6c9ef756a8973ea045610fce6c415)
Once Your Campaign Is Sent
Filters
Each campaign generates statuses like Sent, Opened, Clicked, or Unsubscribed. Some statuses are assigned automatically when the campaign is sent (e.g., Sent), while others appear in the customer’s activity feed only if they’ve interacted with the message (e.g. Opened, Clicked, or Unsubscribed)..png?fit=max&auto=format&n=PP-BodS5bFF14NYd&q=85&s=c0d3a9aeb46da7d55f3a13ccfe1b1ed3)
.png?fit=max&auto=format&n=PP-BodS5bFF14NYd&q=85&s=0ec84db633ff34457bd6027c9d2b8bf2)
.png?fit=max&auto=format&n=05-EV9YqA_RINTJ8&q=85&s=4810fa731c7605814fc4d9c324b540b7)
- Campaign statuses
.png?fit=max&auto=format&n=PP-BodS5bFF14NYd&q=85&s=efa6f98a2b508b6b14e3131ef09a27b3)
.png?fit=max&auto=format&n=PP-BodS5bFF14NYd&q=85&s=7079709defb3bc5d2ee794fac47246ba)
Reports
After the campaign is sent, detailed reports become available:
Performance metrics
Heatmaps
Campaigns report
.png?fit=max&auto=format&n=PP-BodS5bFF14NYd&q=85&s=81f7dee1efab97ab84aa43a5e7b38c9b)